Blynk Board Project Guide
 jimblom
 Project 8: Joystick Joyride
Joysticks are a staple input for a variety of control systems, including arcade gaming, RC-car driving, drone guiding, and assistive-tech maneuvering. They produce two pieces of data: position components along x- and y-axes. Using that data, a project can compute an angle between 0 and 360° and use it to drive another mobile mechanism.
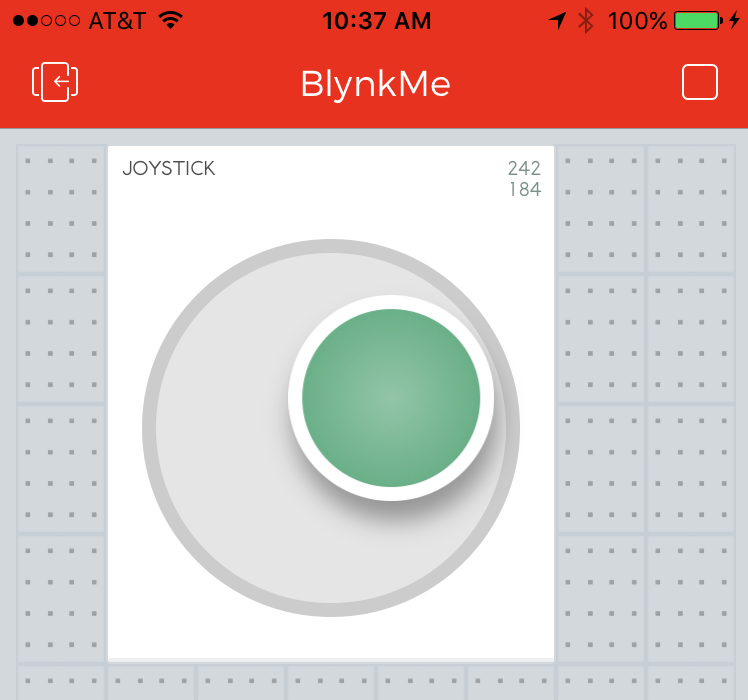
Blynk's take on the joystick is analogous to a physical joystick -- as you move the center-stick around, it'll send x- and y-axis values between 0 and 255 to the Blynk Board. What are we going to to do with that data? Spin a motor!
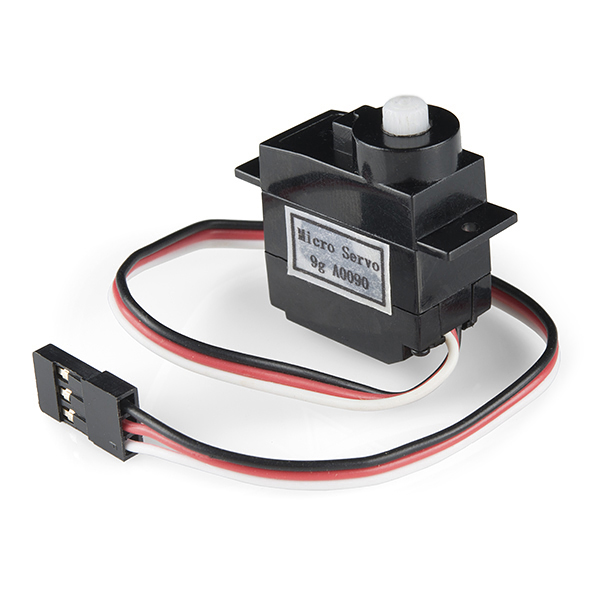
To be more exact, we're going to use the joystick to drive a servo motor. Servo's are specialized motors with a built-in feedback system, which allows for precise control over the motor's position. Instead of rotating continuously, like DC motors, a servo will move to a position you tell it to and stop (unless it's a continuous rotation servo). They're useful for projects which require complete control over movement, like opening or closing a door to an automatic pet-feeder.
Hardware Setup
Most servo motor's are terminated with a 0.1"-pitch 3-pin female header. To interface it with your Blynk Board, plug in a few male-to-male jumper wires into the servo socket (if you have the "connected" jumper wires, peel off a strip of three wires). Then clip a few alligator clip cables onto the ends of those wires.
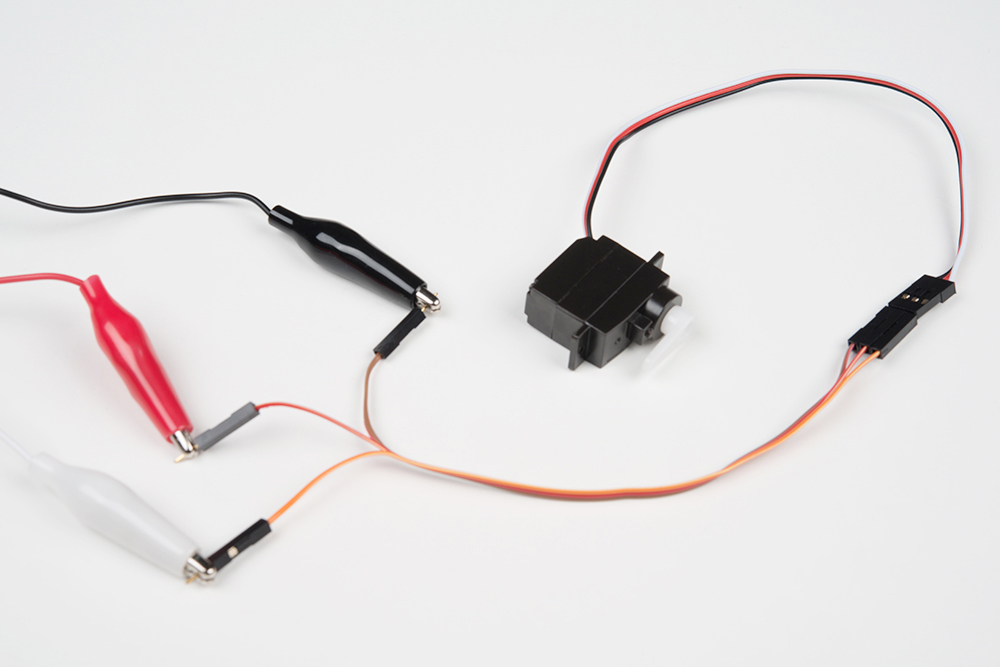
Connect the cable wired to the servo's black wire to GND, red to VIN, and the white signal wire to pin 15.
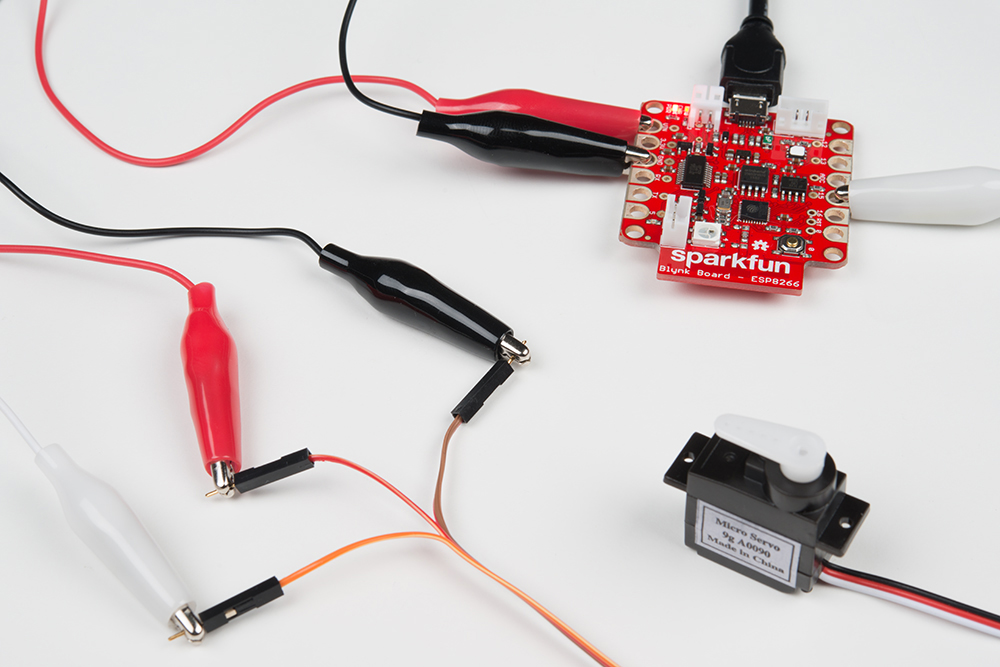
Press one of the servo motor's mounts onto the motor head, so you can better-see the spin of the motor.
Blynk Setup
In addition to the Joystick widget, this project can also optionally use a gauge (or value) and a slider. The slider controls the servo motor's maximum angle, and the gauge displays the calculated servo position (especially handy if you don't have a servo connected).
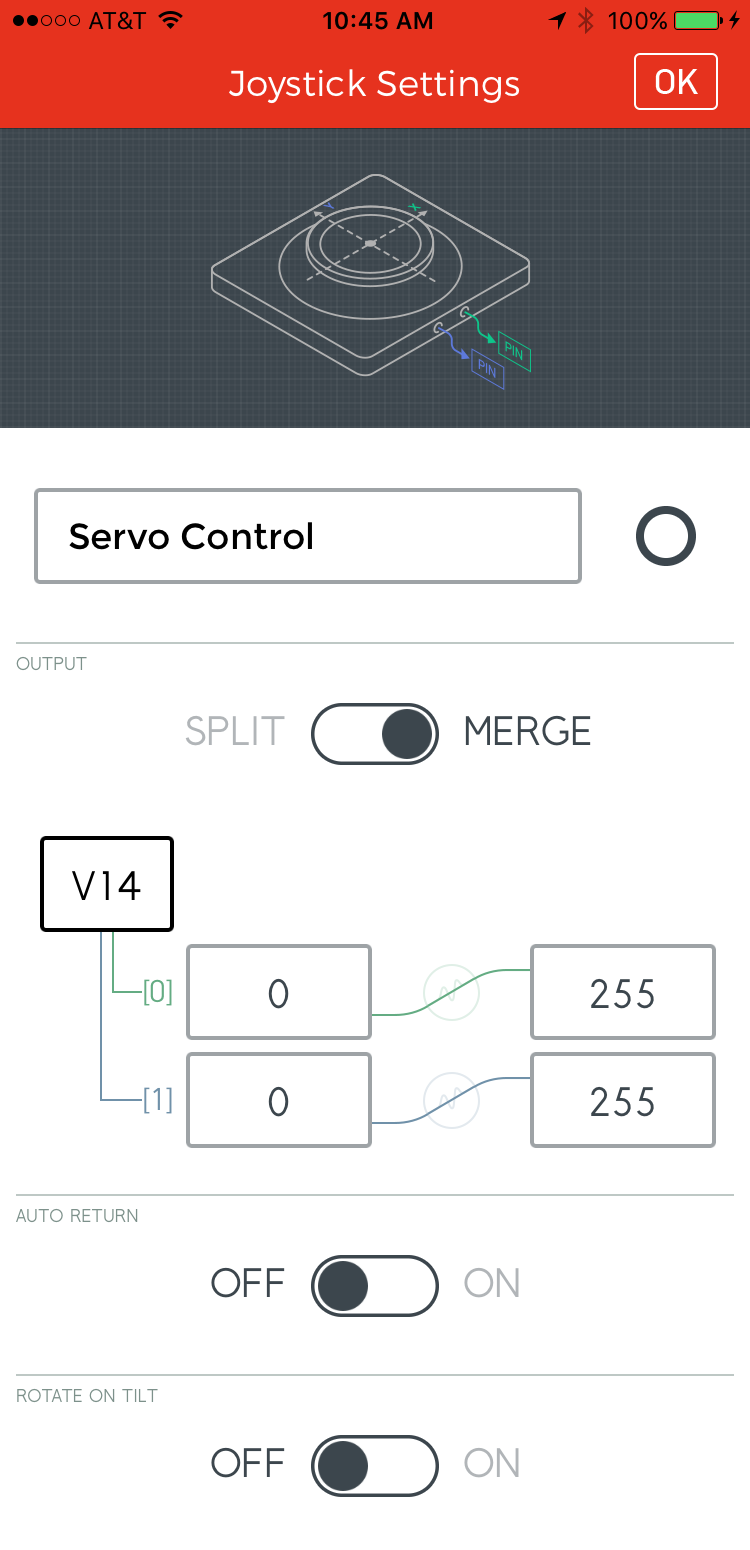
Connect the Joystick to V14
Add a Joystick widget from the "Controllers" section. Slide the Split/Merge switch to Merge, and set the pin to V14. It's not required, but we recommend setting autoreturn to off.
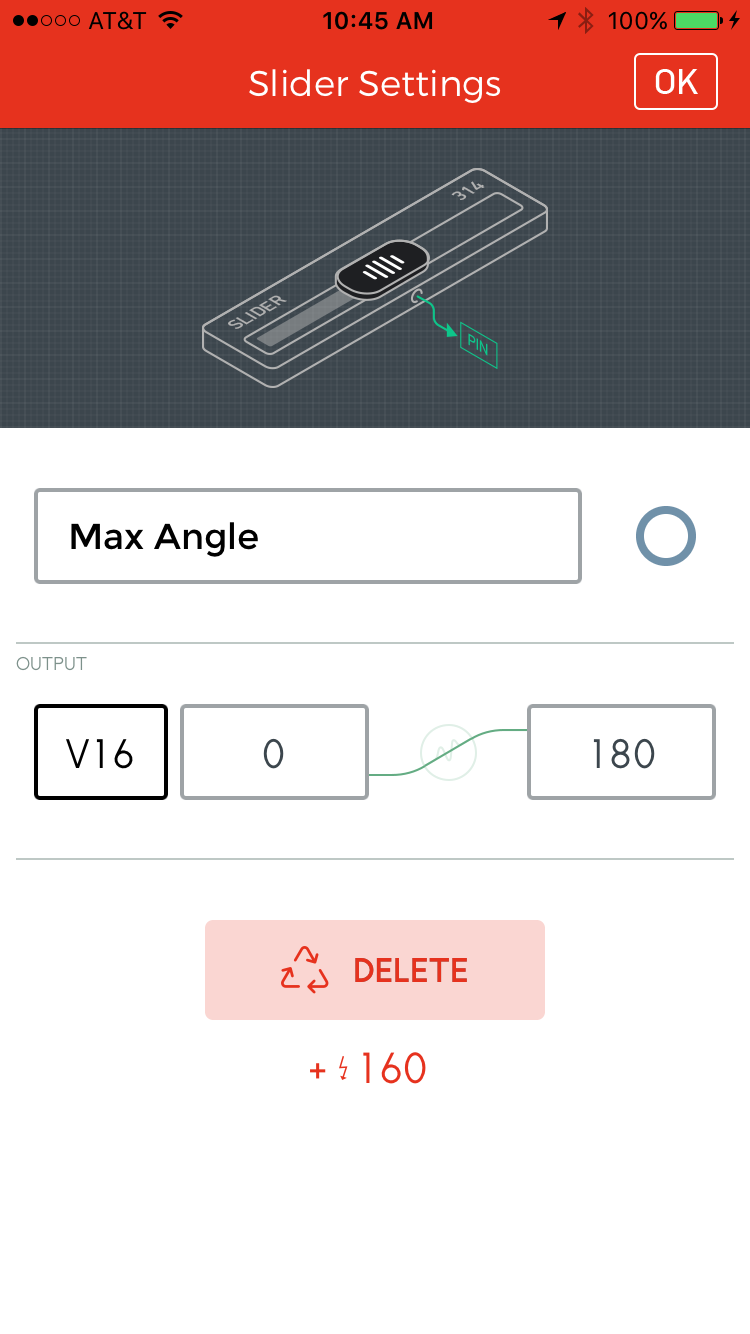
Connect a Slider to V16
If you have a slider in your project, you can re-purpose it to adjust the servo's maximum angle. Set the pin to V16, and modify the range to make it easy to set your servo's maximum value.
Connect a Gauge or Value Widget to V17
Finally, the project produces a virtual output on V17 displaying the servo's current angle. You can use a Value or Gauge widget to show this value. Neither are required -- but it does provides feedback if you don't have a servo motor attached.

Modify the range of the gauge, or else you might not get the right feel for the servo's position.
Blynk Run
Once everything's set up, run it, and joystick!

As you rotate the stick, the servo should noisily reposition itself along the angle you've set.
In the background, the Blynk Board firmware is grabbing the x and y values of the joystick, doing some trigonometry on them to calculate an angle (in degrees), and pushing that calculation back out to V17.
Going Further
Once you've got the servo rotating, connect something physical up to it! How about an automatic fish feeder?
Scrounge around for a bottlecap, and screw it into the servo's single-arm.
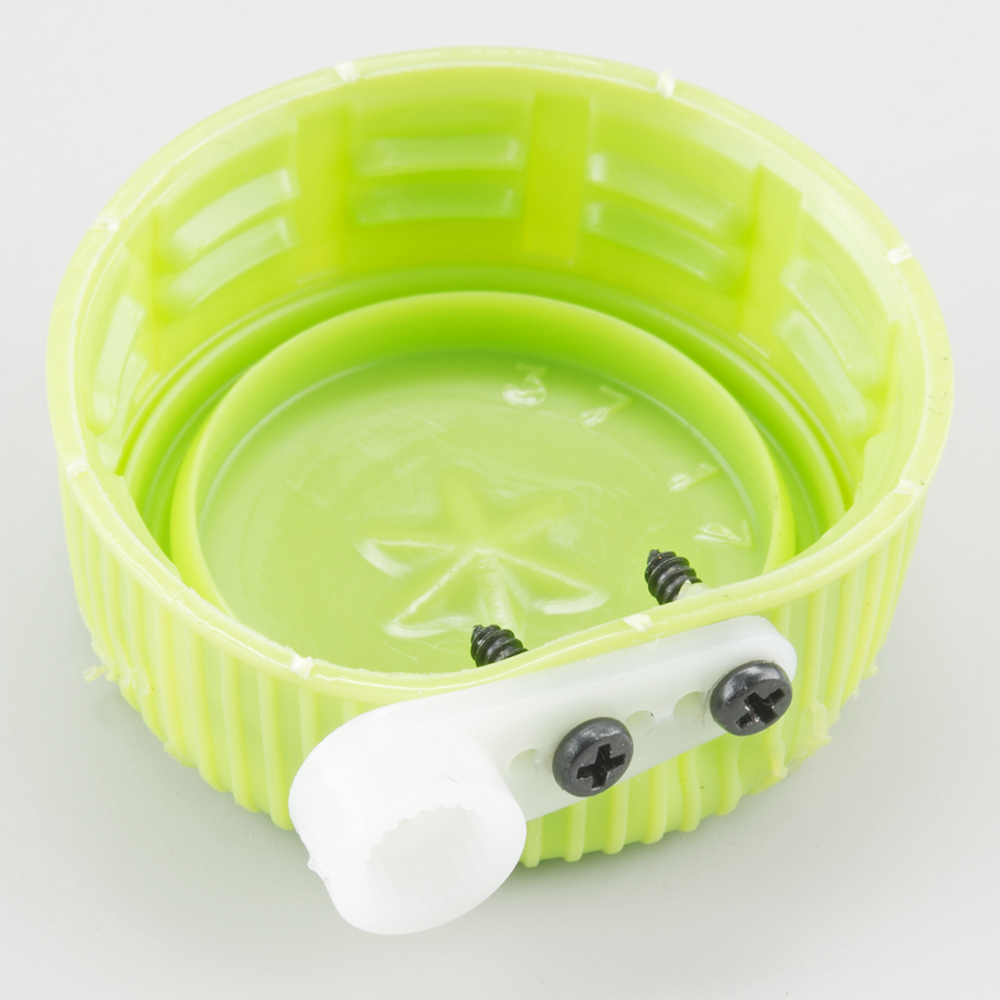
Then slot the servo arm onto your servo motor head, and check the motion of the bottlecap -- you may need to re-position the cap to get the rotation you need.
Now, when you rotate the joystick, you'll have a mobile-food-dumping apparatus -- perfectly sized for a goldfish!