Blynk Board Project Guide
Project 12: BotaniTweeting
For over ten years now, Twitter has been the microblog-of-choice for human and machine alike. While the rich-and-famous use-and-abuse twitter to reach their millions of followers, twitter-enabled projects like our old Kegerator or bots like Stupidcounter have found their own use for the service.
Blynk's Twitter widget is one of three notification-enabling devices in the app. After connecting it to a Twitter account, the widget will give your Blynk Board a voice on the world-wide-web.
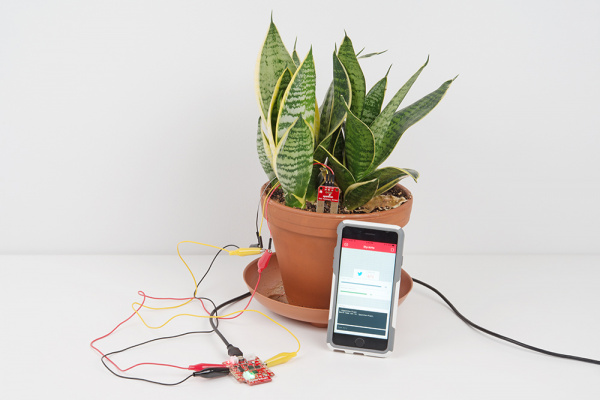
This project, inspired by the Botanicalls Kit, will set your Blynk Board up as a fully-configurable plant soil moisture monitor. Plugged into your favorite house plant, the Blynk Board will give it a voice -- so it can shout to the world when it's thirsty.
Hardware Setup
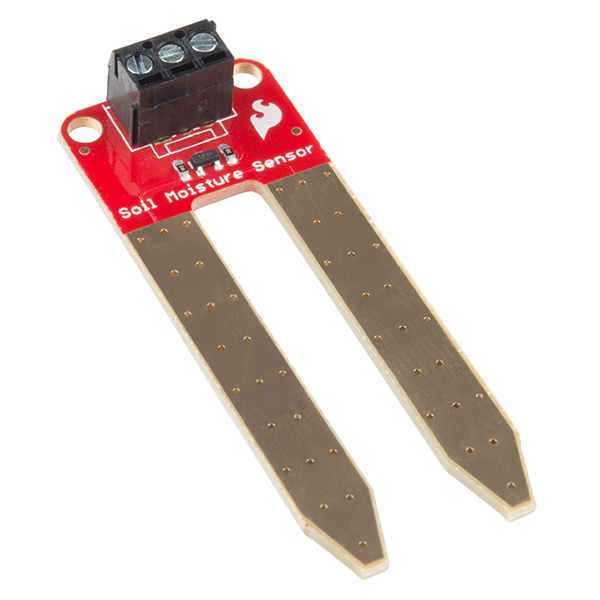
Our handy Soil Moisture Sensor will be the hardware focus of this experiment.
At its core, this two-probed sensor is simply a resistance sensor. Wet soil is less resistive than dry soil, so a parched, dry plant will produce a lower voltage than a wet, sated one.
In addition to the soil moisture sensor, you'll need jumper wires, alligator clip cables, and a screwdriver
Note that while the Soil Moisture Sensor included with the IoT Starter Kit has a screw terminal installed, the stand-alone product version does not. If you've bought the Soil Moisture Sensor separately without the screw terminals, you will need to solder wires or a connector to the board.
Hook Up The Soil Moisture Sensor
There are a few hoops to jump through to get the moisture sensor connected to your Blynk Board. To begin, grab a screwdriver, and three jumper wires -- black, red, and yellow.
Flip the board over to see the terminal labels. Plug the yellow wire into the "SIG" terminal, black wire into "GND", and red into "VCC". Use the small flathead screwdriver bit to securely tighten the jumper wires into the connector.
The SparkFun Pocket Screwdriver includes half-a-dozen bits – small/large, flat/Phillips – but they're hidden in the cap. To access the bits, unscrew the cap and pour them out. Look for the smallest flathead you can find in there, and slot it into the head.
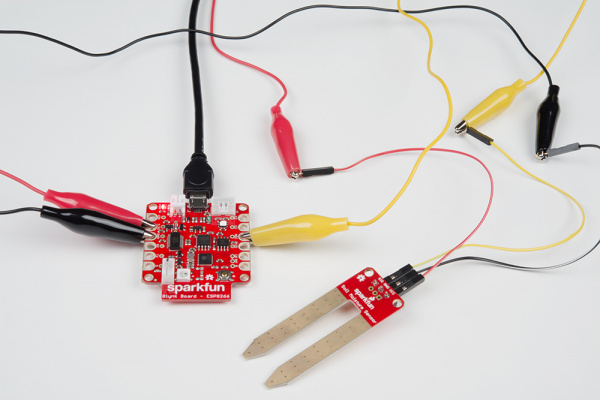
Once the jumper wires are secured, clamp alligator clip cables onto the other ends -- match up the colors if you can!
Finally, clamp the other ends of the alligator clips to 3.3V (VCC/red), GND (GND/black), and the ADC (SIG/yellow).
The higher the reading on the ADC, the wetter (and happier) your plant is.
Blynk Setup
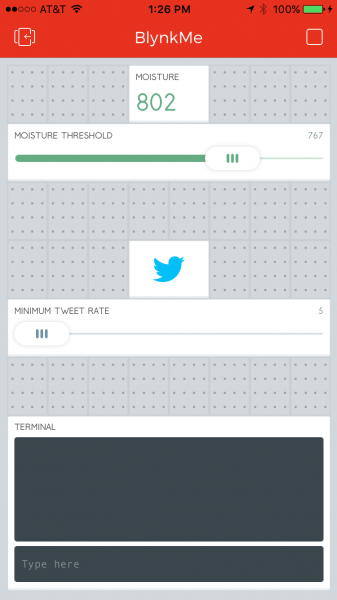
This project requires five widgets: Twitter, Terminal, a Value, and two Sliders. Hopefully you've got the Terminal -- and maybe a few others -- from previous projects. Here's how to set them up:
Set Up the Twitter Widget
Add the Twitter widget from the "Notifications" list. Move it anywhere you'd like, and tap it to configure.
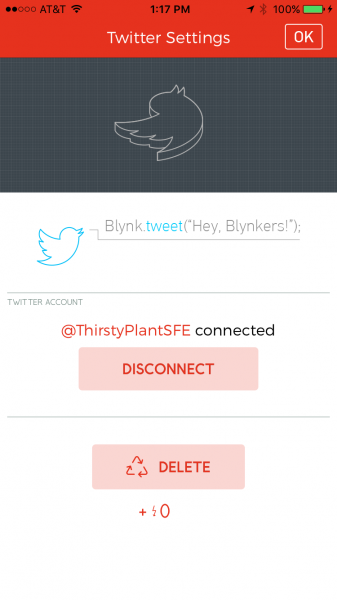
Hit Connect Twitter, and the app will take you to a foreign screen, where you can log in to your Twitter account. This is an OAUTH connection from Blynk to your Twitter account -- if you ever want to disconnect Blynk from your account, you can do so in the Apps section of your account settings.
Once you've logged in and allowed Blynk access to your account, the Twitter widget should have a @YOUR_ACCOUNT link in the settings page. Confirm the settings, and head back to the project.
Set Up the Terminal
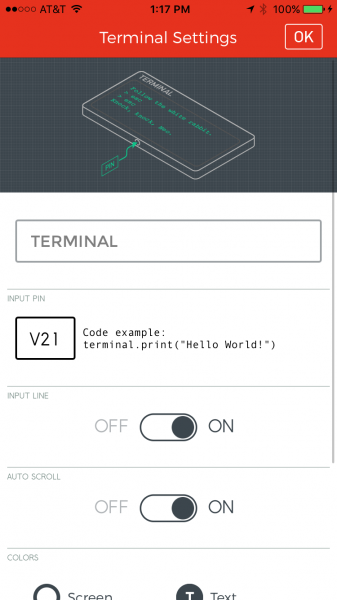
As with the previous project, the Terminal should be connected to V21, make sure "Input Line" is turned ON.
Give the terminal any color(s) you'd like.
Set Up the Sliders
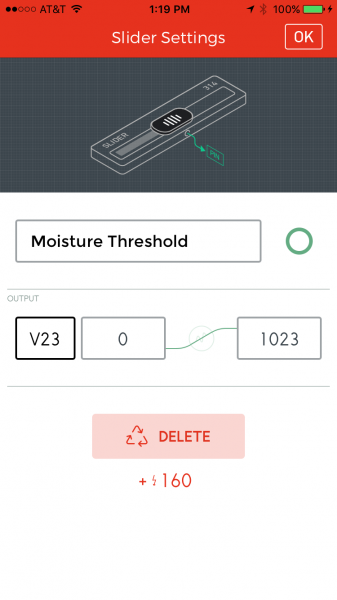
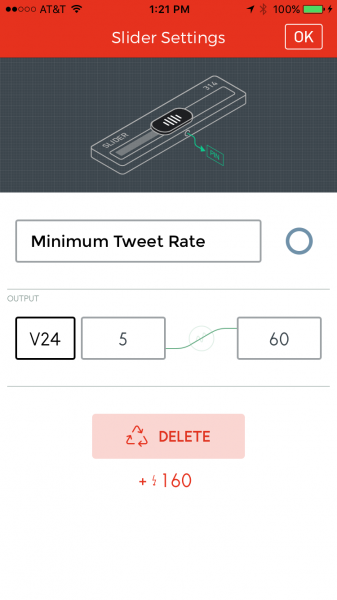
A pair of sliders are used to set your plant's moisture threshold and the minimum tweet rate. Add or re-configure two sliders (large or regular) as so:
| Widget | Name | Pin | Minimum | Maximum |
|---|---|---|---|---|
| Slider | Moisture Threshold | V23 | 0 | 1023 |
| Slider | Minimum Tweet Rate | V24 | 5 | 60 |
The minimum tweet rate slider sets the minimum number of minutes between tweets. The Twitter widget can't tweet more often than once-a-minute, so make sure that's the bare-minimum of the slider. Set the maximum to as long as you'd like between tweets (e.g. 60 minutes, 720 minutes [12 hours], etc.)
If the reading out of the soil moisture sensor falls below the minimum threshold, it will begin tweeting as often as it's allowed (by the tweet rate), until the reading goes back up.
Set up the Value
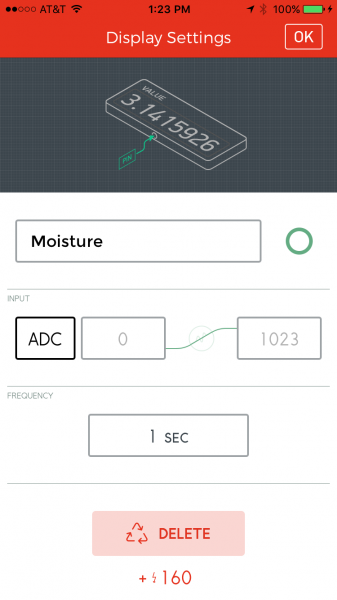
Finally, add or re-configure a value widget to monitor the ADC pin. You'll need that as you hone in on a good threshold value.
Blynk Run
Once you've got all of those widgets set up, run the project. Plug your moisture sensor into your plant, and check the ADC reading.
If your soil is nice-and-moist, the reading should be somewhere around 700-800. Try watering your plant -- see if the reading goes up.
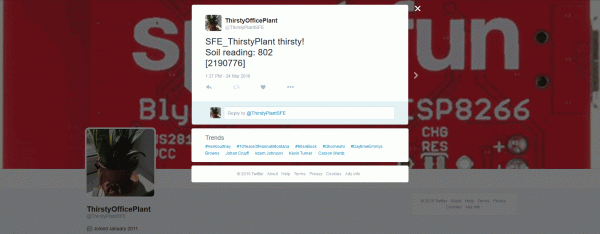
To verify that the project is functioning and tweeting, set the threshold to 1023 and set the tweet limit to 1. Within a minute-or-so, you should see a new tweet on your timeline.
So far, so good. Now the tricky part. You need to set the moisture threshold to a "dry soil" value. It'll be under the current value a bit. If you're moisture is reading out at about 750, try setting the threshold to 740. Then you play the waiting game (or take a heaterizer to your plant's soil). When the soil dries up, your plant should tweet.
Going Further: Setting the Plant's Name
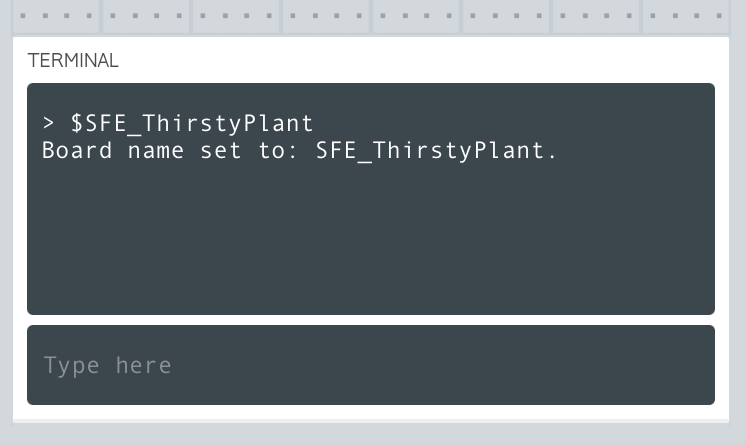
Why the terminal? To name your plant! Come up with a unique, identifiable name for your plant. Then, in the terminal, type $MY_PLANTS_TWITTER_NAME and hit enter. Make sure to type the "$" first. The terminal will catch that and begin tweeting with your new name next time your plant gets thirsty.
Now, when your plant tweets, it'll identify which one it is.
