Blynk Board Project Guide
 jimblom
Project 3: Slide-Dimming LEDs
Now that you're an expert on digital inputs and outputs, it's time to throw a curveball with analog signals. Analog values can take on any shape and be any value among the infinite possibilities in our world.
As with digital signals, the Blynk Board can also produce analog outputs or read in analog inputs. By producing an analog input, the Blynk Board can dim an LED, instead of being left with either turning it on or off.
To produce analog outputs, we'll use the Slider widget in the Blynk app. The slider allows you to precisely set the value of an output on the Blynk Board -- it's not just ON or OFF. Now, you can set a value between 0-255, 0-1023, -8 to +8, or whatever else you please.
Pulse-Width Modulation (PWM)
To be honest, the Blynk Board actually can't produce truly analog outputs. Instead, it quickly pulses a digital signal high and low to produce an average voltage in a technique called pulse-width modulation (PWM).
PWM waves aren't really analog, but they go up and down so fast that a lot of components – like LEDs – can't tell the difference.
Blynk Setup
Once again, you should have plenty of room left in your project -- only delete widgets if you want to clean up a bit. However, if you still have the button triggering the pin 5 blue LED, you'll need to disconnect it in order to use a slider on the pin.
One Pin At a Time
When configured to monitor or control a pin, a Blynk widget lays claim over that pin until it's disconnected. In fact, in most cases the Blynk app won't let you assign one pin to multiple widgets at once.
By limiting pin-control to one widget at time, we make sure the Blynk Board can't get confused – you wouldn't like it when it's confused.
Disconnect the Button From Pin 5
- Stop the project.
- Touch the button to bring up its settings.
- Change the pin to the dash (–) and hit OK a couple times.
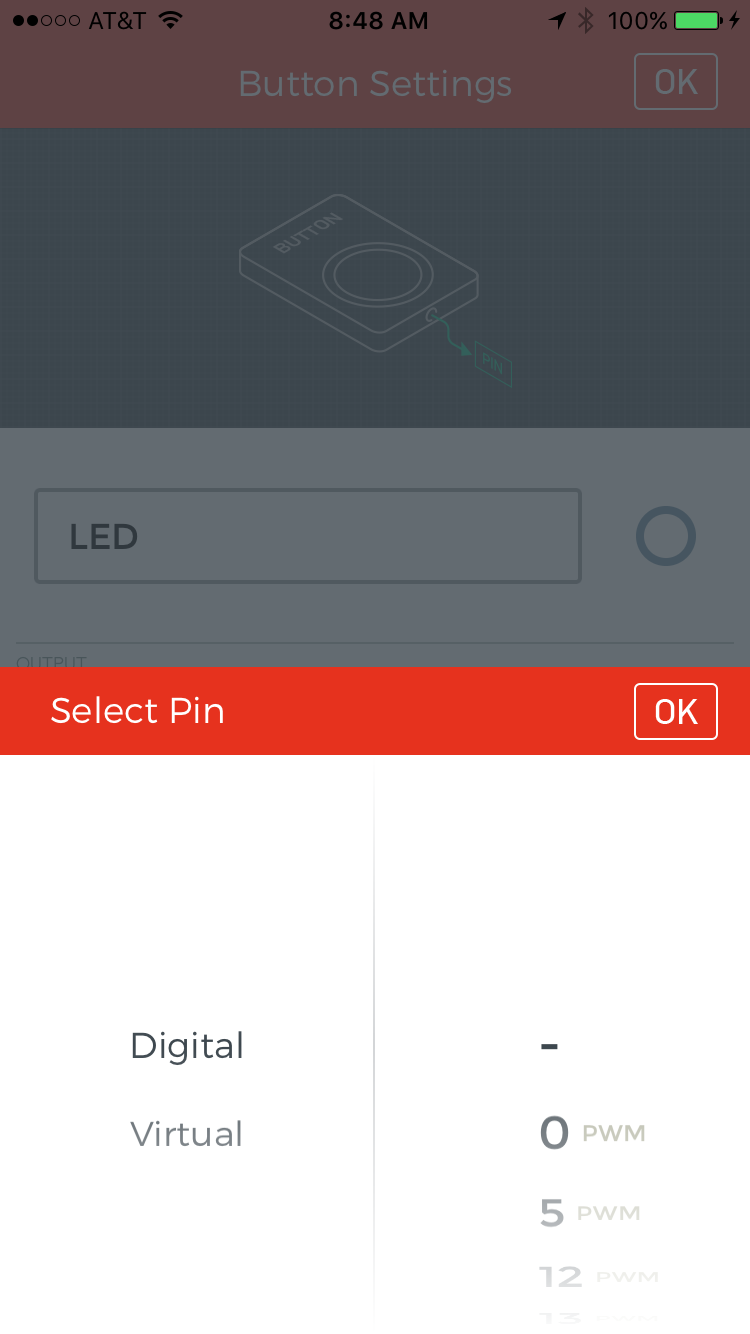
The button will remain in your project -- you won't lose any energy -- but it'll be disconnected from any digital or virtual pins for now. Pressing it while the project is running won't have any effect.
Connect a Slider Widget to Pin 5
- Touch anywhere in the blank project space to open the widget box.
- Select the Slider near the top of the "Controllers" section.
- Drag and position the Slider widget anywhere in your project space.
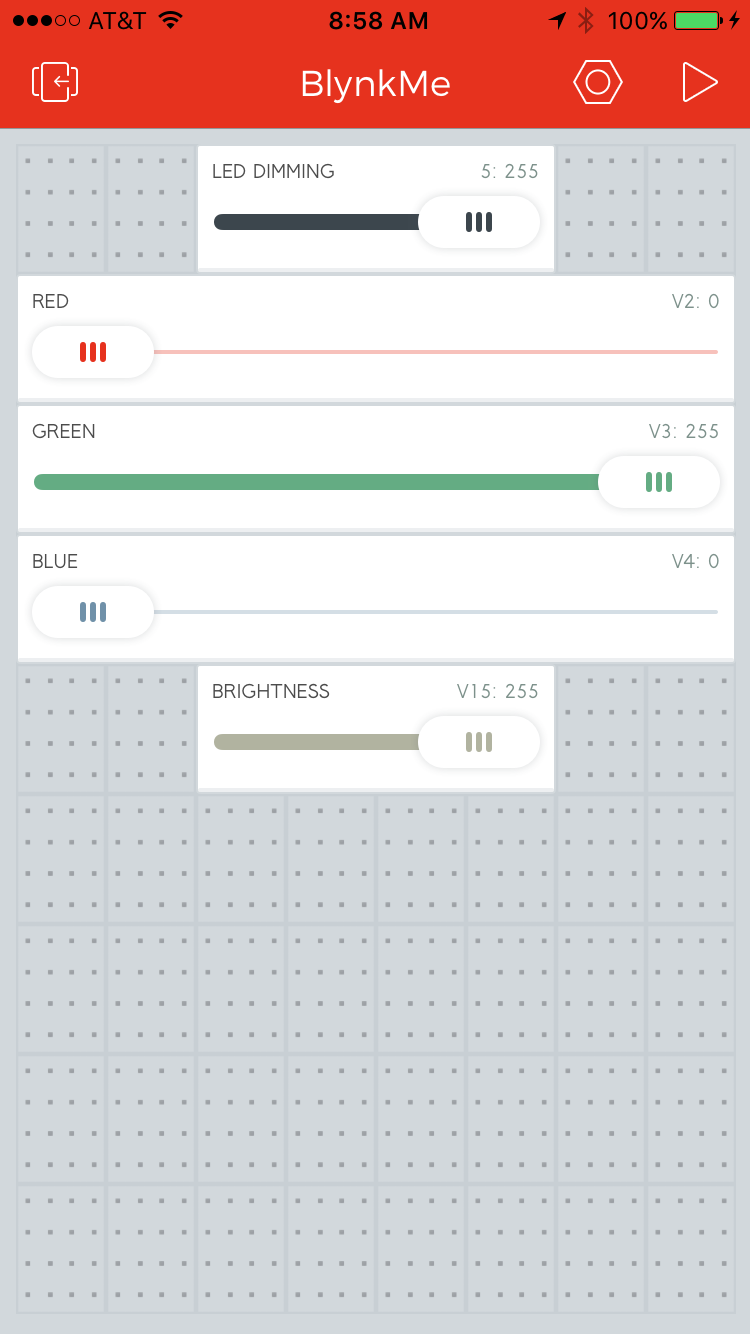
- Touch the Slider widget to open up the Settings dialog, and adjust these values:
- Name: "LED Dimming" – we're using it to control the LED
- Pin: 5 – under the "Digital" list
- Range: 0⟷255, covering the full PWM output range.
- Color: Touch the red circle to change the color of your slider.
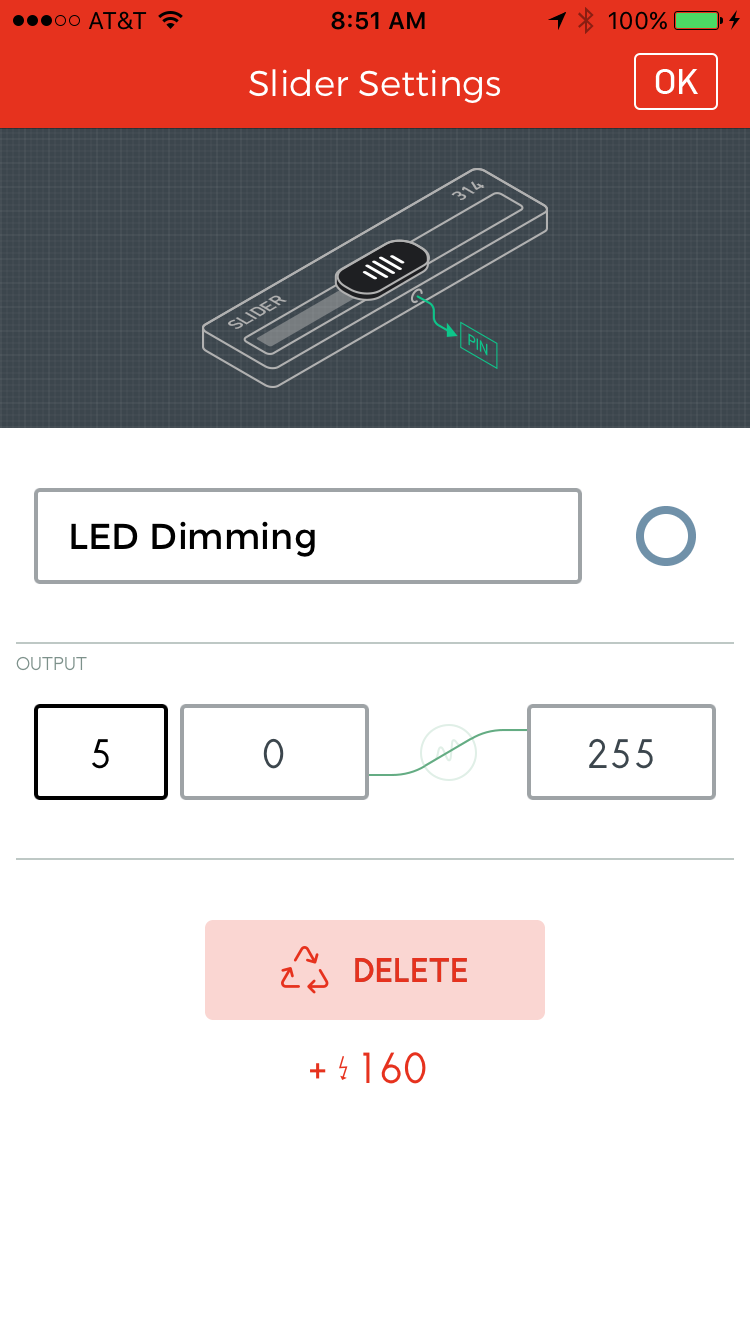
Confirm the settings, and run the project.
Blynk Run
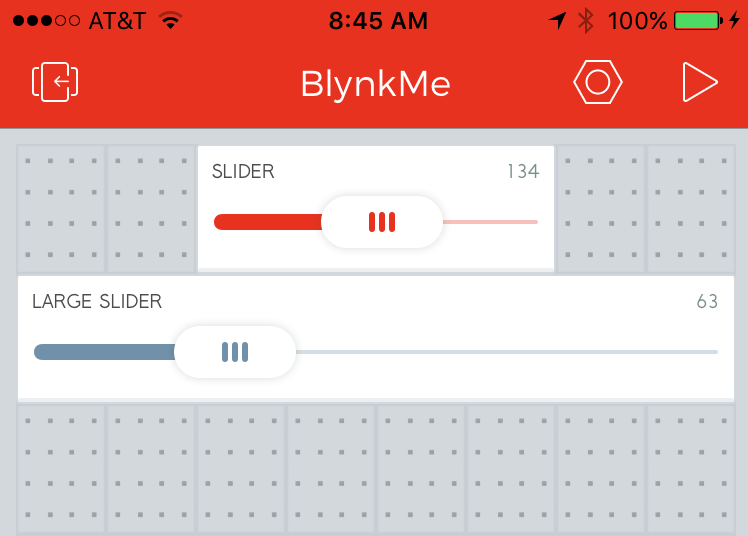
Once the project is running, try grabbing the slider and gradually moving it from one side to the other. The small, blue LED should brighten and dim as you do so. The closer the slider value is to 0, the dimmer it will be. 255 is 100% ON and 0 is totally off.
You can also give the large slider a try. Both sliders accomplish the same task, but the large sliders tend to provide a bit more precision over the pin's value.
Going Further: RGB Precision Control
Sliders can take on all sorts of applications in a Blynk project. In addition to directly controlling a digital pin's PWM value, they can be used to provide a range of input to firmware running on the Blynk Board.
In fact, we've set up virtual pins 2, 3, and 4 to individually control the red, green, and blue channels of the RGB LED. Try adding three more sliders:
| Widget | Name | Pin | Minimum | Maximum |
|---|---|---|---|---|
| Large Slider | Red | V2 | 0 | 255 |
| Large Slider | Green | V3 | 0 | 255 |
| Large Slider | Blue | V4 | 0 | 255 |
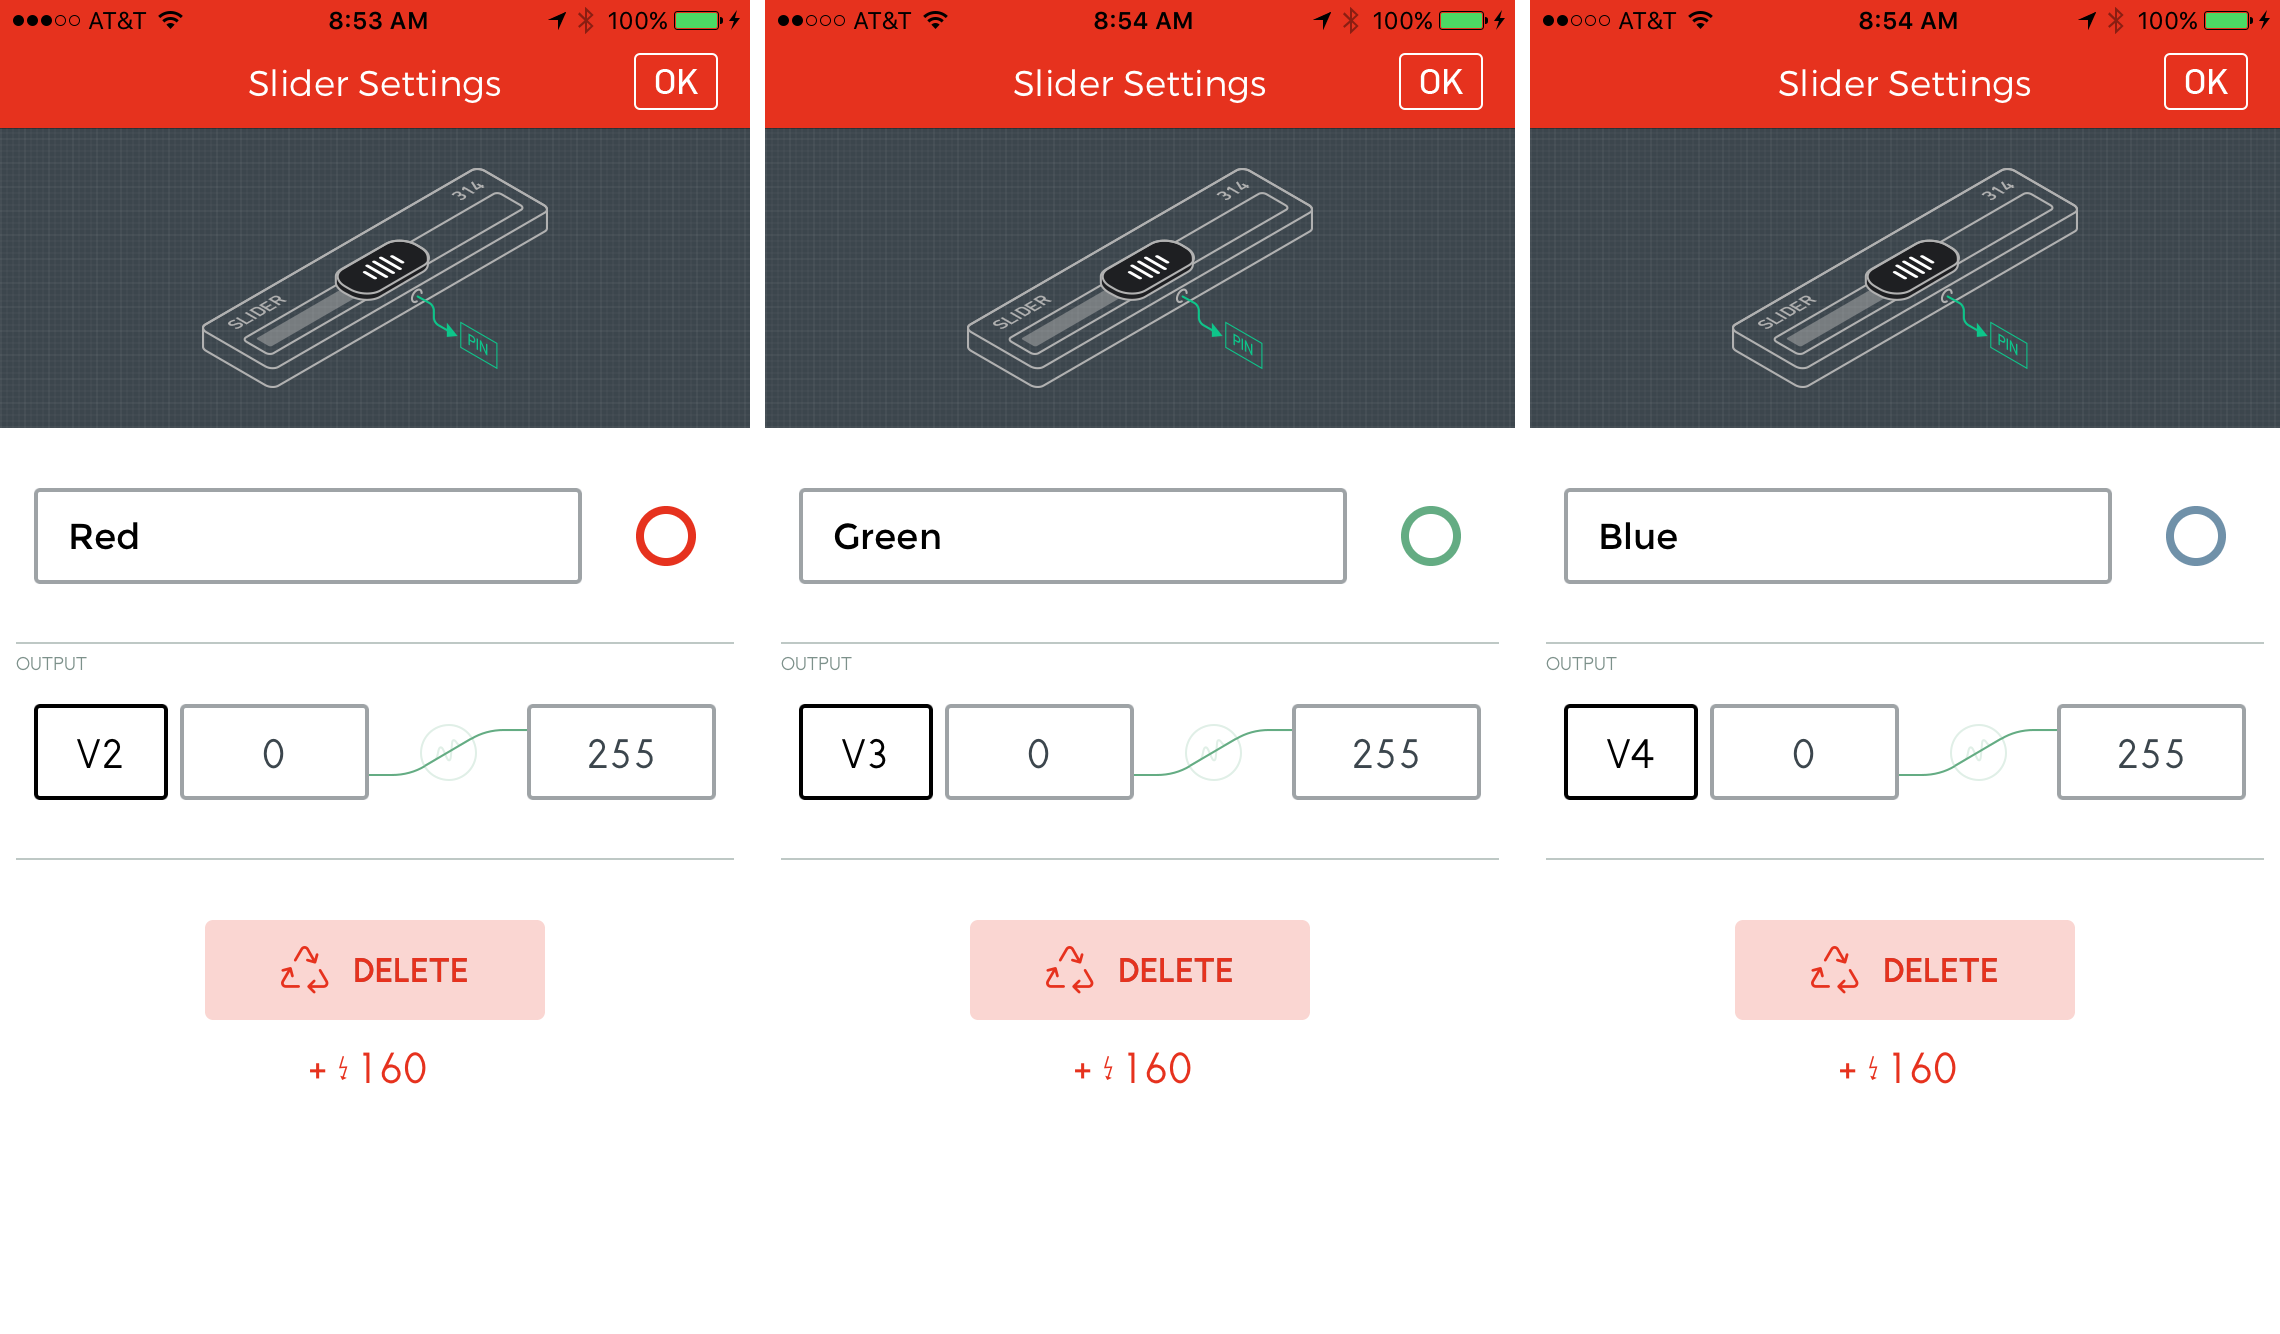
Run the project, and slide around. You may find that the three individual sliders provide more precise control over the mixed color of the RGB LED compared to the zeRGBa widget.

Brightness Control
Time for another admission of guilt: We've been holding back the full awe -- and terror -- of the Blynk Board's RGB LED. In fact, we've been limiting the LED brightness to about 12.5% of it's full power.
To set the maximum range of the RGB LED add a slider to V15 -- you can re-purpose the small slider widget controlling the pin 5 LED, if you'd like. Name it "Brightness", and once again set the range to 0-255.
Play with all four sliders to see the full range of colors you can create. Just be careful! That LED really can get blindingly bright.
Dimming LEDs isn't all the sliders are good for. Later projects will use them as input control, setting values like Twitter timers, moisture thresholds, and sensor update rates.