SparkFun Inventor's Kit for Edison Experiment Guide
 Shawn Hymel
 Experiment 3: Blinky
Introduction
Often, blinking an LED is the first step in testing or learning a new microcontroller: a veritable "Hello, World!" of embedded electronics. However, the GPIO Block requires that we introduce a new component, the transistor, into the mix. As a result, we saved the blinky example for the third experiment.
We will connect an LED to the Edison (using the GPIO Block and a transistor). With some JavaScript, we can control that LED by turning it on and off.
Parts Needed
In addition to the Edison and Block Stack, you will need the following parts:
- 1x Breadboard
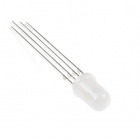
- 1x RGB LED
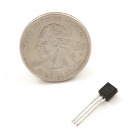
- 1x NPN Transistor
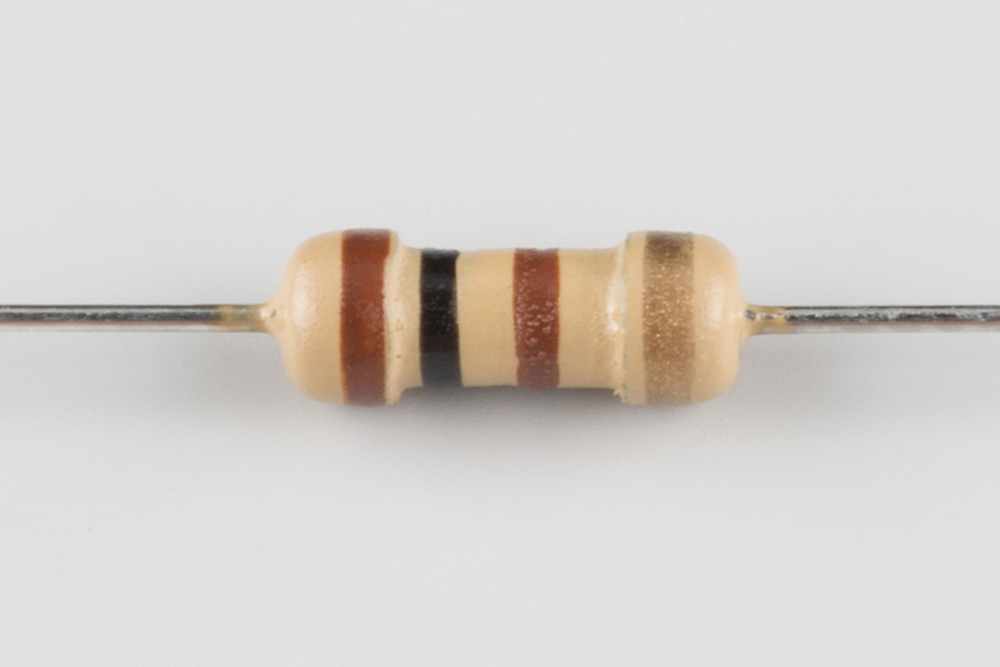
- 1x 1kΩ Resistor
- 1x 100Ω Resistor
- 5x Jumper Wires


Intel® Edison
DEV-13024
SparkFun Block for Intel® Edison - GPIO
DEV-13038
SparkFun Block for Intel® Edison - Base
DEV-13045Suggested Reading
- Transistors -- An introduction to transistors
Concepts
The Transistor
The GPIO Block is not capable of sourcing more than a few milliamps, which is not enough to fully light up an LED. To do that, we will use a transistor. A transistor is a device that can be used to amplify or switch electrical current. We will be using a bipolar junction transistor (BJT), which allows current to flow through the collector and emitter pins whenever a (much smaller) current flows into the base pin.
In this experiment, we will connect the base of the BJT to GP12 on the GPIO Block. When the GP12 pin goes high (3.3V), this causes a little bit of current to flow from GP12 through the base, which turns the transistor on. This allows current to flow from the 3.3V supply (also on the GPIO Block), through the collector, and out the emitter. This current then flows through the 100Ω resistor and LED, turning the LED on.
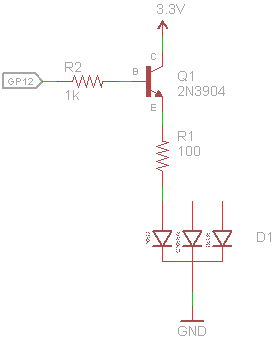
We can calculate the amount of current flowing through the LED, as we want to make sure it is not over 20mA, as per the RGB LED datasheet. To do that, we need to figure out what the voltage drop across the 100Ω resistor. Starting with 3.3V, we can determine that the voltage across the collector and emitter (Vce) is 0.2V (Vce(sat) in the datasheet) when the transistor is fully on. Again from the LED's datasheet, we see that that typical drop across the red LED is 2V. As a result, the voltage drop across the resistor can be calculated:

Knowing that the drop across the resistor is 1.1V, we can use Ohm's Law (V = I x R) to calculate the current flowing through the resistor:


How to Use Logic Like a Vulcan
One of the things that makes the Edison so useful is that it can make complex decisions based on the input it's getting. For example, you could make a thermostat that turns on a heater if it gets too cold, or a fan if it gets too hot, and it could even water your plants if they get too dry. In order to make such decisions, JavaScript provides a set of logic operations that let you build complex "if" statements. They include:
| == | EQUIVALENCE | A == B is true if A and B are the SAME. |
|---|---|---|
| != | DIFFERENCE | A != B is true if A and B are NOT THE SAME. |
| && | AND | A && B is true if BOTH A and B are TRUE. |
| || | OR | A || B is true if A or B or BOTH are TRUE. |
| ! | NOT | !A is TRUE if A is FALSE. !A is FALSE if A is TRUE. |
You can combine these functions to build complex if() statements. For example:
language:c

if ((mode == heat) && ((temperature < threshold) || (override == true))) {
    turnOnHeater();
}
...will turn on a heater if you're in heating mode AND the temperature is low, OR if you turn on a manual override. Using these logic operators, you can program your Edison to make intelligent decisions and take control of the world around it!
In addition to the comparator '==' and '!=', JavaScript also has the strict comparators '===' and '!==' where the two values being compared need to be the same type (e.g. both a string). See this page to learn more about JavaScript comparators.
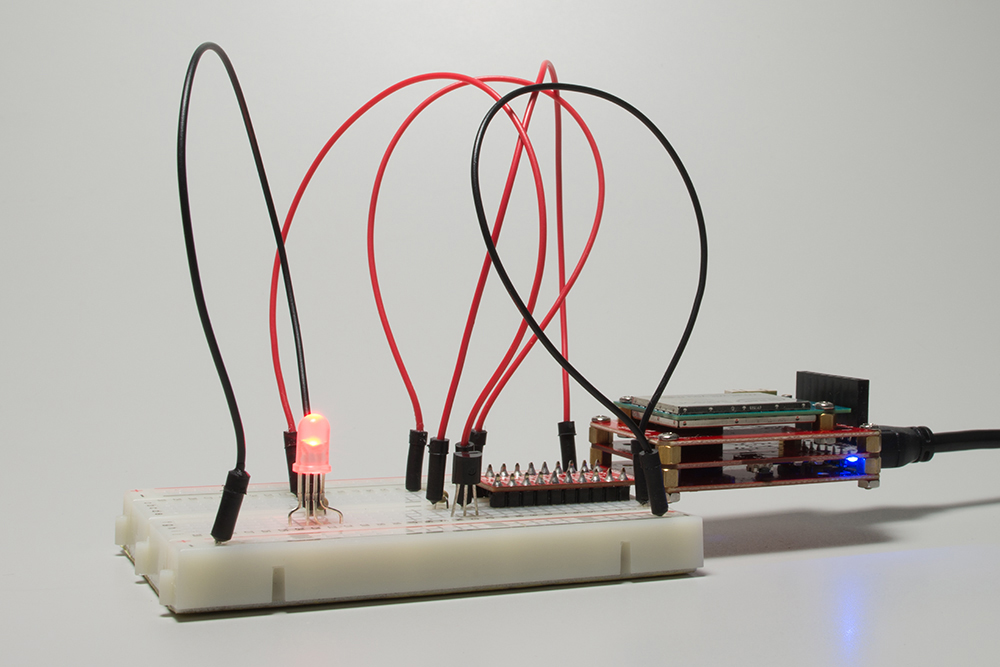
Hardware Hookup
Fritzing Diagram
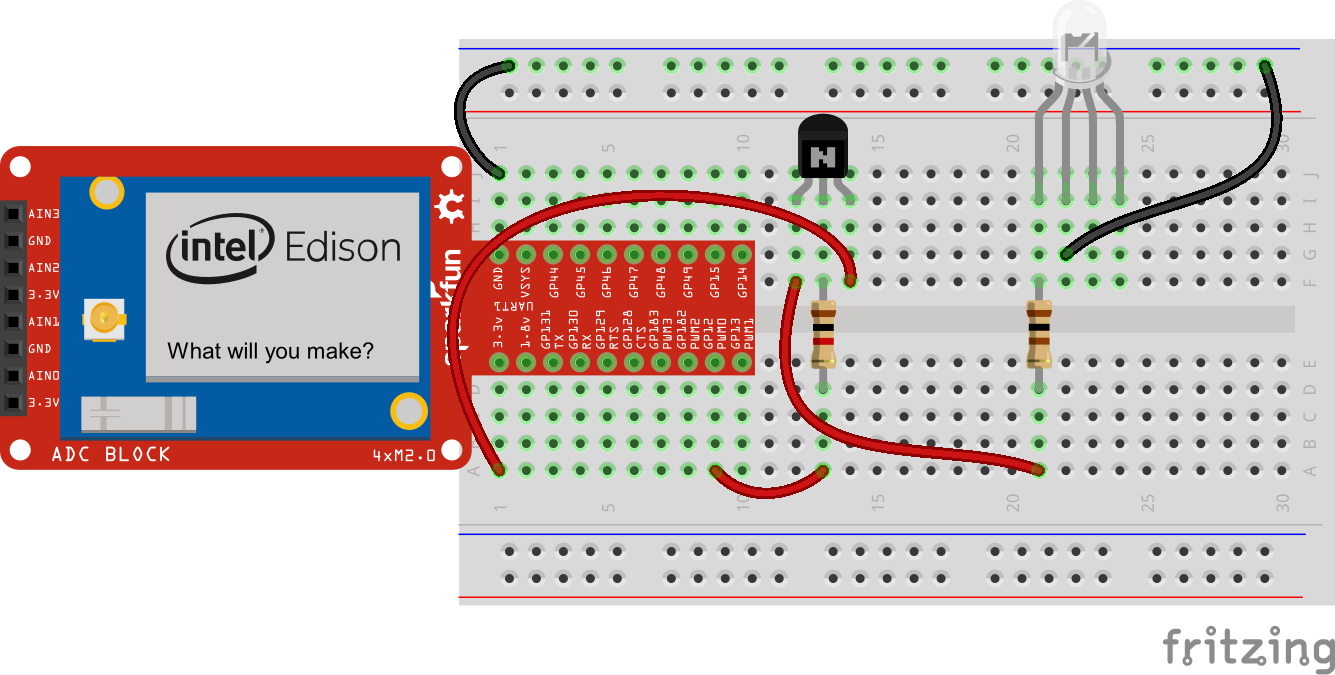
Tips
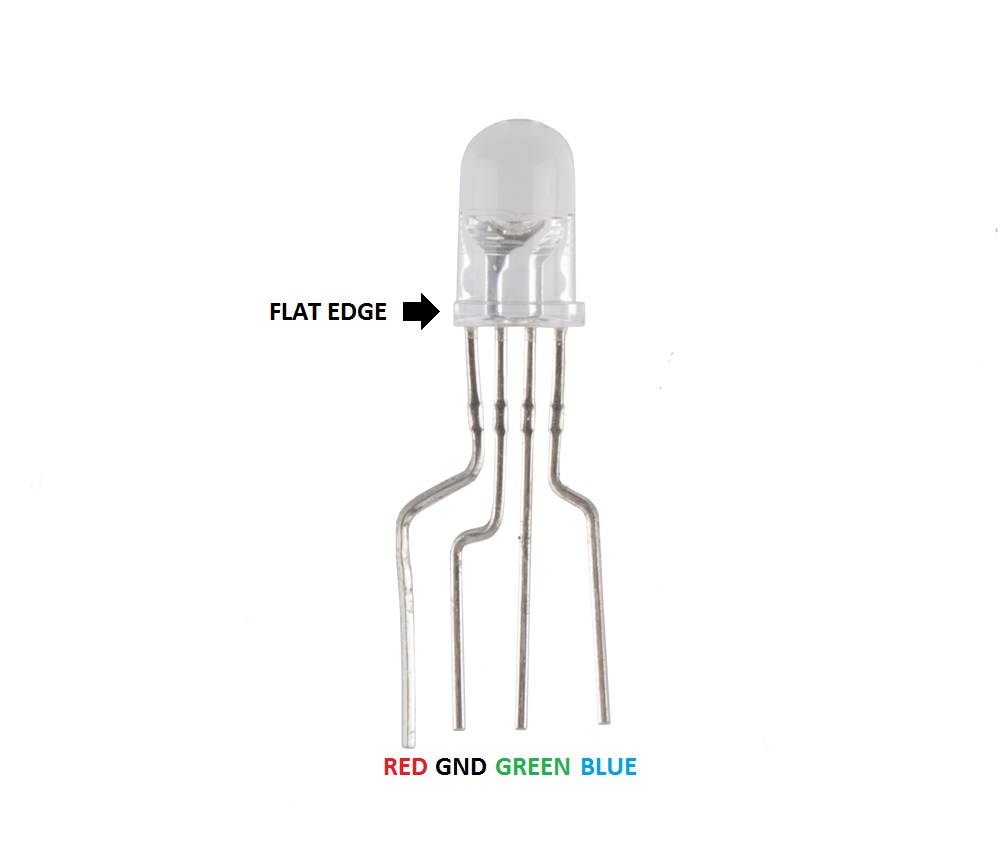
RGB LED
You can use a set of needle nose pliers to bend the LED's leads and a pair of cutters to fit the LED in the breadboard. Note that there is a flat side on the plastic ring around the bottom of the LED. This denotes the side with the pin that controls the red color. See this tutorial to learn more about polarity.
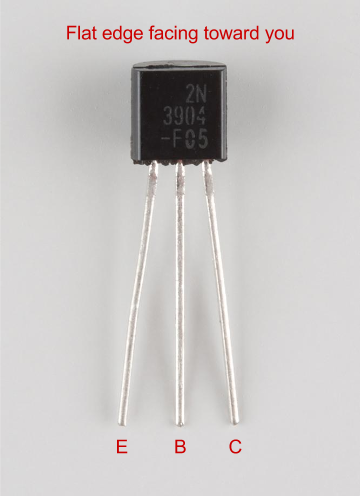
NPN Transistor
Note that the flat face with the 'N' of the transistor in the Fritzing diagram matches up with the flat face (with the writing) of the physical part. With the flat edge facing you, the pins are as follows:
The Code
language:JavaScript
/*jslint node:true, vars:true, bitwise:true, unparam:true */
/*jshint unused:true */
// Leave the above lines for propper jshinting

/**
 * SparkFun Inventor's Kit for Edison
 * Experiment 3: Blinky
 * This sketch was written by SparkFun Electronics
 * October 29, 2015
 * https://github.com/sparkfun/Inventors_Kit_For_Edison_Experiments
 *
 * Blink an LED connected to GP12 (need a transistor if using the Base Block).
 *
 * Released under the MIT License(http://opensource.org/licenses/MIT)
 */

// Import the MRAA module
var mraa = require('mraa');

// Set up a digital output on MRAA pin 20 (GP12)
var ledPin = new mraa.Gpio(20);
ledPin.dir(mraa.DIR_OUT);

// Global variable to remember the LED state
var led = 0;

// Call this function over and over again
periodicActivity();
function periodicActivity() //
{
    // Switch state of LED
    if (led === 0) {
        led = 1;
    } else {
        led = 0;
    }

    // Turn the LED on
    ledPin.write(led);

    // Wait for 500 ms and call this function again
    setTimeout(periodicActivity, 500);
}
What You Should See
Upload and run the program. The LED should start flashing red.
Code to Note
After we declare the ledPin as an output with mraa.DIR_OUT, we create the variable led that stores the state of the led ('1' for on and '0' for off). Because this variable (and similarly mraa and ledPin) is declared outside of any object or function, they are considered global variables, which means they can be accessed by any function, object, etc. in the entire program. In most programming circles, using global variables is considered very bad practice. However, we rely on them in most of our examples because:
- JavaScript makes creating and accessing global variables very easy. This is not a legitimate excuse, but it does make the examples easier to follow.
- Most of the examples are simple, 1-file programs where we can keep track of all the global variables. Global variables are still used by embedded programmers, as most embedded programs are relatively small and they allow for different types of CPU, RAM, or storage optimization.
Troubleshooting
- The Edison won't connect -- This is possible if the Edison is not powered or configured properly. See the "Edison won't connect" section in the Appendix A: Troubleshooting.
- The LED doesn't flash -- Once again, check the wiring. Make sure you are connecting the base of the transistor to GP12 (through a 1kΩ resistor). Additionally, you can add some
console.log()statements in the code to see if certain parts are being executed.
Going Further
Challenges
- Make the LED turn on for 1 second and off for 1 second.
- Make the LED turn on for 200 ms and off for 1 second.
- Add a button (like in the previous experiment). Create a program such that the LED turns on only when the button is pushed.
Digging Deeper
- More information about the history, making of, and different types of transistors
- General-purpose input/output (GPIO)
- Accessing GPIO in Linux