SparkFun Inventor's Kit for Edison Experiment Guide
 Shawn Hymel
 Experiment 6: RGB LED Phone App
Introduction
In the previous experiment, we used WebSockets to create a connection from a client (browser) to the server (Edison). With them, we can send data back and forth to control a simple LED.
In this experiment, we introduce the concept of Web Apps, which are applications designed to run in a browser. Specifically, we will create an HTML application intended for a smartphone. Because the application is written in HTML, it should be capable of running on most phone operating systems, including iOS, Android, and Windows Phone/Mobile.
Parts Needed
In addition to the Edison and Block Stack, you will need the following parts:
- 1x Breadboard
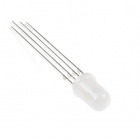
- 1x RGB LED
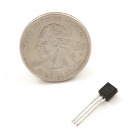
- 3x NPN Transistor
- 3x 1kΩ Resistor
- 3x 100Ω Resistor
- 12x Jumper Wires


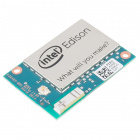
Intel® Edison
DEV-13024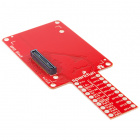
SparkFun Block for Intel® Edison - GPIO
DEV-13038
SparkFun Block for Intel® Edison - Base
DEV-13045Suggested Reading
- Web App Using Intel® XDK -- Creating a simple Web App using the XDK
- Pulse-width Modulation -- How PWM works, and how to use to control the brightness of an LED
- JavaScript basics -- Introduction to JavaScript in the context of web applications
Concepts
Web App
A web application (or web app for short) is a program that runs on a client's browser (although, some of the computing may be shared by the server). With the rise of HTML5 and JavaScript, most browsers are capable of running simple (or even complex) programs with these now ubiquitous languages.
Many smartphones have built-in or third-party browsers capable of running HTML5 and JavaScript. As a result, we can write software in the XDK that runs inside a phone's browser. This allow us to make programs that run across a variety of operating systems and can make network connections (e.g. to the Internet or the Edison). The down side is that some of the phone's native capabilities (e.g. accelerometer, GPS, camera) are not available to web apps. If we want native functionality, we either need to create a native app, designed specifically for a particular phone or operating system, or we need to make a hybrid app, which combined native functionality and web app portability.
We will cover hybrid apps (with Cordova) in a future exercise.
Web App Libraries
In previous examples, we included libraries by adding the appropriate name and version (usually found from npmjs.com) into the package.json file. This told the XDK to download the Node library, build it (if needed), and transfer it to the Edison along with the other necessary program files.
When building a web app, it is often necessary to include other pieces of code as a library, much like we did with Node modules. However, the XDK does not have a good way of automatically knowing which libraries to find when it comes to web apps. As a result, we will need to manually download the library (often packaged as a .js file) and include it with the project files.
The suggested file structure of a web app looks slightly different from the file structure of the Node.js IoT application. In fact, it looks very much like the suggested file structure for web pages. We will keep HTML (user interface) in index.html, JavaScript in js/app.js, and libraries (usually, third-party .js files) in the js directory.
LED Current
The brightness of an LED is controlled by the amount of current flowing through it. LEDs, generally, have a fixed voltage drop across their anode and cathode. In order to fix the amount of current, we usually need to choose the right resistor for the LED.
In our previous circuit, we used just the red channel of the RGB LED, which we will assume is 1 LED. We found that the red LED has a voltage drop of about 2.0V, and by using a 100Ω resistor and a 3.3V rail, we could get 11mA to pass through the resistor (well below its maximum current rating of 20mA.
Now, we want to add 2 more LEDs into the mix. The green and blue LEDs (all packaged within the same RGB LED housing) have a voltage drop of about 3.2V (according to the RGB LED datasheet). If we connect a 100Ω resistor to each of the green and blue LEDs and connect that to the 3.3V rail through a transistor (like we did for red), we would end up with almost no current flowing through them. They probably wouldn't turn on!

That can't happen! So, we need to increase the rail voltage that we are using for the green and blue LEDs (and not for the red channel). We will connect the collector of the transistors for green and blue to the VSYS rail, which is nominally 4.2V.
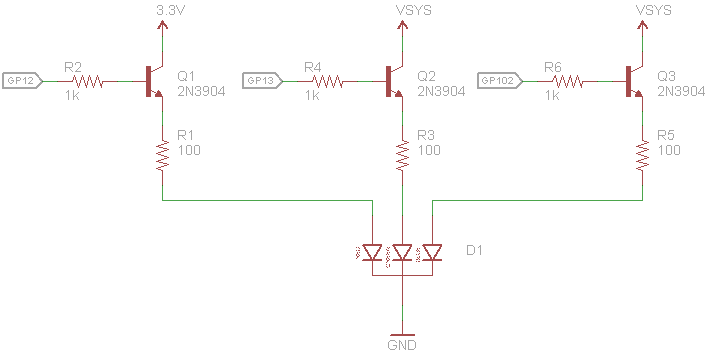
Now, we should have some current flowing through our green and blue LEDs. We can calculate that voltage drop across the 100Ω resistor:

With that, we can calculate the current flowing through the resistor (and, as a result, the LED):


8mA is not exaclty the same as the current flowing through the red LED (11mA), so the brightnesses will be different. For our purposes, it will be good enough to demonstrate how to mix red, green, and blue into different colors.
Pulse Width Modulation
In addition to controlling the current, we can also rapidly turn the LED off and on to give the appearance of a dimmer LED. This is known as "Pulse-Width Modulation" (PWM). Note that we are flipping the LED off and on so fast that generally our eyes cannot see the flickering.
We adjust the "duty cycle" of this flipping process in order to control the brightness. Duty cycle just refers to how long our LED stays on in relation to how long it stays off.
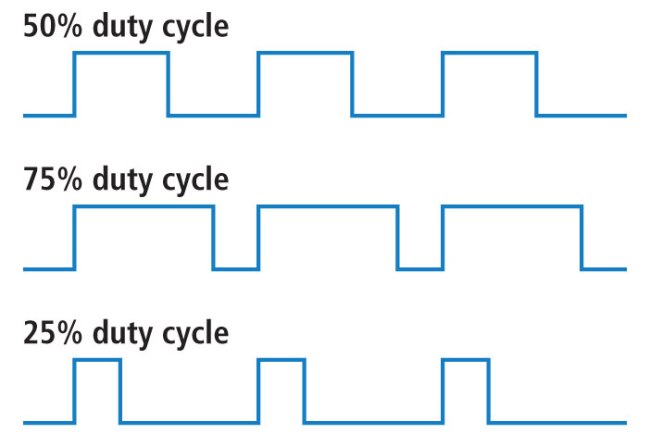
The higher the duty cycle (e.g. 75% in the image above), the brighter the LED will appear to be. At lower duty cycles (e.g. 25%) the LED will hardly appear to be on. For a full tutorial on PWM, see Pulse-width Modulation.
In our program, we will rely on the Edison's built-in PWM functionality (using MRAA's PWM class) to control the duty cycle of the individual red, green, and blue channels of the LED.
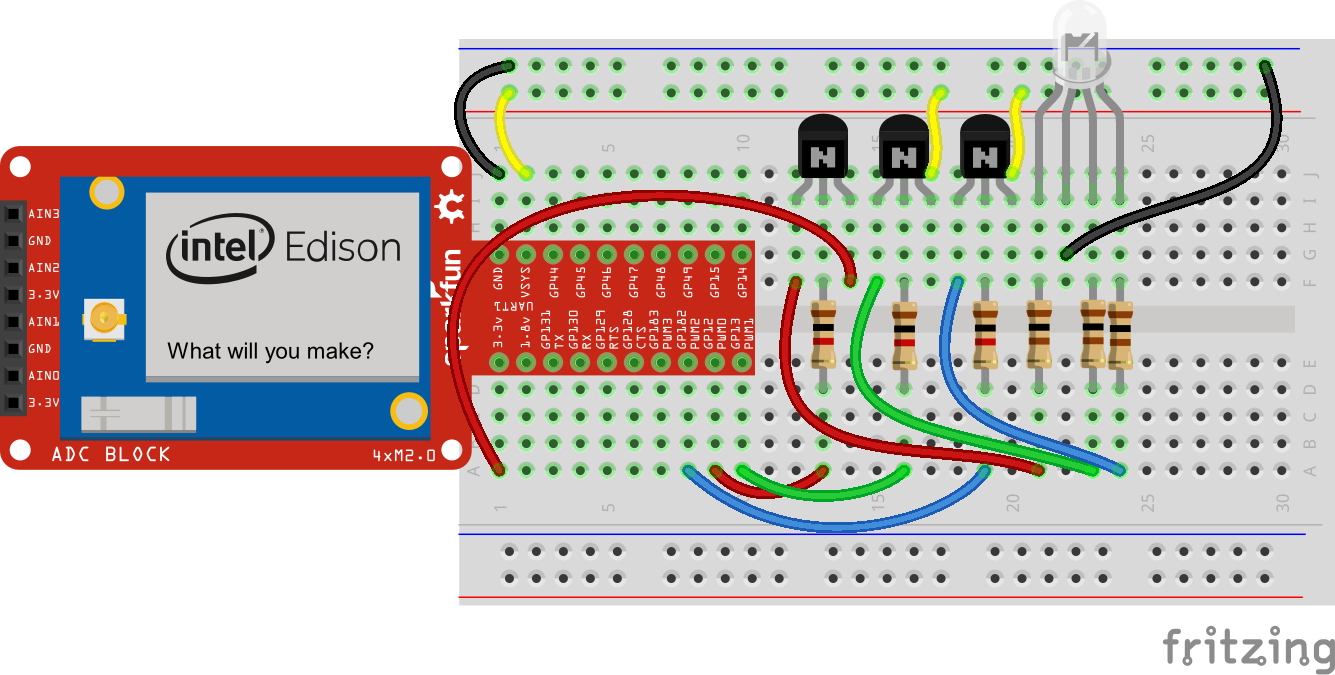
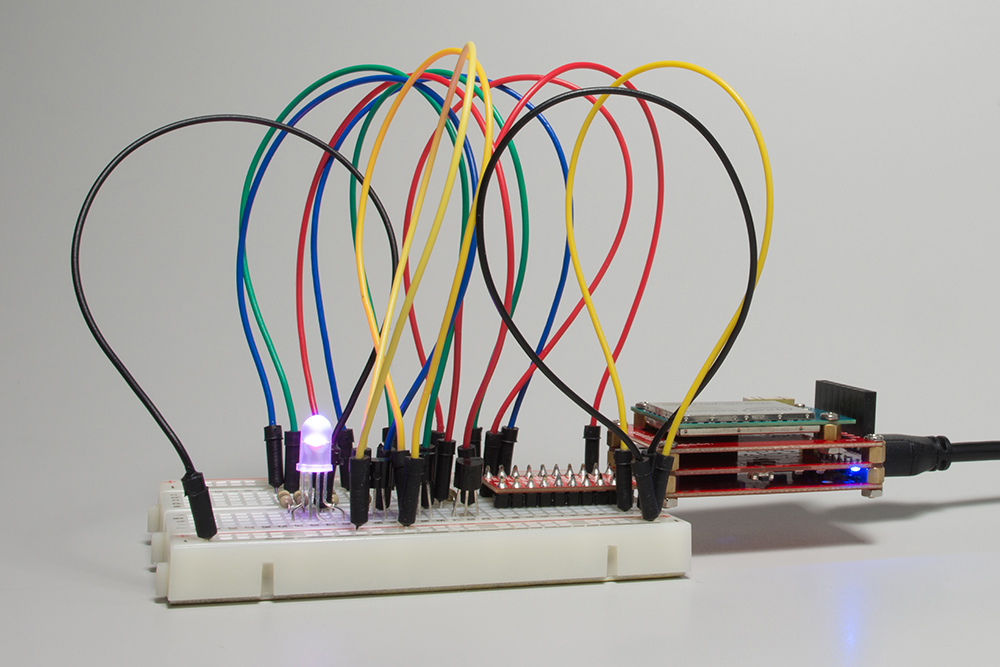
Hardware Hookup
Fritzing Diagram
We build upon the previous, single LED example and add another set of transistors and resistors.
Part 1: Simple Web App
Create a Web App
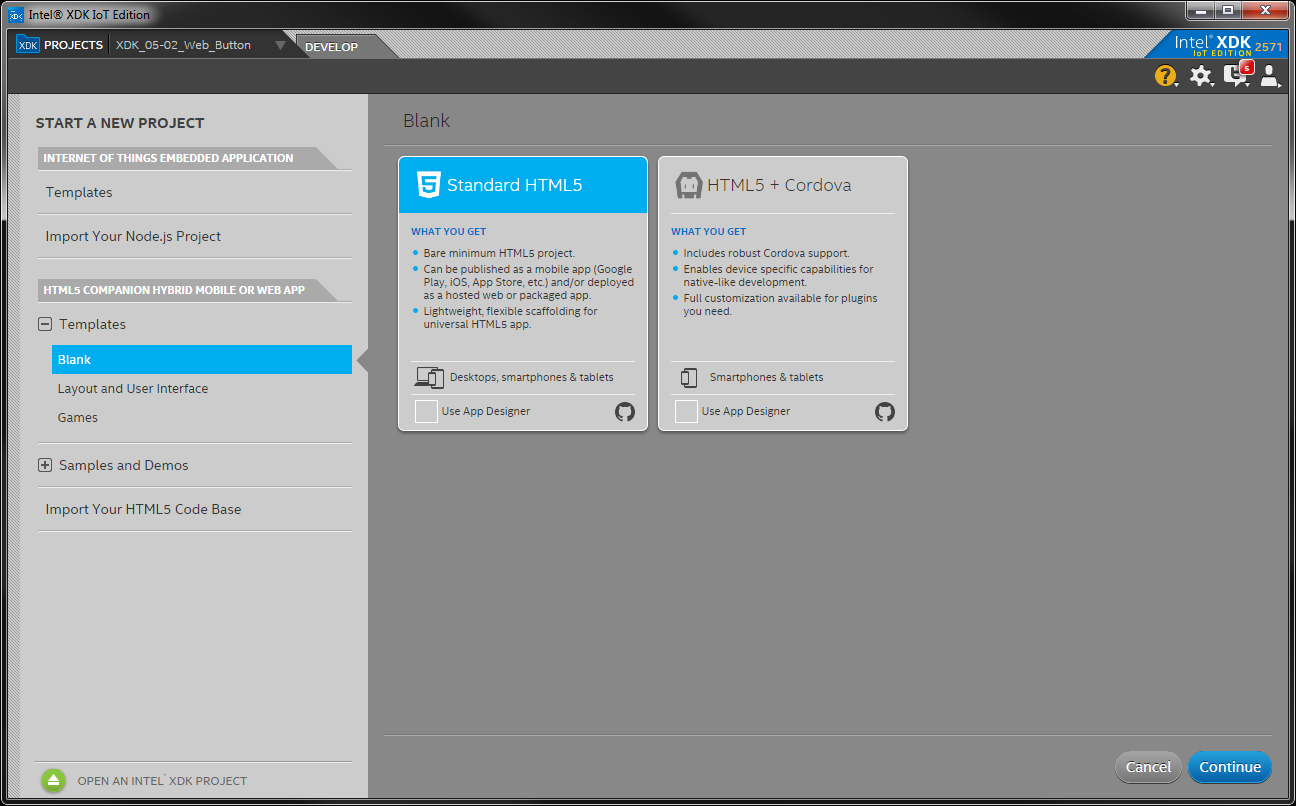
In the XDK, create a new project, and under HTML5 Companion Hybrid or Web App select Templates and Blank. Select Standard HTML5, and click Continue.
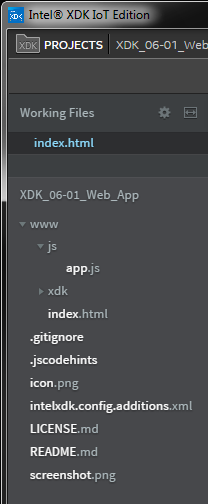
Give your new app a name (e.g. "XDK_MyApp"), and click Create. You will notice that the files and folders in the web app template are different from the ones in IoT project templates.
Libraries
Similar to loading Node.js modules for code that runs on the Edison, we will rely on JavaScript libraries in our web app. In the first part, we will include jQuery, which makes it easier to select HTML elements (from the index.html page) in our JavaScript (app.js) code and handle events like text entry or button clicks.
Navigate to http://jquery.com/download/ and download the latest, uncompressed version (e.g. "Download the uncompressed, development jQuery 2.1.4"). That will download a .js JavaScript file, which we need to copy into our project.
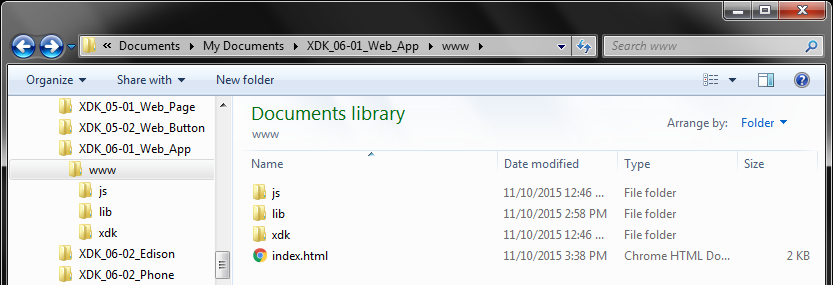
Navigate to your Downloads directory, and copy the newly downloaded .js file. Then, navigate to your project directory. In the www directory (e.g. \
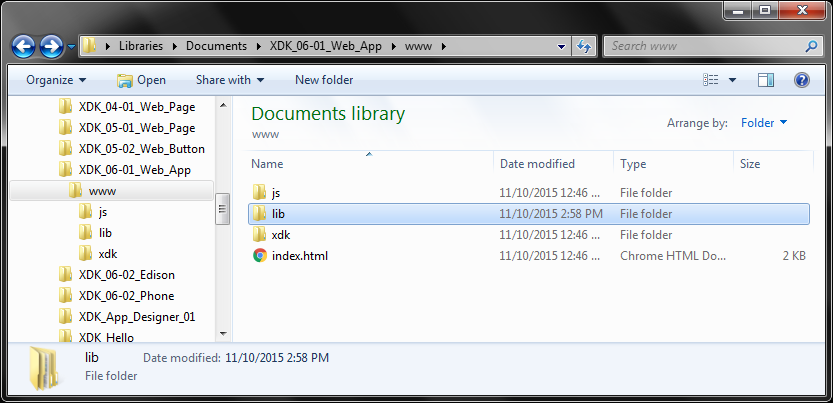
In that directory, create another directory named jquery.
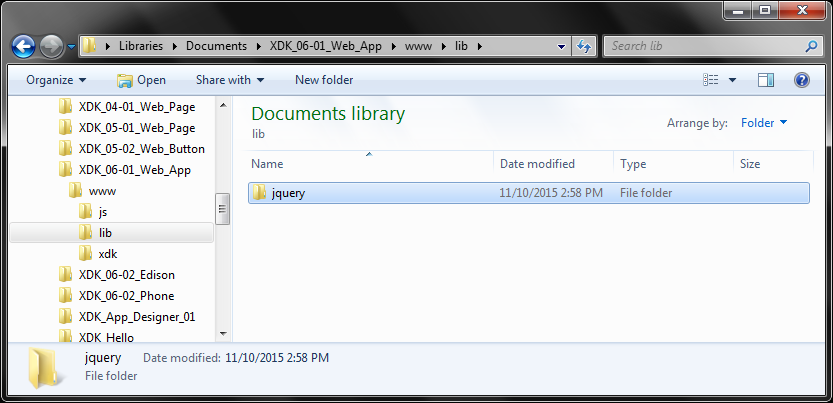
Finally, paste the jQuery JavaScript (.js) file in the jquery directory.
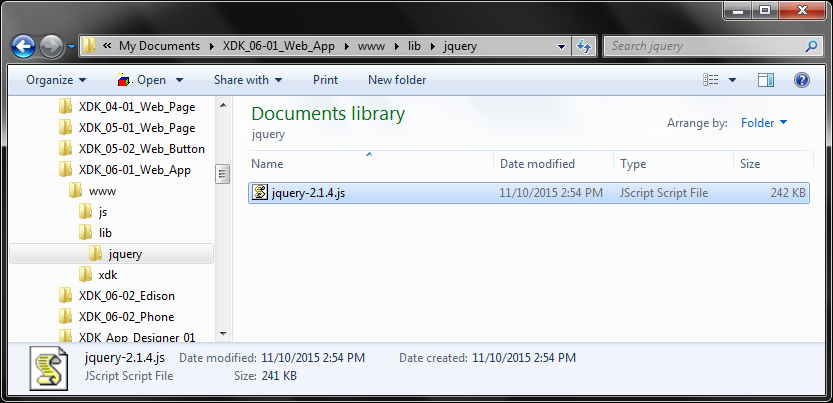
The XDK should now show the jQuery file in the file browser pane (if not, switch to another project and then back to the web app project to reload the file browser).

HTML
Open the index.html file (found in the www directory in the project), and copy in the code below. Don't forget to save the file (File → Save) when you are done!
<!DOCTYPE html>


<html>

<head>
  <title>Simple Web App</title>
    <meta http-equiv="Content-type" content="text/html; charset=utf-8">
    <meta name="viewport" content="width=device-width, minimum-scale=1, initial-scale=1, user-scalable=no">
    <style>
        @-ms-viewport { width: 100vw ; min-zoom: 100% ; zoom: 100% ; }  @viewport { width: 100vw ; min-zoom: 100% zoom: 100% ; }
        @-ms-viewport { user-zoom: fixed ; min-zoom: 100% ; }           @viewport { user-zoom: fixed ; min-zoom: 100% ; }
    </style>
</head>

<body>


    <div>
        <h2>The Button</h2>
        <p><button id="toggle_button">Push Me!</button></p>
    </div>


    <div id="toggle_text" style="display: none;">
        <p>Boo!</p>
    </div>


    <script type="text/javascript" src="lib/jquery/jquery-2.1.4.js"></script>
    <script type="text/javascript" src="js/app.js"></script>
</body>

</html>
JavaScript
Open the app.js file (found in the www/js directory), and copy in the following code. Don't forget to save the file (File → Save) when you are done!
language:javascript
/*jslint unparam: true */
/*jshint strict: true, -W097, unused:false,  undef:true, devel:true */
/*global window, document, d3, $, io, navigator, setTimeout */

/**
 * SparkFun Inventor's Kit for Edison
 * Experiment 6 - Part 1: Simple Web App
 * This sketch was written by SparkFun Electronics
 * November 10, 2015
 * https://github.com/sparkfun/Inventors_Kit_For_Edison_Experiments
 *
 * Create a some dynamic text that appears when a button is pushed.
 *
 * Released under the MIT License(http://opensource.org/licenses/MIT)
 */

// Make the toggle text div appear and disappear
function toggleText() {

    // Put in strict mode to restrict some JavaScript "features"
    "use strict";

    // Declare our variables at the beginning of the scope
    var toggleTextEl = $('#toggle_text');

    // Toggle the visibility of the text
    toggleTextEl.fadeToggle();

    // Print the visibility to the console
    console.log("Visibility: " + toggleTextEl.css('visibility'));
}

// Short for jQuery(document).ready() method, which is called after the page
// has loaded. We can use this to assign callbacks to elements on the page.
$(function() {
    "use strict";

    // Assign a callback to the "Push Me" button
    $('#toggle_button').on('click', function(){
        toggleText();
    });
});
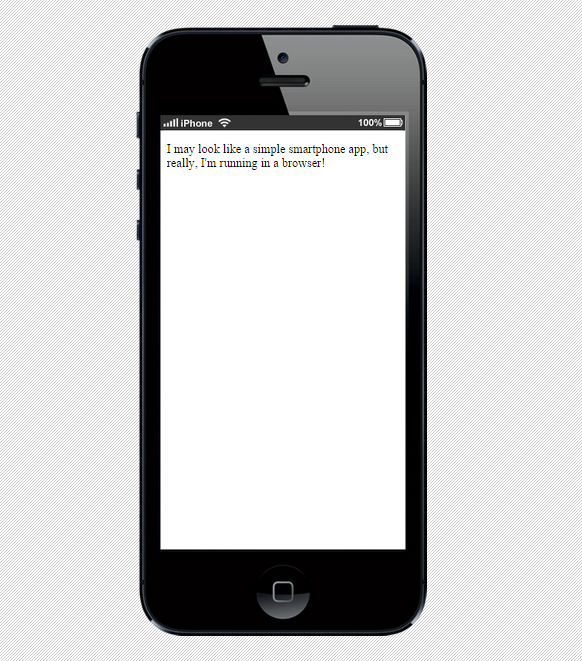
What You Should See
To test the program in the XDK's phone emulator, click on Run My App in the right-side pane. Click on the "Play" symbol (triangle) next to Run in Emulator. The XDK Emulator should boot up and give you a phone-like interface running our web app. Click the "Push Me!" button for a (very insignificant) surprise.
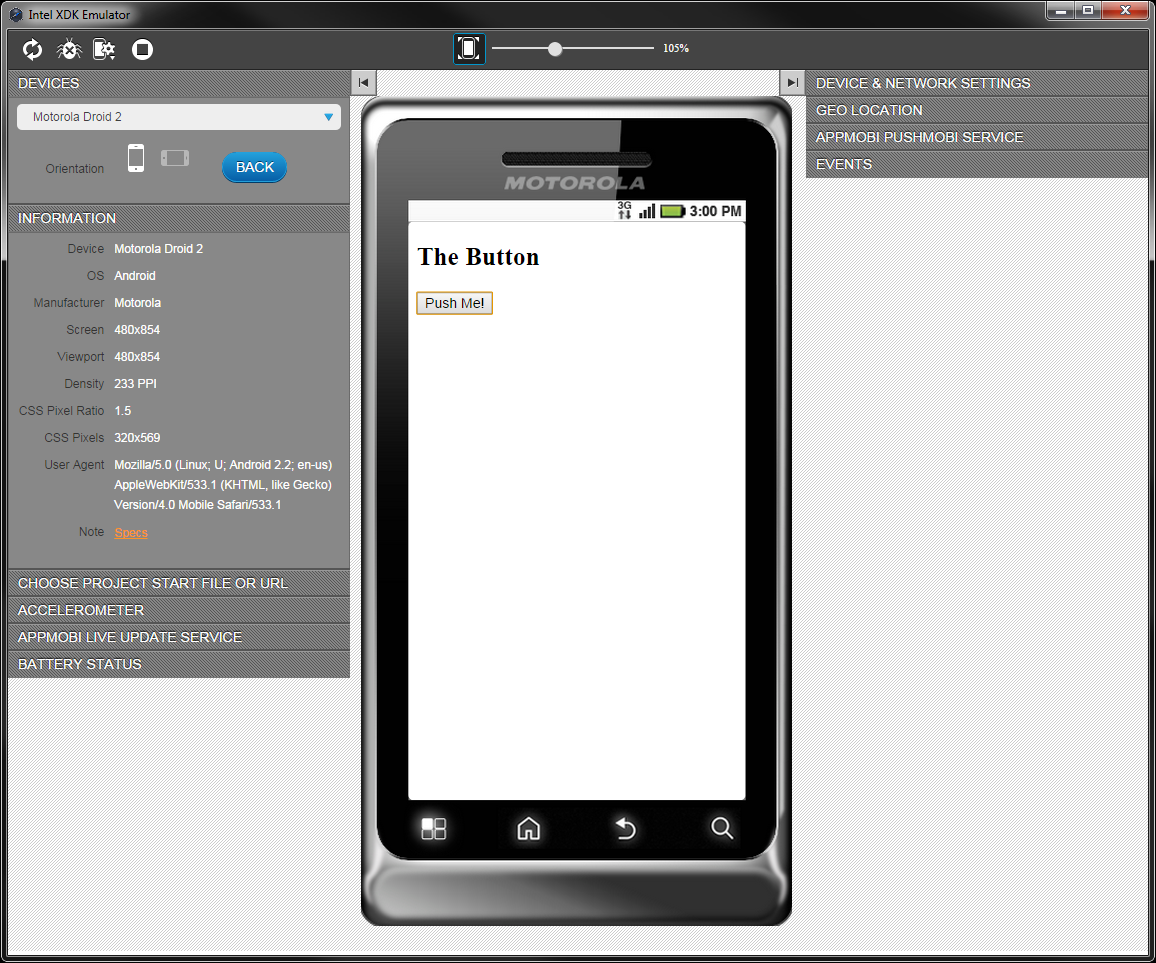
In the top-left pane, you can also select the model of phone you wish to test. It may not be as good as the real thing, but it's a start!
To test the program on a real phone, we will first need to download and install the Intel App Preview from the appropriate app store. App Preview can be found here for iOS, here for Android, or here for Windows.
In the XDK, go to the TEST tab, and click on the Push Files button. This will upload the project to Intel's servers, where you will be able to download it on your phone.
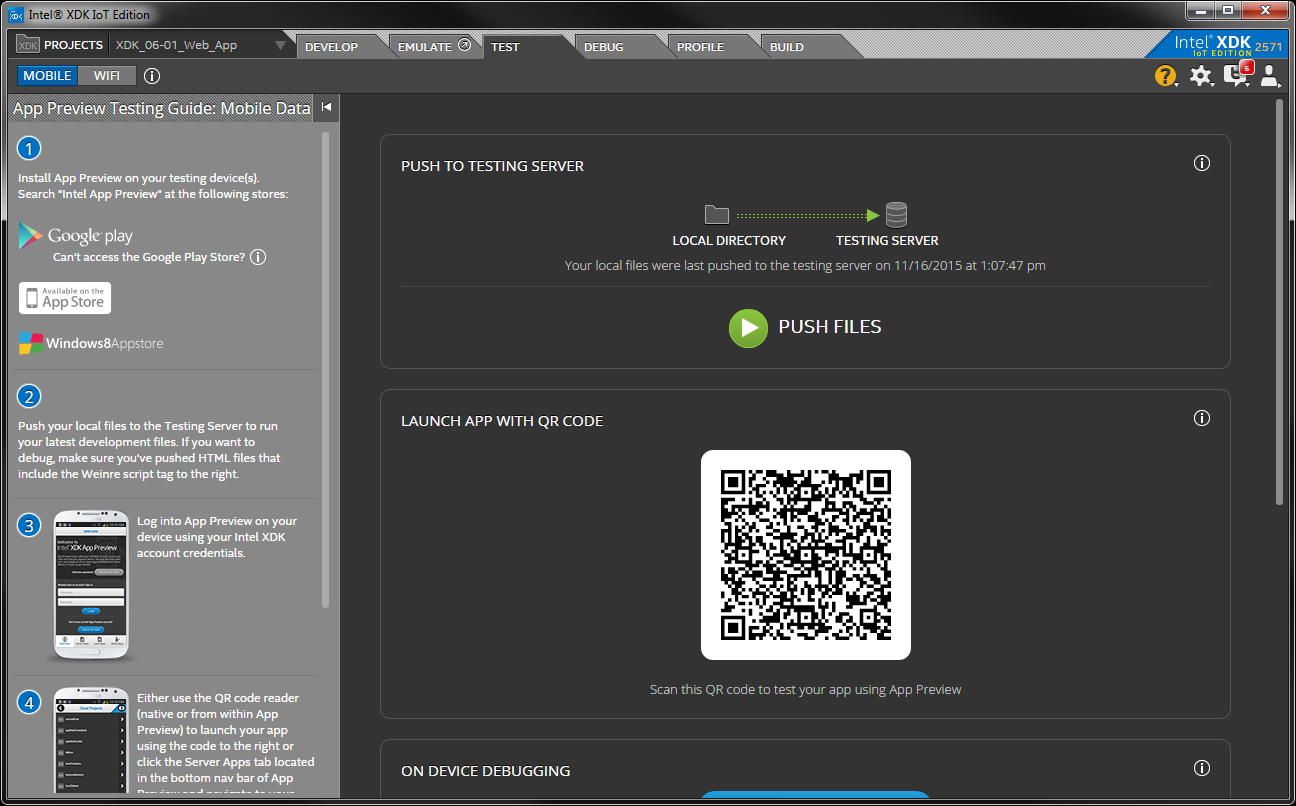
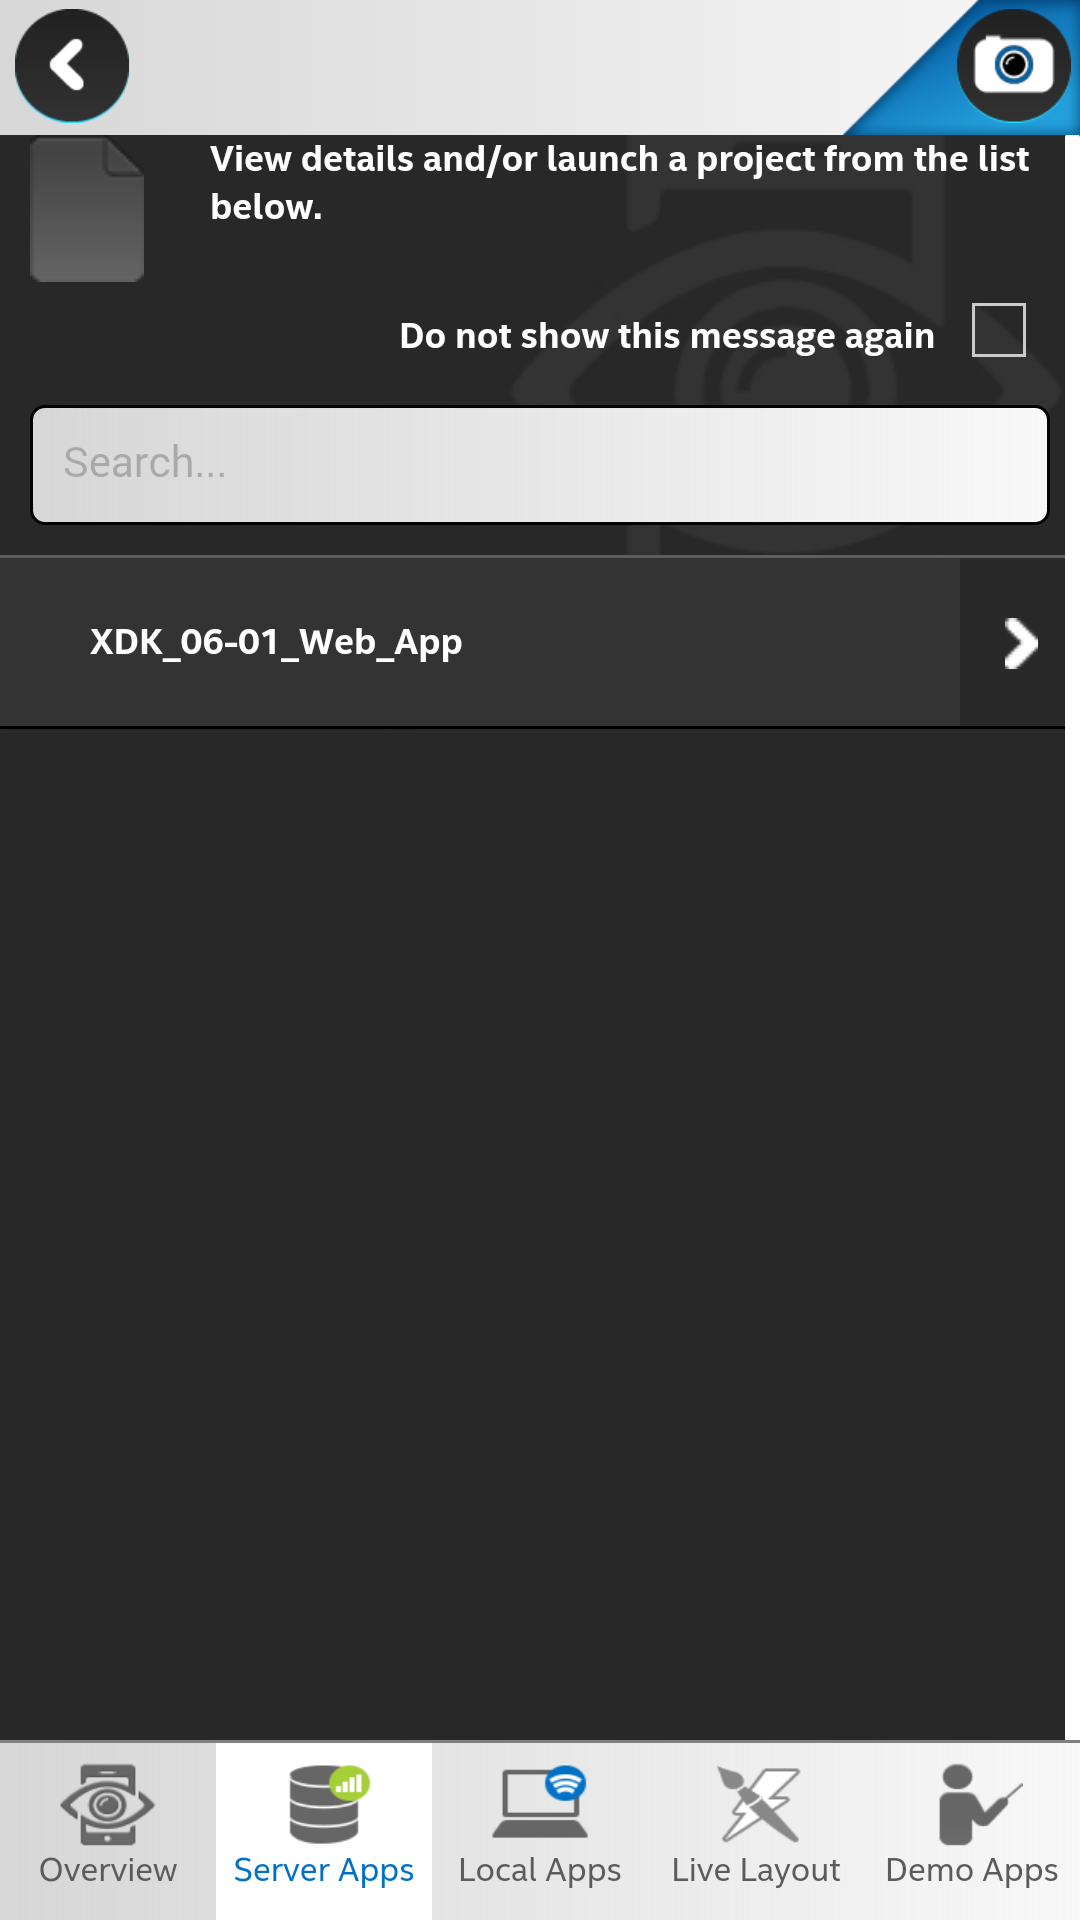
On your phone, open the Intel® App Preview app (don't think about the redundancy too hard). Press the Login button, and enter your Intel® Developer Zone username and password. Press the Server Apps tab on the bottom of the screen to view your uploaded projects (at this point, you should only see one).
Press on your project's name, and you will be presented with a launch screen.
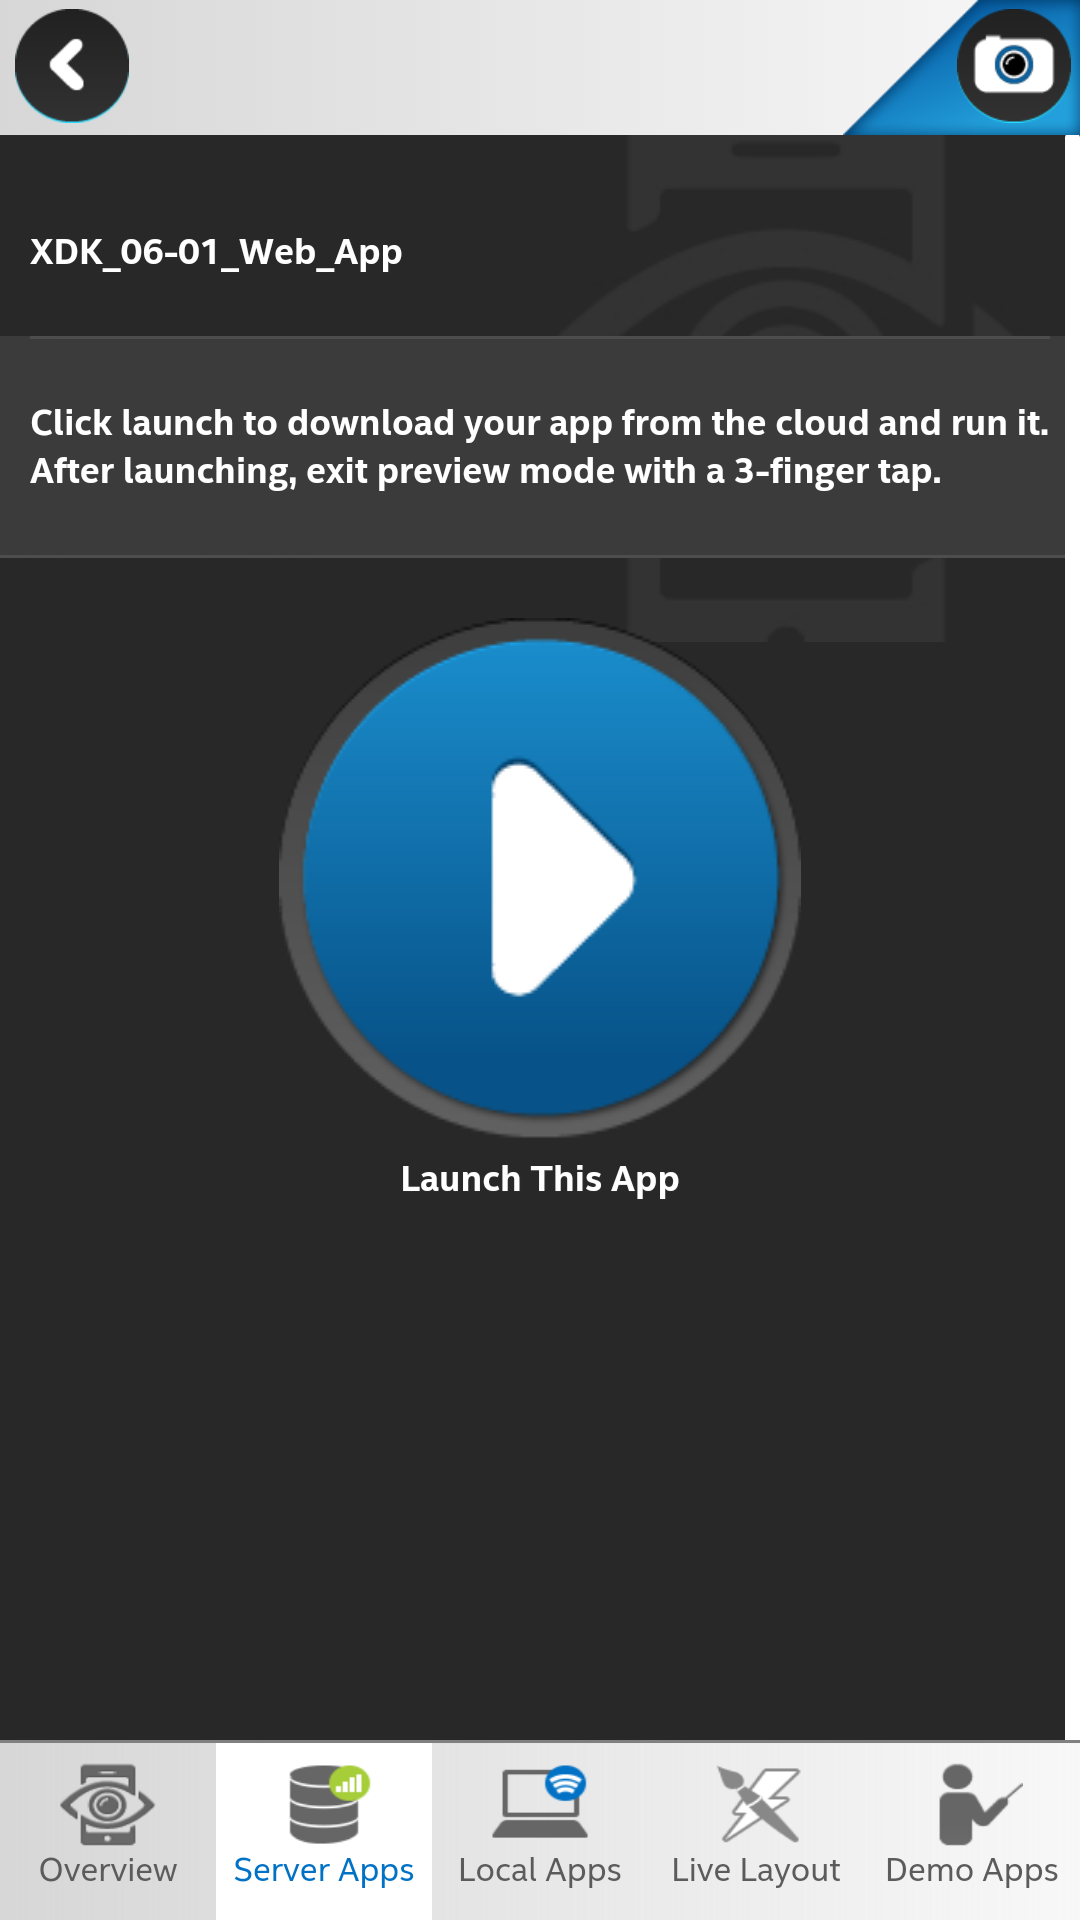
Press the rather large Play button to start your app.

And that's it! Your web app is now running on your phone. To exit, tap the screen with three fingers simultaneously.
To build and deploy your app (i.e. run without the App Preview app), navigate to the BUILD tab in the XDK. There, you will see several options on building your app. To build your program as a Web App, click the WebApp button. To learn more about building XDK apps, read this article.
Code to Note
The \<html>, \<head>, and \<body> tags should look very similar to how we created a simple web page in the previous experiment. The difference here is that the HTML is located in a separate file (index.html) than the JavaScript (app.js).
We load the JavaScript file with
at the end of the body. This allows us to make functions calls to JavaScript as well as have HTML elements be referenced by the JavaScript. For example, we create a button with <button id="toggle_button"> that has the id "toggle_button". In app.js, we assign an event handler (the function .on()) to the toggle_button element.
To make the HTML-JavaScript communication easier, we rely on the jQuery library. jQuery adds event handling, page manipulation, and animations to JavaScript in an easy-to-use fashion. The syntax might take some time to get used to, but for starters, know that $ is short for the class jQuery. That means $('#toggle_button') is really jQuery('#toggle_button') (i.e. it's just a shortcut).
The piece of code
language:javascript
$('#toggle_button').on('click', function(){
    toggleText();
});
assigned the function toggleText() to the on click action for the toggle_button HTML element, which we created in index.html.
Finally, "use strict"; is an odd piece of code that sits in the beginning of functions. This line puts JavaScript into "strict mode" running in browsers, which restricts certain functions and is generally considered more "safe."
Part 2: RGB Color Picker
The Web App
In the previous part, we created a simple web app to demonstrate how web apps work. You might have noticed that we did not use the Edison at all. In this part, we will need to create 2 programs: one that runs on the Edison as a server and one that runs as a client on a smartphone.
Create a new Standard HTML5 app using the Blank Template (just like we did in part 1). Then, we need to add some libraries.
First, download the uncompressed, latest version of jQuery from http://jquery.com/download/. Copy that file (e.g. jquery-2.x.x.js) to \
Second, download the socket.io client library from https://github.com/socketio/socket.io-client (click Download ZIP). Unzip the .zip file, and copy socket.io.js to \
Third, download the JavaScript tinyColorPicker from https://github.com/PitPik/tinyColorPicker. Unzip the .zip file, and copy jqColorPicker.min.js to \
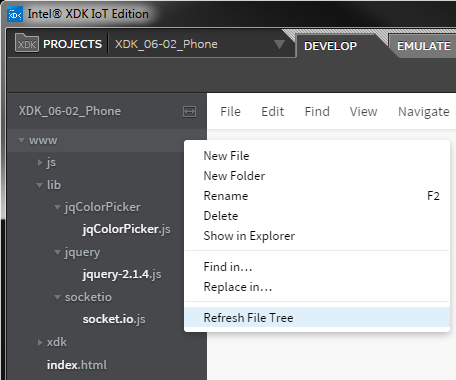
You might have to refresh the project in the XDK (i.e. right-click in the file explorer pane and select Refresh File Tree).
In www/index.html, paste in the following code:
<!DOCTYPE html>


<html>

<head>
  <title>Set RGB of Edison</title>
    <meta http-equiv="Content-type" content="text/html; charset=utf-8">
    <meta name="viewport" content="width=device-width, minimum-scale=1, initial-scale=1, user-scalable=no">
    <style>
        @-ms-viewport { width: 100vw ; min-zoom: 100% ; zoom: 100% ; }  @viewport { width: 100vw ; min-zoom: 100% zoom: 100% ; }
        @-ms-viewport { user-zoom: fixed ; min-zoom: 100% ; }           @viewport { user-zoom: fixed ; min-zoom: 100% ; }
    </style>
</head>

<body>


    <div id="connection">
        <h2>Edison Address</h2>
        <p>Please provide the IP address & port to the Edison</p>
        <p>
            <input id="ip_address" type="text" placeholder="IP Address">
            <input id="port" type="text" placeholder="Port">
        </p>
        <p><button id="send_ip_port">Connect</button></p>
    </div>


    <div id="rgb" style="display: none;">
        <h2>Color Selector</h2>
        <input id="colorSelector" class="color">
    </div>


    <script type="text/javascript" src="lib/jquery/jquery-2.1.4.js"></script>
    <script type="text/javascript" src="lib/jqColorPicker/jqColorPicker.min.js"></script>
    <script type="text/javascript" src="lib/socketio/socket.io.js"></script>
    <script type="text/javascript" src="js/app.js"></script>
</body>

</html>
Save the file, and in www/js/app.js, paste in the following code:
language:javascript
/*jslint unparam: true */
/*jshint strict: true, -W097, unused:false,  undef:true, devel:true */
/*global window, document, d3, $, io, navigator, setTimeout */

/**
 * SparkFun Inventor's Kit for Edison
 * Experiment 6 - Part 2: Phone RGB LED
 * This sketch was written by SparkFun Electronics
 * November 9, 2015
 * https://github.com/sparkfun/Inventors_Kit_For_Edison_Experiments
 *
 * Runs as a web app on a smartphone. Creates a socket.io connection to the
 * Edison and sends RGB values.
 *
 * Released under the MIT License(http://opensource.org/licenses/MIT)
 */

// Connect to Edison server with socket.io
function connectIP() {

    // Put in strict mode to restrict some JavaScript "features"
    "use strict" ;

    // Declare our variables at the beginning of the scope
    var scoket;
    var ipEl = $('#ip_address');
    var portEl = $('#port');
    var connectionEl = $('#connection');
    var rgbEl = $('#rgb');
    var colorSelectorEl = $('#colorSelector');

    // Attach a socket.io object tot he main window object. We do this to avoid
    // a global socket variable, as we will need it in the colorPicker callback.
    window.socket = null;

    // Connect to Edison
    console.log("Connecting to: " + ipEl.val() + ":" + portEl.val());
    window.socket = io.connect("http://" + ipEl.val() + ":" + portEl.val());

    // If we don't have a connection, disconnect and hide the RGB selector
    window.socket.on('connect_error', function() {
        window.socket.disconnect();
        alert("Could not connect");
        rgbEl.fadeOut();
    });

    // If we do have a connection, make the RGB selector appear
    window.socket.on('connect', function() {
        rgbEl.fadeIn();
        colorSelectorEl.trigger('click');
    });
}

// Short for jQuery(document).ready() method, which is called after the page
// has loaded. We can use this to assign callbacks to elements on the page.
$(function() {
    "use strict" ;

    // Assign a callback to the "Connect" port
    $('#send_ip_port').on('click', function(){
        connectIP();
    });

    // Assign initial properties to the color picker element
    $('.color').colorPicker({
        opacity: false,
        preventFocus: true,
        color: 'rgb(0, 0, 0)',

        // This is called every time a new color is selected
        convertCallback: function(colors, type) {
            if (window.socket && window.socket.connected) {
                window.socket.emit('color', colors.RND.rgb);
            }
        }
    });
});
Don't forget to save!
Edison Code
Create a new project (Blank template under Internet of Things Embedded Application). This code will run on the Edison. Copy in the following code into main.js:
language:javascript
/*jslint node:true, vars:true, bitwise:true, unparam:true */
/*jshint unused:true */
// Leave the above lines for propper jshinting

/**
 * SparkFun Inventor's Kit for Edison
 * Experiment 6 - Part 2: Edison RGB LED
 * This sketch was written by SparkFun Electronics
 * November 9, 2015
 * https://github.com/sparkfun/Inventors_Kit_For_Edison_Experiments
 *
 * Waits for socket.io connections and received messages to change RGB LED.
 *
 * Released under the MIT License(http://opensource.org/licenses/MIT)
 */

// Import the MRAA and HTTP modules
var mraa = require('mraa');
var server = require('http').createServer();
var io = require('socket.io').listen(server);

// Port
var port = 4242;

// Set up PWM pins
var rPin = new mraa.Pwm(20);
var gPin = new mraa.Pwm(14);
var bPin = new mraa.Pwm(0);

// Enable PWM
rPin.enable(true);
gPin.enable(true);
bPin.enable(true);

// Set 1000 Hz period
rPin.period(0.001);
gPin.period(0.001);
bPin.period(0.001);

// Turn off LEDs initially
pwm(rPin, 0.0);
pwm(gPin, 0.0);
pwm(bPin, 0.0);

// Wait for a client to connect
io.on('connection', function(socket) {
    console.log("A client is connected!");

    // Look for the "color" message from the client and set the LED
    socket.on('color', function(rgb) {
        console.log("RGB(" + rgb.r + ", " + rgb.g + ", " + rgb.b + ")");
        pwm(rPin, rgb.r / 255);
        pwm(gPin, rgb.g / 255);
        pwm(bPin, rgb.b / 255);
    });
});

// PWM needs a "fix" that turns off the LED on a value of 0.0
function pwm(pin, val) {
    if (val === 0.0) {
        pin.write(0.0);
        pin.enable(false);
    } else {
        pin.enable(true);
        pin.write(val);
    }
}

// Run the server on a particular port
server.listen(port, function() {
    console.log("Server listening on port " + port);
});
What You Should See
Upload the Edison code to the Edison and run it. You should see a note in the console, "Server listening on port 4242". Take note of the Edison's IP address.
Open the web app project back up and run it in an emulator or your smartphone. You will be presented with a couple of fields for IP address and port number. Enter the IP address of the Edison and 4242 for the port.
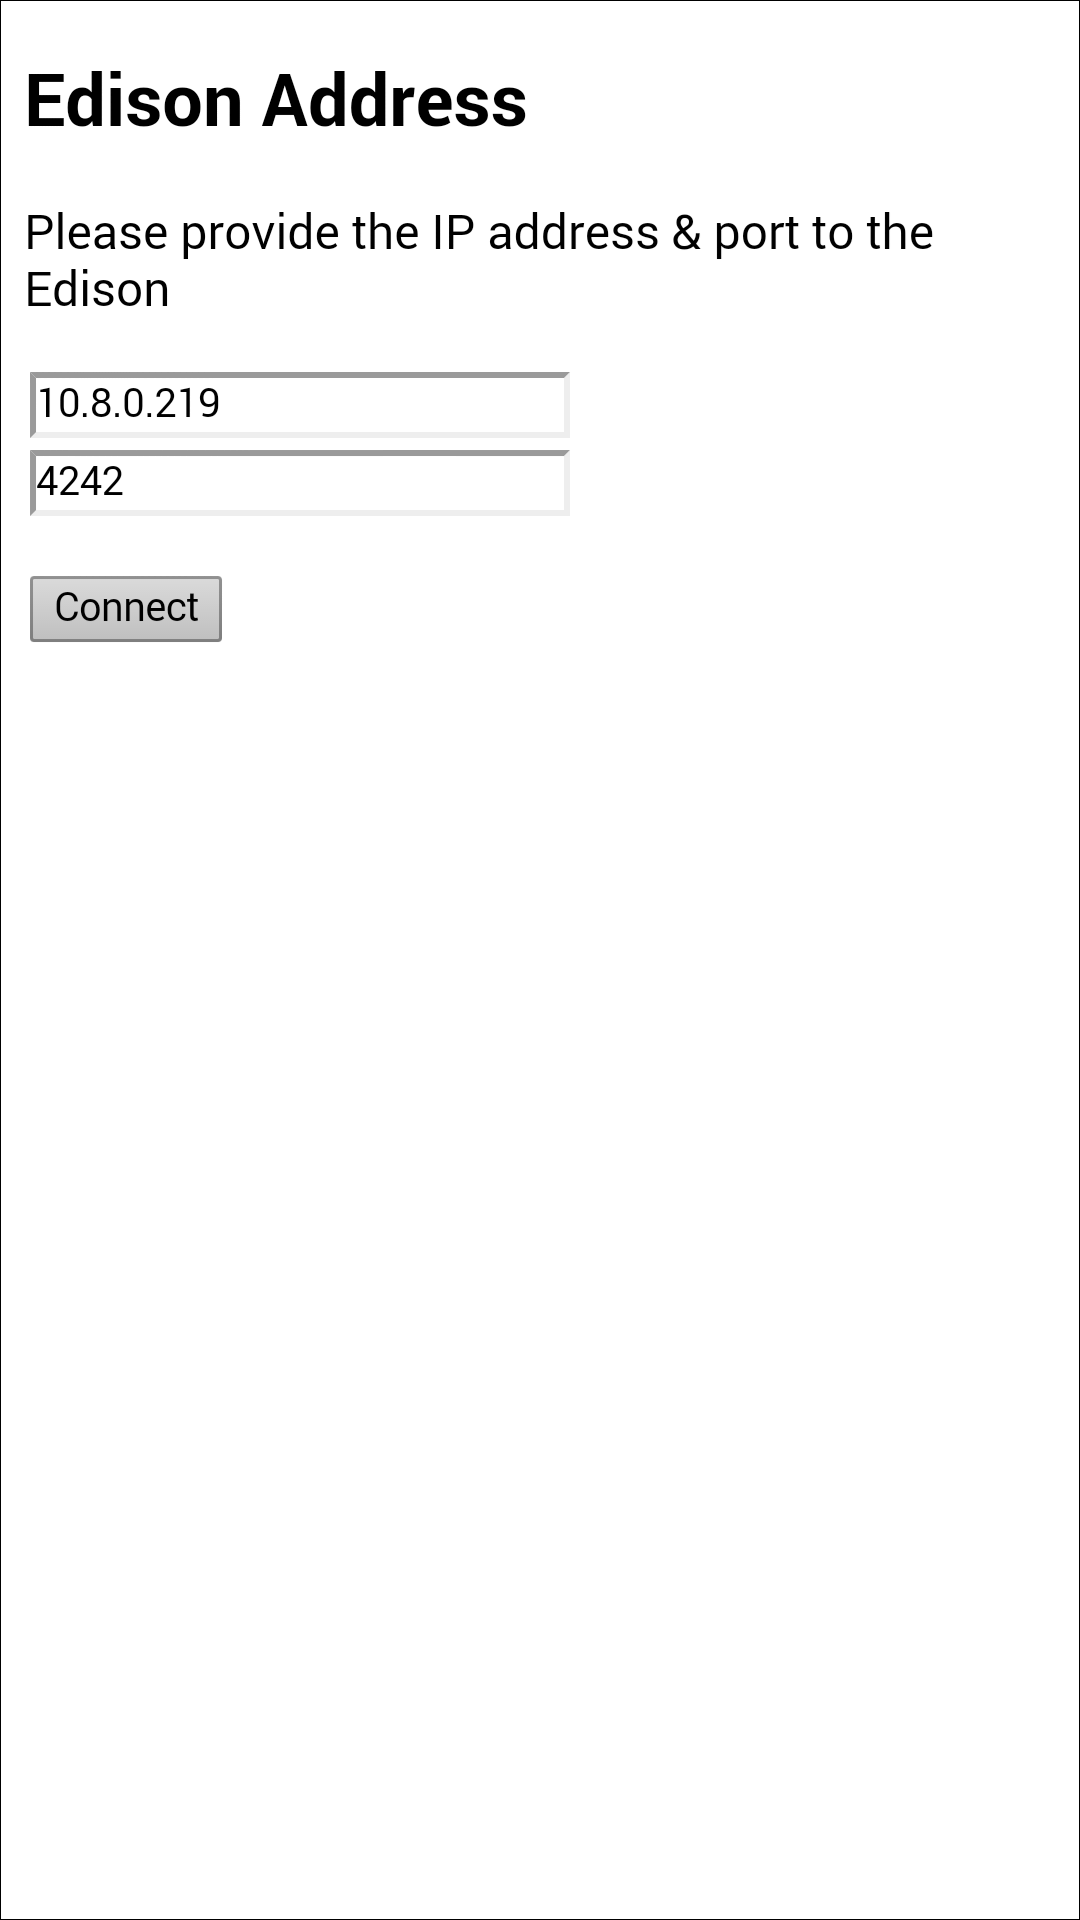
Click Connect and the web app should make a connection with the Edison (assuming your phone/emulator and Edison are on the same network). If it was successful, you should see an RGB color selector appear.
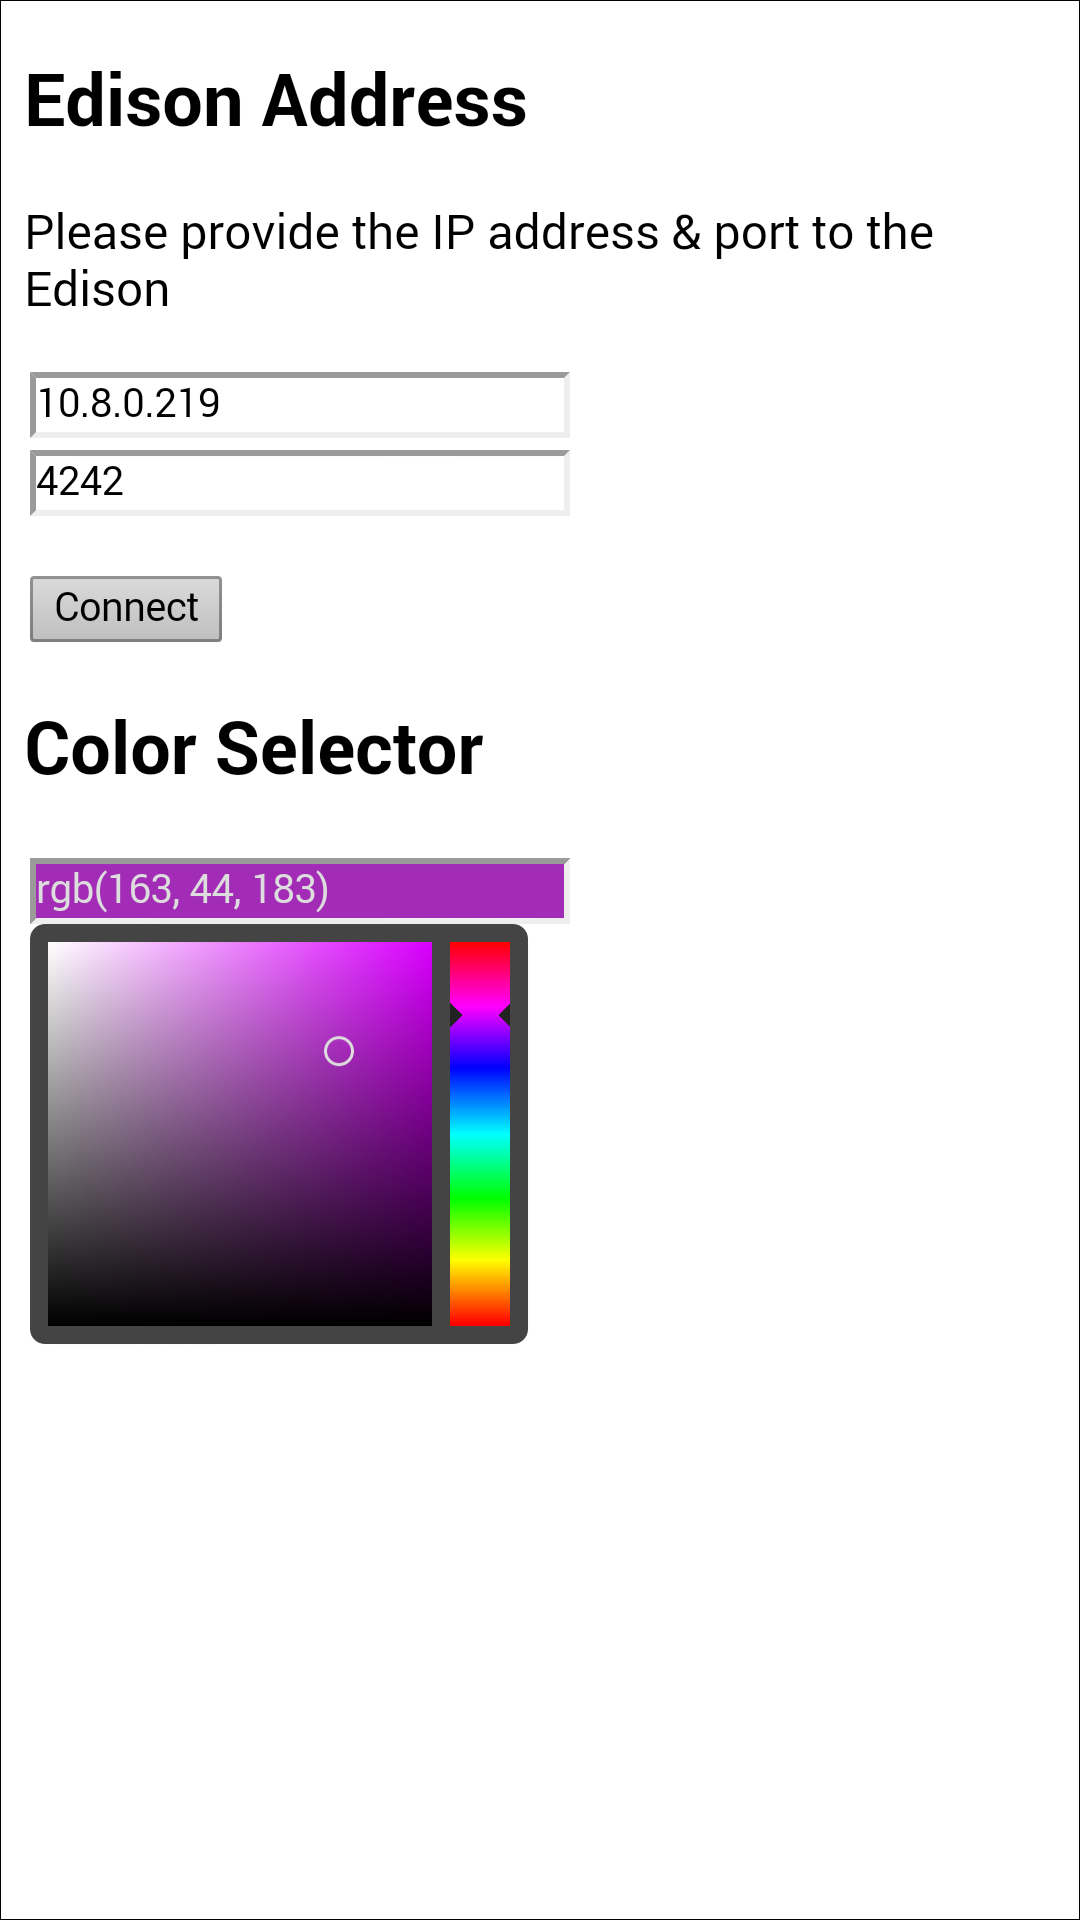
Try selecting different colors, and see how the LED connected to the Edison responds!
Code to Note
In the web app, we are using jQuery again to control elements, like in part 1. We rely on fadeIn() and fadeOut() to make the RGB selector appear and disappear. Additionally, we use the alert() function to make a pop-up appear letting the user that the connection failed.
You might have noticed that we used window.socket in connectIP(). The window object is pre-defined as the open window in a browser. It contains all the displayed HTML. As it turns out, we need to access a socket object in the function connectIP() as well as the callback for the RGB color picker. However, socket was never declared as a global variable, and as a result, the color picker callback (convertCallback) does not know about the existence of socket, as it was declared in connectIP(). This is a problem of "scope."
To solve this issue (and without creating unnecessary global variables), we create a socket object inside the window object (we say that window owns a socket object) with window.socket. Because window is global, we can then access window.socket anywhere in our code! To make sure that the window.socket object exists and has a connection before we use it to send data, we rely on the conditional
language:javascript
if (window.socket && window.socket.connected) {
    ...
}
in convertCallback. That way, we don't throw any undefined errors when we try to use the socket.
In the Edison code, we use the MRAA Pwm object to control the brightness of the RGB LED, which is created with an MRAA pin number. To find the MRAA pin number, first find the pin number as it is listed on the GPIO Block, and find the associated MRAA pin number in Appendix E: MRAA Pin Table. For example, GP12 is MRAA pin 20.
Troubleshooting
- The web app does not start -- Try it in the XDK emulator first. In the emulator, click on the "debug" button (bug icon with an 'X' in the upper-left corner), and click on the Console tab to view error messages.
- The web app won't run on my phone -- Your phone might not be supported. If it is an older phone, read about legacy phone support for the XDK.
- The web app won't connect to the Edison -- Make sure the Edison and phone are on the same network (e.g. the phone must be connected to WiFi and on the same subnet as the Edison).
Going Further
Challenges
- Make a modified email notifier that changes the color of the LED depending on different parameters of your inbox. For example, you could have the LED be green for 1-10 new emails and red for 11+ emails.
- Add an image to the web app that turns the LED off and back on when you press it (hint).