SparkFun Inventor's Kit for Edison Experiment Guide
 Shawn Hymel
 Experiment 2: Pushing Some Buttons
Introduction
In the previous exercise, we tested the connection to the Edison and showed that we could upload code. Now, we can move on to more interesting circuits and examples. In this section, we introduce the humble push button. We connect it to one of the Edison's general-purpose input/output (GPIO) pins and write some code that does something whenever the button is pushed.
This experiment has 2 parts. Both parts use the same hardware, but each has its own code. We recommend you try them both to get an understanding of the different ways to use button pushes.
Parts Needed
In addition to the Edison and Block Stack, you will need the following parts:
- 1x Breadboard
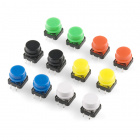
- 1x Push Button
- 1x 1kΩ Resistor
- 4x Jumper Wires


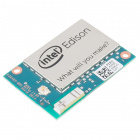
Intel® Edison
DEV-13024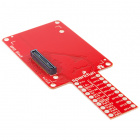
SparkFun Block for Intel® Edison - GPIO
DEV-13038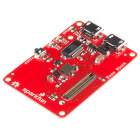
SparkFun Block for Intel® Edison - Base
DEV-13045Suggested Reading
- Switch Basics -- How switches and push buttons work.
- Analog vs. Digital -- What does it mean to say something is "digital?"
- Resistors -- What they do and how to read those funny color bands.
- Pull-up Resistors -- How to use resistors to create a default logic level for circuits.
Concepts
Functions
We mentioned briefly in the last section that functions are pieces of code that do things. To make this more clear, a function is a block of code created to perform a particular task. Functions are useful because they can be written once and called many, many times from other parts of code (we call this code reuse).
In our two code examples below, we will write our own functions and then call them. In JavaScript, functions looks like this:
language:JavaScript
function doSomething( /* parameters */ ) {
    /* Things happen here */
}
We know it is a function because we used the function keyword. Thanks for making this explicit, JavaScript. We can also have 0 to any number of parameters in our function. Parameters are variables that are used to store pieces of information passed to the function. For example:
language:JavaScript
function saySomething(thing) {
    console.log(thing);
}

saySomething("Hi");
We first created a function that outputs something to the console. In this case, the function accepts the parameter thing, which becomes a variable. We can access the contents of that variable by writing thing.
Then, we call our function by writing saySomething(). In between the parentheses, we wrote the string "Hi". This string is passed to the saySomething() function as a parameter and assigned to the variable thing. We then print the contents of thing ("Hi" in this example) to the console.
If we wanted to print something else, we could write saySomething("Something else");. And that's a simple form of code reuse!
Libraries

Libraries are pieces of code that have been packaged up for easy reuse. Often, they are written by someone else (or a group of people).
Node.js (the runtime environment that runs our code on the Edison) uses modules, which are very similar to libraries. Modules are just other pieces of code that we can reuse in our code. In these experiments, we rely heavily on MRAA, which is a library (and subsequent Node.js module) created by Intel and allows us to easily communicate with the hardware pins on the Edison.
We can import the MRAA module with the line
language:JavaScript
var mraa = require('mraa');
With that, all the objects, variables, and functions in the MRAA module are loaded into the variable mraa. We can access those objects, variables, and functions by calling mraa. For example, mraa.Gpio() creates a new GPIO pin that we can access.
The Pull-Up Resistor
We can use a resistor to set a default state of a pin on a microcontroller (or, in this case, the Edison). The pull-up resistor, specifically, sets the state of the pin to a voltage (VCC in the diagram below). For our circuit, we will be using 3.3V as the high voltage. Low will be ground (GND or 0V).
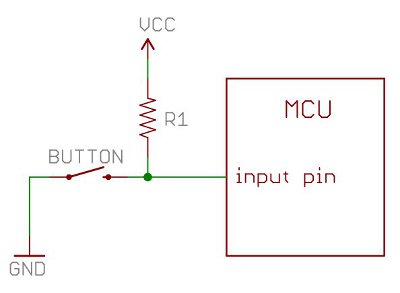
When the switch (or button) is open (as in the diagram), the input pin is VCC. Because little or no current flows through R1, the voltage at the pin is the same (or very nearly the same) as VCC. We will say that the pin is in the "high state" or "logic '1'".
When the switch (or button) is closed, the input pin is the same voltage as GND (0V). The switch creates a short circuit to GND, which causes some current to flow from VCC, through R1, to GND. However, because of the short circuit, the input pin has the same voltage as GND. We will say that the pin is in the "low state" or "logic '0'".
Hardware Hookup
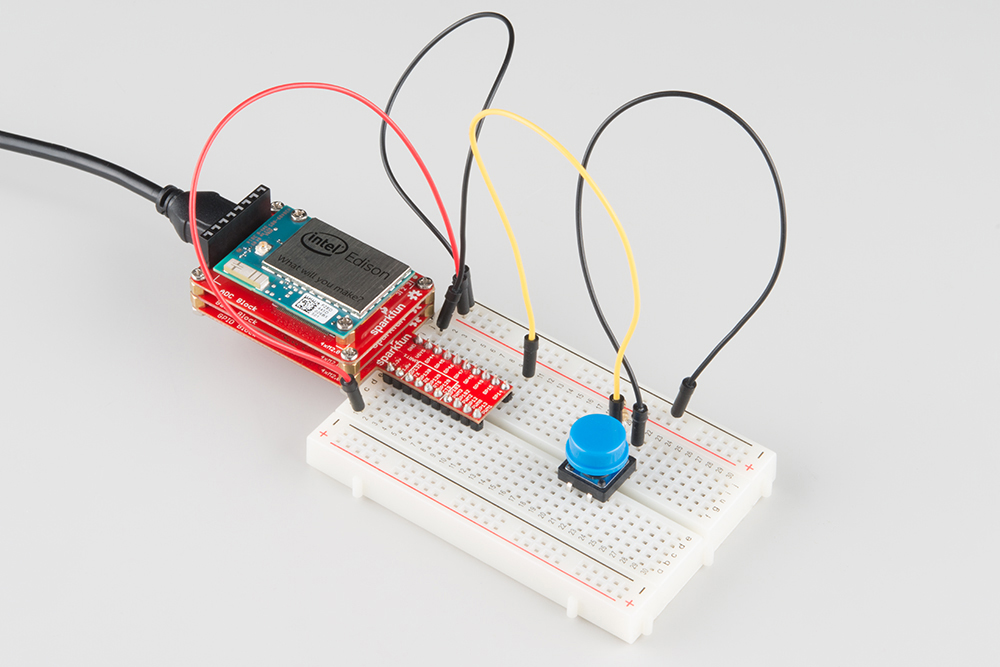
Your kit comes with a bunch of different color push button. All push buttons behave the same, so go ahead and use your favorite color! Follow the Fritzing diagram below.
Fritzing Diagram

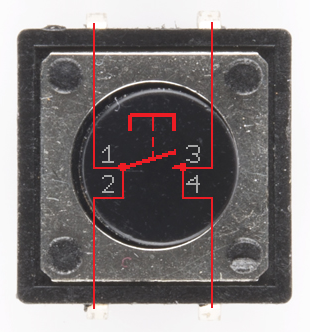
Tips
The leads across each other on the push buttons are always connected to each other. The leads on the same side are only connected when button is pressed.
Part 1: Polling
The Code
language:JavaScript
/*jslint node:true, vars:true, bitwise:true, unparam:true */
/*jshint unused:true */
// Leave the above lines for propper jshinting

/**
 * SparkFun Inventor's Kit for Edison
 * Experiment 2 - Part 1: Pushing Some Buttons
 * This sketch was written by SparkFun Electronics
 * October 27, 2015
 * https://github.com/sparkfun/Inventors_Kit_For_Edison_Experiments
 *
 * This is a simple example program that displays the state of a button
 * to the console.
 *
 * Released under the MIT License(http://opensource.org/licenses/MIT)
 */

// Import the MRAA module
var mraa = require('mraa');

// Set up a digital input/output on MRAA pin 36 (GP14)
var buttonPin = new mraa.Gpio(36);

// Set that pin as a digital input (read)
buttonPin.dir(mraa.DIR_IN);

// Call the periodicActivity function
periodicActivity();

// This function is called forever (due to the setTimeout() function)
function periodicActivity() {

    // Read the value of the pin and print it to the screen
    var val = buttonPin.read();
    console.log('Button is ' + val);

    // Wait for 250 ms and call this function again
    setTimeout(periodicActivity, 250);
}
What You Should See
Try pushing the button.
The console should start outputting "Button is 1", which means that the pin connected to the button is currently in the high state (3.3V, logic '1'). When you push the button (hold it down for a second), the console should show "Button is 0", which means that the pin is in the low state (0V, logic '0').

Code to Note
In JavaScript, functions are objects. Say what? I know it is weird to think about, but they are. The good news is that we can pass functions (like objects) as parameters to other functions. For example, we pass periodicActivity (a function) to setTimeout (another function), which causes periodicActivity to be called every 250 ms (in this example).
Additionally, note that we told MRAA that we want to use pin 36. Pin 36 is defined by MRAA and mapped to GP14, which is the pin definition according to the Edison hardware. Knowing which MRAA pin maps with which GP pin can be confusing, so we crated a nice table in Appendix E. The Edison pinout can be found here.
Part 2: Interrupt Service Routine
The Code
language:JavaScript
/*jslint node:true, vars:true, bitwise:true, unparam:true */
/*jshint unused:true */
// Leave the above lines for propper jshinting

/**
 * SparkFun Inventor's Kit for Edison
 * Experiment 2 - Part 2: Interrupt Service Routine
 * This sketch was written by SparkFun Electronics
 * October 27, 2015
 * https://github.com/sparkfun/Inventors_Kit_For_Edison_Experiments
 *
 * This is a simple example program that prints an incrementing number
 * to the console every time a button is pushed.
 *
 * Released under the MIT License(http://opensource.org/licenses/MIT)
 */

// Import the MRAA module
var mraa = require('mraa');

// Set up digital input on MRAA pin 36 (GP14)
var buttonPin = new mraa.Gpio(36);
buttonPin.dir(mraa.DIR_IN);

// Global counter
var num = 0;

// Our interrupt service routine
function serviceRoutine() {
    num++;
    console.log("BOOP " + num);
}

// Assign the ISR function to the button push
buttonPin.isr(mraa.EDGE_FALLING, serviceRoutine);

// Do nothing while we wait for the ISR
periodicActivity();
function periodicActivity() {
    setTimeout(periodicActivity, 1000);
}
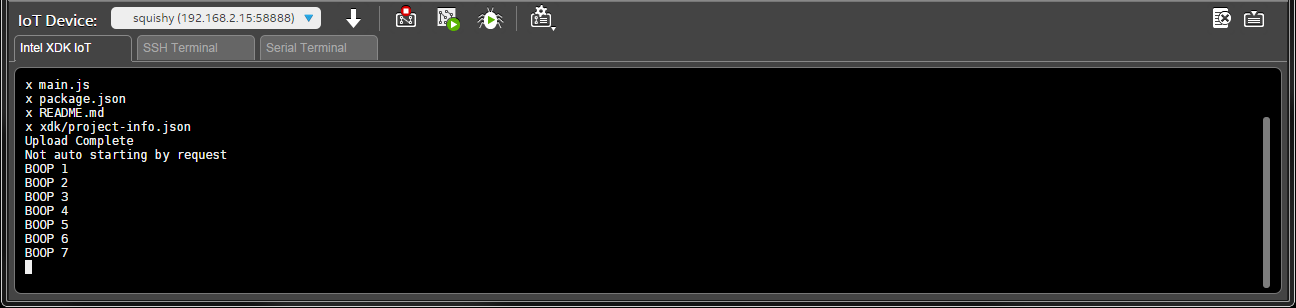
What You Should See
You should not see anything when you first run the program. Press the button, and the word "BOOP" should appear along with a number. Press the button again, and that number should increment by 1.
Code to Note
Interrupt service routines (ISRs) are important in the world of embedded electronics. It is very similar to JavaScript's notion of event-driven programming. When a user or some other external force performs an action, the program responds. In this case, whenever a button was pushed, the serviceRoutine() function gets called.
As in the previous polling example, we use a function as a parameter. We pass the function serviceRoutine to the buttonPin.isr() function. We use mraa.EDGE_FALLING to declare that serviceRoutine should be called whenever the pin's voltage goes from high (3.3V) to low (0V).
Troubleshooting
- The Edison won't connect -- This is possible if the Edison is not powered or configured properly. See the "Edison won't connect" section in the Appendix A: Troubleshooting.
- Nothing happens when the button is pushed -- Double-check the wiring. Often, a jumper wire is off by 1 hole!
Going Further
Challenges
- Add a second button so that when the first button is pushed, it prints "BOOP" to the console, and when the second button is pushed, it prints "BEEP" to the console.
- You might have noticed that pushing the button on the second example causes more than one "BOOP" to appear (if not, try pushing the button many times to see if you can get more than one "BOOP" to appear per button push). This is a phenomenon known as bouncing. Modify the Part 2 example to prevent this from happening (known as debouncing).