SparkFun Inventor's Kit for Edison Experiment Guide
 Shawn Hymel
 Experiment 11: Phone Accelerometer
One interesting feature of the XDK is its ability to let us create cross-platform programs for various phone operating systems without having to rewrite code in different langauges. This ability is possible thanks to a framework called Cordova. Cordova allows us to write programs in HTML and JavaScript (much like the web apps we wrote in previous exercises) but includes plugins that allow us to control hardware components in the phone (e.g. GPS, accelerometer, etc.).
In addition to Cordova, we are also going to introduce Bluetooth Low Energy (BLE) communication. BLE is very useful for communicating between devices within a very short distance of each other.
In the end, we want to turn our phone into a type of controller that reads accelerometer data, sends it to the Edison over BLE, and moves a character on an LCD attached to the Edison.
- If you have an iPhone, you will need to enroll in the Apple Developer Program (there is a yearly membership fee) and create Ad Hoc Provisioning Profiles (discussed later)
- If you have an Android, you can allow the installation of apps from "Unknown Sources" and install the app from a downloaded .apk file
Parts Needed
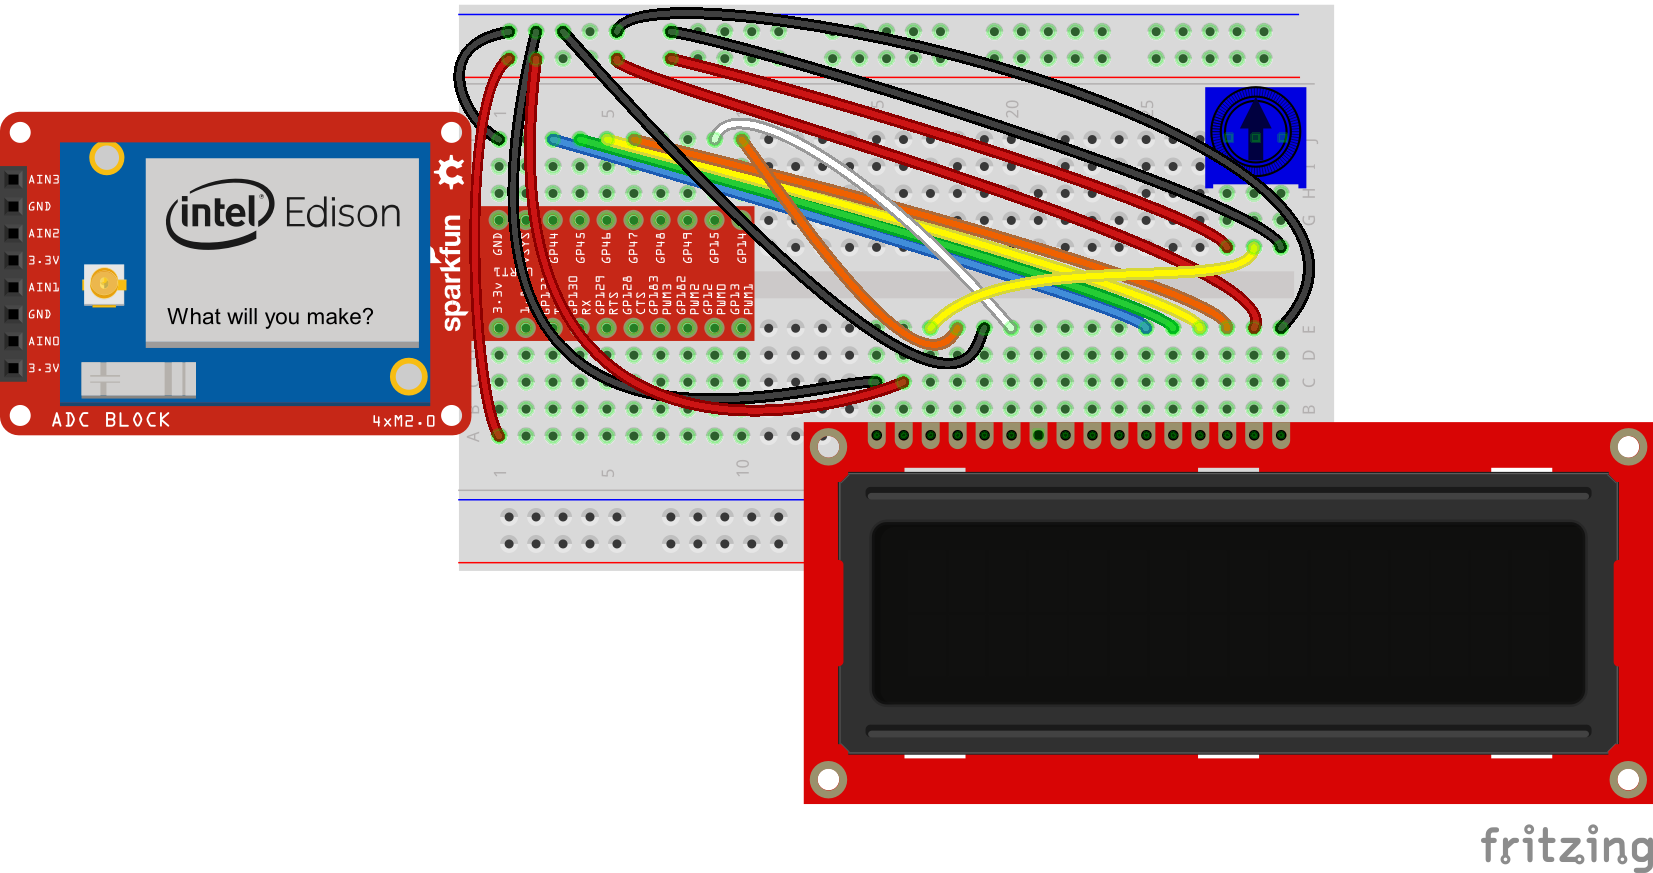
We’ll be using the same circuit as in the previous example, only without the keyboard and USB OTG cable. In addition to the Edison and Block Stack, you will need the following parts:
- 1x Breadboard
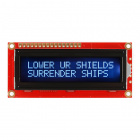
- 1x Character LCD
- 1x 10k Potentiometer
- 16x Jumper Wires


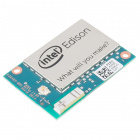
Intel® Edison
DEV-13024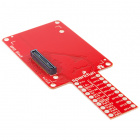
SparkFun Block for Intel® Edison - GPIO
DEV-13038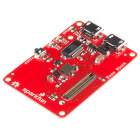
SparkFun Block for Intel® Edison - Base
DEV-13045Suggested Reading
- The State of Native vs. Web vs. Hybrid -- What's the difference between a native app, a web app, and a hybrid app?
- Apache Cordova -- Learn a little bit about Cordova
- Bluetooth Basics -- A brief overview of how Bluetooth works
Concepts
Accelerometer
Most modern accelerometers measure acceleration (or g-force) by using a tiny electromechanical system: small beams that moves when the system undergoes some type of acceleration. The chip can measure the capacitance between sets of beams and determine the acceleration of the device.
Most modern cell phones contain built-in accelerometers. Most often, they are used to determine the orientation of the phone (as gravity offers a 9.8 m/s acceleration toward the center of the Earth). This information allows the phone to adjust the contents of the screen to always be "up" for the user!
In this experiment, we are going to use our smartphone's internal accelerometer to control something on the Edison.
Cordova
Cordova is an open-source framework for creating smartphone apps in standard web languages (e.g. JavaScript, HTML, CSS). It allows developers to access low-level features of the phone, such as GPS and the accelerometer as well as create apps that compile for multiple mobile operating systems, such as iOS and Android, with one set of code.
Cordova relies on a set of plugins that enables developers to call native phone features without having to write native code. In essence, the plugins offer a JavaScript API for calling native features. We will use some of these plugins to access the accelerometer and Bluetooth radio in the phone.
Bluetooth Low Energy
Bluetooth is a protocol for sending and receiving data over a 2.4 GHz wireless link. It was designed to be low-power, low-cost, and short-range. Many devices, including most smartphones, have embedded Bluetooth radios, which allow them to talk to other devices and peripherals, like keyboards and pedometers.
Bluetooth Low Energy is an extension of Bluetooth that was introduced in the Bluetooth 4.0 standard. It offers a huge reduction in power consumption by sacrificing range and data throughput.
Along with great power savings came a new set of terminology and programming model. BLE uses the concept of "servers" and "clients."
- Client -- A device that initiates a commands and connections. For example, your smartphone.
- Server -- A device that accepts commands and returns responses. For example, a temperature sensor.
We also need to be aware of how BLE groups data:
- Service -- A group of related characteristics
- Characteristic -- A data value to be transferred between a server and a client
- Descriptor -- Additional information about the characteristic. For example, an indication of units (e.g. Celsius).
Note that what we have described is the Generic Attribution Profile (GATT). BLE also defines a Generic Access Pofile (GAP) that allows a peripheral to broadcast to multiple central devices, but we will not be using it in this experiment.
In our example, we will treat the Edison as the server (using the bleno module) and the smartphone as the client (using cordova-plugin-ble-central).
Hardware Hookup
The circuit is the same as in the previous experiment.
The Code
Edison Code
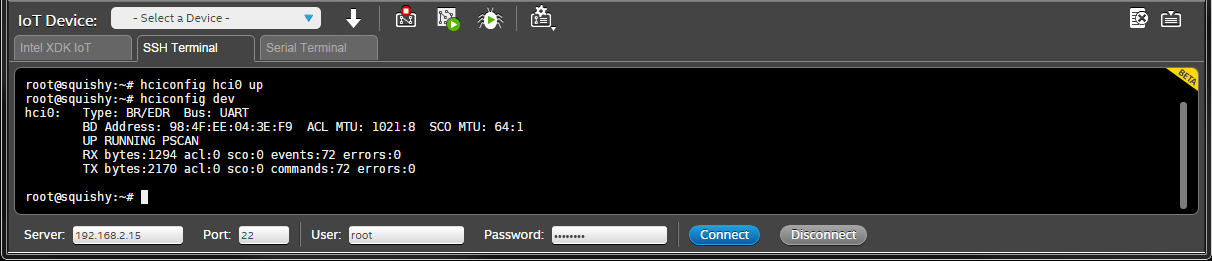
Unfortunately, at this time, the Edison does not enable its Bluetooth radio by default and runs bluetoothd on default, which conflicts with our bleno module. To fix it, we need to issue a few commands in order to use it. Log in to the Edison over SSH or serial and enter your credentials (username root and the password you've created).
Enter the following commands:
rfkill unblock bluetooth
killall bluetoothd
hciconfig hci0 up
We will need to copy the Bluetooth MAC address of the Edison so that we can connect to it from our phone. To do that, enter the following command into your SSH or serial console:
hciconfig dev
You should have 1 (possibly more) entries. One of them should be labeled "hci0," which is our Bluetooth device. Copy or write down the 6 hexadecimal numbers under BD Address.
Create a new Blank IoT Application and copy the following into package.json:
language:javascript
{
  "name": "blankapp",
  "description": "",
  "version": "0.0.0",
  "main": "main.js",
  "engines": {
    "node": ">=0.10.0"
  },
  "dependencies": {
      "bleno": "0.3.3",
      "johnny-five": "0.9.14",
      "edison-io": "0.8.18"
  }


}
Copy the following into main.js:
language:javascript
/*jslint node:true, vars:true, bitwise:true, unparam:true */
/*jshint unused:true */
// Leave the above lines for propper jshinting

/**
 * SparkFun Inventor's Kit for Edison
 * Experiment 11: Edison BLE Display
 * This sketch was written by SparkFun Electronics
 * November 30, 2015
 * https://github.com/sparkfun/Inventors_Kit_For_Edison_Experiments
 *
 * Accepts a connection from a smartphone and processes accelerometer data
 * from the cell phone (sent over BLE). Displays a character on the LCD that is
 * moved with the phone's accelerometer data.
 *
 * Released under the MIT License(http://opensource.org/licenses/MIT)
 */

// bleno makes the Edison act as a BLE peripheral
var bleno = require('bleno');

// We'll also need johnny-five and its Edison wrapper
var five = require('johnny-five');
var Edison = require('edison-io');

// Global game object
var game = {
    lcd: null,
    charX: 7,
    prevX: 0
};

// Create a new Johnny-Five board object that we will use to talk to the LCD
var board = new five.Board({
    io: new Edison()
});

// BLE service and characteristic information
var edison = {
    name: "Edison",
    deviceId: null,
    service: "12ab",
    characteristic: "34cd"
};

// Define our display characteristic, which can be subscribed to
displayCharacteristic = new bleno.Characteristic({
    uuid: edison.characteristic,
    properties: ['write'],
    onWriteRequest : function(data, offset, withoutResponse, callback) {

        // Parse the incoming data into X, Y, and Z acceleration values
        var accel = {
            x: data.readInt16LE(0) / 100,
            y: data.readInt16LE(2) / 100,
            z: data.readInt16LE(4) / 100
        };

        // Write the X, Y, and Z values to the console
        console.log("Write request: X=" + accel.x +
                    " Y=" + accel.y +
                    " Z=" + accel.z);

        // Update character's position and bound it to the limits of the LCD
        game.charX += accel.y / 10;
        if (game.charX < 0) {
            game.charX = 0;
        }
        if (game.charX > 15) {
            game.charX = 15;
        }

        callback(this.RESULT_SUCCESS);
    }
});

// Once bleno starts, begin advertising our BLE address
bleno.on('stateChange', function(state) {
    console.log('State change: ' + state);
    if (state === 'poweredOn') {
        bleno.startAdvertising(edison.name,[edison.service]);
    } else {
        bleno.stopAdvertising();
    }
});

// Notify the console that we've accepted a connection
bleno.on('accept', function(clientAddress) {
    console.log("Accepted connection from address: " + clientAddress);
});

// Notify the console that we have disconnected from a client
bleno.on('disconnect', function(clientAddress) {
    console.log("Disconnected from address: " + clientAddress);
});

// When we begin advertising, create a new service and characteristic
bleno.on('advertisingStart', function(error) {
    if (error) {
        console.log("Advertising start error:" + error);
    } else {
        console.log("Advertising start success");
        bleno.setServices([

            // Define a new service
            new bleno.PrimaryService({
                uuid: edison.service,
                characteristics: [
                    displayCharacteristic
                ]
            })
        ]);
    }
});

// Initialization callback that is called when Johnny-Five is done initializing
board.on('ready', function() {

    // Create our LCD object and define the pins
    // LCD pin name:    RS  EN DB4 DB5 DB6 DB7
    // Edison GPIO:     14  15  44  45  46  47
    game.lcd = new five.LCD({
        pins: ["GP14", "GP15", "GP44", "GP45", "GP46", "GP47"],
        rows: 2,
        cols: 16
    });

    // Make sure the LCD is on, has been cleared, and the cursor is set to home
    game.lcd.on();
    game.lcd.clear();
    game.lcd.home();

    // Start running the game thread
    setInterval(draw, 50);
});

// Main game thread
function draw() {

    // Erase previous character
    game.lcd.cursor(0, game.prevX);
    game.lcd.print(" ");

    // Set cursor to character's current position
    var x = Math.round(game.charX);
    game.lcd.cursor(0, x);

    // Draw character
    game.lcd.print("o");

    // Set previous character location
    game.prevX = x;
}
Upload and run the code. We want the Edison to be looking for connection requests from the smartphone when we start running the phone app.
Phone App
We need to create a Cordova app. To do that, create a new project in the XDK and select HTML5 + Cordova under Blank Templates in HTML5 Companion Hybrid Mobile or Web App.

Give your app some appropriate name and click Create. You should be presented with a development environment much like the one for the web app. In the upper-left corner of the XDK, click the word Projects.

You will be brought to the project settings. Under Cordova Hybrid Mobile App Settings, expand Plugin Management, and click Add plugins to this project.
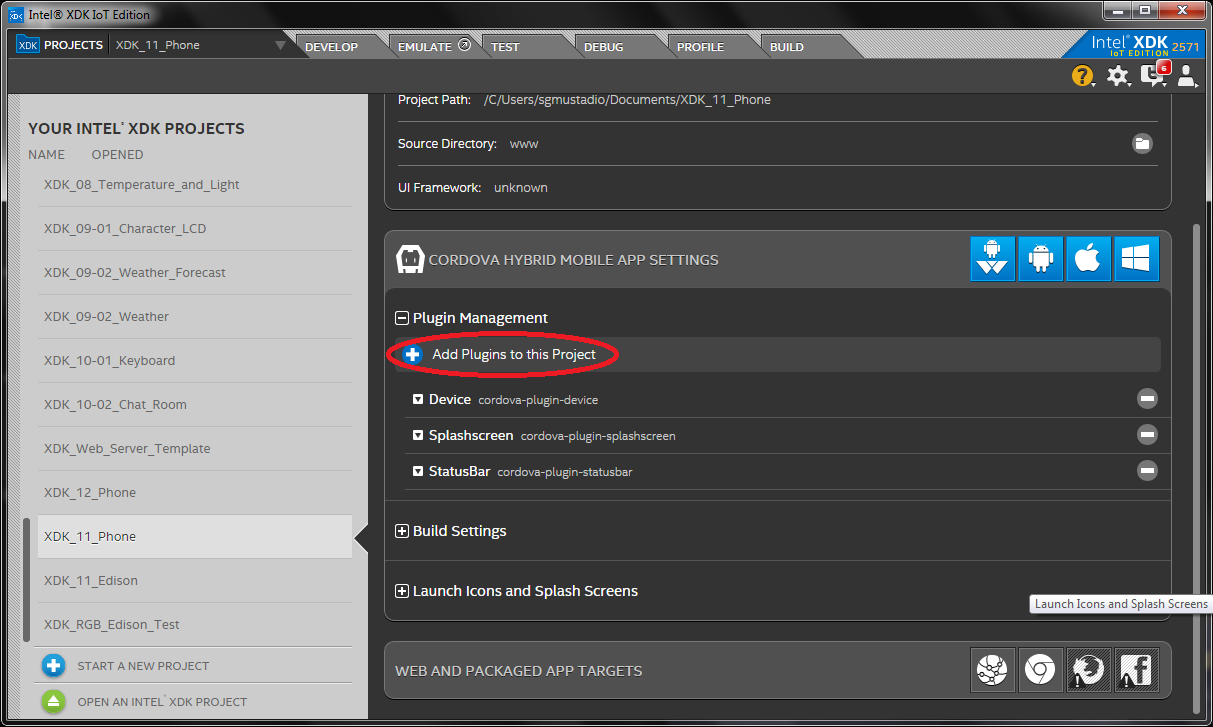
Click on Third-Party Plugins and enter cordova-plugin-ble-central into the Plugin ID field.
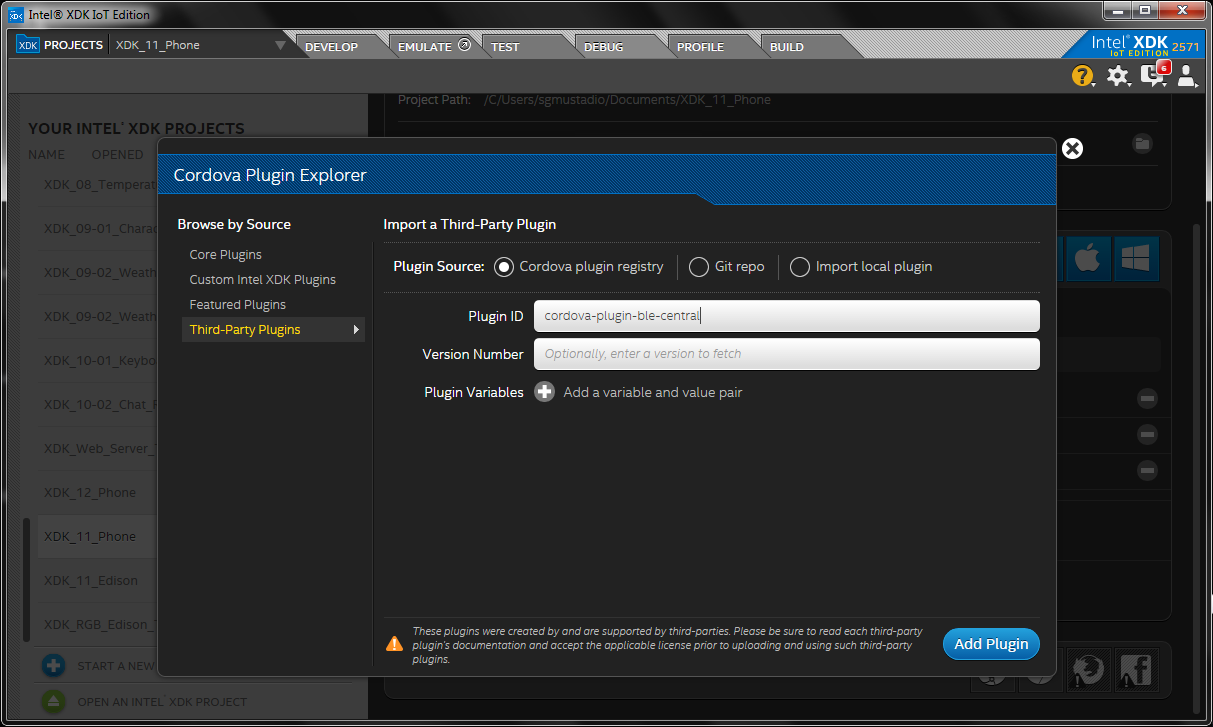
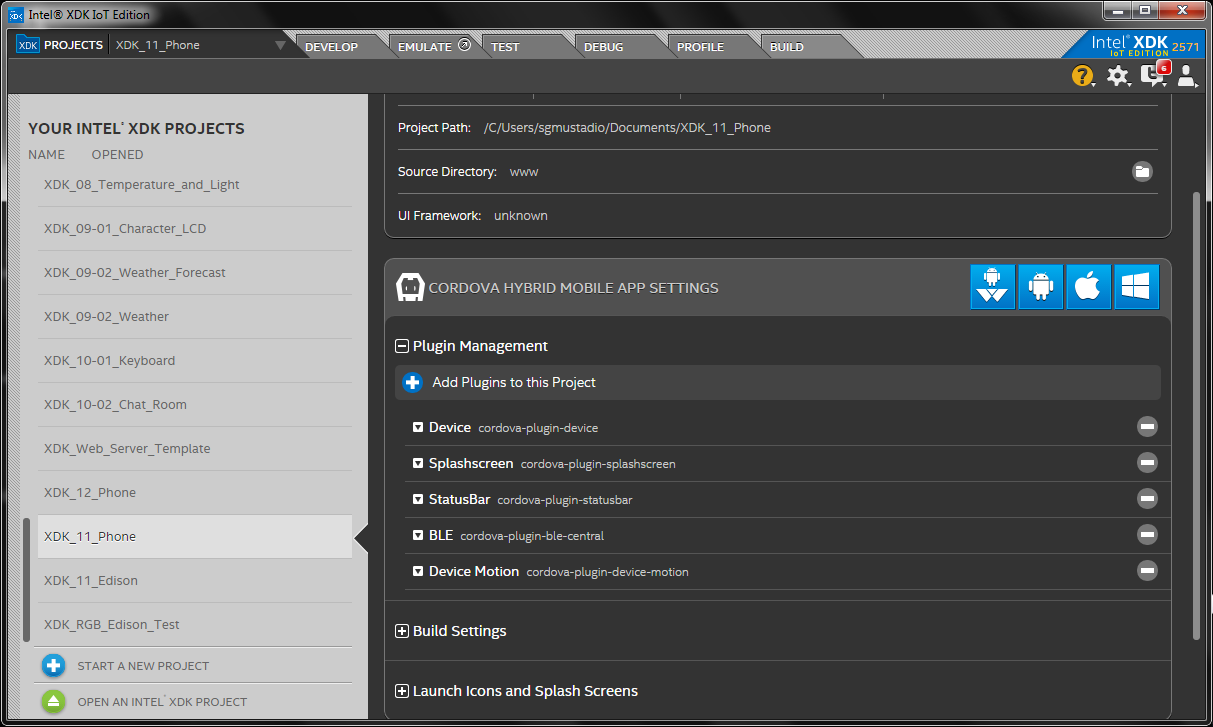
Click Add Plugin, and repeat this same process to add cordova-plugin-device-motion, which allows us to access the phone's accelerometer. Once you have added the two plugins, you should see them listed under Plugin Management in the project settings.
Before we can add code, we need to include jQuery. Download the latest, uncompressed version of jQuery from http://jquery.com/download/. Create two new directories in your project so that you have /www/lib/jquery. Copy the .js file into the jquery directory.
Go back to the Develop tab. In www/index.html, copy in the following:
<!DOCTYPE html>


<html>

<head>
  <title>Accelerometer</title>
    <meta http-equiv="Content-type" content="text/html; charset=utf-8">
    <meta name="viewport" content="width=device-width, minimum-scale=1, initial-scale=1, user-scalable=no">
    <style>
        @-ms-viewport { width: 100vw ; min-zoom: 100% ; zoom: 100% ; }  @viewport { width: 100vw ; min-zoom: 100% zoom: 100% ; }
        @-ms-viewport { user-zoom: fixed ; min-zoom: 100% ; }           @viewport { user-zoom: fixed ; min-zoom: 100% ; }
        .accel {
            clear:both;
            font-family:Arial;
            font-size:14pt;
            margin: auto;
            text-align:right;
            width: 280px;
        }
        .accel:after {
            visibility: hidden;
            display: block;
            font-size: 0;
            content: " ";
            clear: both;
            height: 0;
        }
        .accel * {
            -webkit-box-sizing: border-box;
            -moz-box-sizing: border-box;
            box-sizing: border-box;
        }
        .accel div {
            background-color:#B6B6B6;
            float: left;
            padding: 3px;
            width: 20%;
        }
        .accel div.label {
            background: transparent;
            font-weight: bold;
            width: 10%;
        }
    </style>
</head>

<body>


    <h3 style="text-align:center;">Accelerometer Demo</h3>

    <style>

    </style>


    <div class="accel">
        <div class="label">X:</div>
        <div id="x">0.00</div>
        <div class="label">Y:</div>
        <div id="y">0.00</div>
        <div class="label">Z:</div>
        <div id="z">0.00</div>
    </div>


    <div style="margin:auto;
                width:280px;
                height:20px;
                padding:1px;">
        Debugging console
    </div>
    <div id="debug_box" style="margin:auto;
                               width:280px;
                               height:240px;
                               padding:1px;
                               overflow:auto;
                               background:#0d0d0d;">
        <ul id="debug" style="color:#00BB00;"></ul>
    </div>


    <script type="text/javascript" src="cordova.js"></script>
    <script type="text/javascript" src="lib/jquery/jquery-2.1.4.js"></script>
    <script type="text/javascript" src="js/app.js"></script>
</body>

</html>
In www/js/app.js, copy in the following:
language:javascript
/*jslint unparam: true */
/*jshint strict: true, -W097, unused:false,  undef:true, devel:true */
/*global window, document, d3, $, io, navigator, setTimeout */
/*global ble*/

/**
 * SparkFun Inventor's Kit for Edison
 * Experiment 11: Accelerometer Demo
 * This sketch was written by SparkFun Electronics
 * November 29, 2015
 * https://github.com/sparkfun/Inventors_Kit_For_Edison_Experiments
 *
 * Runs as BLE central on smartphone. Connects to the Edison and sends
 * accelerometer data.
 *
 * Released under the MIT License(http://opensource.org/licenses/MIT)
 */

// Put in strict mode to restrict some JavaScript "features"
"use strict" ;

// BLE service and characteristic information
window.edison = {
    deviceId: "98:4F:EE:04:3E:F9",
    service: "12ab",
    characteristic: "34cd"
};

/******************************************************************************
 * Bluetooth connection
 *****************************************************************************/

// Global app object we can use to create BLE callbacks
window.app = {

    // A way for us to reference the thread
    watchID: null,

    // Call this first!
    initialize: function() {
        window.app.connect();
    },

    // Scan for and connect to our statically-encoded Edison MAC address
    connect: function() {
        ble.scan([],
                 5,
                 window.app.onDiscoverDevice,
                 window.app.onError);
    },

    // Find BLE devices in range and connect to the Edison
    onDiscoverDevice: function(device) {
        debug("Found " + device.name + " at " + device.id);
        if (device.id === window.edison.deviceId) {
            debug("Connecting to: " + window.edison.deviceId);
            ble.connect(window.edison.deviceId,
                        window.app.onConnect,
                        window.app.onError);
        }
    },

    //  On BLE connection, notify the user
    onConnect: function() {
        debug("Connected to " + window.edison.deviceId);

        // Set the accelerometer to sample and send data every 100 ms
        window.watchID = navigator.accelerometer.watchAcceleration(
            function(acceleration) {
                window.app.onAccelerometer(acceleration, window);
            },
            window.app.onError,
            { frequency: 100 }
        );
    },

    // This gets executed on new accelerometer data
    onAccelerometer: function(accel, win) {

        // Create an array of accelerometer values
        var a = [accel.x, accel.y, accel.z];

        // Set new values for X, Y, and Z acceleration on phone
        $('#x')[0].innerHTML = a[0].toFixed(2);
        $('#y')[0].innerHTML = a[1].toFixed(2);
        $('#z')[0].innerHTML = a[2].toFixed(2);

        // Assign X, Y and Z values to a 16-bit, signed integer array
        var buf = new Int16Array(3);
        buf[0] = a[0] * 100;
        buf[1] = a[1] * 100;
        buf[2] = a[2] * 100;

        // Write data to the characteristic
        ble.write(win.edison.deviceId,
                  win.edison.service,
                  win.edison.characteristic,
                  buf.buffer);
                  //function() {debug("Acc data written!");},
                  //function() {debug("Acc data NOT written");});
    },

    // Alert the user if there is an error
    onError: function(err) {
        navigator.accelerometer.clearWatch(window.watchID);
        debug("Error: " + err);
        alert("Error: " + err);
    }
};

/******************************************************************************
 * Execution starts here after the phone has finished initializing
 *****************************************************************************/

// Wait for the device (phone) to be ready before connecting to the Edison
// and polling the accelerometer
document.addEventListener("deviceready", onDeviceReady, false);
function onDeviceReady() {

    // Prepare the BLE connection
    window.app.initialize();
}

// Create a pseudo-debugging console
// NOTE: Real apps can also use alert(), but list messages can be useful when
// you are debugging the program
function debug(msg) {
    $('#debug').append($('<li>').text(msg));
}
Remember the Bluetooth MAC address that we copied from the Edison? You will need to find the MAC address in the code and replace it with your MAC address. Look for "98:4F:EE:04:3E:F9" (my MAC address) under window.edison and replace it with the Bluetooth MAC address for your Edison.
Building the Phone App
Unlike the web apps we made in previous experiments, we need to actually build our project because we are including native code as part of the Cordova framework. In the XDK, go to the Build tab.

Click Build on the phone OS of your choice and follow the instructions.
iPhone
Intel's
Go to the iOS Certs tab and follow the directions on the screen.

You will first need to create an iOS Certificate Signing Request (CSR). Upload that file to the Apple Developers iOS certificate page in order to generate an ad-hoc certificate signed by Apple. Note that this requires you to be enrolled in the Apple Developer Program.
A walkthrough with screenshots for creating an ad-hoc certificate can be found here.
Android
Upload and build your program. Once it is complete, you should see an option to Download Build.
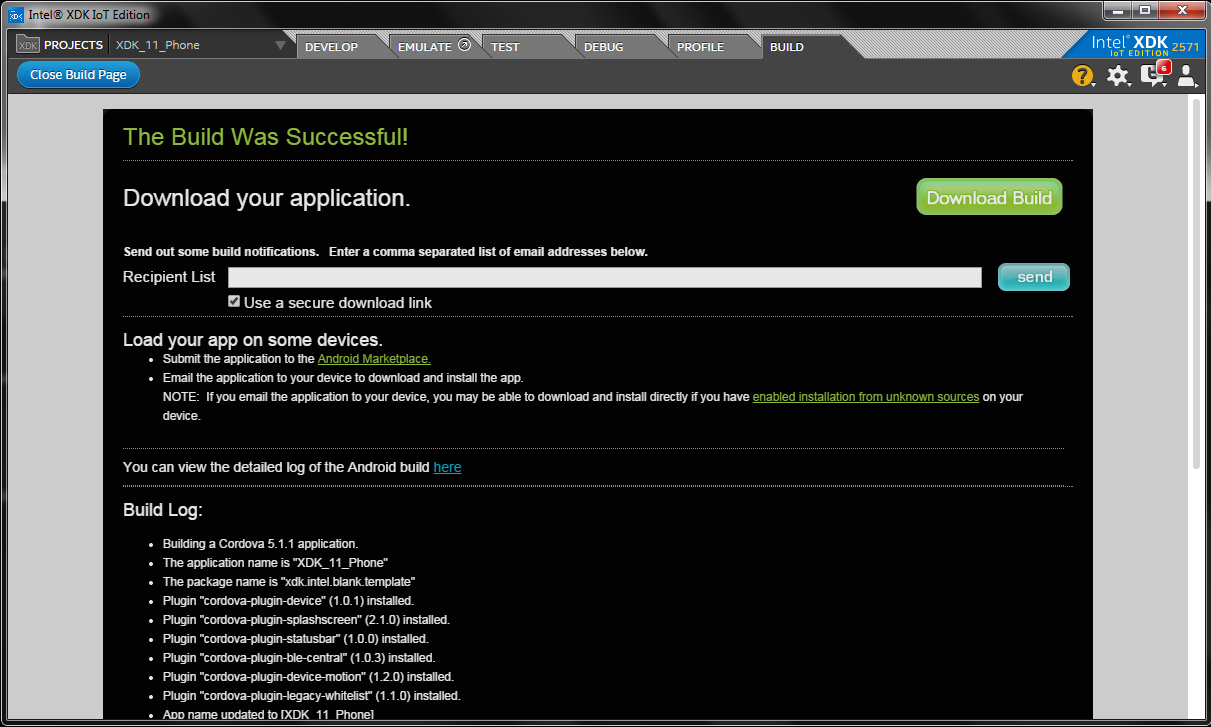
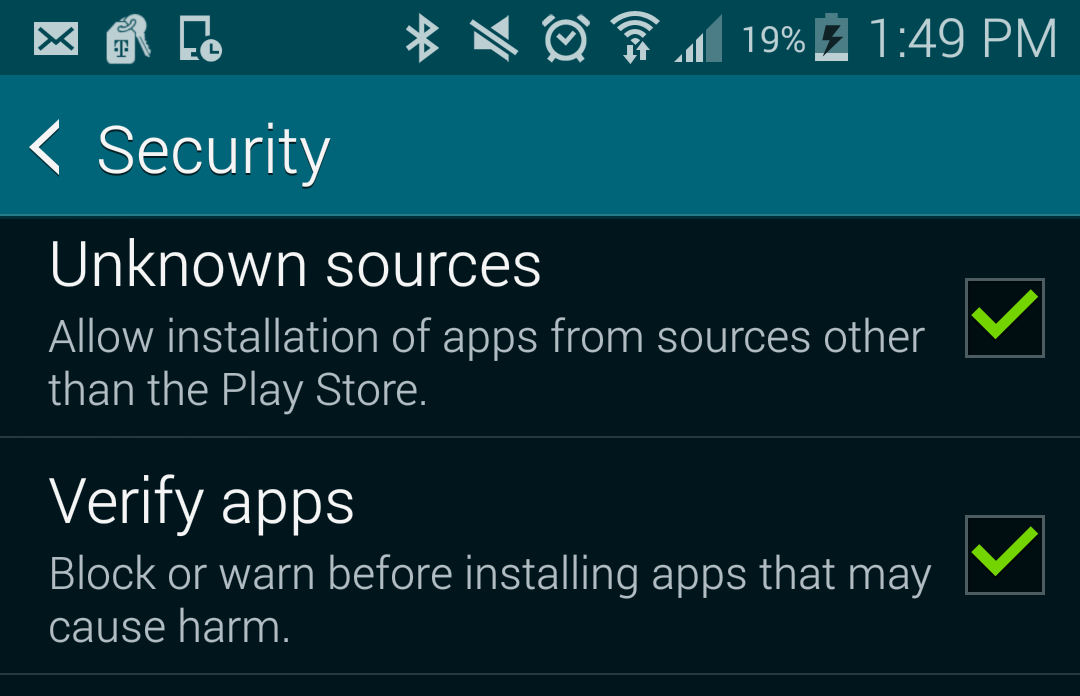
This will download a .apk file, which you can install directly from your Android phone. However, you will need to allow installation of apps from Unknown Sources from the Security features in Settings.
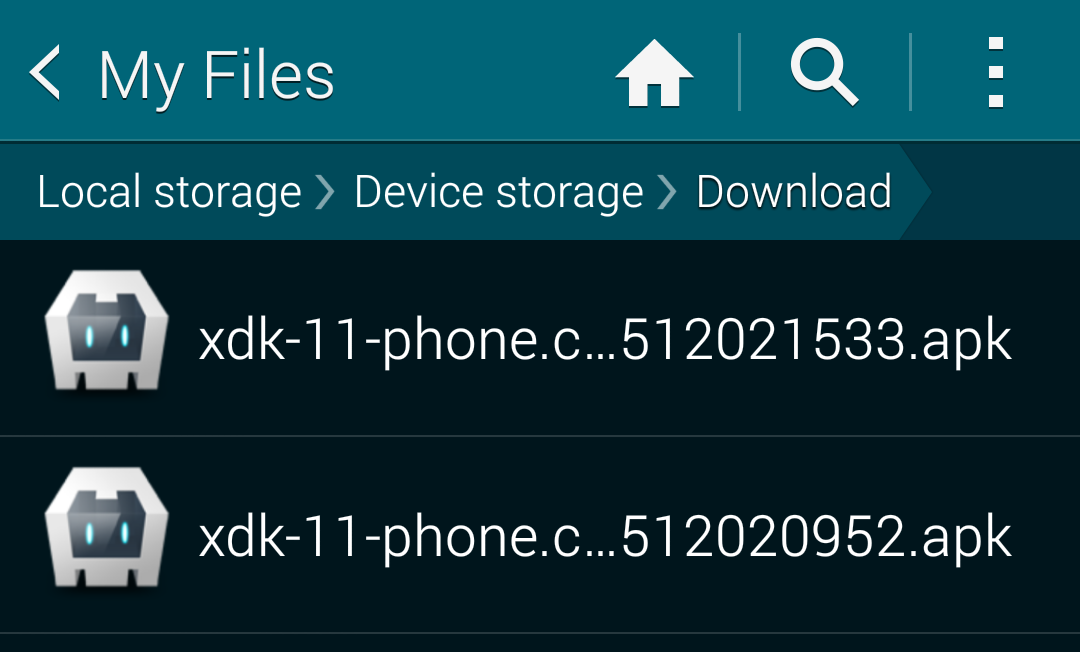
From there, you can simply find the .apk package in a file browser and tap on it to install the program.
Other
More information about the build process for iOS, Android, and other phone operating systems can be found on Intel's site.
What You Should See
With the Edison running, start the phone app. The app should automatically connect to the Edison over BLE. You will see a notification in the "debug" area.
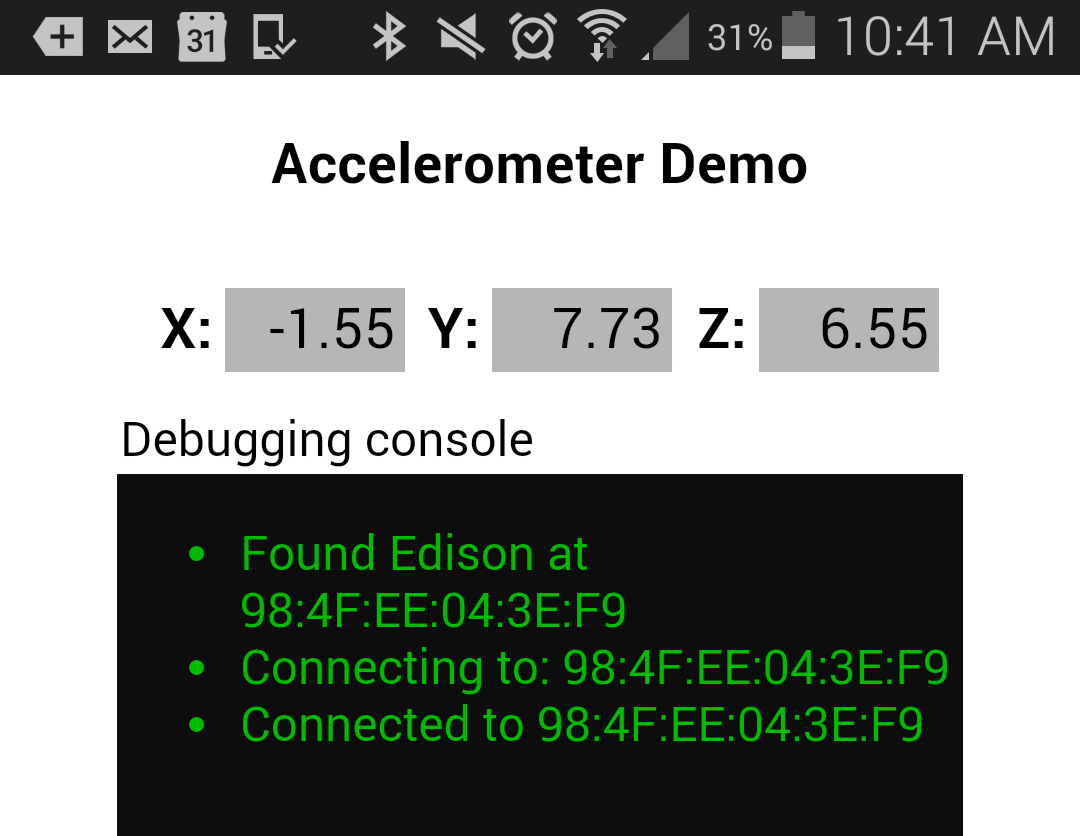
Hold your phone parallel to the ground (in a landscape fashion), and tilt it from side to side. The character on the LCD should move based on the direction of the tilt!

Code to Note
bleno
Bleno, much like many other JavaScript packages, works asynchronously. That means we need to wait for events to happen rather than calling specific functions, and this is accomplished through several bleno.on() definitions.
We wait for bleno to initialize the Bluetooth driver with bleno.on('stateChange', function() {...}), which calls the callback parameter once its done. In our code, we tell bleno to start advertising our service and characteristic.
We define our own characteristic (bleno.Characteristic) near the beginning of the code, which we call displayCharacteristic. The characteristic contains a number of properties and callbacks. In displayCharactersitic, we only allow for writes to that characteristic, as given by properties in the displayCharacteristic definition. onWriteRequest is called whenever that characteristic is written to (from the phone in this example).
We don't broadcast the name "displayCharacteristic." Instead, we broadcast a universally unique identifier (UUID) for our service and characteristic (as given by the properties edison.service and edison.characteristic). Our phone also has those numbers (12ab and 34cd) hardcoded into its app, so it knows which service and characteristic to write to.
cordova-plugin-ble-central
cordova-plugin-ble-central is similar to bleno, but it is meant to be used as a Cordova plugin for phones (instead of bleno, which was created as a module for Node.js).
In our phone app, we wait for the device (our phone) to tell us that it has finished initializing with the "deviceReady" event. With that, we can start the Bluetooth driver and the plugin. To make the app easier to use, we don't wait for the user to input anything; we try to connect immediately to the Edison using the hardcoded MAC address.
This connection process is accomplished by first scanning for available devices (ble.scan). When we find a device that matches our hardcoded MAC address (if (device.id === window.edison.deviceId)), we attempt to connect to it (ble.connect()).
Once a connection has been made, we immediately begin sampling the accelerometer once every 100 ms using the accelerometer.watchAccerlation() function built into device-motion Cordova plugin.
Scaling
Trying to disassemble and reassemble the bytes in a floating point number can prove troublesome. In order to make life easier, we round the X, Y, and Z acceleration data (measured in meters per second) to 2 decimal places and multiply each one by 100. This turns each one into an integer, which we then store in a 16-bit value before sending over the BLE link.
Once the Edison has received the 3 numbers, it divides each one by 100 to get the correct acceleration. This trick is known as "scaling," and is often used to save space or reduce the required throughput on a communication channel.
Debugging
Many cell phones do not have a built-in consoles for debugging apps, like we did when simulating the web apps. We can, however, create a very simple debugging console in the app itself by using the same principles from the chatroom example in the last experiment.
In JavaScript, we create a function debug(msg) that we can call with a string. This function simply appends that string as a list element to a division (named "debug_box"), which we defined in index.html.
In the rest of the JavaScript portion of our program, we can call debug("Some message"); to have a message appear in our makeshift debugging console. This can be very useful to see if Bluetooth messages are being received or not!
CSS
We have been sneaking in yet another language in our HTML that you may or may not have noticed for the past few experiments.
We would like to introduce Cascading Style Sheets (CSS). Almost all modern websites use CSS to format text and media. Most of them keep CSS in a separate file along with the likes of index.html and app.js. For brevity, we are going to use CSS inline with the rest of our HTML.
CSS can be used to format pieces of HTML by using the HTML property style within a tag. For example:
<div style="margin:auto; width:280px; padding:10px; font-size:14pt">
    ...
</div>
The properties set by style are used to:
- Center the division within the page
- Set the width of the division box to 280 pixels
- Create a buffer of 10 pixels between the border of the division box and the text within
- Set the default font size of text in the division to 14-point
To learn more about CSS, see this guide.
Troubleshooting
- Bluetooth doesn't work -- On the Edison, make sure you typed in the commands into an SSH or serial console to unblock the Bluetooth radio and kill bluetoothd. On your phone, make sure that Bluetooth is enabled (through the OS's settings) and that the MAC address in the code matches the MAC address of the Edison.
- Nothing happens when I tilt the phone -- Make sure you are tilting along the long edge of the phone. Add a
debug()statement in the phone code to make sure your phone is successfully reading the accelerometer. Finally, put aconsole.log()statement in the Edison code to make sure the Edison is correctly receiving the accelerometer data over BLE. - Bluetooth is showing up as "Dual Mode" -- This happens sometimes on Android, even though the Edison does not support Dual Mode Bluetooth (at this time). Try powering down your Android phone and turning it on again to reset the Bluetooth driver.
Going Further
Challenges
- Have the character move whenever you tilt the phone along its short axis (instead of its long axis).
- Create a phone app that grabs GPS data (hint) and sends it over BLE to the Edison. Have the Edison animate a character that moves whenever you walk along a line (say, longitudinally).
Digging Deeper
- Cordova Documentation
- Bluetooth Overview
- Cordova plugin database
- bleno GitHub repository
- cordova-plugin-ble-central GitHub repository
- cordova-plugin-device-motion GitHub repository
- CSS Reference