SparkFun Inventor's Kit for Edison Experiment Guide
 Shawn Hymel
 Experiment 12: Bluetooth Game Controller
We will continue with the concept of BLE. This time, we will keep the phone as the central (master) device, but we will use the Edison as a controller to send data as notifications to the phone.
In this experiment, we are going to construct a type of very powerful (probably overkill) Bluetooth game controller out of the Edison with 4 buttons. The Edison will periodically poll the state of these buttons and notify the smartphone over BLE of any button pushes.
On the phone, we will create a very simple "game" that consists of a red ball in the middle of a box. Pushing one of the four buttons on the Edison will cause the ball to move in a cardinal direction (up, down, left, or right). While the game itself does not have a real purpose, it could easily be the starting point for a real video game that requires some kind of Bluetooth controller.
- If you have an iPhone, you will need to enroll in the Apple Developer Program (there is a yearly membership fee) and create Ad Hoc Provisioning Profiles (discussed later)
- If you have an Android, you can allow the installation of apps from "Unknown Sources" and install the app from a downloaded .apk file
Parts Needed
In addition to the Edison and Block Stack, you will need the following parts:
- 1x Breadboard
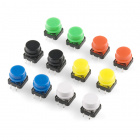
- 4x Push Buttons
- 4x 1kΩ Resistors
- 10x Jumper Wires


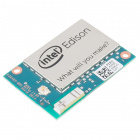
Intel® Edison
DEV-13024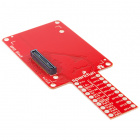
SparkFun Block for Intel® Edison - GPIO
DEV-13038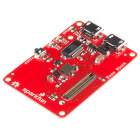
SparkFun Block for Intel® Edison - Base
DEV-13045Suggested Reading
- Introduction to Object-Oriented JavaScript -- What constitutes an object and an overview of prototypes
- The Game Loop -- What is a game loop, and why almost every video game has one
Concepts
The Class
In previous experiments, we have either used existing objects or created a one-off object in JavaScript with something like:
language:javascript
var oneOff = {
    prop1: "red",
    prop2: 42
};
In this experiment, we finally get to create our own object. If you are familiar with other object-oriented programming language, you might be familiar with the concept of a class. JavaScript is considered classless, since you can create objects without a blueprint (class). However, there are times when we want to create several instances of an object and don't want to rewrite code. As a result, JavaScript still offers us a way to create classes.
The class is like a blueprint or a recipe. We create properties and functions that all objects of that type must have (it saves us rewriting lots of code when we want many ojects of the same type). To define this blueprint in JavaScript, we first create a constructor and assign any members (variables unique to that object).
language:javascript
function MyBlueprint() {
    this._member = 0;
}
Wait, this is a function! Correct. In order to create an instance of the class MyBlueprint, we need to use the special new keyword. The following creates one instance (named myInstance) from the class MyBlueprint (notice that we capitalize the first character in the class but not for instances):
language:java
var myInstance = new MyBlueprint();
We've just created an object from our class! It is very similar to following a blueprint, schematic, or recipe to make a bridge, circuit, or meal. myInstance, thanks to the constructor, contains a member variable called _member. The value of _member is unique to that one instance. We can access that value with myInstance._member in order to get or set its value.
In addition to members, we can create functions that are shared among all instances of our class. We need to use the special keyword prototype:
language:javascript
MyBlueprint.prototype.updateMember = function(num) {
    this._member = num;
};
This function (called a method), when called from an instance, allows you to set the value of that instance's member variable (_member in this case). We use the this keyword to refer to the instance. For example, if we named our instance myInstance, this would refer to the myInstance object. By specifying this._member, we refer to the member variable within that particular instance.
Some jargon you should be aware of:
- Object -- A piece of code that contains properties (variables and/or functions)
- Class -- A blueprint to create several objects of the same type
- Instance -- An object created using a class (as a blueprint)
- Member -- A variable unique to an instance as defined within a class
- Method -- A function defined by a class
Here is a basic example of a class and some instances created from that class. Feel free to run the code on your Edison. What do you expect to see in the console when you run it? Can you identify the class, the instances, the member, and the methods?
language:javascript
// This is the constructor. Calling this with "new" creates a new object
// (instance) of type "MyBlueprint"
function MyBlueprint() {
    this._member = 0;
}

// Objects of type "MyBlueprint" will all have this function, which allows you
// to update the member variable within that instance.
MyBlueprint.prototype.updateMember = function(num) {
    this._member = num;
};

// Again, all instances of "MyBlueprint" will have this function. Calling this
// will print the member variable's value to the screen.
MyBlueprint.prototype.printMember = function() {
    console.log(this._member);
};

// Let's test this by creating 2 instances of our MyBlueprint class.
var instance_1 = new MyBlueprint();
var instance_2 = new MyBlueprint();

// To test the methods, we can update the member variable for one instance
instance_1.updateMember(42);

// Print the member's value to the console. What do you expect to see?
instance_1.printMember();
instance_2.printMember();
The Game Loop
Almost all video games rely on the Game Loop. This loop is a simple programming construct with 4 parts and executes endlessly (at least until the game ends).
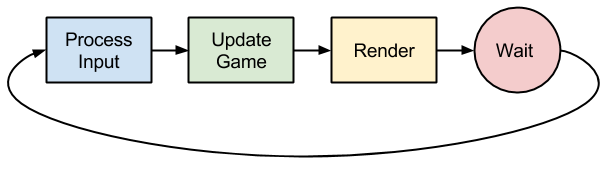
The Game Loop consists of the 4 main parts:
- Process Input -- Look for input from the controller or input device. For example, the player is pushing a button.
- Update Game -- Take input from the controller and update the game variables as a result. For example, the button input told the character to move up. Update the character's Y position by -1 (toward the top of the screen).
- Render -- Render is another fancy name for "draw." Most simple games will clear the screen and re-draw the whole scene. In our example, this includes having the character appear 1 pixel above where they used to be.
- Wait -- Do not do anything so that we can reach our target framerate (measured in frames per second or FPS). This is often variable. For example, if the first three steps took 32 ms, we need to wait 18 ms in order to meet our framerate goal of 20 FPS (1 frame every 50 ms).
In our experiment, our game loop is only going to consist of steps 3 and 4. Thanks to JavaScript's asynchronous nature, we will update the game variables (the position of a ball) whenever a button push event arrives over BLE from the Edison. This means that the Edison is handling step 1 (polling for button pushes), and the phone is handling step 2 asynchronously (whenever a button push event arrives).
However, steps 3 and 4 will still execute in an endless loop. Every 50 ms, the game's canvas (play area on the phone) is cleared and a new ball is drawn in the position determined by the ball's x and y properties. We then wait for the rest of the 50 ms until the draw function is called again.
Hardware Hookup

The Code
Edison Code
Before we run any code on the Edison, we need to enable Bluetooth. Connect via SSH or Serial, and enter the following commands:
rfkill unblock bluetooth
killall bluetoothd
hciconfig hci0 up
In the XDK, create a new Blank IoT Application. In package.json, copy in the following:
language:javascript
{
  "name": "blankapp",
  "description": "",
  "version": "0.0.0",
  "main": "main.js",
  "engines": {
    "node": ">=0.10.0"
  },
  "dependencies": {
      "async": "1.5.0",
      "bleno": "0.3.3"
  }
}
In main.js, copy in the following:
language:javascript
/*jslint node:true, vars:true, bitwise:true, unparam:true */
/*jshint unused:true */
// Leave the above lines for propper jshinting

/**
 * SparkFun Inventor's Kit for Edison
 * Experiment 12: Edison BLE Controller
 * This sketch was written by SparkFun Electronics
 * November 24, 2015
 * https://github.com/sparkfun
 *
 * Broadcasts as a BLE device. When a central device (e.g. smarthphone)
 * connects, it sends out button pushes as a notification on a characteristic.
 *
 * Released under the MIT License(http://opensource.org/licenses/MIT)
 */

// As per usual, we need MRAA. Also, bleno.
var mraa = require('mraa');
bleno = require('bleno');

// Define our global variables first
var bleno;
var controllerCharacteristic;

// BLE service and characteristic information
var edison = {
    name: "Edison",
    deviceId: null,
    service: "12ab",
    characteristic: "34cd"
};

// Create buttons on pins 44, 45, 46, and 47
var upPin = new mraa.Gpio(44, true, true);
var downPin = new mraa.Gpio(45, true, true);
var leftPin = new mraa.Gpio(46, true, true);
var rightPin = new mraa.Gpio(47, true, true);

// Set that pin as a digital input (read)
upPin.dir(mraa.DIR_IN);
downPin.dir(mraa.DIR_IN);
leftPin.dir(mraa.DIR_IN);
rightPin.dir(mraa.DIR_IN);

// Define our controller characteristic, which can be subscribed to
controllerCharacteristic = new bleno.Characteristic({
    value: null,
    uuid: edison.characteristic,
    properties: ['notify'],
    onSubscribe: function(maxValueSize, updateValueCallback) {
        console.log("Device subscribed");
        this._updateValueCallback = updateValueCallback;
    },
    onUnsubscribe: function() {
        console.log("Device unsubscribed");
        this._updateValueCallback = null;
    },
});

// This field holds the value that is sent out via notification
controllerCharacteristic._updateValueCallback = null;

// We define a special function that should be called whenever a value
// needs to be sent out as a notification over BLE.
controllerCharacteristic.sendNotification = function(buf) {
    if (this._updateValueCallback !== null) {
        this._updateValueCallback(buf);
    }
};

// Once bleno starts, begin advertising our BLE address
bleno.on('stateChange', function(state) {
    console.log('State change: ' + state);
    if (state === 'poweredOn') {
        bleno.startAdvertising(edison.name,[edison.service]);
    } else {
        bleno.stopAdvertising();
    }
});

// Notify the console that we've accepted a connection
bleno.on('accept', function(clientAddress) {
    console.log("Accepted connection from address: " + clientAddress);
});

// Notify the console that we have disconnected from a client
bleno.on('disconnect', function(clientAddress) {
    console.log("Disconnected from address: " + clientAddress);
});

// When we begin advertising, create a new service and characteristic
bleno.on('advertisingStart', function(error) {
    if (error) {
        console.log("Advertising start error:" + error);
    } else {
        console.log("Advertising start success");
        bleno.setServices([

            // Define a new service
            new bleno.PrimaryService({
                uuid: edison.service,
                characteristics: [
                    controllerCharacteristic
                ]
            })
        ]);
    }
});

// Call the periodicActivity function
periodicActivity();

// This function is called forever (due to the setTimeout() function)
function periodicActivity() {

    // If a button is pushed, notify over BLE
    if (upPin.read() == 0) {
        controllerCharacteristic.sendNotification(new Buffer([0]));
    }
    if (downPin.read() == 0) {
        controllerCharacteristic.sendNotification(new Buffer([1]));
    }
    if (leftPin.read() == 0) {
        controllerCharacteristic.sendNotification(new Buffer([2]));
    }
    if (rightPin.read() == 0) {
        controllerCharacteristic.sendNotification(new Buffer([3]));
    }

    // Wait for 20 ms and call this function again
    setTimeout(periodicActivity, 20);
}
Phone App
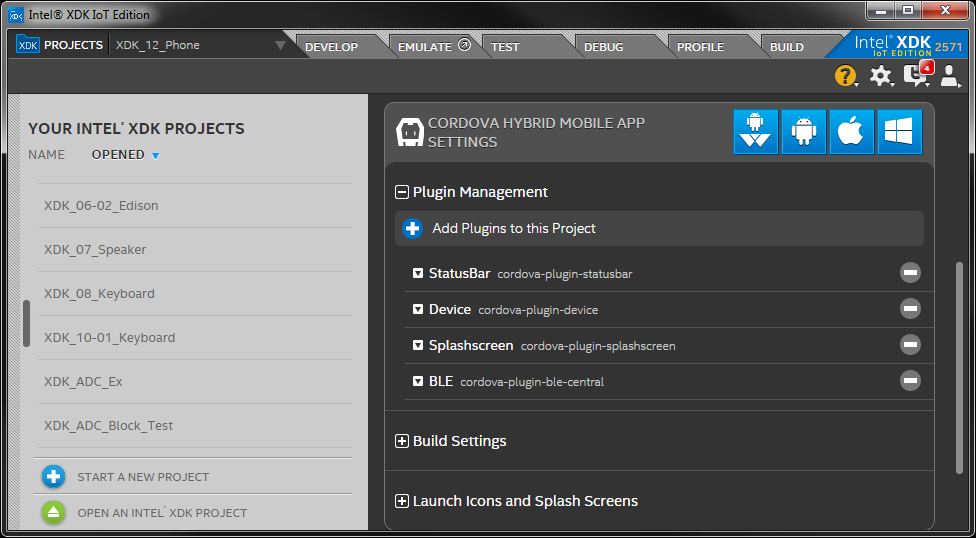
As in the previous experiment, create a blank HTML5 + Cordova app under HTML5 Companion Hybrid Mobile or Web App.
In the project settings, add the plugin cordova-plugin-ble-central.
Once again, we need to include jQuery. Download the latest, uncompressed version of jQuery from http://jquery.com/download/. Create two new directories in your project so that you have /www/lib/jquery. Copy the .js file into the jquery directory.
Go back to the Develop tab. In www/index.html, copy in the following:
<!DOCTYPE html>


<html>

<head>
  <title>BLE Ball</title>
    <meta http-equiv="Content-type" content="text/html; charset=utf-8">
    <meta name="viewport" content="width=device-width, minimum-scale=1, initial-scale=1, user-scalable=no">
    <style>
        @-ms-viewport { width: 100vw ; min-zoom: 100% ; zoom: 100% ; }  @viewport { width: 100vw ; min-zoom: 100% zoom: 100% ; }
        @-ms-viewport { user-zoom: fixed ; min-zoom: 100% ; }           @viewport { user-zoom: fixed ; min-zoom: 100% ; }
    </style>
</head>

<body>


    <h3 style="text-align:center;">BLE Controller Demo</h3>
    <div id="connection" style="margin:auto; width:240px; padding:5px;">
        <input id="ble_name" type="text" placeholder="Name of device"
               style="width:60%;">
        <button id="connect_ble" style="width:35%;">Connect</button>
    </div>


    <div style="margin:auto; width:260px; height:260px;">
        <canvas id="ball_canvas" width="240" height="240"
                style="background:#E5E5E5;
                       margin-left:auto;
                       margin-right:auto;
                       display:block;">
        </canvas>
    </div>


    <div id="debug_box" style="margin:auto;
                               width:280px;
                               height:140px;
                               padding:1px;
                               overflow:auto;
                               background:#0d0d0d;">
        <ul id="debug" style="color:#00BB00;"></ul>
    </div>


    <script type="text/javascript" src="cordova.js"></script>
    <script type="text/javascript" src="lib/jquery/jquery-2.1.4.js"></script>
    <script type="text/javascript" src="js/app.js"></script>
</body>

</html>
In www/js/app.js, copy in the following:
language:javascript
/*jslint unparam: true */
/*jshint strict: true, -W097, unused:false,  undef:true, devel:true */
/*global window, document, d3, $, io, navigator, setTimeout */
/*global ble*/

/**
 * SparkFun Inventor's Kit for Edison
 * Experiment 12: Phone BLE Ball
 * This sketch was written by SparkFun Electronics
 * November 23, 2015
 * https://github.com/sparkfun/Inventors_Kit_For_Edison_Experiments
 *
 * Runs as BLE central on smartphone. Accepts BLE connection from Edison and
 * moves ball around screen based on BLE notifications from the Edison.
 *
 * Released under the MIT License(http://opensource.org/licenses/MIT)
 */

// Put in strict mode to restrict some JavaScript "features"
"use strict" ;

// BLE service and characteristic information
window.edison = {
    name: null,
    deviceId: null,
    service: "12ab",
    characteristic: "34cd"
};

/******************************************************************************
 * Game Class
 *****************************************************************************/

// Game constructor
function Game(canvas) {

    // Assign the canvas to our properties
    this._canvas = canvas;
    this._ctx = this._canvas.getContext("2d");

    // Initialize the rest of the properties
    this._gameThread = null;
    this._ball = {
        x: this._canvas.width / 2,
        y: this._canvas.height / 2,
        radius: 10,
        visible: false
    };
}

// Call this to update the ball's position
Game.prototype.updateBallPos = function(dx, dy) {

    // Increment the ball's position
    this._ball.x += dx;
    this._ball.y += dy;

    // Make the ball stick to the edges
    if (this._ball.x > this._canvas.width - this._ball.radius) {
        this._ball.x = this._canvas.width - this._ball.radius;
    }
    if (this._ball.x < this._ball.radius) {
        this._ball.x = this._ball.radius;
    }
    if (this._ball.y > this._canvas.height - this._ball.radius) {
        this._ball.y = this._canvas.height - this._ball.radius;
    }
    if (this._ball.y < this._ball.radius) {
        this._ball.y = this._ball.radius;
    }
};

// Draws the ball on the canvas
Game.prototype.drawBall = function() {
    this._ctx.beginPath();
    this._ctx.arc(this._ball.x,
                  this._ball.y,
                  this._ball.radius,
                  0,
                  Math.PI * 2);
    this._ctx.fillStyle = "#BB0000";
    this._ctx.fill();
    this._ctx.closePath();
};

// This gets called by the main thread to repeatedly clear and draw the canvas
Game.prototype.draw = function() {
    if (typeof this._ctx != 'undefined') {
        this._ctx.clearRect(0, 0, this._canvas.width, this._canvas.height);
        if (this._ball.visible) {
            this.drawBall();
        }
    }
};

// Call this to start the main game thread
Game.prototype.start = function() {
    var that = this;
    this._ball.visible = true;
    this._gameThread = window.setInterval(function() {
        that.draw();
    }, 50);
};

// Call this to stop the main game thread
Game.prototype.stop = function() {
    this.ball.visible = false;
    this.draw();
    window.clearInterval(this.gameThread);
};

/******************************************************************************
 * Main App
 *****************************************************************************/

// Global app object we can use to create BLE callbacks
window.app = {

    // Game object
    game: null,

    // Call this first!
    initialize: function() {

        // Create a new instance of the game and assign it to the app
        this.game = new Game($('#ball_canvas')[0]);

        // Connect events to page elements
        this.bindEvents();
    },

    // Connect events to elements on the page
    bindEvents: function() {
        var that = this;
        $('#connect_ble').on('click', this.connect);
    },

    // Scan for a BLE device with the name provided and connect to it
    connect: function() {
        var that = this;
        window.edison.name = $('#ble_name').val();
        debug("Looking for " + window.edison.name);
        ble.scan([],
                 5,
                 window.app.onDiscoverDevice,
                 window.app.onError);
    },

    // When we find a BLE device, if it has the name we want, connect to it
    onDiscoverDevice: function(device) {
        var that;
        debug("Found " + device.name + " at " + device.id);
        if (device.name == window.edison.name) {
            window.edison.deviceId = device.id;
            debug("Attempting to connect to " + device.id);
            ble.connect(window.edison.deviceId,
                        window.app.onConnect,
                        window.app.onError);
        }
    },

    //  On BLE connection, subscribe to the characteristic, and start the game
    onConnect: function() {
        window.app.game.start();
        debug("Connected to " + window.edison.name + " at " +
              window.edison.deviceId);
        ble.startNotification(window.edison.deviceId,
                              window.edison.service,
                              window.edison.characteristic,
                              window.app.onNotify,
                              window.app.onError);
    },

    // Move the ball based on the direction of the notification
    onNotify: function(data) {
        var dir = new Uint8Array(data);
        debug("Dir: " + dir[0]);
        switch(dir[0]) {
            case 0:
                window.app.game.updateBallPos(0, -1);
                break;
            case 1:
                window.app.game.updateBallPos(0, 1);
                break;
            case 2:
                window.app.game.updateBallPos(-1, 0);
                break;
            case 3:
                window.app.game.updateBallPos(1, 0);
                break;
            default:
                debug("Message error");
        }
    },

    // Alert the user if there is an error and stop the game
    onError: function(err) {
        window.app.game.stop();
        debug("Error: " + err);
        alert("Error: " + err);
    }
};

/******************************************************************************
 * Execution starts here after page has loaded
 *****************************************************************************/

// Short for jQuery(document).ready() method, which is called after the page
// has loaded. We can use this to assign callbacks to elements on the page.
$(function() {

    // Initialize the app and assign callbacks
    window.app.initialize();
});

// Create a pseudo-debugging console
// NOTE: Real apps can also use alert(), but list messages can be useful when
// you are debugging the program
function debug(msg) {
    $('#debug').append($('<li>').text(msg));
}
Refer to the previous example on how to build the phone app for your smartphone.
What You Should See
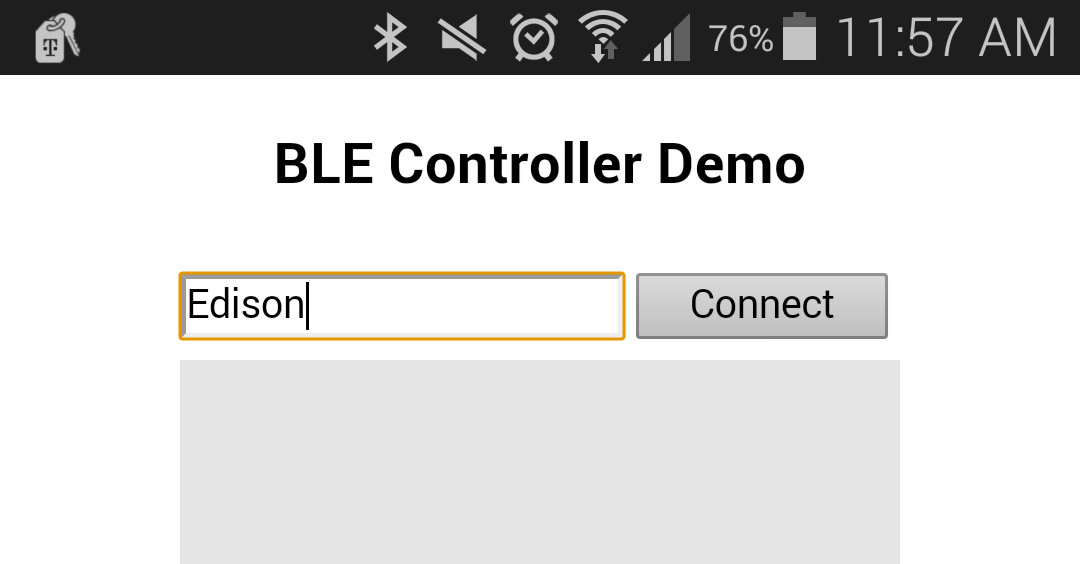
Make sure that you have enabled Bluetooth on the Edison and that it is running the controller program. Run the phone app, and you should be presented with an input, a blank game canvas, and a debugging console (much like in the last experiment). Enter Edison into the input field and tap Connect.
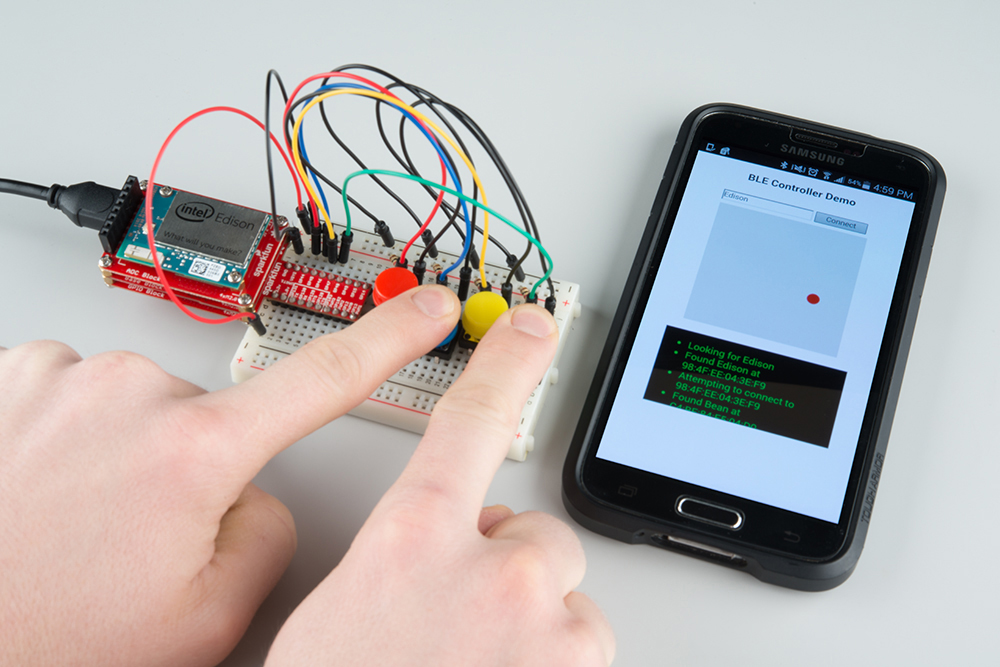
Once your phone connects to the Edison, a small, red ball should appear in the middle of the canvas (you should also see a "Connected to" message in the debugging console). Push the buttons connected to the Edison to move the ball around!
Code to Note
The Game Object
As introduced in the Concepts section, we create a class named Game along with some members and methods. The window.app.game object (an instance of the Game class) is responsible for remembering the ball's X and Y coordinates (stored as variables within the this._ball member) as well as drawing the ball on the canvas, which is accomplished using an HTML Canvas element.
Once a BLE connection has been made, the program starts the game loop by calling window.app.game.start(). This function sets up an interval timer that calls the .draw() function every 50 ms. In .draw(), the canvas is cleared, and the ball is drawn every interval.
In window.app.onNotify, which is called on a received BLE notification, the BLE's data (the first and only byte) is parsed to determine which way the ball should move. A received '0' means "move the ball up", '1' means "down", '2' means "left", and '3' means "right". Updating the ball's position is accomplished by calling window.app.game.updateBallPos(dx, dy).
BLE by Name
In the previous experiment, we needed to hardcode the Edison's Bluetooth MAC address into the program. This time, we take a different approach. When the user presses the Connect button, the program retrieves the value of the input (ideally, "Edison") and stores it in the global window.edison object (as window.edison.name).
The program then scans for all available BLE peripherals, noting their names (device.name in the onDiscoverDevice callback). If one is found to be equal to window.edison.name (ideally, "Edison" once again), the program attempts to connect to that device. No need to set the MAC address anywhere!
In the Edison code, we assign the BLE name "Edison" in the global edison object. If we change that name, we will need to enter the same name into the input field of the phone app.
BLE Notifications
In the Edison code, we define a BLE characteristic called controllerCharacteristic. Unlike the previous example where we only allowed writing to the characteristic, we allow notifications to this characteristic.
A BLE notification sends out an update to all devices that have subscribed whenever that characteristic has changed. To accomplish this in the Edison, we create a member variable of the controllerCharacteristic named _updateValueCallback. This variable is assigned the function updateValueCallback whenever a device subscribes to the characteristic. We create the external function controllerCharacteristic.sendNotification(buf) so that other parts of the code may send data as a notification over BLE.
'sendNotification(buf)calls the functionupdateValueCallback()with the data it received from the caller (buf`). The causes the bleno module to send a notification for that particular characteristic over BLE.
On the phone side, cordova-plugin-ble-central is configured to subscribe to the characteristic with ble.startNotification(...). Notifications to that characteristic call the function onNotify(), which then parses the received data to determine how to move the ball.
This and That (Dummy Functions)
As mentioned previously, the keyword this refers to the calling object. Sometimes, we have to create a wrapper around a callback function so that we can pass the object to the function.
For example, in the phone code app.js, the method Game.prototype.start uses the built-in function setInterval() to call the draw method repeatedly. As it is, setInterval() is a method of the global window object. If we were to write
language:javascript
Game.prototype.start = function() {
    this._ball.visible = true;
    this._gameThread = window.setInterval(this.draw, 50);
};
the keyword this (only within setInterval) would refer to window, not the Game object! And, as you might guess, window has no draw() function. This piece of code would throw an error (unless you made a window.draw() function).
To get around this, we first assign this to a placeholder variable, which we will (humorously) call that. Then, we can create a dummy function as the callback for setInterval, which calls that.draw(), referring to the draw() method in the Game object.
language:javascript
Game.prototype.start = function() {
    var that = this;
    this._ball.visible = true;
    this._gameThread = window.setInterval(function() {
        that.draw();
    }, 50);
};
Troubleshooting
- Bluetooth is not connecting -- If you restarted the Edison since the last experiment, make sure you enter the three commands
rfkill unblock bluetooth,killall bluetoothd, andhciconfig hci0 upinto an Edison terminal (SSH or serial) before running the Edison code. - The ball does not move -- If you see the ball on the screen, then Bluetooth is connected. A visible ball that does not move could be caused by several issues:
- The Edison might not be detecting button pushes. Insert
console.log()statements into the Edison code to determine the state of each of the buttons. - The Edison might not be sending notifications over BLE. Use another BLE phone app (e.g. BLE Scanner) to see if the characteristic is being updated.
- The phone app might not be receiving notifications. Place
debug()statements inonNotifyto see if it is being called. - The phone app might not be updating the ball postion. Place
debug()statements inGame.prototype.updateBallPosto see if it is being called.
- The Edison might not be detecting button pushes. Insert
Going Further
Challenges
- Make the ball's radius grow by 1 every time it touches a wall.
- Make the ball move faster (this can be accomplished in several ways).
- Make a real game! For example, you could make a Breakout clone that uses the Edison controller to move the paddle. See this tutorial to help you get started.