SparkFun Inventor's Kit for Photon Experiment Guide
 Joel_E_B,
  b_e_n,
  HelloTechie,
  Knutson,
  jimblom,
  RBERLIA
 Experiment 6: Environment Monitor
Introduction
This experiment will hook the Photon up to a temperature/humidity sensor and a photocell to observe lighting conditions. We'll initially use serial communication to check their readings. Once you've gotten a handle on interacting with those sensors, we can gather their data and regularly post it to a data stream.
In addition to covering the basics of serial communication, this experiment will also introduce libraries. Libraries are a powerful tool in the Particle IDE. They're pre-written files of code designed to accomplish certain tasks -- like reading a sensor -- in a very concise manner. They'll make your life a lot easier.
Once the experiment is completed, you'll have a fully functional environmental data logging station, which can be observed from anywhere in the world!
Parts Needed
- 1x RHT03 Humidity and Temperature Sensor
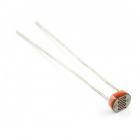
- 1x Mini Photocell
- 1x 330Ω Resistor
- 7x Jumper Wires


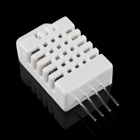
Humidity and Temperature Sensor - RHT03
SEN-10167Suggested Reading
- Serial Communication -- Serial interfaces allow devices to exchange complex strings of data using just two wires. In this experiment, we'll use a serial interface between the Photon RedBoard and our computer to check the latest readings from the light and temperature/humidity sensors.
- Serial Terminal Basics -- To interact with a serial interface on your computer, you'll need a serial terminal program. You may already have a serial terminal installed on your computer. If not, check out this tutorial for our recommendations, and a guide to getting started.
- Including Particle Libraries -- Libraries are one of the most powerful tools availabe in the Particle Build IDE. Read through this tutorial to find out how to add a library to your application code.
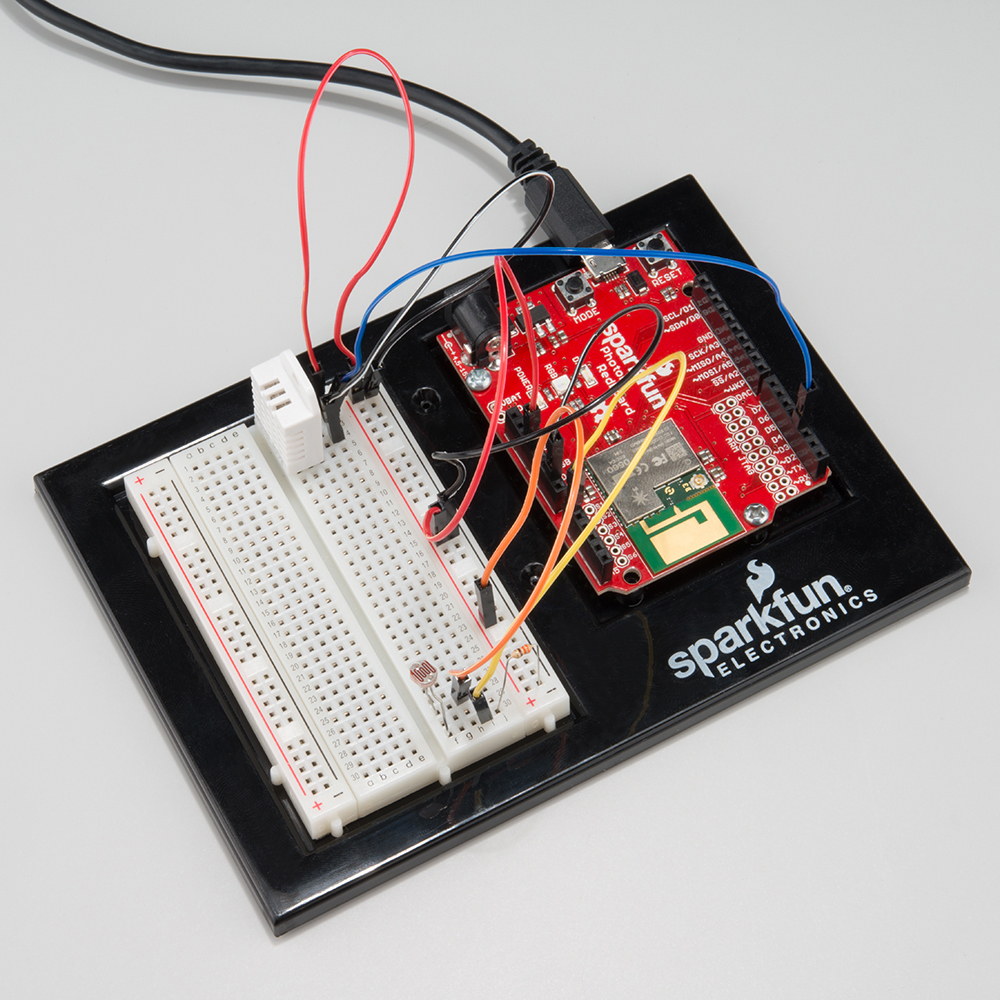
Hardware Hookup
Hook up your circuit as shown below:
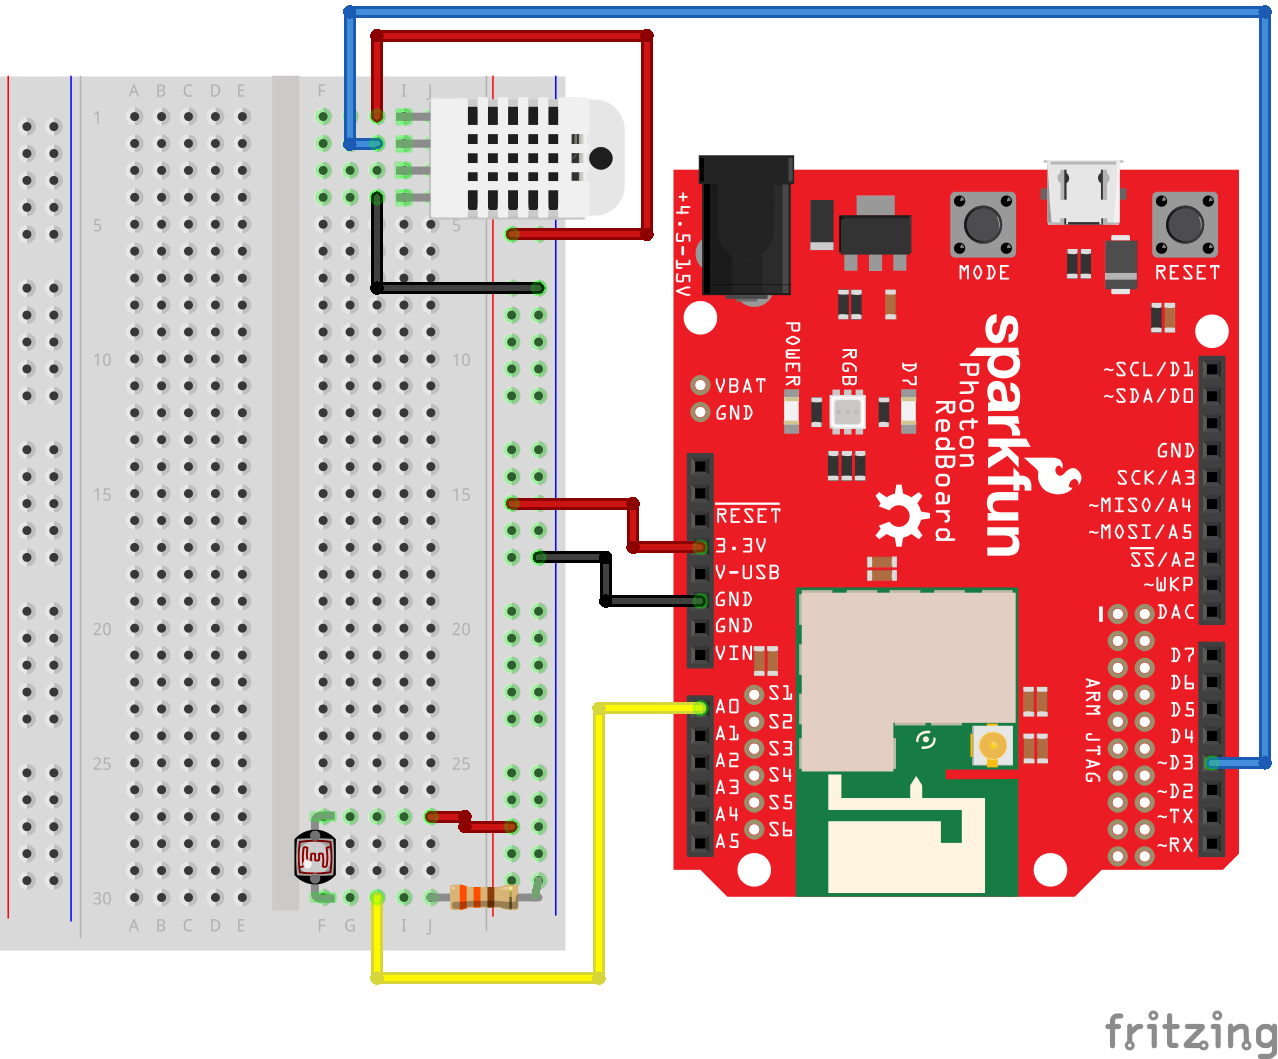
The yellow wire running from the photocell to the Photon's A0 pin carries an analog value relative to the light being sensed. The blue wire, running between the RHT03 sensor and Photon pin D3, is a very precisely-timed digital data interface. The SparkFunRHT03 library simplifies this interface to just a few lines of code.
Both the photocell and the RTH03 need a power supply to be operational. In this circuit, we're powering both off the Photon's 3.3V/GND supply.
Photon Code
Copy and paste the code below into a new application -- ours is called EnvironmentLoggerSerial:
/////////////////////
// Pin Definitions //
/////////////////////
const int RHT03_DATA_PIN = D3; // RHT03 data pin
const int LIGHT_PIN = A0; // Photocell analog output
const int LED_PIN = D7; // LED to show when the sensor's are being read

///////////////////////////
// RHT03 Object Creation //
///////////////////////////
RHT03 rht; // This creates a RTH03 object, which we'll use to interact with the sensor

unsigned int minimumLight = 65536;
unsigned int maximumLight = 0;
float minimumTempC = 5505;
float maximumTempC = 0;
float minimumTempF = 9941;
float maximumTempF = 0;
float minimumHumidity = 100;
float maximumHumidity = 0;

#define PRINT_RATE 1500 // Time in ms to delay between prints.

void setup()
{
    // Serial.begin() is used to open up a serial interface between the Photon
    // and your computer.
    // The '9600' parameter configures the speed of the interface. This value is
    // called the "baud rate", which is equivalent to bits per second (bps).
    Serial.begin(9600); // Start the serial interface at 9600 bps

    // Using the 'rht' object created in the global section, we'll begin by calling
    // its member function `begin`.
    // The parameter in this function is the DIGITAL PIN we're using to communicate
    // with the sensor.
    rht.begin(RHT03_DATA_PIN);  // Initialize the RHT03 sensor

    // Don't forget to set the pin modes of our analog sensor (INPUT) and the LED (OUTPUT):
    pinMode(LIGHT_PIN, INPUT); // Set the photocell pin as an INPUT.
    pinMode(LED_PIN, OUTPUT); // Set the LED pin as an OUTPUT
    digitalWrite(LED_PIN, LOW); // Initially set the LED pin low -- turn the LED off.
}

void loop()
{
    digitalWrite(LED_PIN, HIGH); // Turn the LED on -- it'll blink whenever the sensor is being read.

    // Use the RHT03 member function `update()` to read new humidity and temperature values from the sensor.
    // There's a chance the reading might fail, so `update()` returns a success indicator. It'll return 1
    // if the update is successful, or a negative number if it fails.
    int update = rht.update();

    if (update == 1) // If the update succeeded, print out the new readings:
    {
        // Use analogRead to get the latest light sensor reading:
        unsigned int light = analogRead(LIGHT_PIN);
        // Do some math to calculate the minimum and maximum light sensor readings we've seen:
        if (light > maximumLight) maximumLight = light;
        if (light < minimumLight) minimumLight = light;

        // The `humidity()` RHT03 member function returns the last successfully read relative
        // humidity value from the RHT03.
        // It'll return a float value -- a percentage of RH between 0-100.
        // ONLY CALL THIS FUNCTION AFTER SUCCESSFULLY RUNNING rht.update()!.
        float humidity = rht.humidity();
        // Do some math to calculate the max/min humidity
        if (humidity > maximumHumidity) maximumHumidity = humidity;
        if (humidity < minimumHumidity) minimumHumidity = humidity;

        // The `tempF()` RHT03 member function returns the last succesfully read
        // farenheit temperature value from the RHT03.
        // It returns a float variable equal to the temperature in Farenheit.
        // ONLY CALL THIS FUNCTION AFTER SUCCESSFULLY RUNNING rht.update()!.
        float tempF = rht.tempF();
        // Do some math to calculate the max/min tempF
        if (tempF > maximumTempF) maximumTempF = tempF;
        if (tempF < minimumTempF) minimumTempF = tempF;

        // `tempC()` works just like `tempF()`, but it returns the temperature value in
        // Celsius.
        // ONLY CALL THIS FUNCTION AFTER SUCCESSFULLY RUNNING rht.update()!.
        float tempC = rht.tempC();
        // Do some math to calculate the max/min tempC
        if (tempC > maximumTempC) maximumTempC = tempC;
        if (tempC < minimumTempC) minimumTempC = tempC;


        // `Serial.print()` is used to send data from the Photon to our computer over the serial interface.
        // The parameter passed to `print()` can be anything from a String, to a constant array of charaters,
        // to a float value, integer, or nearly any other type of variable.
        Serial.print("Light: "); // Print "Light: "
        Serial.print(light); // Print the light reading
        Serial.print(" ("); // Print " ("
        Serial.print(minimumLight); // Print the minimum light reading
        Serial.print('/'); // Print a '/' -- single quotes mean we're only sending one character
        Serial.print(maximumLight); // Print the maximum light reading.
        Serial.println(") (min/max)"); // Finish the line by printing ") (min/max)"
        // The full line will look something like: "Light: 545 (8/791) (min/max)"

        // Print the temperature in °C:
        // Example printout: "Temp: 24.9 °C (23.5/24.5) (min/max)"
        Serial.print("Temp: ");
        Serial.print(tempC, 1); // Printing a float, we can set the precision (number of decimal points) with the second parameter
        Serial.print(" ");
        // `write()` can be used to write a SINGLE BYTE value over the serial line:
        Serial.write(248); // 248 is the ASCII value for the ° symbol. We're fancy.
        Serial.print("C (");
        Serial.print(minimumTempC, 1);
        Serial.print('/'); // Print a '/'
        Serial.print(maximumTempC, 1);
        Serial.println(") (min/max)");

        // Print the temperature in °F:
        // Example printout: "Temp: 76.1 °F (74.3/76.1) (min/max)"
        Serial.print("Temp: "); // Print "Temp: "
        Serial.print(tempF, 1); // Print the tempF variable -- 1 decimal point
        Serial.print(' ');      // Print a space
        Serial.write(248);      // Print ASCII value 248 (the ° symbol)
        Serial.print("F (");    // Print "F ("
        Serial.print(minimumTempF, 1); // Print minimum temperature -- 1 decimal point
        Serial.print('/');      // Print a '/'
        Serial.print(maximumTempF, 1); // Print maximum temp -- 1 decimal point
        Serial.println(") (min/max)"); // Finsh the line by printing ") (min/max)"

        // Print the relative humidity:
        // Example printout: Humidity: 29.7 % (29.10/41.80) (min/max)
        Serial.print("Humidity: ");
        Serial.print(humidity, 1);
        Serial.print(" %");
        Serial.print(" (");
        Serial.print(minimumHumidity, 1);
        Serial.print("/");
        Serial.print(maximumHumidity, 1);
        Serial.println(") (min/max)");

        Serial.println(); // Print a blank line:
    }
    else // If the update failed, give the sensor time to reset:
    {
        Serial.println("Error reading from the RHT03."); // Print an error message
        Serial.println(); // Print a blank line

        delay(RHT_READ_INTERVAL_MS); // The RHT03 needs about 1s between read attempts
    }
    digitalWrite(LED_PIN, LOW); // Turn the LED off

    delay(PRINT_RATE); // delay for 1s, printing too much will make the output very hard to read.
}
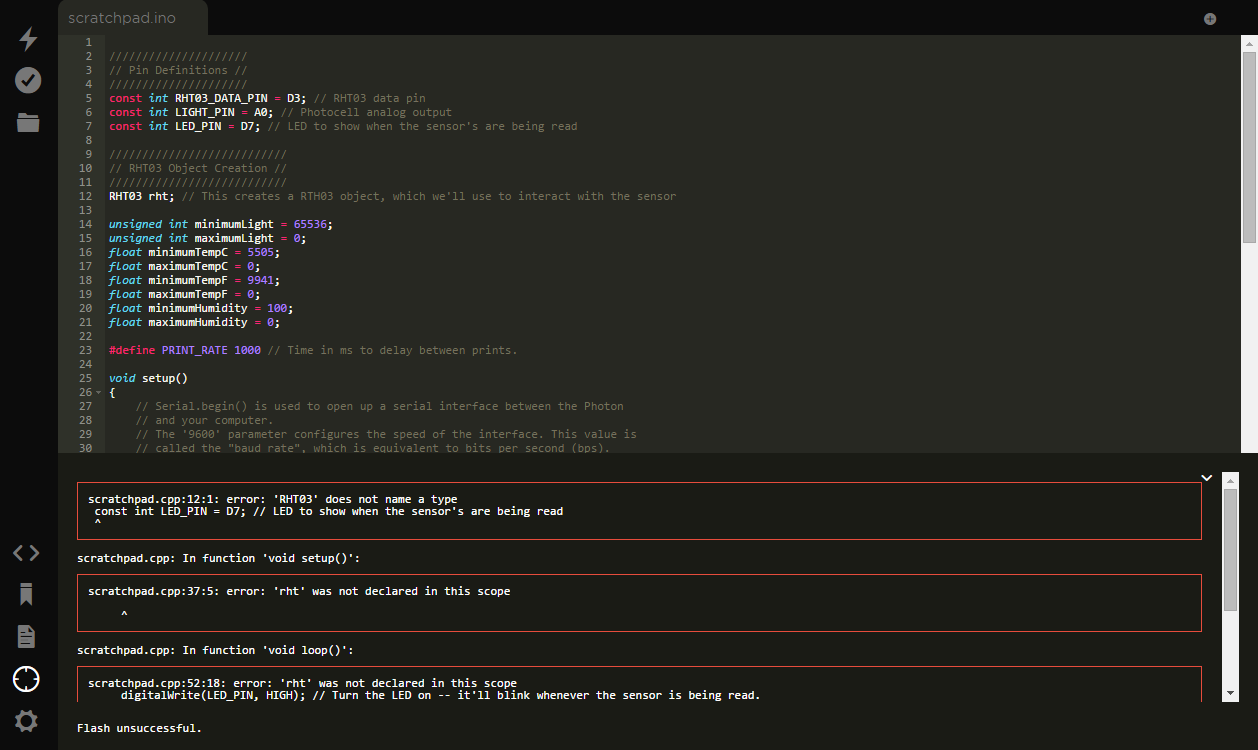
But wait! Don't try to upload it yet. In fact, if you try to compile, you should get an error, because we need to add the SparkFunRHT03 library.
Click the Libraries icon ![]() on the left. Then click into the search bar and find SparkFunRHT03. Click it to get a description of the library, and options for using it.
on the left. Then click into the search bar and find SparkFunRHT03. Click it to get a description of the library, and options for using it.
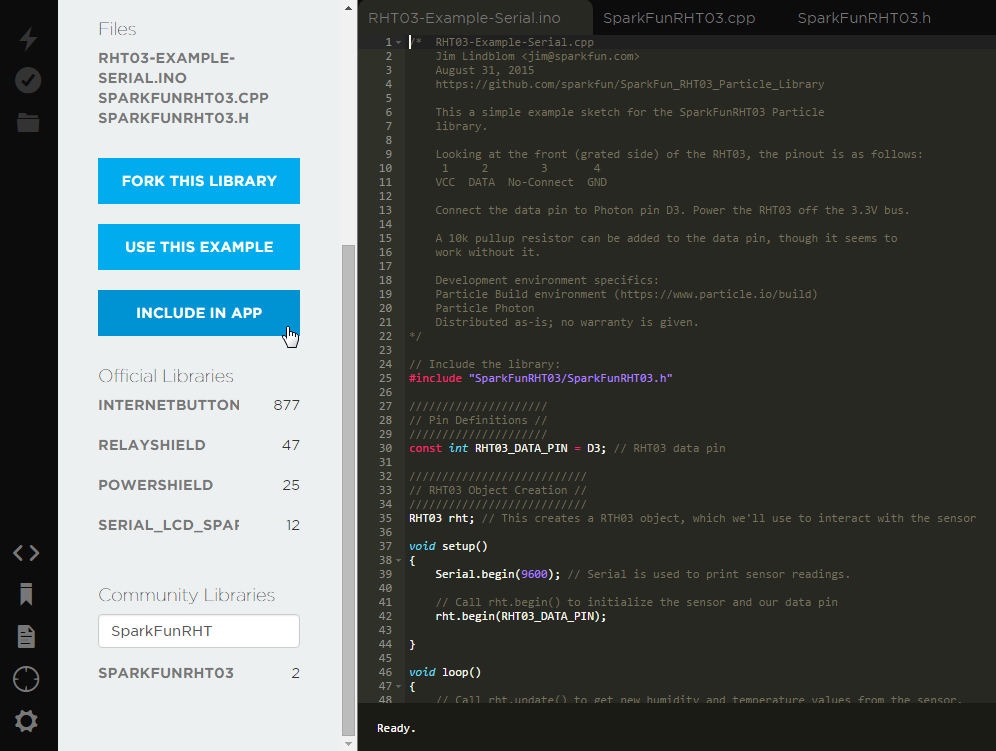
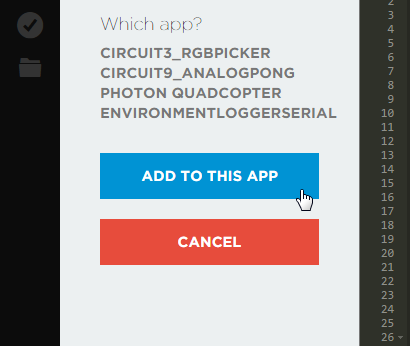
Next, click the INCLUDE IN APP button, and select your new application, and verify by selecting ADD TO THIS APP.
Two lines of code should be appended to your application:
language:c
// This #include statement was automatically added by the Particle IDE.
#include "SparkFunRHT03/SparkFunRHT03.h"
That's the library! Now you can verify and flash.
#include statement won't actually include the library files in your application. Every time you want to include a library, you'll have to go through the process described above.What You Should See
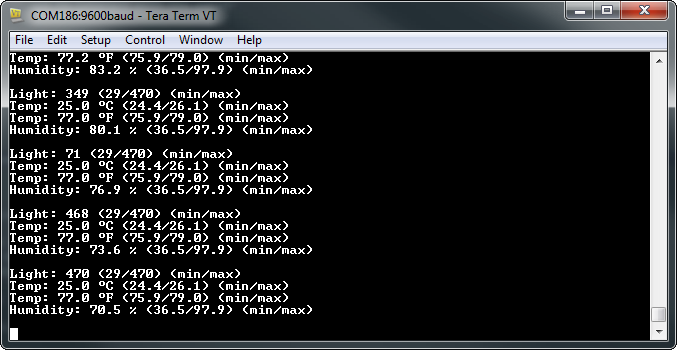
After uploading the code, open up a serial terminal to your Photon RedBoard's port. If you're on a Windows machine, it should look something like "COMN". On Mac or Linux, the port should be something like "/dev/tty.usbmodenNNNN".
Make sure the baud rate is set to 9600. Once the Photon connects (starts pulsing cyan), you should begin to see the light, temperature, and humidity values stream by.
Cover up the light sensor, or shine a flashlight on it. Covering the sensor should make the readings go down -- can you get it to 0?
Breathe on the temperature/humidity sensor. Does the temperature value go up? Can you influence the humidity value as well (don't try too hard -- no pouring water on the sensor!)?
Code to Note
Including the SparkFunRHT03 library gives us access to the RHT03 class. To begin using that class, we need to begin by creating an RHT03 object in the global section:
language:c
RHT03 rht; // This creates a RTH03 object, which we'll use to interact with the sensor
rht is the object we'll use from here on to interact with the sensor. Once that's set up, we can call rht.begin(<pin>) in the setup() function to initialize the sensor. <pin> should be the Photon digital pin connected to the sensor.
language:c
const int RHT03_DATA_PIN = D3; // RHT03 data pin
...
void setup()
{
    ...
    rht.begin(RHT03_DATA_PIN); // Initialize the RHT03 sensor
    ...
}
Finally, we can read the the temperature and humidity values from the sensor. This is a two-step process: (1) read the sensor to update all values, then (2) using get functions to use the value.
Begin by calling rht.update(). If update() succeeds (indicated by returning a 1), you can call rht.tempF(), rht.tempC(), and rht.humidity() to get the values of interest:
language:c
int update = rht.update(); // Read from the RHT
if (update == 1) // If the update was successful:
{
    float humidity = rht.humidity(); // Read humidity into a variable
    float tempC = rht.tempC(); // Read celsius temperature into a variable
    float tempF = rht.tempF(); // Read farenheit temperature into a variable
    ...
}
Troubleshooting
If your terminal program won't let you open the serial port -- citing an error like: "COM port in use". Or, if the COM port has disappeared from a selectable list, try following these steps:
- Close the serial terminal program.
- Reset your Photon RedBoard
- Wait for the RedBoard to connect to WiFi
- Open the terminal program back up and try connecting.
If all you see is a stream of "Error reading from the RHT03", make sure everything is correctly wired up. If you're still not having any luck with the sensor, consider getting in touch with our tech support team. (It's normal for the "Error..." output to show up occasionally -- the RHT03's one-wire interface isn't very robust.)