SparkFun Inventor's Kit for Photon Experiment Guide
 Joel_E_B,
  b_e_n,
  HelloTechie,
  Knutson,
  jimblom,
  RBERLIA
 Experiment 7: Automatic Fish Feeder
Introduction
In this experiment, you’ll learn how to control the physical world with digital world using a servo motor. Having the ability to control devices such as motors, relays, actuators, and other moving objects opens up a world of opportunities. For this particular example, you will learn how to control a servo motor with the Photon RedBoard. Once you learn the basics of controlling a servo motor, you'll automate the task of feeding fish or other small pets by creating an internet-connected auto-feeder.
Parts Needed
You will need the following parts:
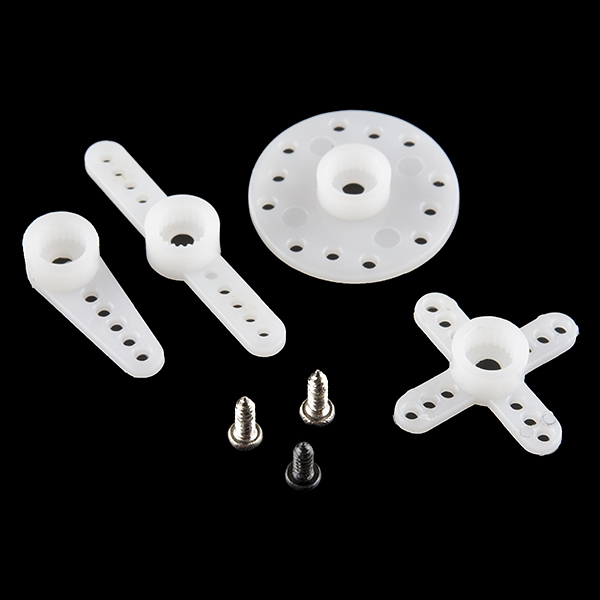
- 1x Servo Motor with Bag of Motor Mounts and Screws
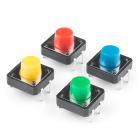
- 1x Button
- 5x Jumper Wire


Along with the parts mentioned above, you will also need a bottle cap or something similar (not included with the Inventor's Kit) to build your fish feeder. The cap from a water or soda bottle will work best.
Tools Needed
You will need the screwdriver included in the Photon SIK. If screwing the bottle cap to a servo motor mount proves to be too difficult, you can substitute hot glue or other adhesives to attach the cap the a motor mount.
Suggested Reading
Before continuing on with this experiment, we recommend you be familiar with the concepts in the following tutorials:
- Pulse-width Modulation (PWM) - Pulse-width modulation is the driving force behind how servo motors work and maintain their precision.
- Servo Motor Background - This portion of our Servo Trigger Hookup Guide has a lot of good background information on the theory behind servo motor operation.
- Particle Servo Library - Particle built the servo library into their default functions, so you don't have to download any extra libraries to use servo motors! Learn about all the functions you can use with Servo.
- Particle Time Library - We will also be using the built-in Particle Time Library to tell our automatic feeder to dispense food at a specific time.
- Particle Cloud Functions - Some of these will be used in the second half of this experiment to expose variables and functions for us to manipulate them over the web.
Hardware Hookup
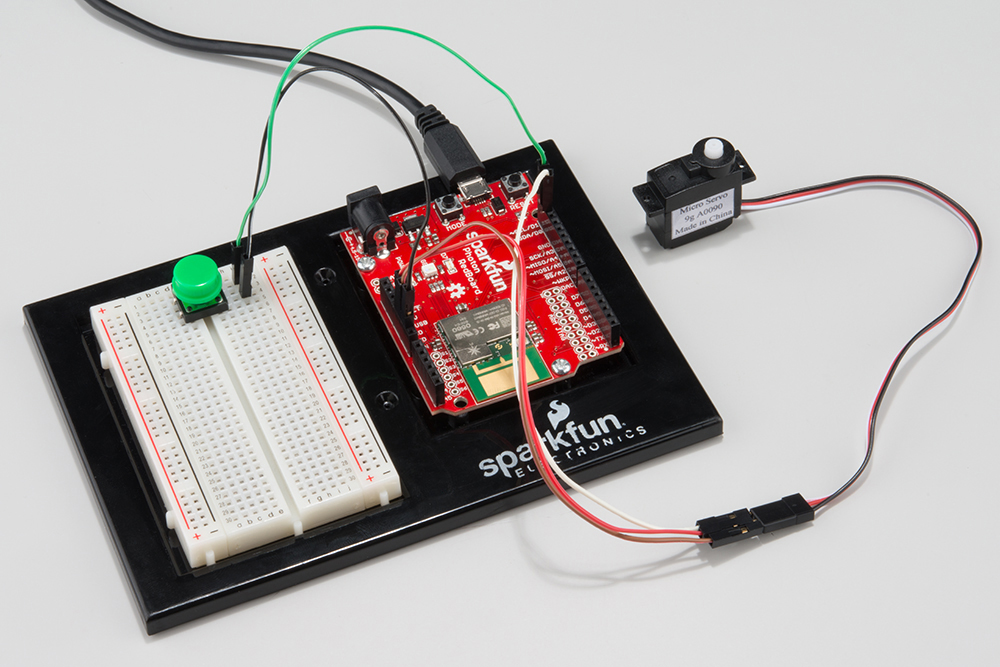
Hook up your circuit as pictured below:

You can plug the jumper wire ends directly into the servo motor header.
The button will only be used for a brief portion of this experiment. After it has served its use, you can leave out the breadboard entirely. Should you wish to leave your fish feeder intact after you've completed all the other experiments, you can hook up the servo to just the Photon RedBoard to make the project more compact.
Photon Code Part 1a
For this experiment, we will need a few different pieces of code. The very first sketch you'll need to upload will put the servo motor in a known state. When first unpacked, it's difficult to know what position the servo motor is in, so this sketch moves the motor all the way to the end of its 180° range of motion. Copy and paste the following code into the Particle IDE, and upload it to the Photon RedBoard.
language:c
/*  SparkFun Inventor's Kit for Photon
    Experiment 7 - Part 1a: Servo Motor
    This sketch was written by SparkFun Electronics
    Joel Bartlett <joel@sparkfun.com>
    August 31, 2015
    https://github.com/sparkfun/Inventors_Kit_For_Photon_Experiments

    This application controls a servo with the press of a button.
    Development environment specifics:
    Particle Build environment (https://www.particle.io/build)
    Particle Photon RedBoard
    Released under the MIT License(http://opensource.org/licenses/MIT)
*/
Servo myservo;// create servo object using the built-in Particle Servo Library

int button = D1;    //declare variable for button
int servoPin = D0;  //declare variable for servo
int pos = 0;        //variable to keep track of the servo's position
bool flag = 1;      //variable to keep track of the button presses

// This routine runs only once upon reset
void setup()
{
  Serial.begin(9600);//Start the Serial port @ 9600 baud

  pinMode(button, INPUT_PULLUP);   // sets button pin as input with internal pullup resistor


  myservo.attach(servoPin);  //Initialize the servo attached to pin D0
  myservo.write(180);        //set servo to furthest position
  delay(500);                //delay to give the servo time to move to its position
  myservo.detach();          //detach the servo to prevent it from jittering

}

// This routine loops forever
void loop()
{
    if(digitalRead(button) == LOW) //if a button press has been detected...
    {
      //This is known a s state machine.
      //It will move the servo to the opposite end from where it's set currently
      if(flag == 1)
        pos = 0;
      if(flag == 0)
        pos = 180;

      myservo.attach(servoPin);
      myservo.write(pos);
      delay(500);           //debounce and give servo time to move
      myservo.detach();

      flag = !flag;         //set flag to the opposite of what it's currently set to
      Serial.println(pos);  //prints to the serial port to keep track of the position
    }

}
What You Should See Part 1a
When you first power your Photon RedBoard, give it a few seconds to connect to the web, then you should see the motor move to the 180° position. Once there, it will stay until the button is pressed. Press the button to move it to 0°. Press the button again and it will move back to the first position. The purpose of this code it to give you an idea for the full range of motion for the servo motor and to help you plan out your fish feeder.
Assemble the Fish Feeder
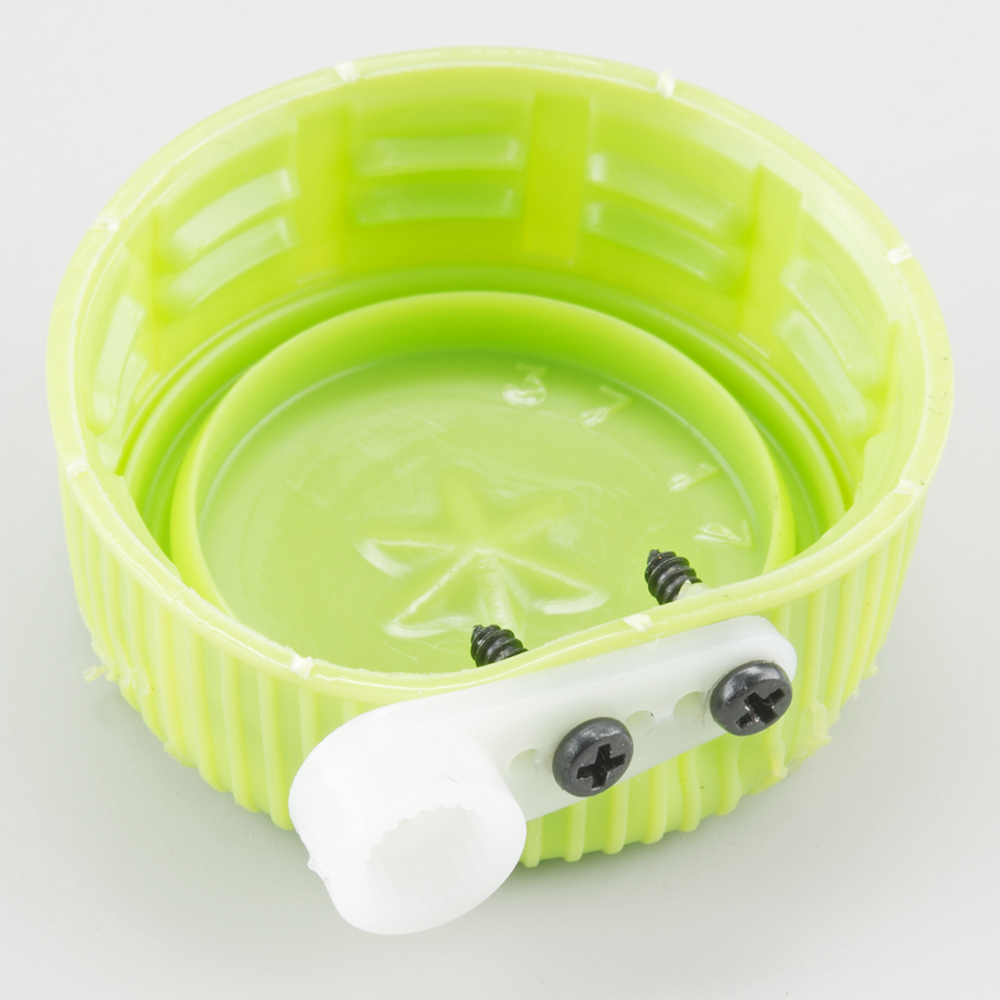
With the above sketch still loaded on your RedBoard, it's time to build the actual feeding mechanism. Take your bottle cap, and screw (or glue) it onto a motor mount of your choosing. We opted for the single arm in this setup.
Next, power your RedBoard with the Micro USB cable, if it isn't already, and open up your favorite Serial Terminal program at 9600 baud. You should now see the position of the servo printed to the screen when the button is pressed.
0
180
0
180
0
180
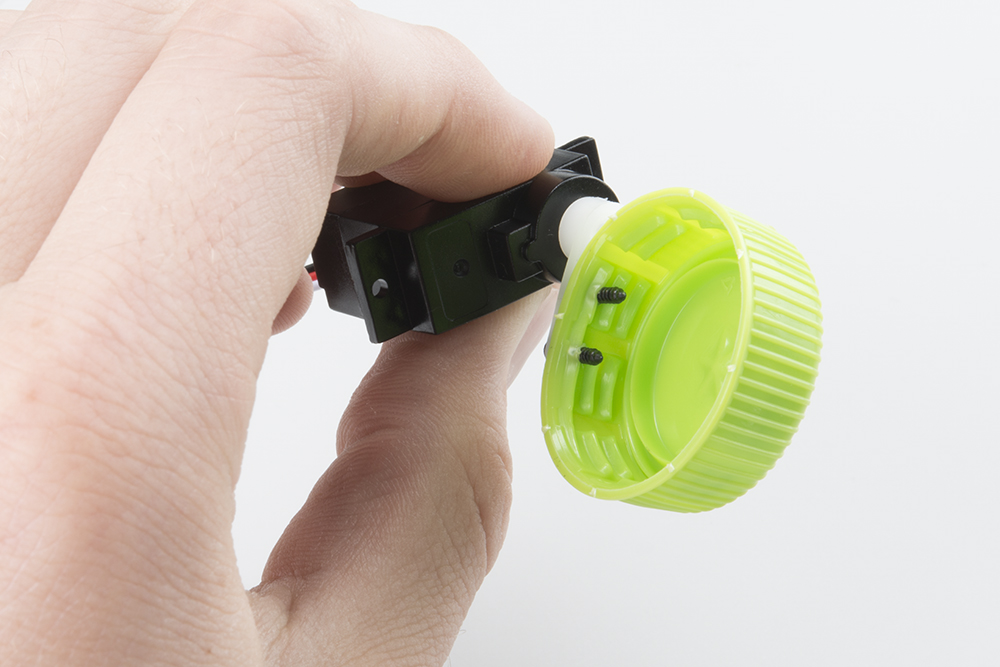
Hold you servo so that the moving portion is facing you and is on the right-hand side of the motor. Now it's time to attach the mount to the servo so that the cap dumps your food into the tank. This may take a few tries to get it exactly right.
Move the servo in the 180° position, using the button. Attach the mount by pressing it onto the servo gear until it is snug. We found that positioning the cap at a 45° angle works well as it holds the food and provides a good angle for dumping the food. If you would like to secure your mount with the provided screw, now would be the best time. You may need to screw then unscrew the cap (making holes in it), attach the mount to the servo, screw the mount, then screw the cap back on to the mount.
With the feeding mechanism attached, press the button again to move into the dumping position (0°). This is your chance to make any adjustments necessary to ensure all of the food gets dumped out.
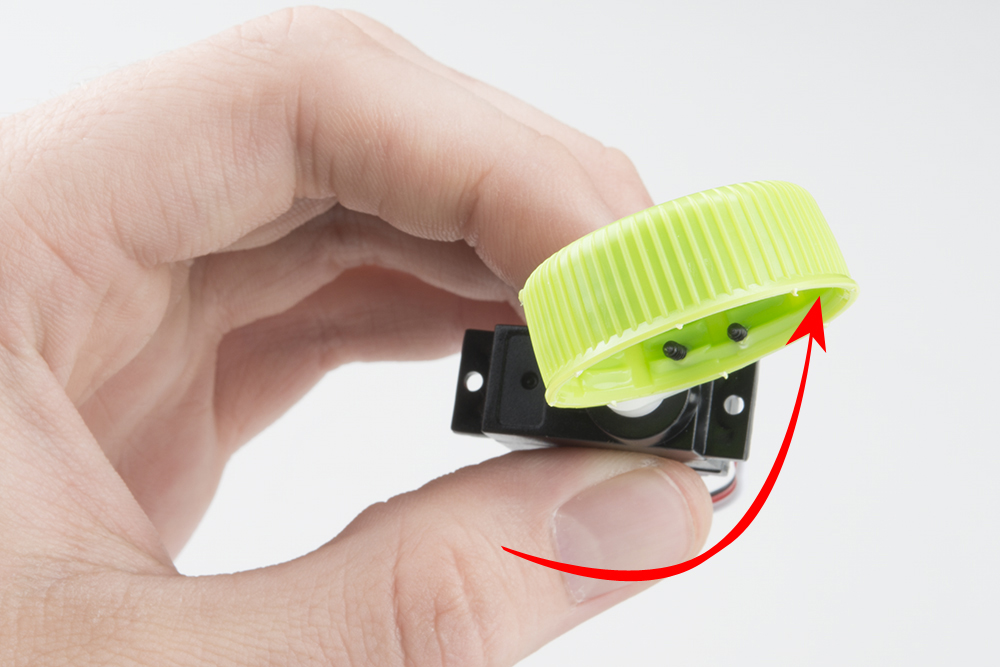
If you attached your cap to the motor mount opposite of the image above, you may have to reverse these steps, starting at position 0° and then dumping at 180°.
Photon Code Part 1b
Now, the code will trigger the servo motor at a specific time instead of on a button press. You will need to change the Timezone to your local timezone. You will also need to select an hour and minute at which you'd like your feeder to activate. Copy, paste, and upload the code below.
language:c
/*  SparkFun Inventor's Kit for Photon
    Experiment 7 - Part 1b: Servo Motor with Time
    This sketch was written by SparkFun Electronics
    Joel Bartlett <joel@sparkfun.com>
    August 31, 2015
    https://github.com/sparkfun/Inventors_Kit_For_Photon_Experiments

    This application controls a servo at a specific time.
    Development environment specifics:
    Particle Build environment (https://www.particle.io/build)
    Particle Photon RedBoard
    Released under the MIT License(http://opensource.org/licenses/MIT)
*/
Servo myservo;// create servo object using the built-in Particle Servo Library

int servoPin = D0;  //declare variable for servo

void setup()
{

  myservo.attach(servoPin);  //Initialize the servo attached to pin D0
  myservo.write(180);        //set servo to 180. This position will hold the food
  delay(500);                //delay to give the servo time to move to its position
  myservo.detach();          //detach the servo to prevent it from jittering

  Time.zone(-6);//Set timezone to Mountain Daylight Time (MDT) Spring/Summer
  //Time.zone(-7);//Set timezone to Mountain Standard Time (MST) Fall/Winter
  //Find out your time zone here: http://www.timeanddate.com/time/map/

  Spark.syncTime();//sync with the Particle Cloud's time

}

void loop()
{
  //This if statement checks to see if it is the correct hour and minute of the day to dispense food.
  //The Photon uses 24 hour time so there's no confusion between 1am and 1pm, etc.
  if(Time.hour() == 15 && Time.minute() == 0)  //feed at 3:00pm
  {
    myservo.attach(servoPin);
    myservo.write(0);//set to a zero position. Dumps food
    delay(2000);
    myservo.write(180);//set to a zero position
    delay(500);
    myservo.detach();//detach to keep the servo from jittering

    delay(60000);//wait the rest of the minute out
  }

}
What You Should See Part 1b
Depending on what time you chose in your code, you should see your servo motor turn to the food dumping position at that time and then return to its original position. Before implementing, you should test your code out by entering a time in the not-so-distant future, so you can see the servo move and verify it is working. Once, verified, program the actual feeding time in and integrate it into your fish tank or other habitat.
This code will only get you through one day of feeding. If you will be gone for say three days and want to feed on the second day, you can use the Time.month() and Time.day() functions to check for a specific time on a specific day of the month to feed. Learn more about all of the time functions at Particle.io.
Code to Note
To prepare the Photon RedBoard to control a servo, you must first create a Servo "object" for each servo (here we've named it "myservo"), and then "attach" it to a digital pin (here we're using digital pin D0). This is creating an instance of the Servo class, which is part of the built-in Servo Library.
Servo myservo;
To use the servo after it's been declared, you must attach it. This tells the Photon to which pin this servo is connected. The detach function relinquishes that pin and stops all signals from being sent to the servo.
myservo.attach(D0);
myservo.detach();
The servo in this kit doesn't spin all the way around, but they can be commanded to move to a specific position. We use the servo library's write() command to move a servo to a specified number of degrees(0 to 180). Remember that the servo requires time to move, so give it a short delay() if necessary.
servo.write(180);
delay(500);
The Time library is also built in to the Photon firmware. However, you may have noticed that it does not need to be initialized before it can be used. You can call any of the Time functions at any point in your code. For example, we call Time.zone(-6) without any reference to Time before that.
Troubleshooting
Servo not moving at all - Make sure you have the correct pins in the correct place. Most all servo are color-coded with Red being Power, Black being GND, and White or Yellow being the Signal.
Servo twitching and jittering a lot - If you do not detach your servo after every call, it may twitch and jitter a lot. If this is a problem, add
myservo.detach()after everymyservo.write()function. Don't forget to re-attach it before writing it again.These servos can only withstand a small amount of abuse. If held in a position it doesn't like for very long, the servo can be permanently damaged. If all the connections are correct, you're detaching after every servo write, and the servo is still misbehaving, you may have damaged your servo. If your servo arrived in this state, contact our customer service team, and they'll help you get a replacement.
Part 2: Feed Your Pets from the Internet
Thus far, we've only used the web to sync the time on our Photon Redboard. Accurate time is great, but let's see if we can't use the Internet more to our advantage. In part 2 of this experiment, you'll learn how to trigger your auto fish feeder from anywhere in the world as long as it and you have an Internet connection.
New Photon Code
Your circuit will be the same as it was in Part 1, but the code will be slightly different. We've added a new line, Spark.function("feed",triggerFeed); and the corresponding function triggerFeed(), explained in the comments below. Copy, paste, and upload the code.
language:c
/*  SparkFun Inventor's Kit for Photon
    Experiment 7 - Part 2: Automatic Fish Feeder
    This sketch was written by SparkFun Electronics
    Joel Bartlett <joel@sparkfun.com>
    August 31, 2015
    https://github.com/sparkfun/Inventors_Kit_For_Photon_Experiments

    This application controls a servo at a specific time and over the web.
    Development environment specifics:
    Particle Build environment (https://www.particle.io/build)
    Particle Photon RedBoard
    Released under the MIT License(http://opensource.org/licenses/MIT)
*/
Servo myservo;// create servo object using the built-in Particle Servo Library

int servoPin = D0;  //declare variable for servo

int myMinute = 0;  //00
int myHour = 9; //9 am
int myDay = 14;
int myMonth = 8;//August


void setup()
{

  myservo.attach(servoPin);  //Initialize the servo attached to pin D0
  myservo.write(180);        //set servo to 180. This position will hold the food
  delay(500);                //delay to give the servo time to move to its position
  myservo.detach();          //detach the servo to prevent it from jittering

  Time.zone(-6);//Set timezone to Mountain Daylight Time (MDT) Spring/Summer
  //Time.zone(-7);//Set timezone to Mountain Standard Time (MST) Fall/Winter
  //Find out your time zone here: http://www.timeanddate.com/time/map/

  Particle.syncTime();//sync with the Particle Cloud's time

  // We are also going to declare a Spark.function so that we can trigger our feeder from the cloud.
  Particle.function("feed",triggerFeed);
  // When we ask the cloud for the function "feed", it will employ the function triggerFeed() from this app.

}

void loop()
{
  //The Photon uses 24 hour time so there's no confusion between 1am and 1pm, etc.
  //This time we are checking for a specific date and time.
  if(Time.month() == myMonth && Time.day() == myDay) //check the date, if it's not the right day, don't bother with the time.
  {
      if(Time.hour() == myHour && Time.minute() == myMinute) //check the time
      {
        myservo.attach(servoPin);
        myservo.write(0);//set to a zero position. Dumps food
        delay(2000);
        myservo.write(180);//set to a zero position
        delay(500);
        myservo.detach();//detach to keep the servo from jittering

        delay(60000);//wait the rest of the minute out
      }
  }

}


int triggerFeed(String command)
{
/* Particle.functions always take a string as an argument and return an integer.
Since we can pass a string, it means that we can give the program commands on how the function should be used.

In this case, telling the function "feed" will trigger the servo.
Then, the function returns a value to us to let us know what happened.
In this case, it will return 1 if the function was called and -1 if we
received a totally bogus command that didn't do anything.
This does not check for any mechanical failures however. Only code.
*/

    if (command=="feed")
    {
        myservo.attach(servoPin);
        myservo.write(0);//set to a zero position. Dumps food
        delay(2000);
        myservo.write(180);//holding position
        delay(500);
        myservo.detach();
        return 1;
    }
    else
        return -1;
}
What You Should See
When you register a function or variable in the cloud, you're making a space for it on the internet. There's a specific address that identifies you and your device. You can send requests, like GET and POST requests, to this URL just like you would with any webpage in a browser.
The code below will give you a webpage from which you can trigger the auto-feeder. Copy and paste the code below into your favorite text editor that can save files as .html.
<!DOCTYPE>
<html>
  <body>
  <center>
  <br>
    Feed your pets anywhere you have an Internet connection!
    <br>
    <br>
    <form name= "input" action="https://api.particle.io/v1/devices/your-device-ID-goes-here/feed?access_token=your-access-token-goes-here" method="post">
    <input type= "submit" name="%" value= "feed" style="height:50px; width:150px" >
    </form>
  </center>
  </body>
</html>
Edit the code in your text file so that "your-device-ID-goes-here" is your actual device ID, and "your-access-token-goes-here" is your actual access token. These things are accessible through your IDE at build.particle.io. Your device ID can be found in your Devices drawer (the crosshairs) when you click on the device you want to use, and your access token can be found in Settings (the cogwheel).
Open that .html file in a browser. You'll see a very simple HTML form that allows you to call the triggerFeed functions we exposed earlier.
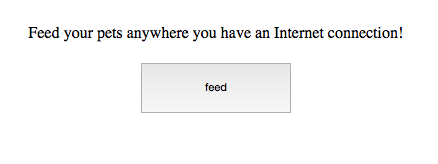
You'll get some info back after you submit the page that gives the status of your device and lets you know that it was indeed able to post to the URL. If you want to go back, just click "back" on your browser.
Similarly, you can also call this function by opening a Command Line Terminal and typing
particle call device_name feed feed
Remember to replace device_name with either your device ID or the casual nickname you made for your device when you set it up.
Now, if you need to trigger your autofeeder ahead of schedule for any reason, you can do so with the click of a button on your smartphone or computer.
Code to Note
The Particle.function line is allowing us to "expose" that function to the rest of the Internet. This allows us to trigger the feeder from other mediums such as a webpage or the command line. You can learn more about the Particle Cloud Functions here.
Troubleshooting
- If you cannot get your servo to move via the web or command line interface, you may be calling the wrong device ID. If you have more than one Photon, Photon RedBoard or Core, then it is possible that the device IDs may have been mixed up at some point.
- Another problem could be your access token. If you get an error saying the access token is expired, visit the Particle IDE at build.particle.io and refresh your access token.
Going Further
Need to feed your fish for multiple days? Add a second servo, or grab a continuous rotation servo to create a feeding mechanism that only dispenses a small portion of its food reserves at a time.
You could then try to create a webpage app that allows you to change the feeding time on the fly without having to reprogram your Photon RedBoard.