Photon Development Guide
 jimblom
Particle Build (Online)
The Particle Build IDE is an always-online, browser-based portal where your Photon code can be edited, saved, and shared. This cloud-based IDE handles code compilation and flashes the built binaries to your Photon over-the-air. You don't even need your Photon next to you to update its program!
To load the Build IDE head over to build.particle.io.
If it's your first time working with Build you may have to create an account, otherwise log in to one you've already created.
Tour of the Build IDE
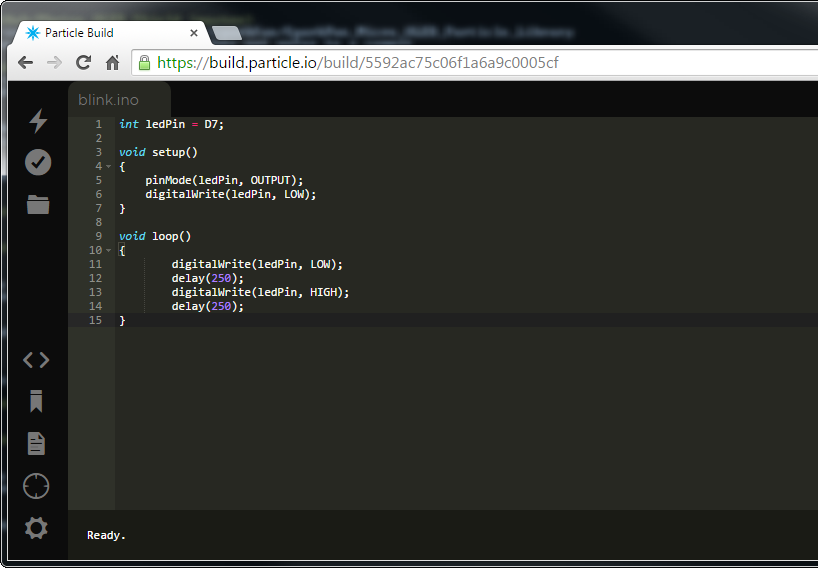
The majority of the Build IDE's window is taken up by your code view -- as it should be. To navigate around the Build IDE there are buttons on the left side of the window. Hover over any button to get a brief overview of what it does -- you'll quickly become familiar with all of these icons.
 -- Flash: Remotely upload your application code to the selected device.
 -- Verify: Compile your code and check for errors. Any compilation errors will be listed under the code.
 -- Save: Save early. Save often! This'll save your app, which you'll be able to find under the Code view.
 -- Code: This button will list of all of your saved apps. From there you can click one to load it.
 -- Libraries: Opens a list of libraries -- those you've contributed and those added by the community.
 -- Docs: Your go-to link for everything from the IDEs, to firmware API, to hardware datasheets.
 -- Devices: Click here to select which Photon (or Core, or Electron) you want to flash code to.
 -- Settings This is where you can log out, change your password, or find your access token.
Selecting Your Device, Programming Blink
Before you can upload any code, you have to tell the IDE which of your Photon's you'd like to flash it to. Click on the "Devices" tab to see your list of Photons, Cores, and P1 modules.
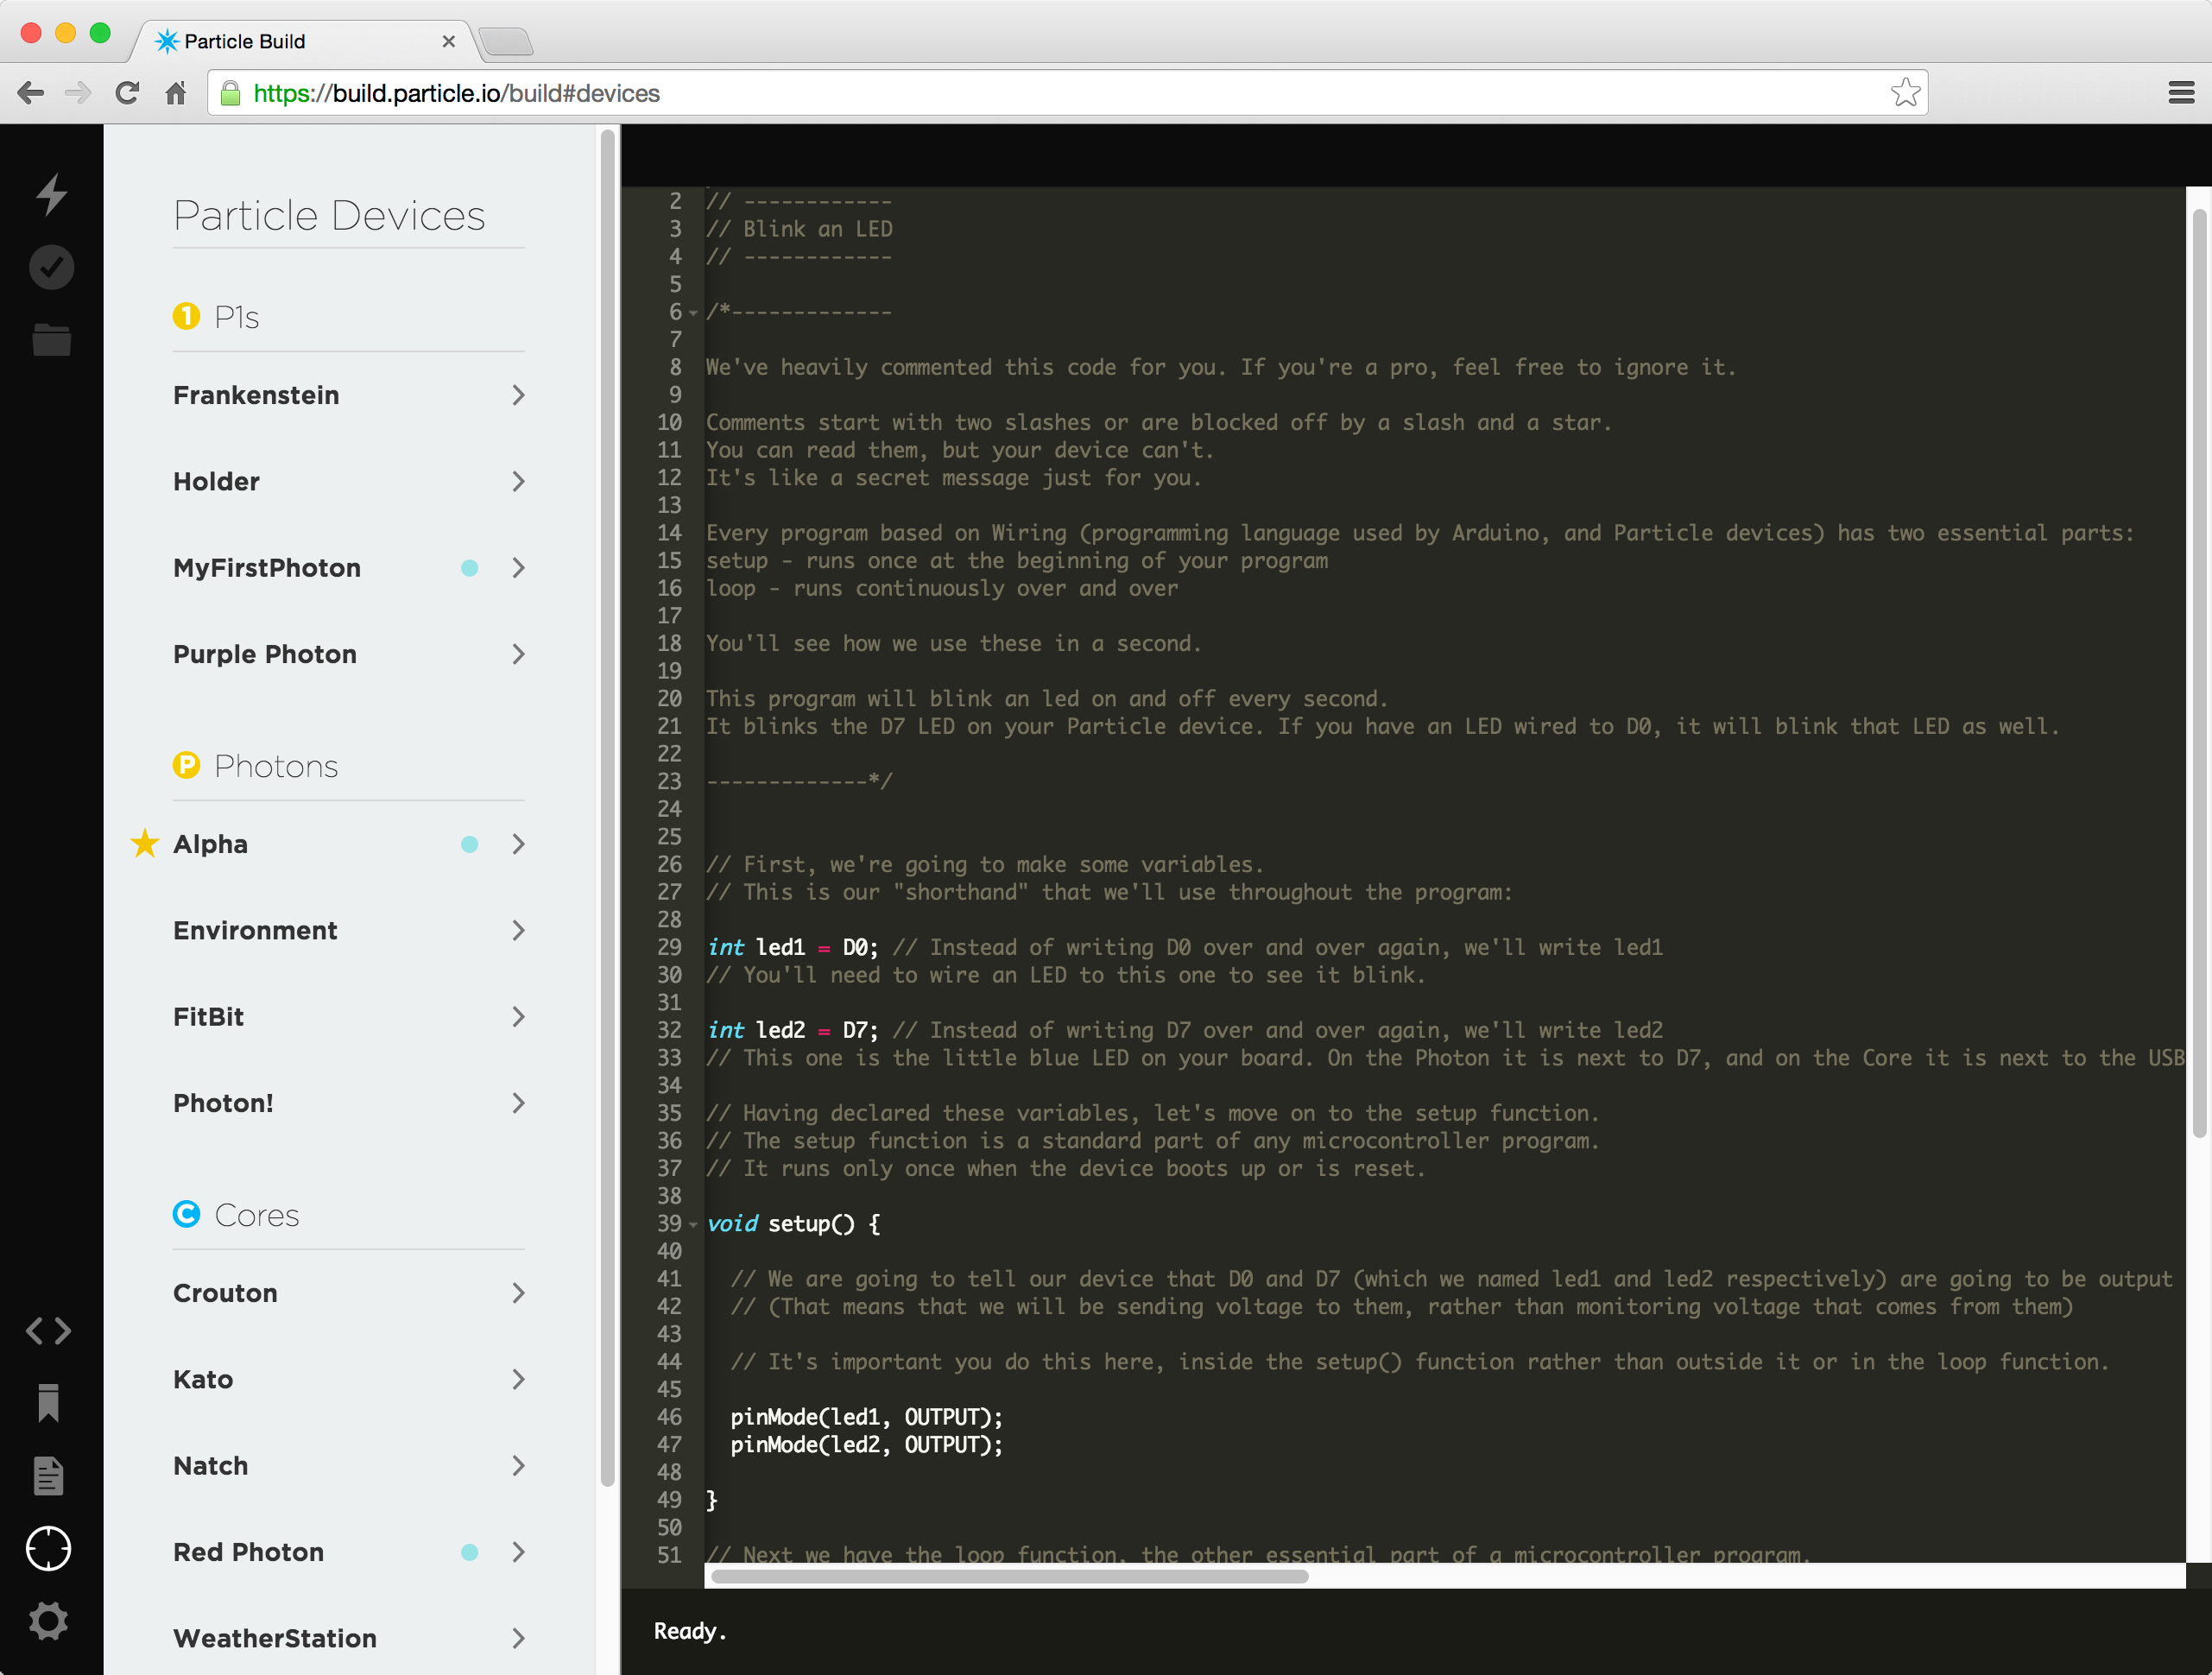
Mark the Photon you want to program with a yellow star, by clicking to the left of the name. You can only select one device at a time.
After selecting your device, navigate over to the Code tab, and either create a new App or select one of the examples. For your first try, the Blink and LED example is always a good tool to test with.
Finally, click the Flash button in the top-left corner and watch the bottom status-bar area of the IDE. The text down there will keep you up-to-date on how the flash process is progressing. Your Photon's RGB LED will also display it's status -- it should go from breathing cyan (connected to cloud), to blinking magenta (receiving flash), to blinking green (update done, connecting to WiFi), back to breathing cyan.
Including Libraries
Particle's community-contributed libraries allow you to easily plug proven code to your application with the click of a button. Adding a library to an app can be somewhat confusing the first time through, so here's a quick rundown.
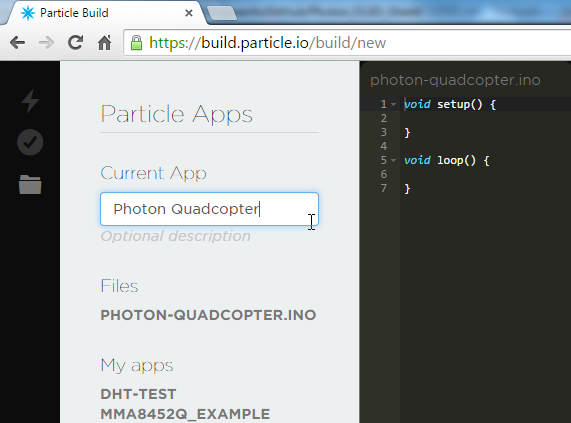
Create an App -- Before you can add a library to an application, you have to have one created for it. Switch to the Code tab, and click Create New App. Name it whatever you please, you can always change it. Press enter to create the app.
Find your Library -- Navigate over to the Libraries tab. Then, using the search box, find the library you're looking for. For example, to add our LSM9DS1 library to your app, search for "SparkFunLSM9DS1".
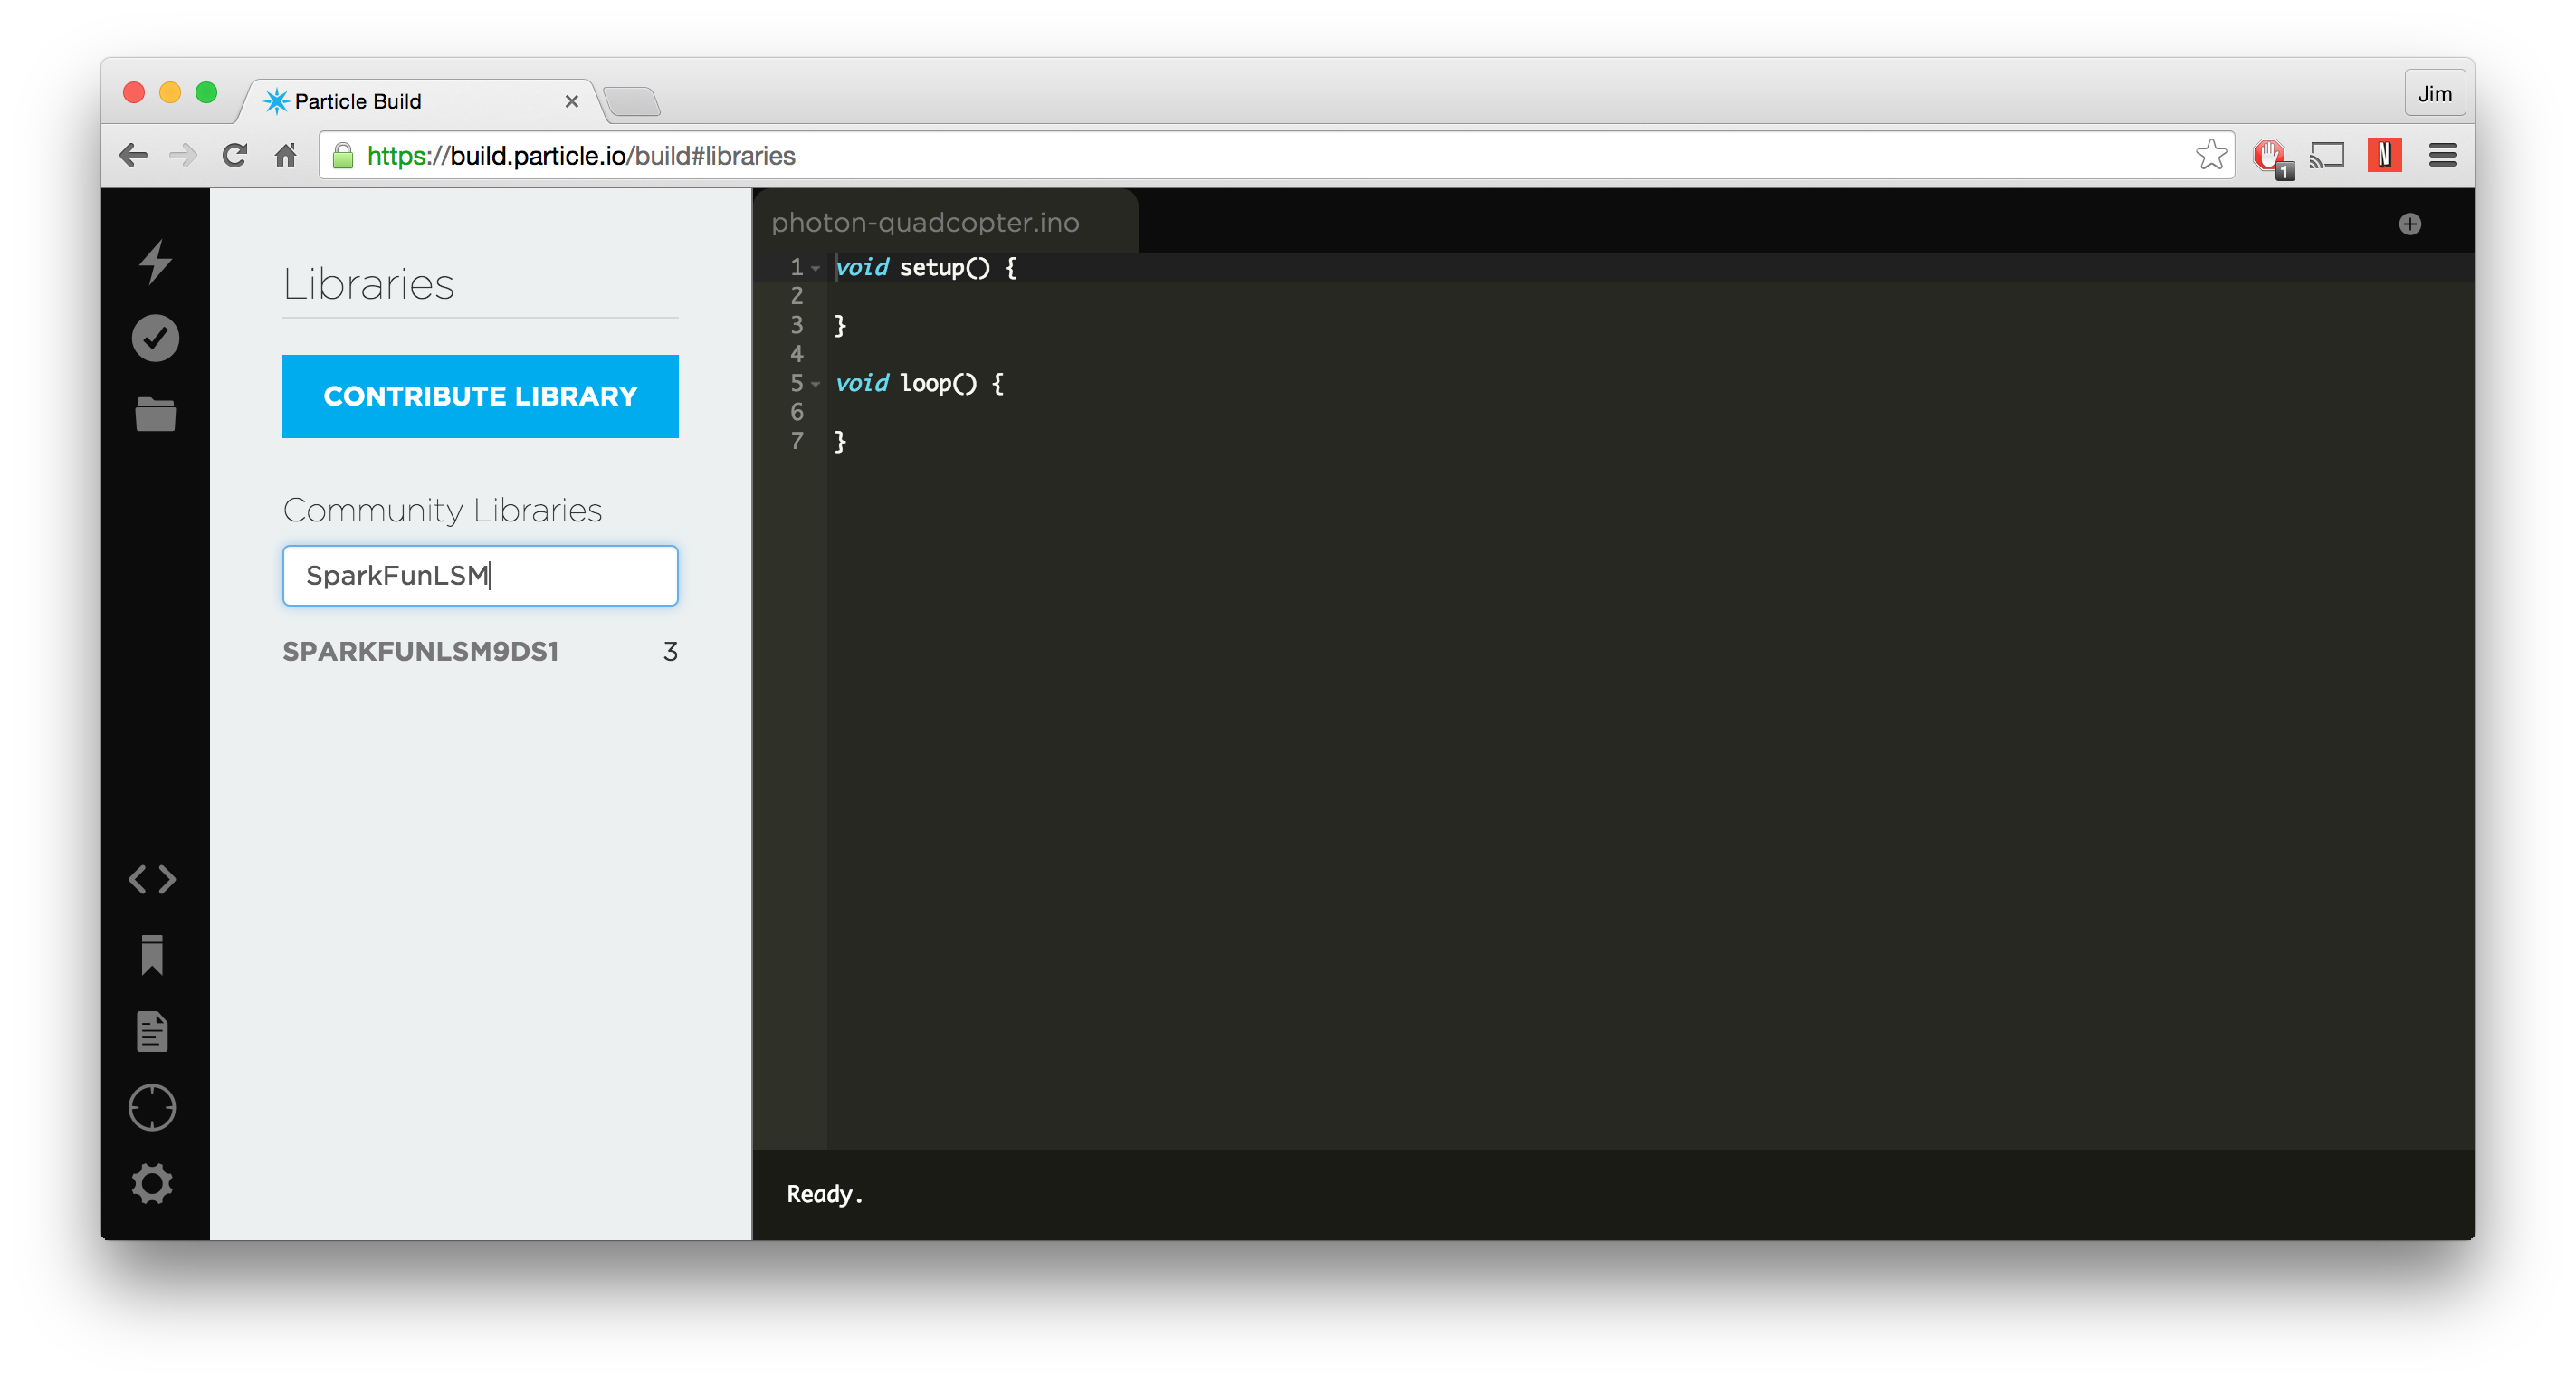
Select the Library -- Once you've found the library you're looking for, click on it to load up an overview of it. Here you'll be able to view all of the library's contents, and even get some information about what the library does.
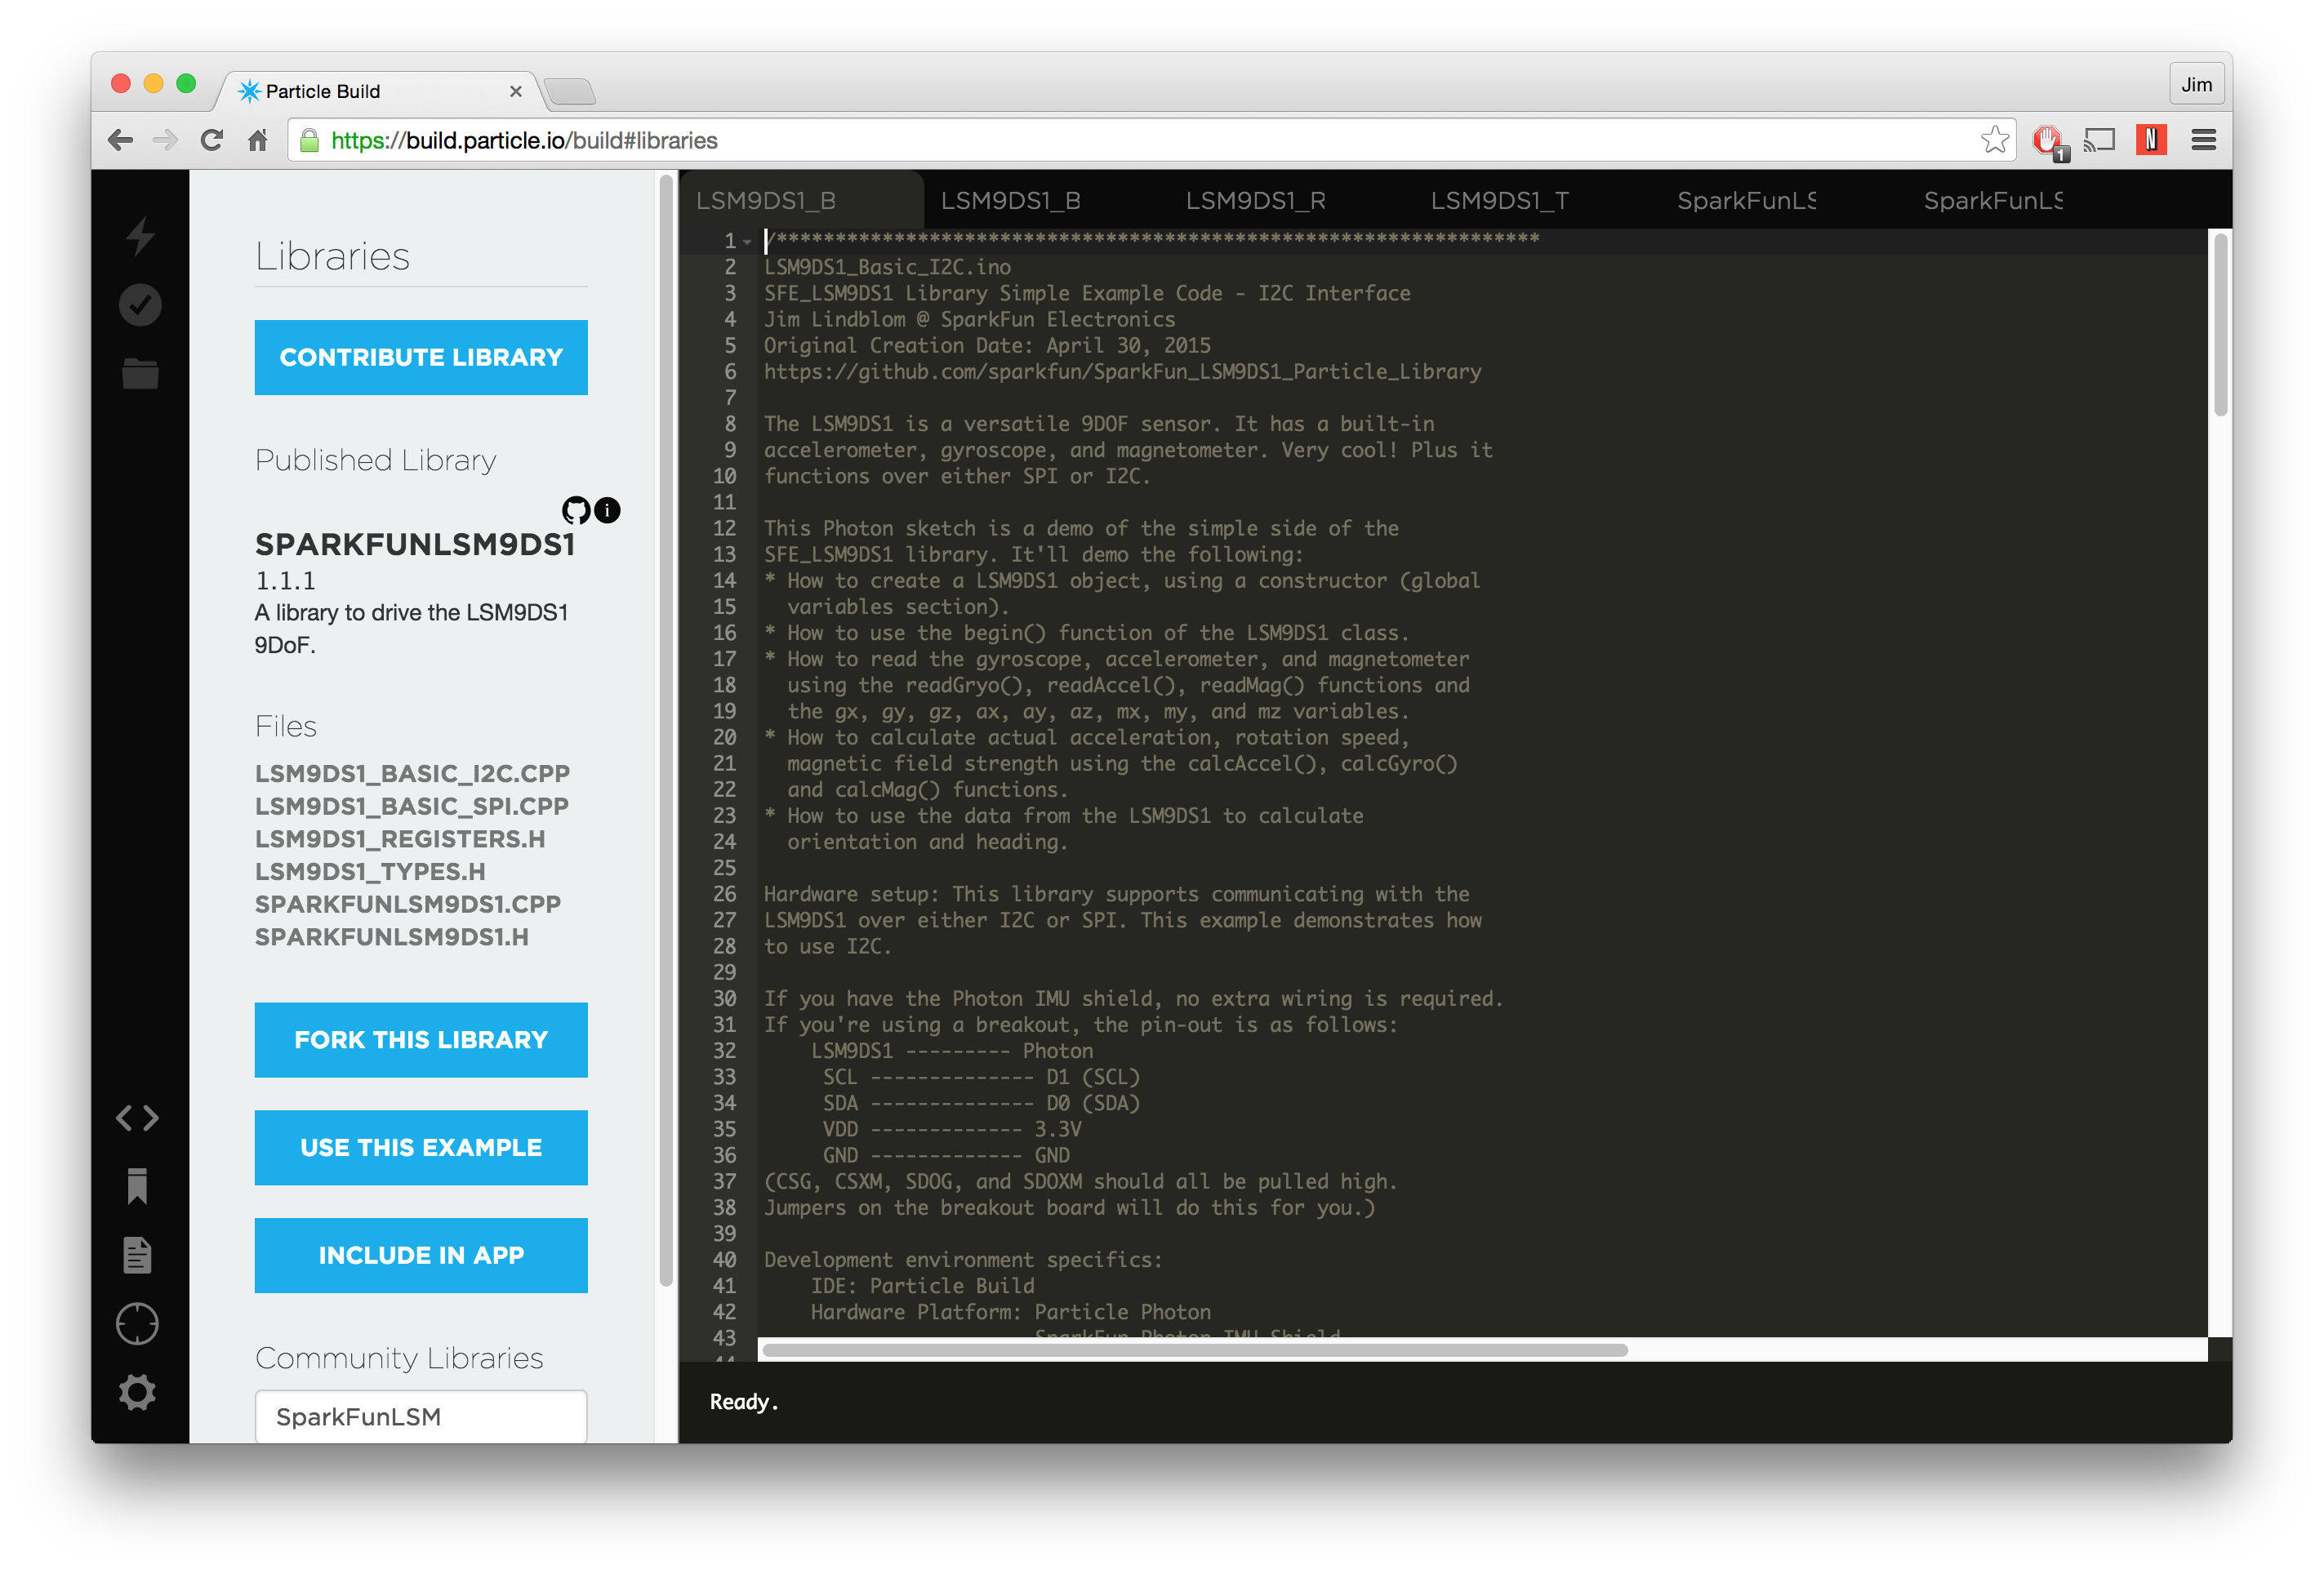
Include in App -- Finally, click the Include in App button, then click the app it's destined for. To verify, click Add to this App. Magically, an #include statement will appear at the top of your app.
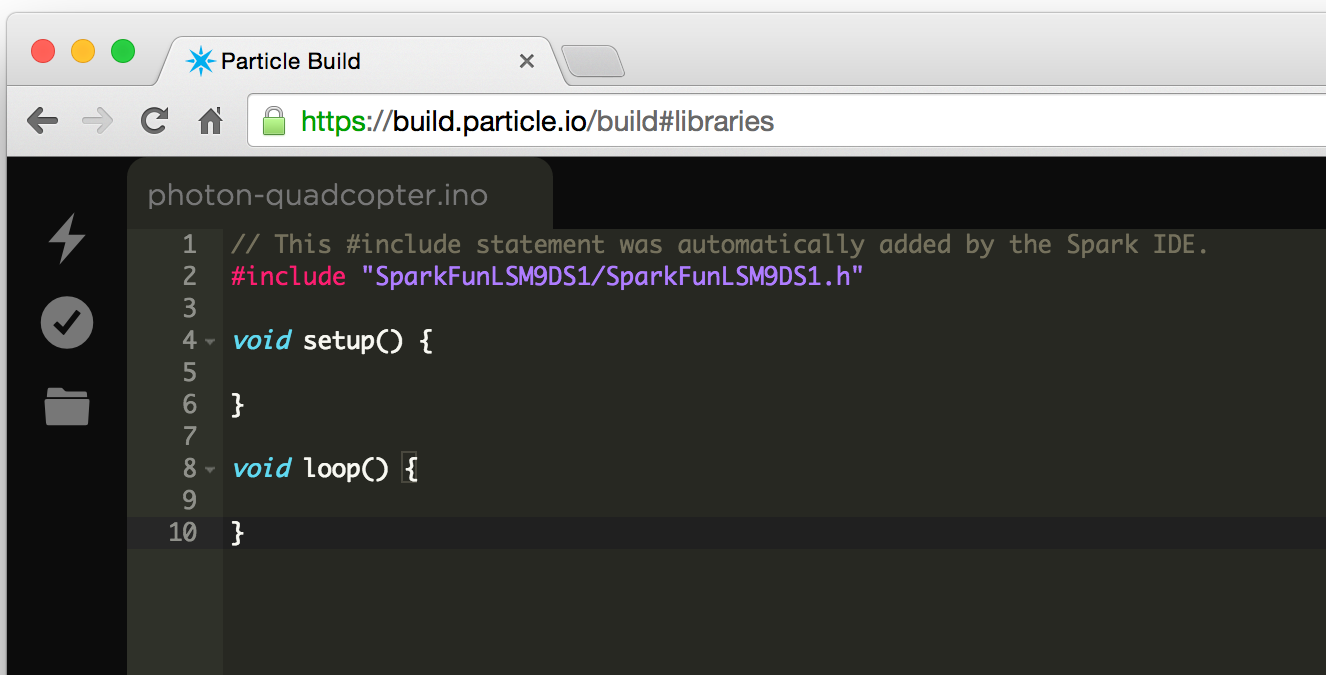
Note that simply copy/pasting the #include statement won’t actually add the library to your app, you need to go through the "Include in App" process.
For more information on using the Particle Build IDE, check out Particle's Build documentation. There you can learn more about contributing libraries, checking your memory usage, and using keyboard shortcuts.