Getting Started with the MyoWare® 2.0 Muscle Sensor Ecosystem
 QCPete,
  bboyho
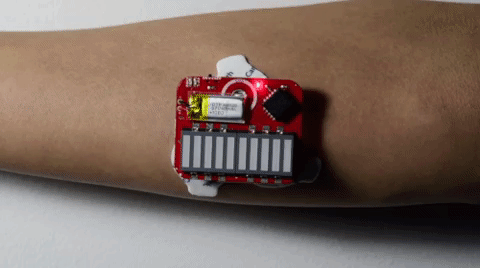
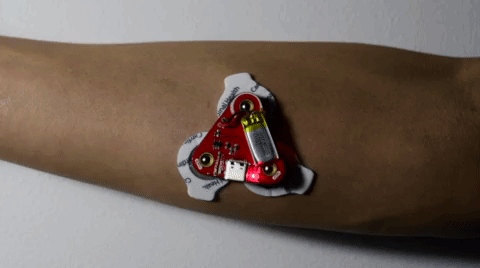
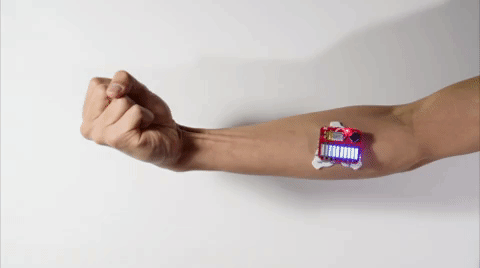
Standalone Example 0: LED(s)
To test the MyoWare 2.0 Muscle Sensor without an Arduino, you could use the MyoWare 2.0 Power Shield or the LED Shield. Both shields have a built-in battery removing the need to solder a power source to the sensor. After stacking the boards together and sticking it to a muscle group, flip the power switch to the ON position. Start flexing the muscle to see if you can light up the ENV LED on the Power Shield or the LED segments on the LED Shield!
If you are using the MyoWare 2.0 Power Shield, observe the ENV LED. The LED will be off. As you flex, the voltage from the ENV pin increases. As a result, the ENV LED will start to light up and increase in intensity as you flex the muscle. If you look closely between the stacked boards, you will also notice the ENV LED on the MyoWare 2.0 Muscle Sensor light up.
If you are using the MyoWare 2.0 LED Shield, observe the LED segments. The LED segments will be off. As you flex, the voltage from the ENV pin increases. As a result, the LED segments will start to light up. The more you flex the muscle, the more LED segments will light up. When fully flexed, all 10x LED segments will be on.
For users that cut the jumper labeled as MODE (i.e. enabling dot mode) on the MyoWare 2.0 LED Shield, you will see a different effect. A leading LED bar (i.e. "dot") will light up and traverse the segments. Any trailing LEDs behind it will be turned off instead of filling in with light. When fully flexed, one LED segment should be on.