Qwiic SHIM Kit for Raspberry Pi Hookup Guide
 bboyho
 Introduction
The Qwiic SHIM Kit for Raspberry Pi gets you started with some of the basics surrounding I2C and Python on your Raspberry Pi. This tutorial will go over connecting Qwiic-enabled devices, installing their Python packages, and running the example code.

SparkFun Qwiic SHIM Kit for Raspberry Pi
KIT-16987Required Materials
To follow along with this tutorial, you will also need a few pieces of hardware. Single board computers with the Raspberry Pi 40-pin GPIO standard header will work. We'll be using a Raspberry Pi throughout this tutorial. If you have not worked with a Raspberry Pi, we recommend pairing the Qwiic SHIM Kit with a Raspberry Pi 4 kit. At a minimum, you'll need a basic kit. However, if you need keyboard and mouse combination, we recommend getting the desktop kit.
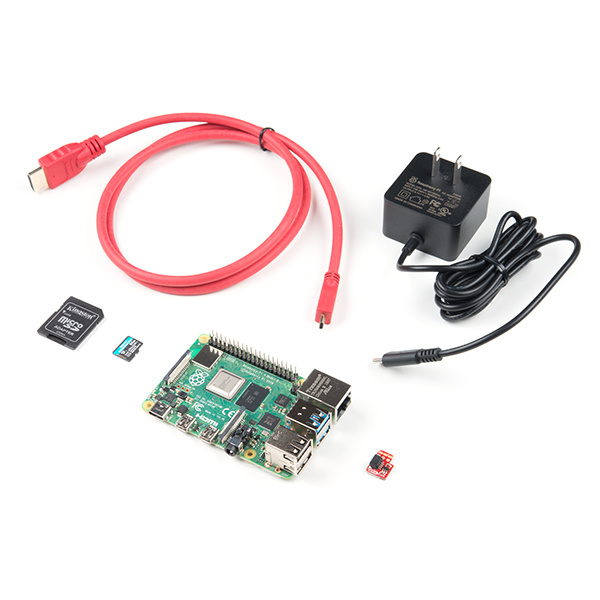
SparkFun Raspberry Pi 4 Basic Kit - 4GB
KIT-16384
Optional Materials
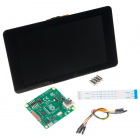
You have several options when it comes to working with the Raspberry Pi. Most commonly, the Pi is used as a standalone computer, which requires a monitor. The following parts can be used with the Pi 4 if you opt for a small display. To save on costs, the Pi can also be used as a headless computer (without a monitor, keyboard, and mouse). This setup has a slightly more difficult learning curve, as you will need to use the command-line interface (CLI) from another computer.
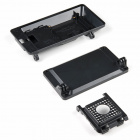
SmartiPi Touch 2
PRT-16302Suggested Reading
If you aren't familiar with Qwiic, we recommend reading here for an overview.
 |
| Qwiic Connect System |
We also recommend taking a look at some of our other tutorials and familiarizing yourself with some of these topics and parts. We will end up working with the Raspberry Pi and Python programming language.
Raspberry Pi 4 Kit Hookup Guide
Python Programming Tutorial: Getting Started with the Raspberry Pi
I2C
Serial Terminal Basics
AVR-Based Serial Enabled LCDs Hookup Guide
SparkFun 9DoF IMU (ICM-20948) Breakout Hookup Guide
Qwiic SHIM for Raspberry Pi Hookup Guide
Hardware Assembly
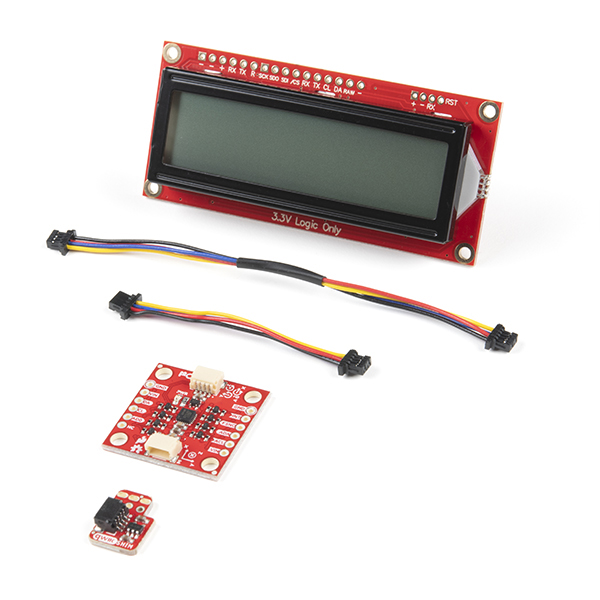
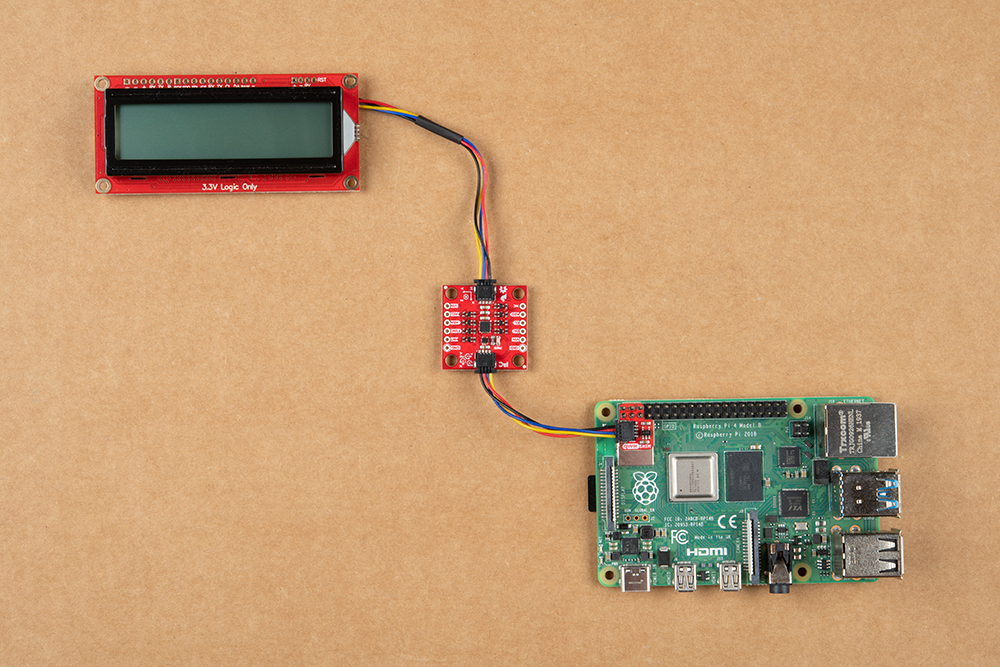
The hardware that is included in this kit is a 16x2 SerLCD with RGB backlight, 9DoF IMU (ICM-20948), Qwiic SHIM, and Qwiic cables. The Qwiic connector color may vary. This should not affect the overall functionality of the boards.
Connecting Qwiic devices to the Raspberry Pi makes it even easier than ever with the Qwiic SHIM. Slide the Qwiic SHIM into the Raspberry Pi's header so that the square PTH pad is aligned with pin 1.

At this point, connect the Qwiic cable between the boards. Insert the shorter Qwiic cable between the Qwiic SHIM and 9DoF's Qwiic connectors. Then insert the longer Qwiic cable between the 9DoF and Qwiic SHIM. The length of the cable between the boards does not really matter so you could insert the cables any way that you would like as well.
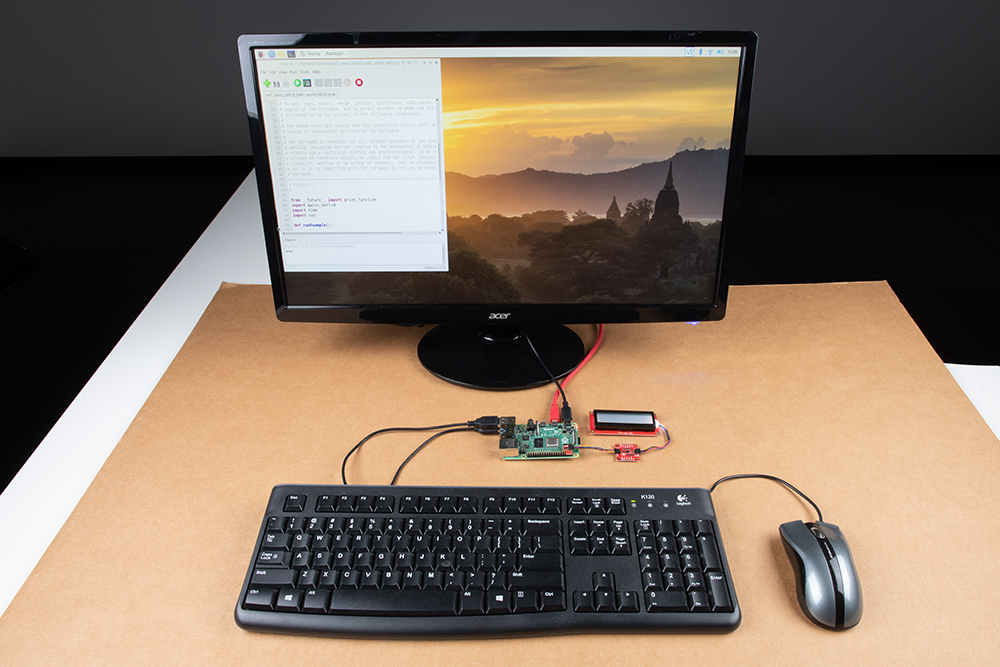
Then connect all the necessary peripherals to your Raspberry Pi. In this case, we connected a keyboard, mouse, HDMI monitor, and a power supply.
Configure Your Pi
We are going to assume that you already have a Raspberry Pi up and running with Raspbian. We'll also assume that it is connected to the Internet. If not, check out our starter kits and tutorials on setting up a Raspberry Pi.
Raspberry Pi 4 Kit Hookup Guide
Make sure to update the image so that we have the latest distribution. Enter the following commands in the command line individually to update your image.
language:bash
sudo apt-get update
sudo apt-get dist-upgrade
sudo.User Configuration Settings
Once you are set up, I highly recommend changing your password. At this point, we don't want unsavory characters sneaking into your system using the default login: (username: pi, password: raspberry).
Raspberry Pi Configuration via Desktop GUI
To change the password using the Desktop GUI, head to the Raspberry Pi Start Menu > Preferences > Raspberry Pi Configuration > System > Change Password...
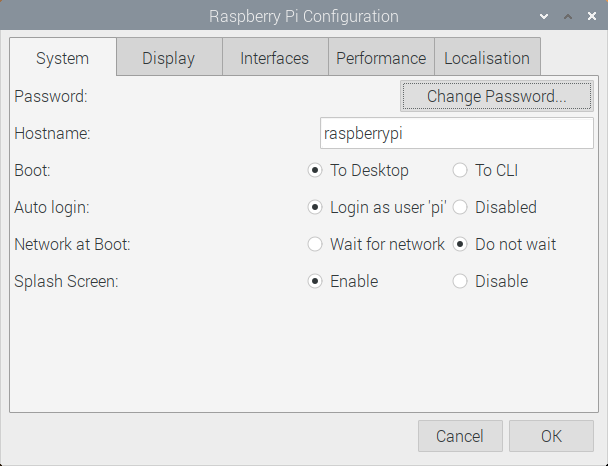
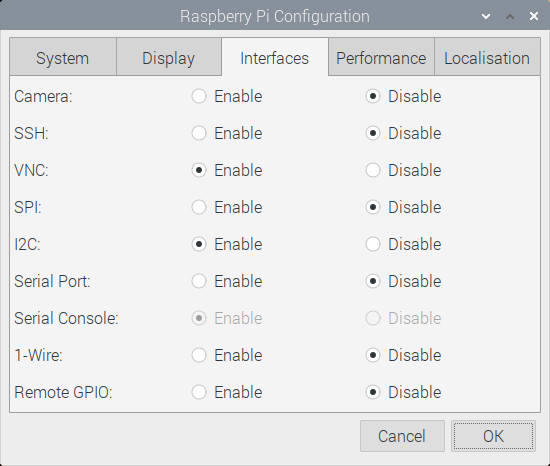
At this point, you can also head to the Interfaces tab and set I2C to Enabled. Once the settings have been changed, click OK.
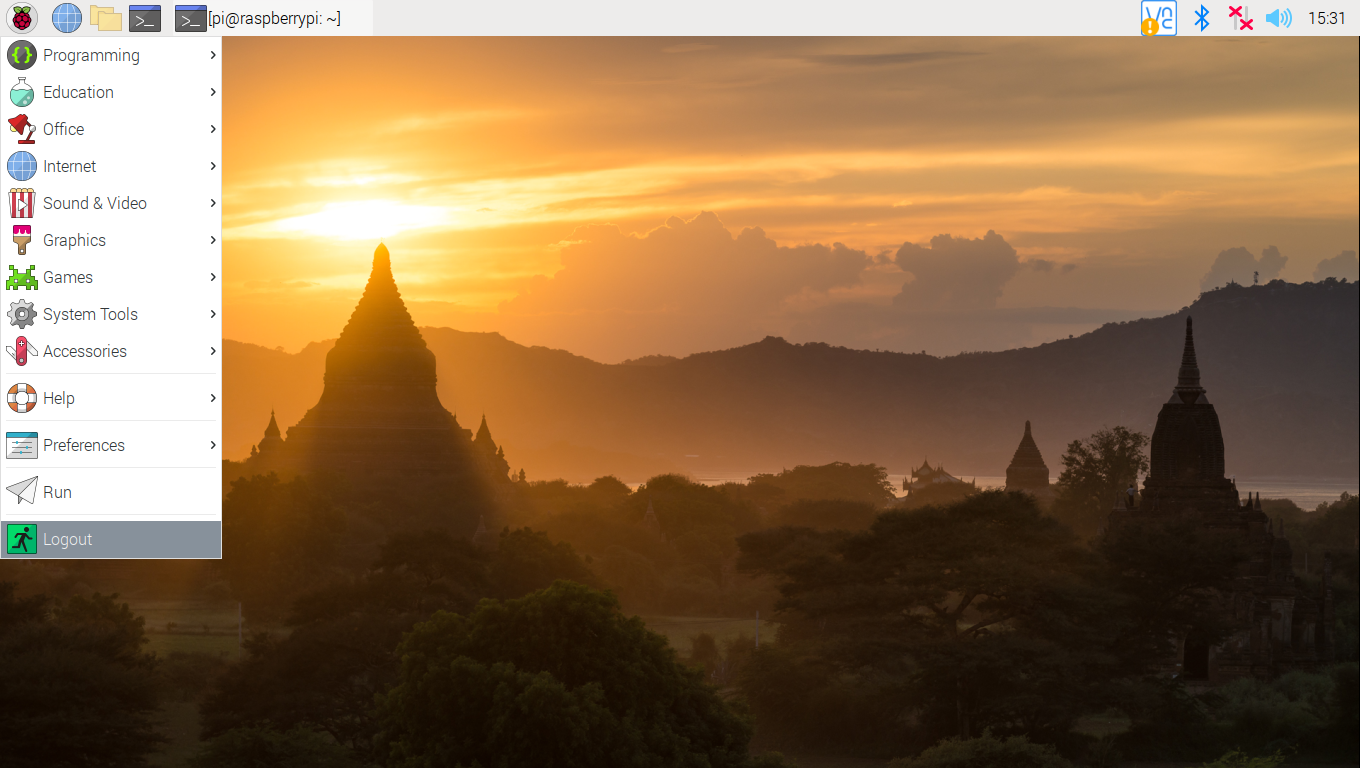
You will need to restart your Pi before the settings can take effect. Head to Raspberry Pi Start Menu > Logout > Reboot
raspi-config Tool via Terminal
The raspi-config tool is a quick way to change your password as well as setup the network, language, keyboard, etc. Type the following command using the command line and then go through the menus to update your information.
language:bash
sudo raspi-config
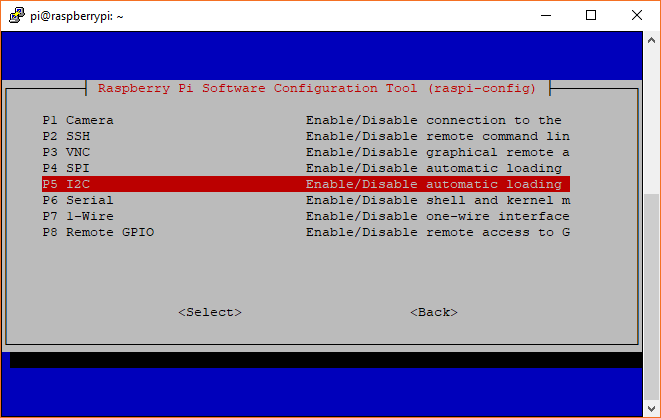
You'll want to enable the I2C pins using the tool to read the sensors on the I2C bus.
You will need to restart your Pi before the settings can take effect. After exiting raspi-config, let's reboot your Pi with the following command.
language:bash
sudo reboot
SD Cards and Writing Images
Getting Started with the Raspberry Pi Zero Wireless
Headless Raspberry Pi Setup
How to Use Remote Desktop on the Raspberry Pi with VNC
Python
- Raspbian Pi OS Full (32-bit) version 10, Kernel version 5.4 (Released 12/2/2020)
- Python version 3.7.3
- pip 20.3.3 for Python 3.7
Other versions may affect how some of the steps in this guide are performed.
Indentation
In many programming languages, we indent things to make things easier to read. In Python, those indents are part of the code. Instead of putting brackets around your loop or if() statements, you just indent that entire chunk with a leading whitespace. In other words, you have to make sure your indents are correct. I also recommend not using your keyboard's TAB button to indent as various programs will read it differently (and usually incorrectly).
Commenting
Another thing to keep in mind is comments. In Python, the symbol "#" is used to denote that the line is a comment. Unlike many other languages there is no official multi-line comment available. So you'll just have to get use to typing # for each line when writing large comments.
Python Versions and Installing PIP
There are also 2 commonly used Python versions. Even after Python 3 came out many people continued to use 2.7 for many years. Part of the reason is that Python 3 improved on some things and in the process made it not backwards compatible. As of January 1st, 2020, Python 2 is no longer supported. For our example we will be using Python 3.7. To see what version of Python your Pi is using, open a command line and type each of the following commands individually to check.
language:bash
python --version
python -m pip --version
If you are not using Python 3, then we'll need to open the */.bashrc file and add an alias.
First, you will need to update the python installation package by running the following command to install pip for Python 3. Execute the following commands.
language:bash
sudo apt-get install python3-pip
Type the following command to open the file.
language:bash
nano ~/.bashrc
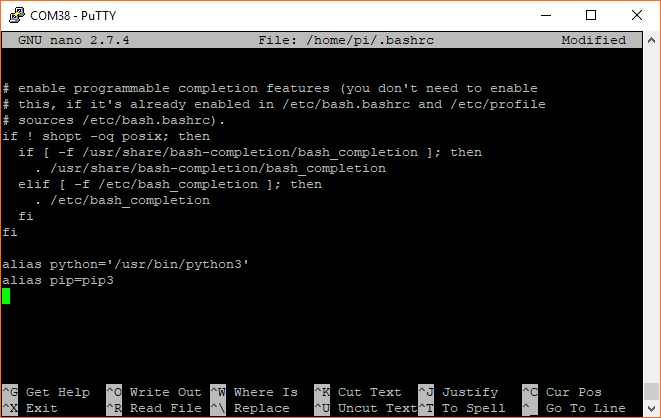
Then add the following lines at the end. That should tell the computer whenever you want to run python to look for the file located at /usr/bin/python3.
language:bash
alias python='/usr/bin/python3'
alias pip=pip3
To exit nano type CTRL + X and then hit Y when it asks you if you want to save and then ENTER. You can now either reboot or type the following to force the Pi to run the *.bashrc file again.
language:bash
source ~/.bashrc
Once adjusted, type the following command to ensure that pip is up to date.
language:bash
python -m pip install --upgrade pip
Python Library
We will also need to install the Qwiic Python libraries. This will automatically download a folder containing all the Qwiic_Py files and dependencies to your Raspberry Pi. Run the following command to automatically install the modules for the Qwiic sensors and SerLCD. To ensure that you are installing to the correct path for Python 3, make sure that you use pip3.
language:bash
sudo pip3 install sparkfun_qwiic
uninstall with the command: sudo pip3 uninstall sparkfun_qwiicExample: ICM-20948 Readings
To start, there are basic examples written in Python for the ICM-20948 and SerLCD. We'll go over one for each to see if the Qwiic-enabled devices are working as expected.
Reading the Data with the ICM-20948
In your terminal window, type the following to download the basic example code from the GitHub repository. Otherwise, you can manually download the example code.
language:bash
git clone https://github.com/sparkfun/Qwiic_9DoF_IMU_ICM20948_Py
Then navigate to examples folder by entering the following command.
language:bash
cd Qwiic_9DoF_IMU_ICM20948_Py/examples
Using the ls command will list the examples in the folder. As of the writing from this tutorial, there's only one so we will enter the following command to run the example.
language:bash
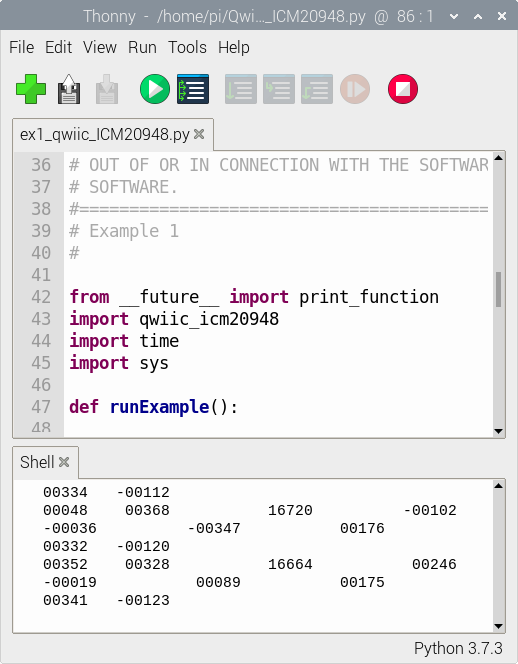
python ex1_qwiic_ICM20948.py
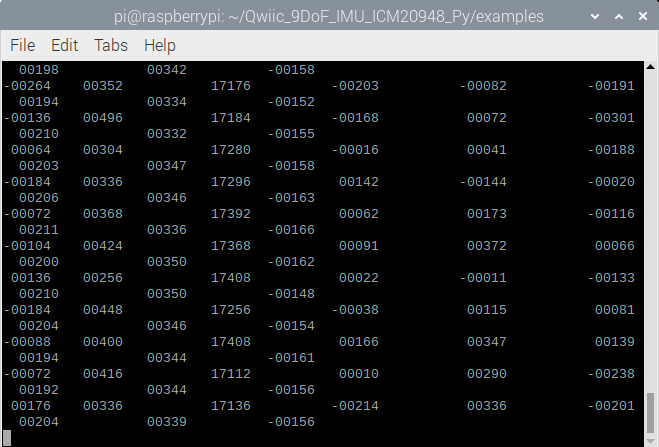
You should see an output similar to image below. Depending on how the sensor is oriented, the values might be different. Moving the sensor around will change the raw values in the terminal window. The window will probably be too small and wrap around to the next row. To slow the output down, stop the code by typing CTRL + C and adjust the value for the delay after the print() function where it says time.sleep(0.03) to a larger number. Once the code has been adjusted, try running the code again.
You could also navigate to the example folder, open the example in Thonny, and hit the Run button. The readings will show up in the shell.
Example: SerLCD - Hello World!
SerLCD: Hello World!
In your terminal window, type the following to download the basic example code from the GitHub repository.
language:bash
git clone https://github.com/sparkfun/Qwiic_SerLCD_Py
Then navigate to the examples folder by entering the following command.
language:bash
cd Qwiic_SerLCD_Py/examples
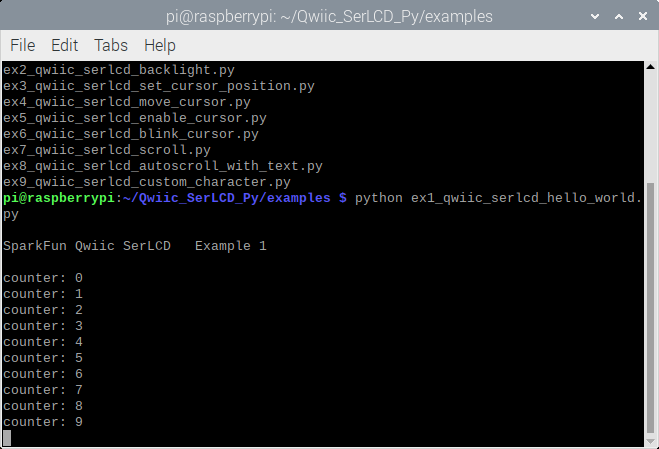
Using the ls command will list the examples in the folder. There are few examples in the folder but we're interested in only viewing the "Hello World!" example. Enter the following command to run the example.
language:bash
python ex1_qwiic_serlcd_hello_world.py
You should see the familiar phrase "Hello World!" displayed in the terminal window with a counter increasing.
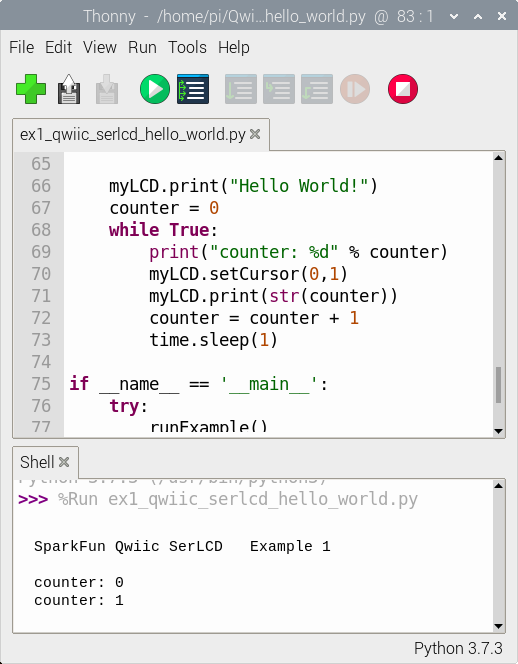
If you are using Thonny, you should see the same output in the Shell.
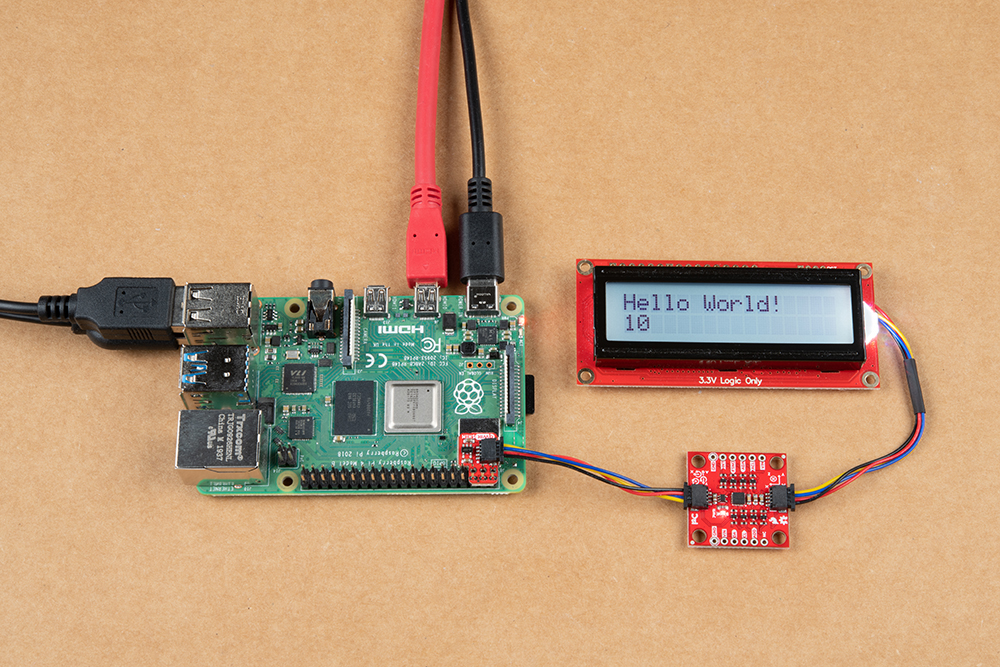
You should see the same message on the SerLCD with a counter increasing on the next row as well.
Sweet! There are several other examples available in the Qwiic_SerLCD_Py library. Try running the other examples listed in the examples folder to test by using the python command followed by the name of the python file.
Example: Combined SerLCD and ICM-20948
Combined Example
This code combines a few of the examples together. The orientation of the 9DoF will control the RGB backlight. For simplicity, we will only display the name of the color. Try scaling the readings down before printing the accelerometer readings on the screen.
In your terminal window, type the following to download the combined example code from the GitHub repository.
language:bash
git clone https://github.com/sparkfun/Qwiic_SHIM_Kit
Then navigate to the examples folder by entering the following command.
language:bash
cd Qwiic_SHIM_Kit/examples
Enter the following command to run the combined example.
language:bash
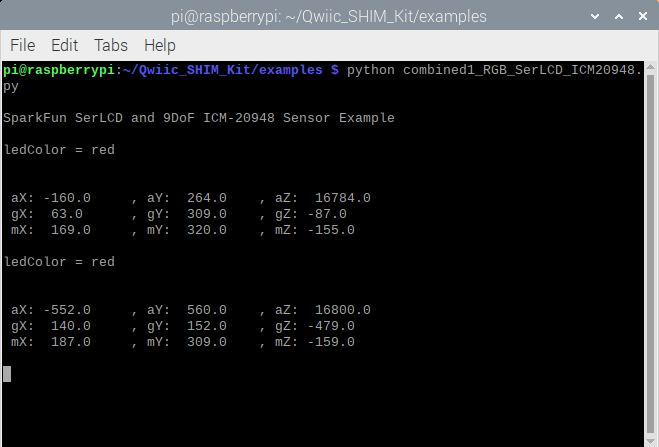
python combined1_RGB_SerLCD_ICM20948.py
You can also copy the example below.
language:python
#!/usr/bin/env python3
#-----------------------------------------------------------------------------
# combined1_RGB_SerLCD_ICM20948.py
#
# Combined example to control the RGB LED on the SerLCD
# based on the accelerometer readings on the ICM20948.
#------------------------------------------------------------------------
#
# Written by  SparkFun Electronics, March 2020
#
# This python library supports the SparkFun Electroncis qwiic
# qwiic sensor/board ecosystem on a Raspberry Pi (and compatible) single
# board computers.
#
# More information on qwiic is at https://www.sparkfun.com/qwiic
#
# Do you like this library? Help support SparkFun. Buy a board!
#
#==================================================================================
# Copyright (c) 2019 SparkFun Electronics
#
# Permission is hereby granted, free of charge, to any person obtaining a copy
# of this software and associated documentation files (the "Software"), to deal
# in the Software without restriction, including without limitation the rights
# to use, copy, modify, merge, publish, distribute, sublicense, and/or sell
# copies of the Software, and to permit persons to whom the Software is
# furnished to do so, subject to the following conditions:
#
# The above copyright notice and this permission notice shall be included in all
# copies or substantial portions of the Software.
#
# THE SOFTWARE IS PROVIDED "AS IS", WITHOUT WARRANTY OF ANY KIND, EXPRESS OR
# IMPLIED, INCLUDING BUT NOT LIMITED TO THE WARRANTIES OF MERCHANTABILITY,
# FITNESS FOR A PARTICULAR PURPOSE AND NONINFRINGEMENT. IN NO EVENT SHALL THE
# AUTHORS OR COPYRIGHT HOLDERS BE LIABLE FOR ANY CLAIM, DAMAGES OR OTHER
# LIABILITY, WHETHER IN AN ACTION OF CONTRACT, TORT OR OTHERWISE, ARISING FROM,
# OUT OF OR IN CONNECTION WITH THE SOFTWARE OR THE USE OR OTHER DEALINGS IN THE
# SOFTWARE.
#==================================================================================

from __future__ import print_function
import qwiic_serlcd
import qwiic_icm20948
import time
import sys

#create global variable to keep track of color when debugging
ledColor = 1

def runExample():

    print("\nSparkFun SerLCD and 9DoF ICM-20948 Sensor Example\n")
    myLCD = qwiic_serlcd.QwiicSerlcd()
    IMU = qwiic_icm20948.QwiicIcm20948()

    if myLCD.connected == False:
        print("The Qwiic SerLCD device isn't connected to the system. Please check your connection", \
            file=sys.stderr)
        return

    if IMU.connected == False:
        print("The Qwiic ICM20948 device isn't connected to the system. Please check your connection", \
              file=sys.stderr)
        return


    myLCD.setBacklight(255, 255, 255) # Set backlight to bright white
    myLCD.setContrast(5)  # Set contrast. Lower to 0 for higher contrast.
    myLCD.clearScreen()   # Clear Screen - this moves the cursor to the home position as well
    myLCD.print("white")  # Write to color name to SerLCD

    time.sleep(0.5) # give a sec for system messages to complete

    IMU.begin()

    while True:
        #declare ledColor a global variable inside here to access it
        global ledColor

        if IMU.dataReady():
            IMU.getAgmt() # read all axis and temp from sensor, note this also updates all instance variables

            #the following are the threshold values for each axis is pointing right-side up

            # anything above IMU.azRaw > 16000 is red
            # ledColor = 1
            aZPos = 16000

            # anything below IMU.azRaw < -16000 is blue
            # ledColor = 2
            aZNeg = -16000

            # anything above IMU.ayRaw > 16100 is green
            # ledColor = 3
            ayPos = 16100

            # anything below IMU.ayRaw < -16000 is green
            # ledColor = 4
            ayNeg = -16000

            # anything above IMU.axRaw > 16000 is magenta
            # ledColor = 5
            axPos = 16000

            # anything below IMU.axRaw < -16400 is cyan
            # ledColor = 6
            axNeg = -16400

            #adjust color of the LED based on the accelerometer's reading
            if IMU.azRaw > aZPos:
                # Set LED red
                myLCD.setBacklight(255, 0, 0) # Set backlight to bright white
                ledColor = 1
                myLCD.clearScreen()
                myLCD.print("red")

            elif IMU.azRaw < aZNeg:
                # Set LED blue
                myLCD.setBacklight(0, 0, 255) # Set backlight to bright white
                ledColor = 2
                myLCD.clearScreen()
                myLCD.print("blue")

            elif IMU.ayRaw > ayPos:
                # Set LED yellow
                myLCD.setBacklight(255, 255, 0) # Set backlight to bright white
                ledColor = 3
                myLCD.clearScreen()
                myLCD.print("yellow")

            elif IMU.ayRaw < ayNeg:
                # Set LED green
                myLCD.setBacklight(0, 255, 0) # Set backlight to bright white
                ledColor = 4
                myLCD.clearScreen()
                myLCD.print("green")

            elif IMU.axRaw > axPos:
                # Set LED magenta
                myLCD.setBacklight(255, 0, 255) # Set backlight to bright white
                ledColor = 5
                myLCD.clearScreen()
                myLCD.print("magenta")

            elif IMU.axRaw < axNeg:
                # Set LED cyan
                myLCD.setBacklight(0, 255, 255) # Set backlight to bright white
                ledColor = 6
                myLCD.clearScreen()
                myLCD.print("cyan")

            if ledColor == 1:
                print("ledColor = red" ,'\n', '\n')
            elif ledColor == 2:
                print("ledColor = blue" ,'\n', '\n')
            elif ledColor == 3:
                print("ledColor = yellow" ,'\n', '\n')
            elif ledColor == 4:
                print("ledColor = green" ,'\n', '\n')
            elif ledColor == 5:
                print("ledColor = magenta" ,'\n', '\n')
            elif ledColor == 6:
                print("ledColor = cyan" ,'\n', '\n')

            aX = IMU.axRaw
            aY = IMU.ayRaw
            aZ = IMU.azRaw
            gX = IMU.gxRaw
            gY = IMU.gyRaw
            gZ = IMU.gzRaw
            mX = IMU.mxRaw
            mY = IMU.myRaw
            mZ = IMU.mzRaw

            # Remove the `#` for the following lines to
            # display accelerometer readings on SerLCD

            #myLCD.setCursor(8,0)
            #myLCD.print("aX")
            #myLCD.print(str(aX))

            #myLCD.setCursor(0,1)
            #myLCD.print("aY")
            #myLCD.print(str(aY))

            #myLCD.setCursor(8,1)
            #myLCD.print("aZ")
            #myLCD.print(str(aZ))

            print(\
             ' aX:', '{: 4.1f}'.format(aX)\
            , ' \t, aY:', '{: 4.1f}'.format(aY)\
            , '\t, aZ:', '{: 4.1f}'.format(aZ)\
            , '\n gX:', '{: 4.1f}'.format(gX)\
            , '\t, gY:', '{: 4.1f}'.format(gY)\
            , '\t, gZ:', '{: 4.1f}'.format(gZ)\
            , '\n mX:', '{: 4.1f}'.format(mX)\
            , '\t, mY:', '{: 4.1f}'.format(mY)\
            , '\t, mZ:', '{: 4.1f}'.format(mZ)\
            , '\n'\
            )

            time.sleep(1) # small delay so that the screen doesn't flicker
        else:
            print("Waiting for data")
            time.sleep(0.5)


if __name__ == '__main__':
    try:
        runExample()
    except (KeyboardInterrupt, SystemExit) as exErr:
        print("\nEnding Combined Example")
        sys.exit(0)
The terminal will begin displaying the current color and sensor readings.
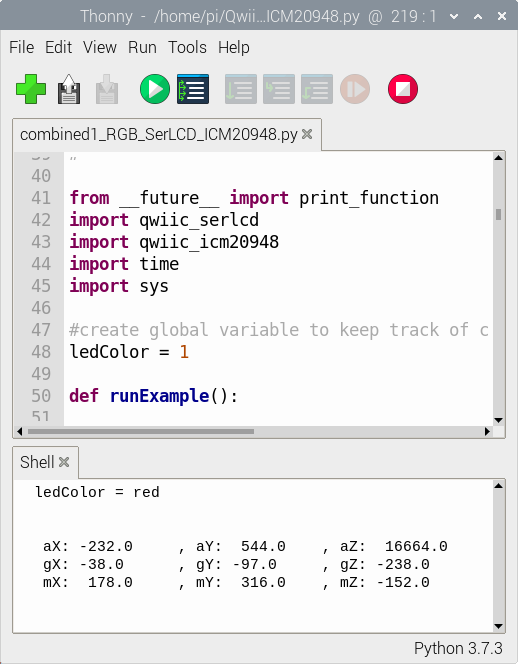
If you are using Thonny, you will see the same output in the Shell.
If you check out the SerLCD with RGB backlight, the screen will display the color name and color backlight based on the accelerometer readings. The color will change depending on what axis is pointing up. Your setup may look slightly different depending on how you connected the Qwiic cables so be sure to reference the silkscreen for the accelerometer.

Resources and Going Further
For more information, check out the resources below:
- GitHub
- Python Modules (i.e. Libraries)
- Qwiic SHIM Kit for Pi Demo Code
Looking for more inspiration? Check out these other Raspberry Pi projects and Python tutorials.:
Graph Sensor Data with Python and Matplotlib
Python GUI Guide: Introduction to Tkinter
How to Run a Raspberry Pi Program on Startup
RedBoard Turbo Hookup Guide
SparkFun Auto pHAT Hookup Guide
Jetson Nano + Sphero RVR Mash-up (PART 1)
Setup and Using MicroPython for Beginners
Or check out some of these blog posts for ideas: