Getting Started with the Raspberry Pi Zero Wireless
 M-Short
 Introduction
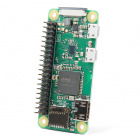
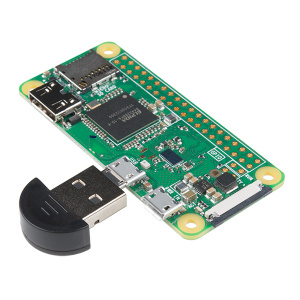
The Raspberry Pi is a popular Single Board Computer (SBC) in that it is a full computer packed into a single board. Many may already familiar with the Raspberry Pi 3 and its predecessors, which comes in a form factor that has become as highly recognizable. The Raspberry Pi comes in an even smaller form factor. The introduction of the Raspberry Pi Zero allowed one to embed an entire computer in even smaller projects. This guide will cover the latest version of the Zero product line, the Raspberry Pi Zero - Wireless, which has an onboard WiFi module. While these directions should work for most any version and form factor of the Raspberry Pi, it will revolve around the Pi Zero W.
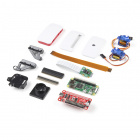
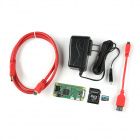
If you're looking for a starter pack, this kit includes everything you need to start using your Pi Zero W.

Required Materials
To follow along with this tutorial, you will need the following items:
- Raspberry Pi Zero W Basic Kit
- Monitor
- Keyboard
- Mouse (optional but suggested)
- USB hub (for more than one USB device)
Suggested Reading
Here are some tutorials you may find interesting before continuing:
Single Board Computer Benchmarks
SD Cards and Writing Images
Raspberry gPIo
Raspberry Pi SPI and I2C Tutorial
Looking to get hands-on with Raspberry Pi?
We've got you covered!
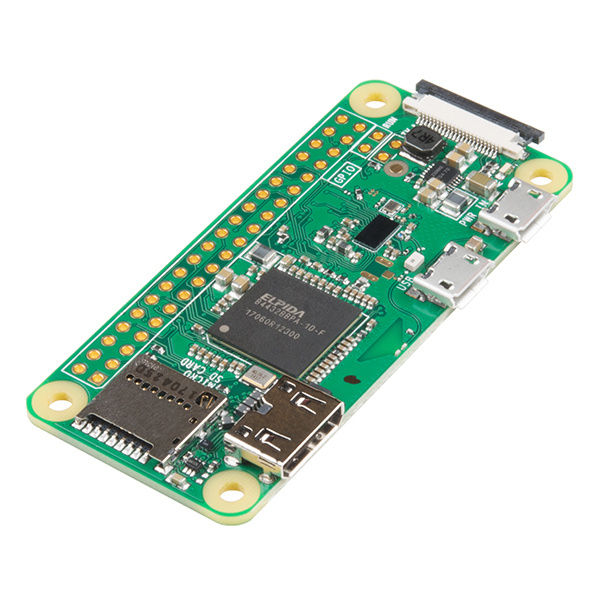
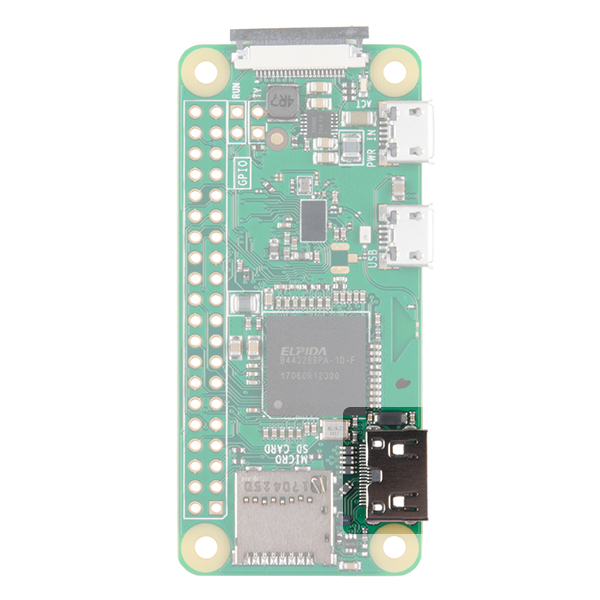
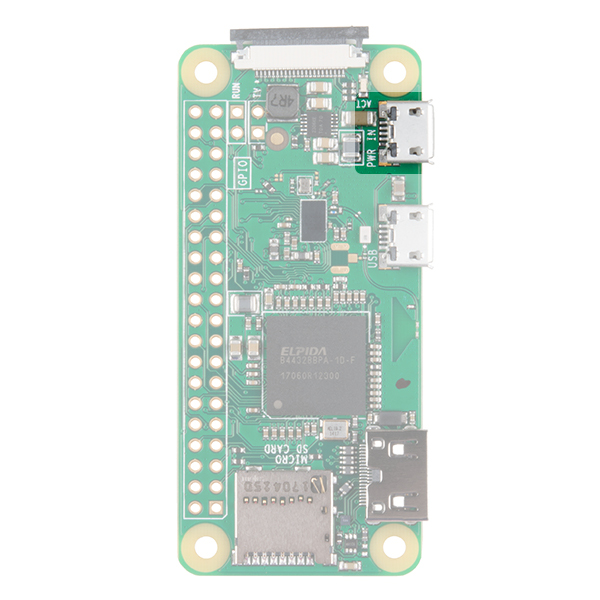
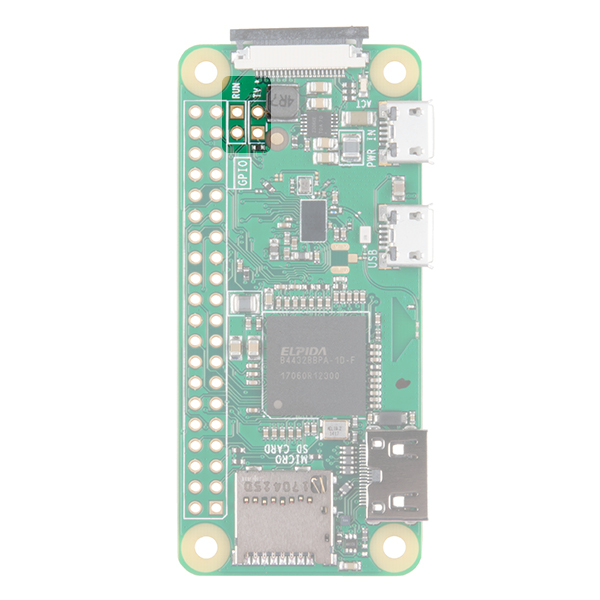
Hardware Overview
Let's go over some of the most noticeable differences between the Raspberry Pi Zero (and Pi Zero W) and the Raspberry Pi 3.
Both boards are identical in features except that the W has built in Wifi and Bluethooth. Getting started with the Pi Zero board can be a little more cumbersome than with the Pi 3 because many of the connectors need adapters to connect to standard size connectors. Otherwise, to get started, all you need is a uSD card with a Raspberry Pi image on it and power.
Mini HDMI
Unlike the previous models of the Raspberry Pi which use a standard HDMI connector, the Zero uses a mini HDMI connector to save space. To connect the Zero to a monitor or television, you will need a mini HDMI to HDMI adapter or cable.
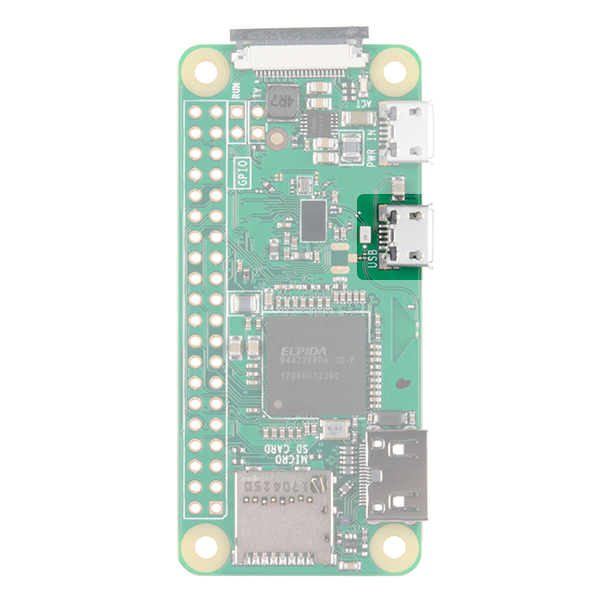
USB On-the-Go
The Raspberry Pi 3 and other models have traditionally had 2-4 standard size female USB connectors, which allowed for all variety of devices to connect including mice, keyboards, and WiFi dongles. Again to save space, the Zero has opted for a USB On-the-Go (OTG) connection. The Pi Zero uses the same Broadcom IC that powered the original Raspberry Pi A and A+ models. This IC connects directly to the USB port allowing for OTG functionality, unlike the Pi B, B+, 2 and 3 models, which use an onboard USB hub to allow for multiple USB connections.
To connect a device with a standard male USB connection, you will need a USB OTG cable. Plug the microUSB end into the Pi Zero, and plug your USB device into the standard female USB end.
For use with other standard USB devices, it is recommended that you use a powered USB hub. Wireless keyboard and mouse combos work best as they have one USB dongle for both devices.
Power
Like other Pis, power is provided through a microUSB connector. Voltage supplied to the power USB should be in the range of 5-5.25V.
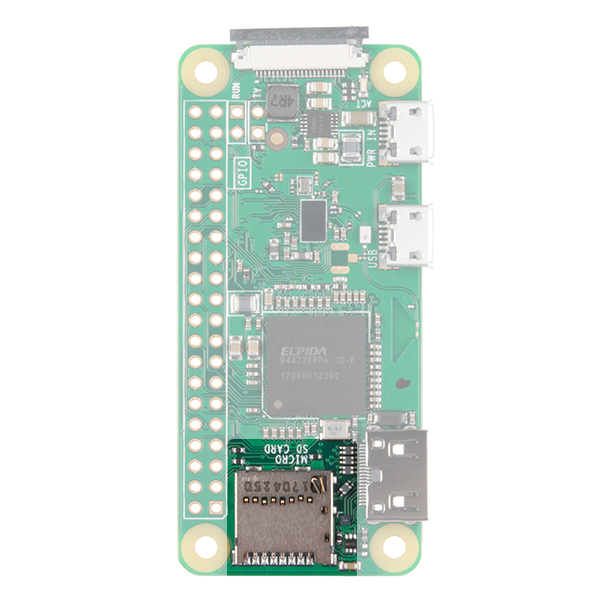
microSD Card Slot
Another familiar interface is the microSD card slot. Insert your microSD cards that contains your Raspberry Pi image file here.
WiFi and Bluetooth
As with the Raspberry PI 3, the Zero W offers both 802.11n wireless LAN and Bluetooth 4.0 connectivity. This frees up many of the connections that would have been made over USB, such as a WiFi dongle and a USB keyboard and mouse if substituting a Bluetooth keyboard/mouse.
Camera Connector
The Raspberry Pi Zero V1.3+ and all Zero Ws have an onboard camera connector. This can be used to attach the Raspberry Pi Camera module. However, the connector is a 22pin 0.5mm and different than the standard Pi. You will need a different cable to connect the camera to the Pi Zero W.

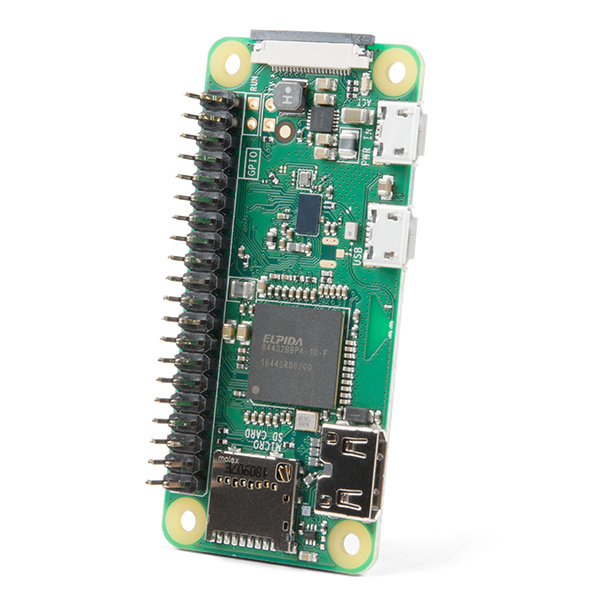
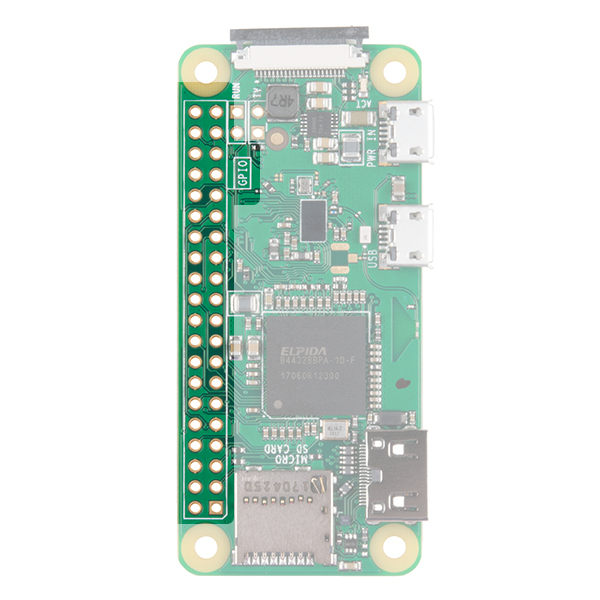
GPIO
As with all other models of the Raspberry Pi, there are a plethora of GPIO pins broken out, many of which other other functionality such as I2C. If you are using the GPIO header, you may want to consider soldering headers to it.
Additional Connections
Last, you may notice two sets of thruhole pads labeled TV and Run. The TV pads allow you to connect an RCA jack to the board instead of using the HDMI out. The Run pins connect to the chips reset pin and will either turn the board off or turn it back on once it has been shutdown. Connecting a button here is a good way to power cycle your board.
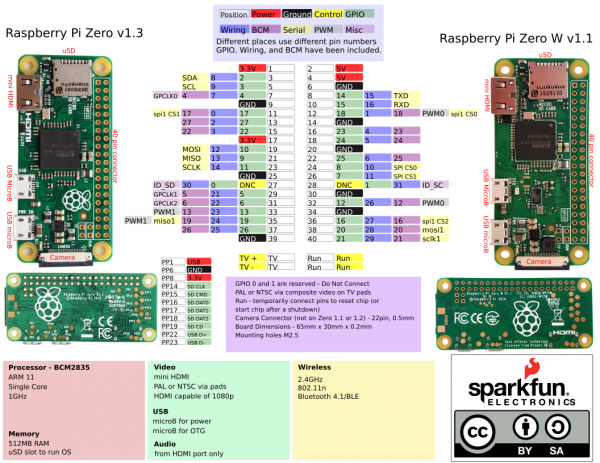
For a complete description of each pin on the GPIO header and all the connectors on the PI Zero, consult the graphical datasheet below.
Hardware Assembly
Depending on your use case, setup for the Pi Zero can be minimal, or it can be cumbersome due to smaller connectors on the Zero and the adapters needed to connect standard devices such as mice, keyboards, and monitors.
Monitor
To attach the Pi Zero to a Monitor or TV that has an HDMI input, attach a miniHDMI to HDMI cable or adapter to the miniHDMI connector on the Pi Zero. Connect the other end to the HDMI port on your monitor or television.
Connect the USB OTG cable to the Pi Zero via the microUSB connector. If you have a keyboard/mouse combe, attach your dongle to the standard female USB end. If you have a separate mouse and keyboard, you will need a USB hub to attach both tto the USB OTG cable.
Make sure that you have a valid Raspberry Pi image on your microSD card (more on this later). Insert the microSD card into the microSd slot.
Power your Pi Zero via the microUSB power input.
There are a few other connectors to point out but we won't be using. The Pi Zero has a 40 pin GPIO connector on the board that matches the pinout of the standard Pi 3. You can solder wires, headers or Pi Hats to this connector to access the GPIO pins or even power. The camera connector will allow you to connect the Raspberry Pi camera although it is worth noting that the connector is a 22pin 0.5mm and different than the standard Pi and will need a different cable to connect the camera to the Pi.
Installing the OS
Before powering on your Pi Zero W you'll need to flash an image of the Raspberry Pi OS (or if you prefer, a third party operating system that work with Raspberry Pi) to the microSD card included with the Basic Kit. The Raspberry Pi Foundation created a great tool called the Raspberry Pi Imager that makes downloading and flashing an OS image a microSD card simple. This section briefly goes over how use that tool to upload an image of the Raspberry Pi OS on your microSD card.
Option 1: Raspberry Pi Imager
The Raspberry Pi Imager tool makes selecting and writing an image of a Raspberry Pi-compatible operating system to a microSD card way easier than it was in the past. All you need to do is select the OS and storage device and the tool takes care of the rest. Download the tool from Raspberry Pi's software page here:
Once the tool is downloaded and installed on your computer, follow the steps below to complete the image installation:
- Insert the microSD card and SD adapter into the appropriate port on your computer.
- Open the Raspberry Pi Imager.
- Click the Choose OS button to select your preferred Operating System (this tutorial will use the default Raspberry Pi OS).
- Click the Choose Storage button and select your microSD's drive location.
- Click Write.
Writing the OS to the microSD card can take a few minutes depending on which version was selected and the speed of the port/microSD card. Once the write is finished, the tool should automatically perform the software ejection for the microSD card so you can remove it once the process completes.
NOOBS, or New Out Of the Box Software to give it its full name, was an SD card-based installer for Raspberry Pi computers; we no longer recommend or support using NOOBS. Going forward, please use Raspberry Pi Imager.For users that are still interested in NOOBS, you can check out the GitHub repo.
Option 2: .img File
If you want something other than the basic Raspbian install or other options found on NOOBS, you will need to install your own image on the uSD card. This method is slightly more involved because you need a special *.img file that not only puts your files on the card, but also sets up things like making the card bootable. The Raspberry Pi foundation has a handful of images like Ubuntu, OSMC (Open Source Media Center), and even Windows 10 IOT Core. A Google search will find many more including specialized images for certain tasks. If you've never worked with Raspberry Pi before, we recommend Raspian. You can download the latest version using the link below.
To install your own image on your card, we recommend software called Etcher. These guys have taken all the different steps needed and put them all in one piece of software to take care of everything. Download your image, then run the program, select your image, select your uSD card drive, and then hit flash. Once it is done, remove your card and you are good to go. Once the image is installed, insert the card into the board and apply power.
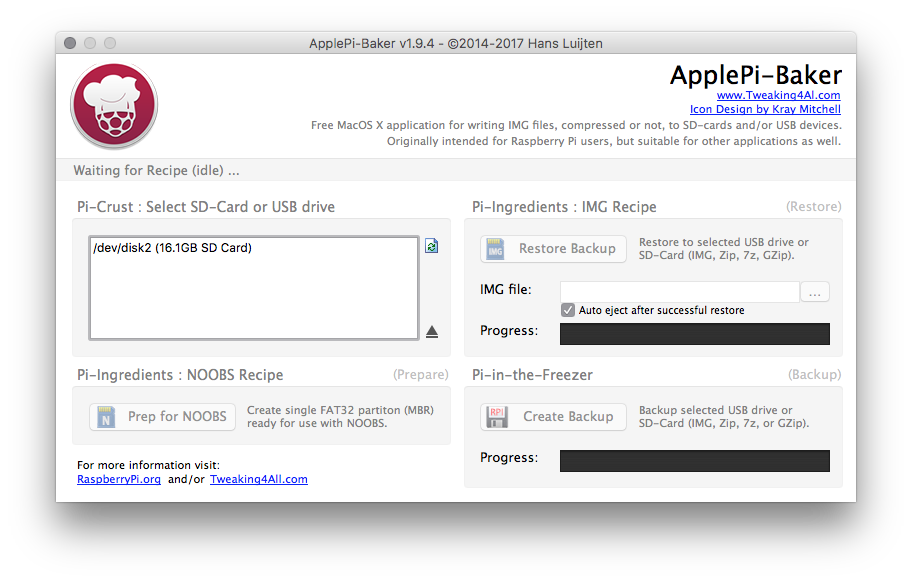
For Mac users, the ApplePi Baker Software is a great way to upload a new image to an SD card. It will ask for an admin password upon startup. Select the SD card on the left plane, then upload your image iundet the Pi Ingrediants: IMG Recipe section. Click Restore Backup, wait for the progress bar to finish, and you're done. The program even ejects the card you, so can yank it right out and insert it into your Pi.
For the rest of this tutorial, we'll assume you've installed Raspbian either by installing the image directly or with Noobs. The tutorial should also work fine for most Linux based systems with a Graphical User Interface, but things might be in slightly different locations
Using the Raspberry Pi OS
Now that you've gotten your board up and running let's go over some basics of the Raspberry Pi OS. This section covers how to use the Pi via HDMI out to a monitor.
Raspberry Pi OS
The Raspberry Pi OS is Linux based (to be specific it is a port of Debian Bullseye with the Raspberry Pi Desktop). Don't let that scare you too much. Gone are the days of having to remember lots of commands or that you need to type :wq to save and exit your text editor. The OS runs a desktop Graphical User Interface (GUI) similar to Windows or MacOS, and, while you will probably want to learn a few basic commands and shorcuts, you can usually get away with not using them.
Initial Boot
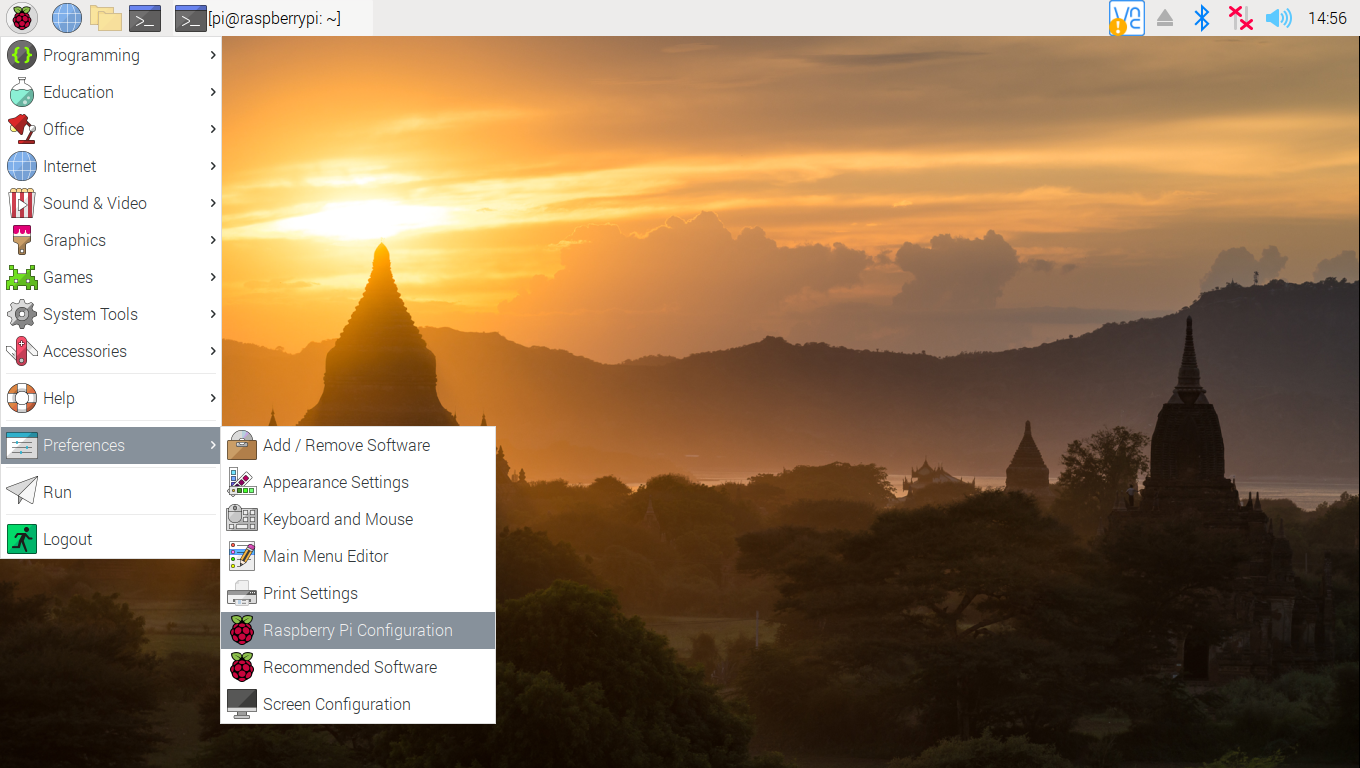
The first boot of the Pi with a fresh install of the OS takes a few minutes and the Pi will most likely restart at least once. Once the OS finishes initial setup, you should be greeted by a desktop setup similar to the image below:
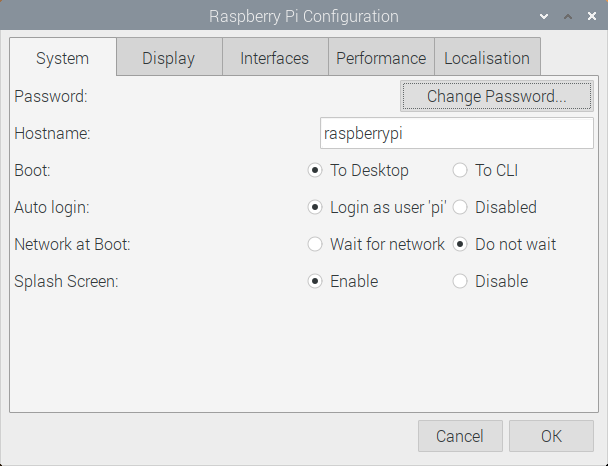
Follow the set up wizard to configure the location settings, set a new password, connect to WiFi, update the system and packages and more settings on the Pi. You can skip some of these steps but we strongly recommend at least setting the location and setting a new password. If you ever need to go back and update the settings, open them by going to the Raspberry Pi Start Menu > Preferences > Raspberry Pi Configuration.
This opens a pop up allowing you to update the region, monitor, keyboard, password, as well as turn on any peripheral interfaces like SPI and I2C.
Update Software
In case you skipped the step in the set up wizard or need to update software packages in the future, we can update the software package on the Pi through the Command Line Interface (CLI). Access it by opening the terminal and type the following and hit Enter:
language:bash
sudo apt-get update
This command tells the Pi to retrieve the latest package information and tells the package manager what needs updating.
sudo(also known as super user) is a command that you will see a lot, specifically with high security commands. It temporarily allows the user (if you’re not already logged in as root) the ability to run these commands if your user name is in a list of users ('sudoers').apt-getis the package manager andupdateis the command we are giving it.
This downloads and upgrades all packages on the system and may take a while.
Shutdown/Reboot
The desktop includes a standard shutdown button in the desktop main menu but you can also tell the Pi to shutdown through the CLI using this command:
language:raspberrypi
sudo shutdown -h now
shutdownas you may guess, shuts down the machine.nowtells it do perform the action immediately (15would tell the machine to shutdown in 15 minutes).
To reboot the Pi through the CLI send this command:
language:bash
sudo shutdown -r now
Raspberry Pi Safe Reboot and Shutdown Button
Other Useful Linux Commands
A few other useful commands for use in the terminal command line:
pwd- Print Working Directory, if you not sure what folder you are in this will tell you where you are in the filesystem.ls- List, this will show you the contents of the folder. To show all files, including hidden ones, typels -ato show all files/folders. Alternatively, typingls -alwill show you all files/folders as well as their permission settings.cd- this is how you change directories.cd foldernamewill move you to that folder.cd ..will back you up one level.cd ~will take you back to your home directory.passwd- this will allow you to change your passwordman- this stands for manual. Type man before a command to get a summary of how to use it.nano- this will open a basic text editor that is fairly easy to use.
Troubleshooting
Having issues getting the Raspberry Pi to work? Check out this sticky note from the Raspberry Pi Foundation's forum for basic troubleshooting.
Having problems with a piece of SparkFun hardware designed for the Raspberry Pi and interfacing it? Try checking out the SparkFun forums to see if we can assist.
Resources and Going Further
Raspberry Pi Resources
- Raspberry Pi Homepage
- Raspberry Pi images
- Raspberry Pi Zero and Zero W Graphical Datasheet
- Etcher - MacOS, Windows and Linux application for writing .img files to SD cards.
- ApplePi Baker - MacOS application for writing .img files to SD cards.
Looking to make the Raspberry Pi Zero W a dongle? Check out the Pi Zero USB Stem:
For more Raspberry Pi fun, check out these other great SparkFun tutorials.