Raspberry Pi 4 Kit Hookup Guide
 bboyho,
  MTaylor
 Introduction
The improved Raspberry Pi 4 Model B [ 2GB, 4GB, and 8GB ] is another upgrade in the line of Raspberry Pi single board computers, what's new? This hookup guide goes through the same process of getting going that worked with the previous Raspberry Pi Models.
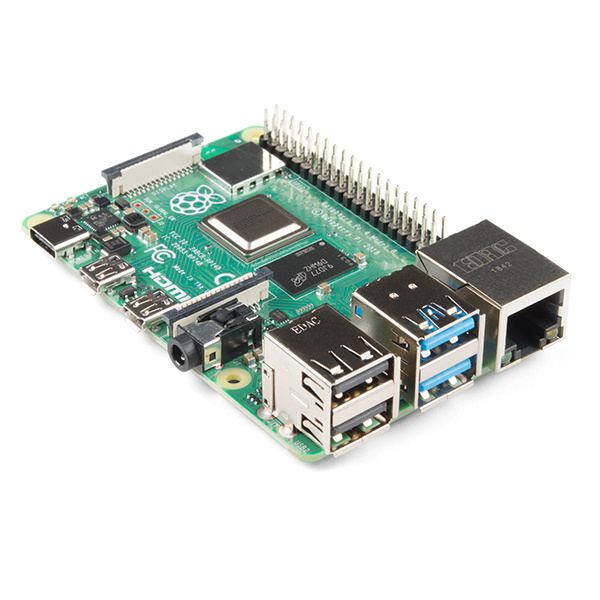

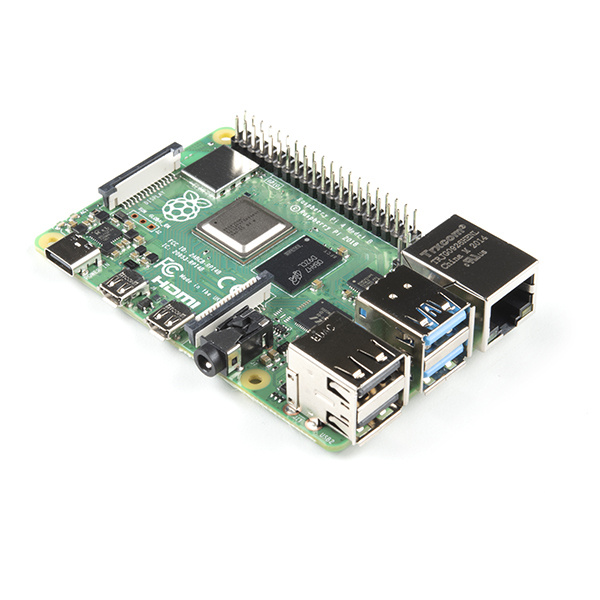
There are a few kits available depending on your project. Depending on the version that you order, you can have one that includes the 2GB, 4GB, or 8GB RAM.
 |
 |
 |
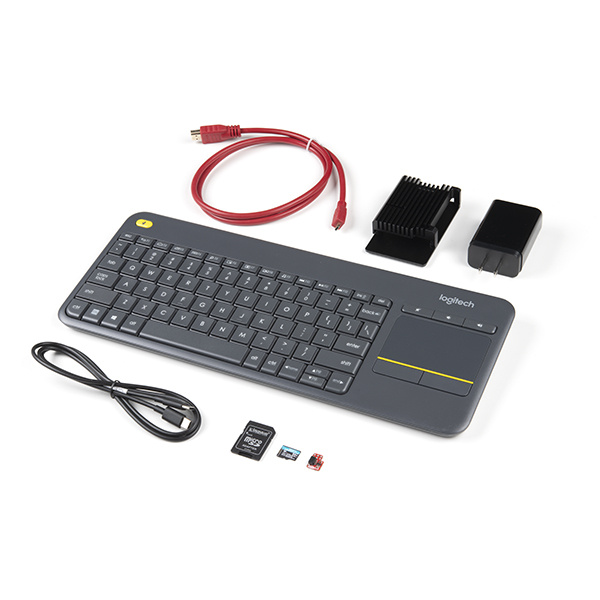
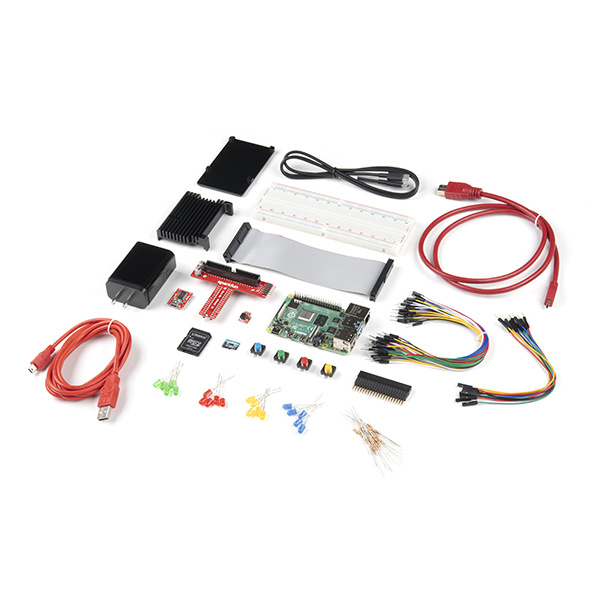
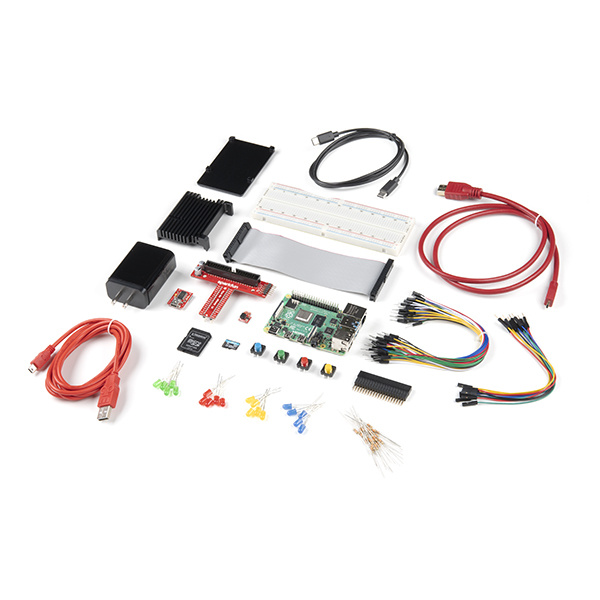
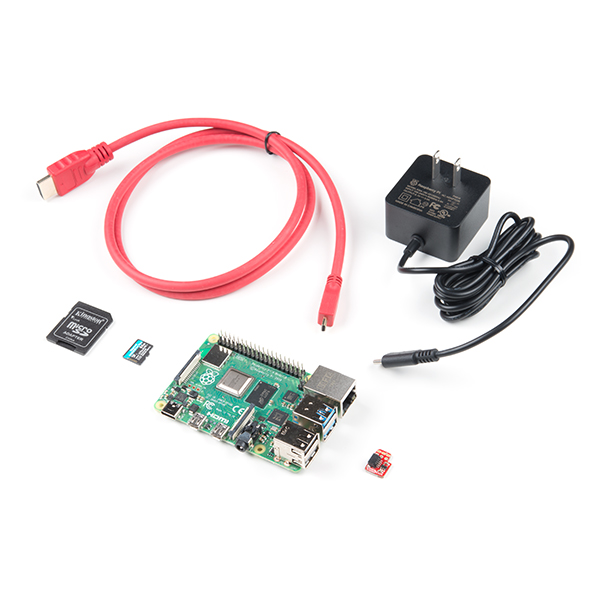
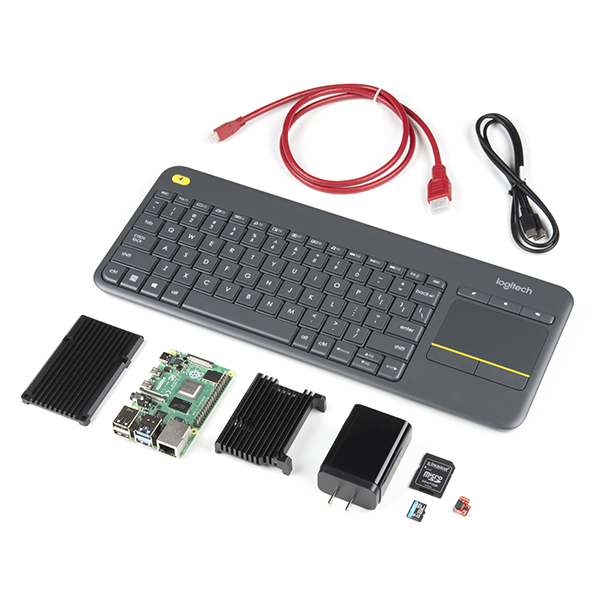
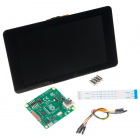
| Basic Kit | Desktop Kit | Hardware Starter Kit |
Materials Required
You'll need a mouse, keyboard, monitor, wall adapter with minimum power requirements, and cables to begin. Once configured, the Pi can be operated from its own peripherals or another computer connected over the Internet.
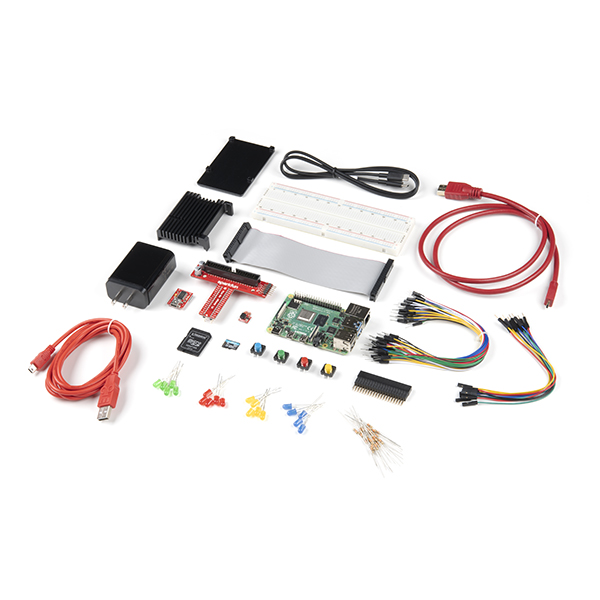
Kit Versions
There are three versions of the kit available at SparkFun. Each version includes a Raspberry Pi 4 with a different size RAM. Check out below for the different kit versions available!
Basic Kit Version
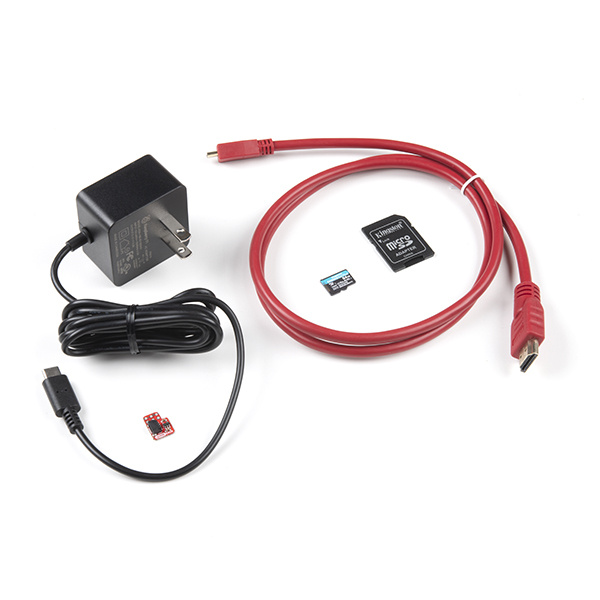
The basic kit offers the bare bones of what you need to get up and running. This is assuming that you have a monitor, keyboard, mouse, and card reader [1] on hand. The connectors are different on the Pi 4 so the kit provides a mini-HDMI to HDMI cable and USB-C wall adapter at a minimum. The kits include a raw microSD card and SD card adapter so that you can flash your favorite Linux distribution. A Qwiic Shim is included to easily connect a I2C device to the Raspberry Pi. A Raspberry Pi 4 with either a 2GB, 4GB, or 8GB RAM is included in the kit. We also have a kit without a Raspberry Pi 4 if you already have one.

SparkFun Raspberry Pi 4 Basic Kit - 2GB
KIT-16383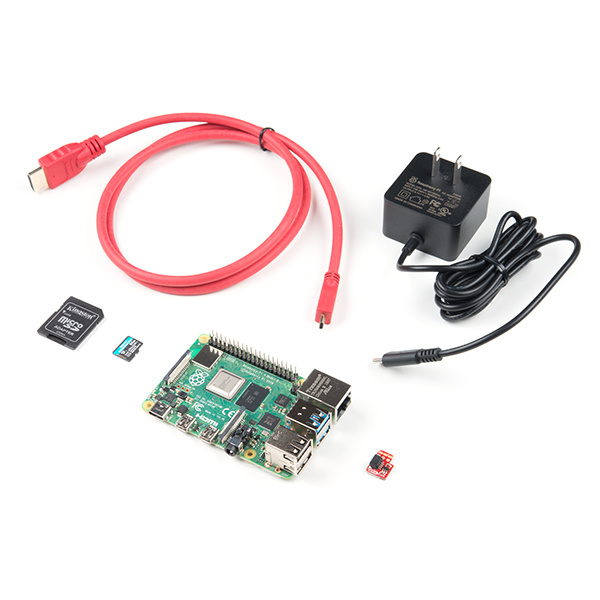
SparkFun Raspberry Pi 4 Basic Kit - 4GB
KIT-16384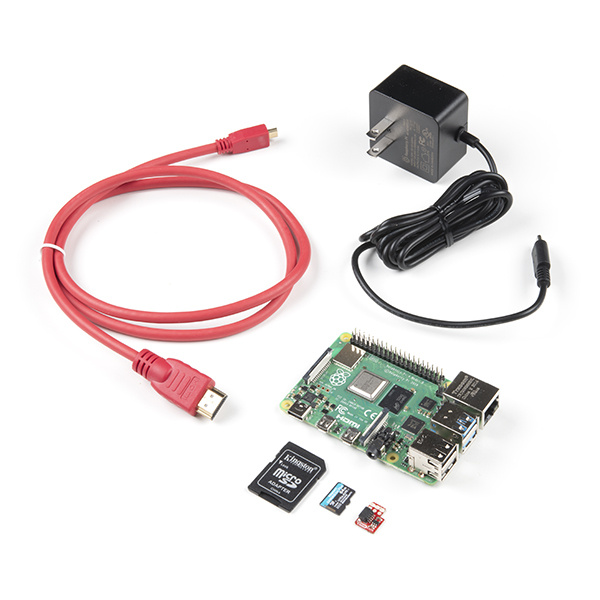
SparkFun Raspberry Pi 4 Basic Kit - 8GB
KIT-17980Desktop Kit Version
The desktop kit is pretty much the basic. However, a wireless keyboard with touchpad is included. We also include a heat sink case to keep your Pi cool as a cucumber when pushing your Pi's processing capabilities. The power supply included in this kit is provides a modular power system with the USB Type C wall adapter and Type C to Type C USB cable. Compared to the basic kit, the raw microSD card [1] included in this kit has a faster read/write speeds to take advantage of the Pi 4's processing power. This cuts the amount of time to flash or update the Linux distribution of your choice down significantly. A Raspberry Pi 4 with either a 2GB, 4GB, or 8GB RAM is included in the kit. We also have a kit without a Raspberry Pi 4 if you already have one.


Hardware Starter Kit Version
The hardware kit is designed for those that are interested in prototyping a circuit on a breadboard. It includes components from both the basic and desktop kits. In addition, the hardware starter kit includes a breadboard, Pi Wedge adapter, IDC cable, LEDs, current limiting resistors, buttons, jumper wires, 2x20 extension header, 3.3V USB-to-Serial converter, and mini-B USB cable. A Raspberry Pi 4 with either a 4GB or 8GB RAM is included in the kit. We also have a kit without a Raspberry Pi 4 if you already have one.

microSD USB Reader
COM-13004Comparison Chart
Below is a table that shows the differences between the basic, desktop, and hardware kits.
| Includes | Basic | Desktop | Hardware |
|---|---|---|---|
 |
 |
 |
|
| Raspberry Pi 4 Version | 2 GB / 4 GB / 8 GB / Without Pi 4 |
2 GB / 4 GB / 8 GB / Without Pi 4 |
4 GB / 8 GB / Without Pi 4 |
| Wall Adapter w/ Type C Cable | ✓ (for the 2GB, 4GB, and 8GB, and without Pi 4 versions) | ||
| USB Type C Wall Adapter | ✓ (initial release in the older 8GB version) | ✓ | ✓ |
| USB Type C Cable | ✓ (initial release in the older 8GB version) | ✓ | ✓ |
| HDMI Micro to HDMI | ✓ | ✓ | ✓ |
| MicroSD Card w/ Adapter |
✓ (initial release of the 2GB version) | ||
| High Speed MicroSD Card w/ Adapter |
✓ | ✓ | ✓ |
| Logitech N400 Plus Wireless Keyboard & Touchpad | ✓ | ||
| Qwiic Shim | ✓ | ✓ | ✓ |
| Heat Sink Case | ✓ | ✓ | |
| 2x20 Extension Header | ✓ | ||
| Raspberry Pi Wedge w/ IDC Cable | ✓ | ||
| Breadboard | ✓ | ||
| M/F Premium Jumper Wires 6" (10 Pack) |
✓ | ||
| M/M Standard Jumper Wires 7" (30 Pack) |
✓ | ||
| Assorted Colored LEDs (20 Pack) |
✓ | ||
| 330Ω 1/4 Watt Current Limiting Resistors (20 Pack) |
✓ | ||
| Multicolored Buttons (4 Pack) |
✓ | ||
| 3.3V FTDI Basic Breakout | ✓ | ||
| Mini-B USB Cable | ✓ |
Getting an OS
 |
 |
The microSD card included in each kit does not have an image flashed. You'll need to flash a new image to the microSD card if you are just starting out or if your existing image becomes corrupt somewhere down the line. There are a few Linux-based images available depending on your application. Or feel free to power down your Pi and switch microSD cards out to experiment with a different image. For beginners, we recommend getting NOOBS. Otherwise, the Raspbian with the PIXEL desktop would be the best.
- NOOBS (i.e. New Out-Of-the Box Software) - Contains Raspbian and LibreELEC. Other images can also be downloaded from the internet and installed.
- Raspbian - Official Raspberry Pi Debian-based computer operating system. There are three downloads. We recommend the desktop version with recommended software. The other downloads are the same but with less software. For advanced users, Raspbian Lite is the minimal text-only version and requires users to navigate using the command line interface (CLI).
- Other 3rd Party OS Images - There are other distributions available from third-party. If you are feeling adventurous, check out the other images available!
For the scope of this tutorial, we will summarize two of the images from the Pi foundation.
Flashing the Image NOOBS
If you decide to use NOOBS, you will need to:
- Insert the microSD card into a card reader.
- Download the ZIP file for NOOBS.
- Extract the ZIP file.
- Format your Raspberry Pi's microSD card if needed.
- Copy all the contents from the unzipped folder into the microSD card.
- Eject the microSD card from your computer.
Flashing the Image Raspbian and 3rd Party OS Images
Then follow the steps below to flash an image using the Raspberry Pi Imager.
- Insert the microSD card and card reader into your computer's port.
- Open the software imaging tool [2] of your choice (in this case, we'll use the Raspberry Pi Imager for your OS but you can use other images as well).
- Press CHOOSE OS to select the Operating System from the list (in this case, we'll use one of the Raspbian images but you could use any of the 3rd party images ).
- Press CHOOSE SD CARD to select mounted microSD Card.
- Press Write (it will take a while depending on the image and microSD card so just do a little dance as you wait).
- Eject the microSD card when finished.
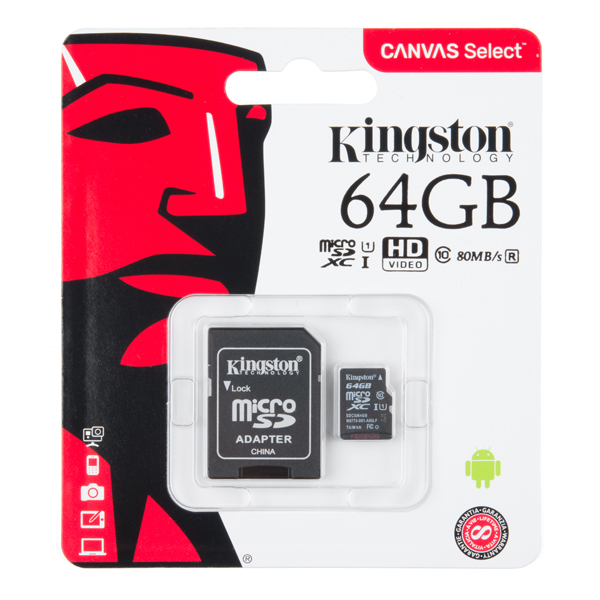
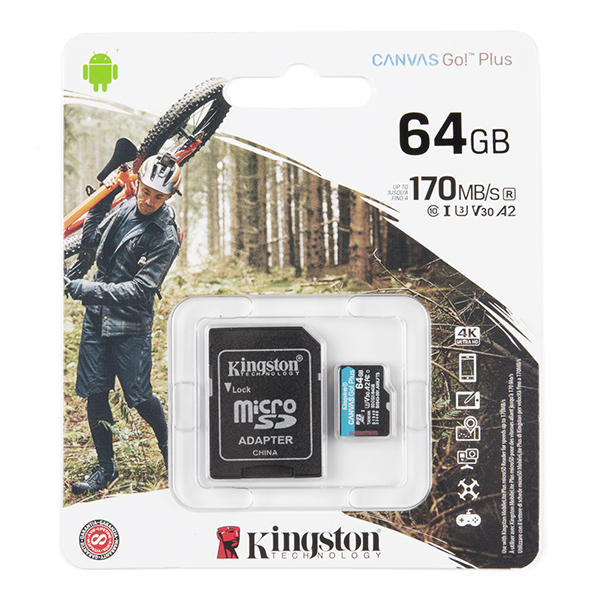
SD Cards and Writing Images
Hardware Assembly
The Pi is straight-forward and easy to put together, but in the event that something doesn't seem right, this section will give you an idea of what it is supposed to look like to get the Pi up and running.
|
|
|
| Basic Kit | Desktop Kit | Hardware Starter Kit |
Attaching a Heat Sink Enclosure Optional

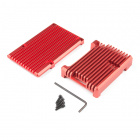
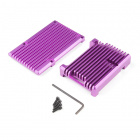
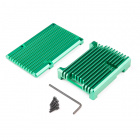

If you are using the heat sink enclosure, grab the thermal pad that matches the size of the Pi's CPU. Remove the thin, clear plastic film and paper from both sides of the thermal pad. Attach the side that had the paper to the Pi's CPU. There are thermal pads shaped for other IC and can be added on those chips as well. However, those do not get hot.
Grab the top of the heat sink case with the cutout for the GPIO pins and place it on the Pi. If you are using the DSI port or Raspberry Pi camera, now would be good time to insert the ribbon cable between the Pi and the top of the heat sink.
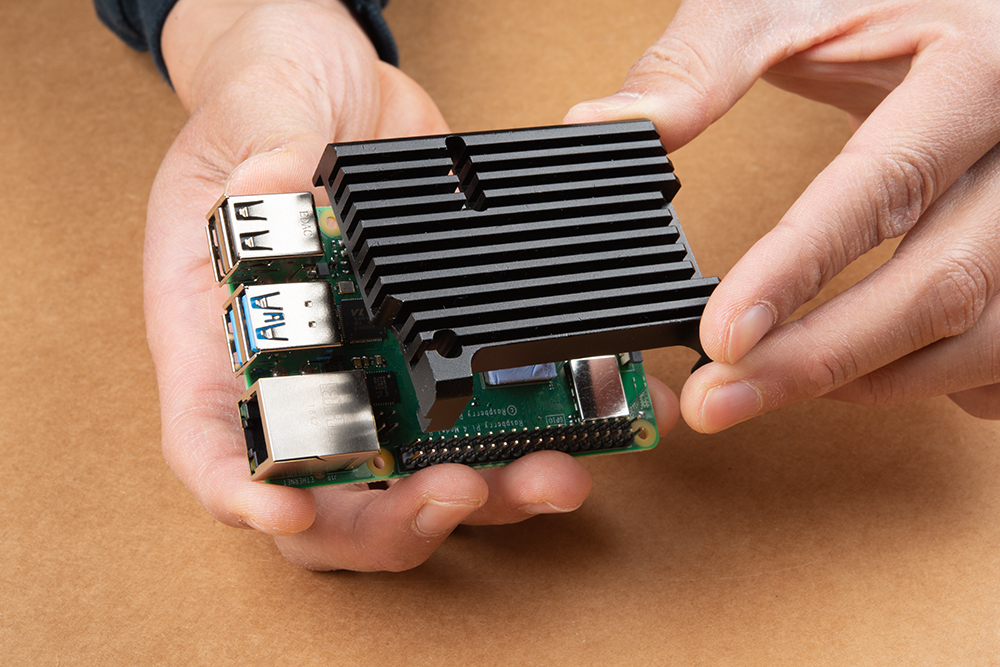
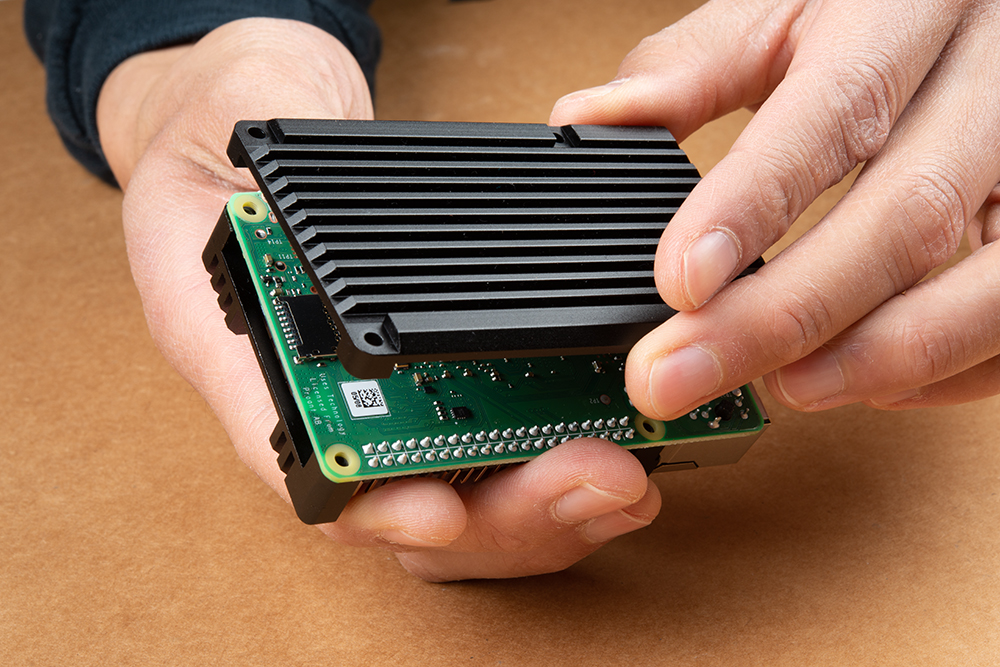
Align the mounting holes of the bottom of the heat sink case.
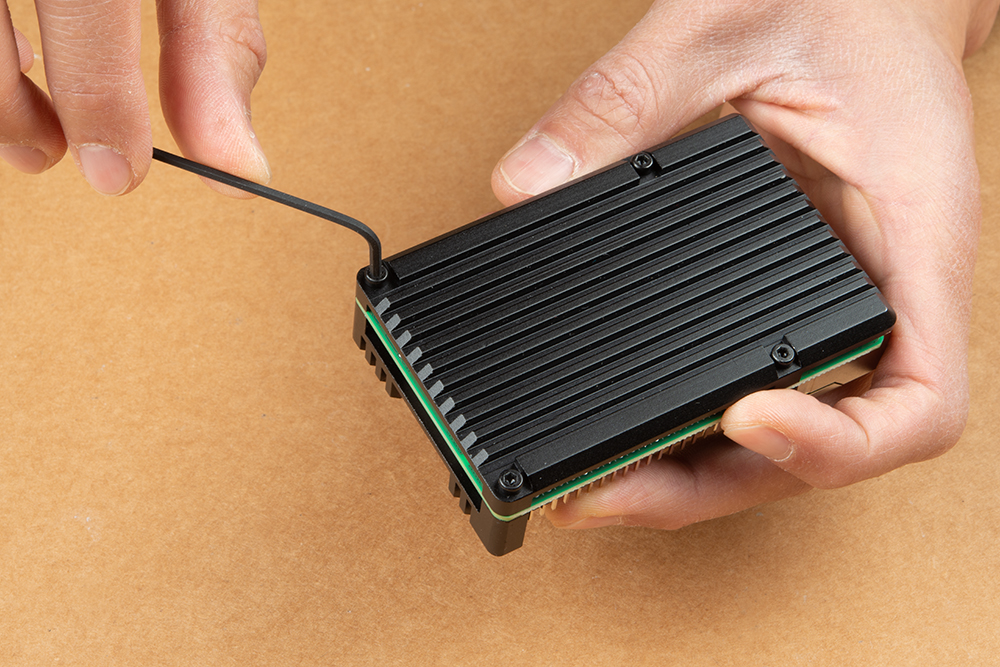
Screw and tighten the hex bolts using the allen key.
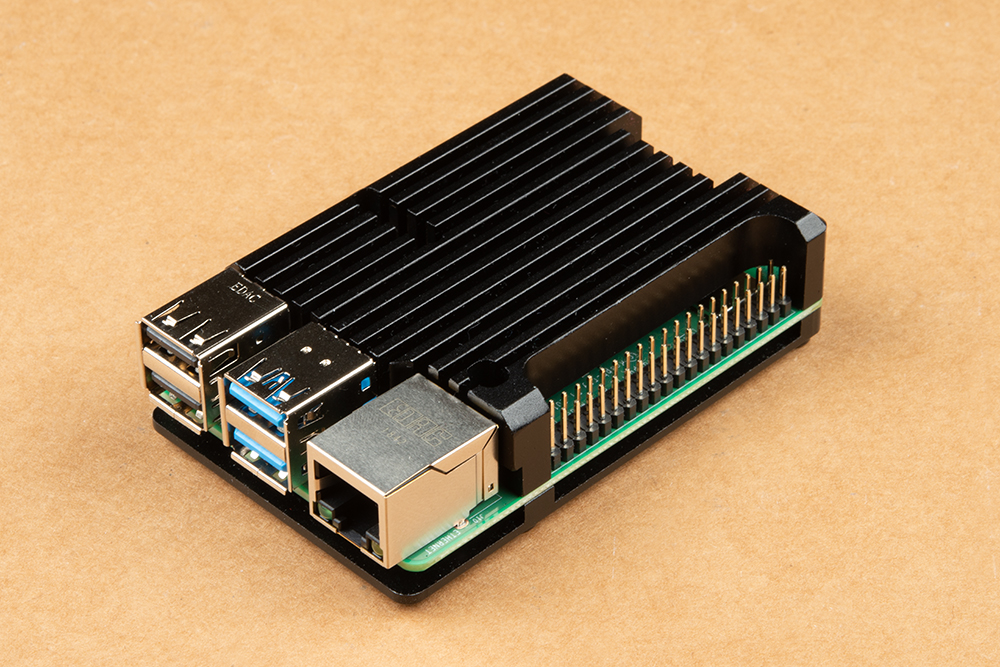
Rotate the Pi. Your heat sink enclosure should look like the image below!
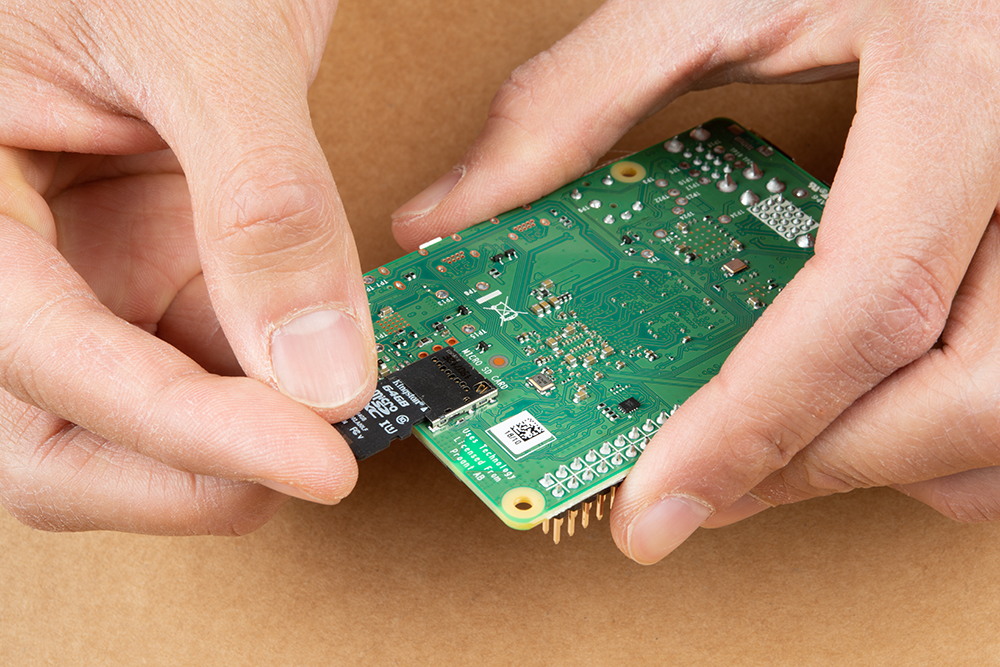
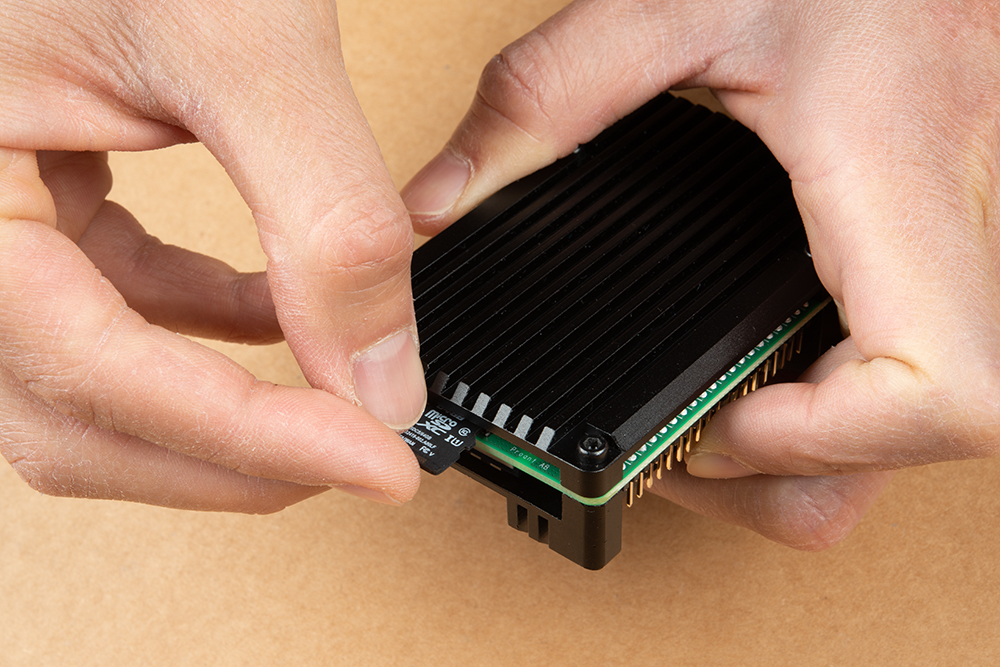
Insert the microSD Card
With the image flashed on the microSD Card, insert it into the microSD socket.
 |
 |
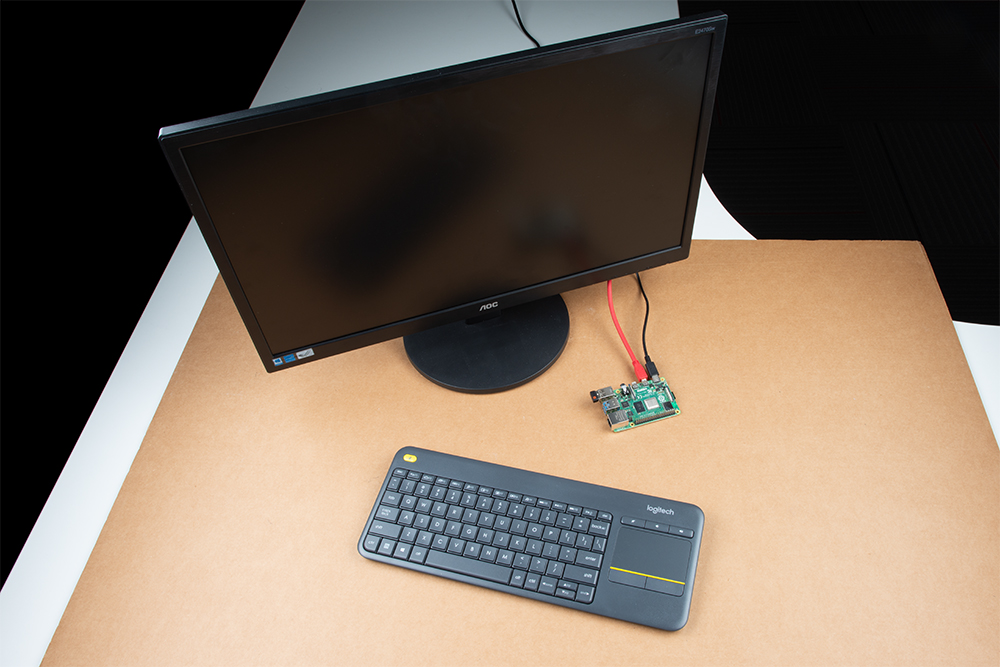
Attaching Peripherals
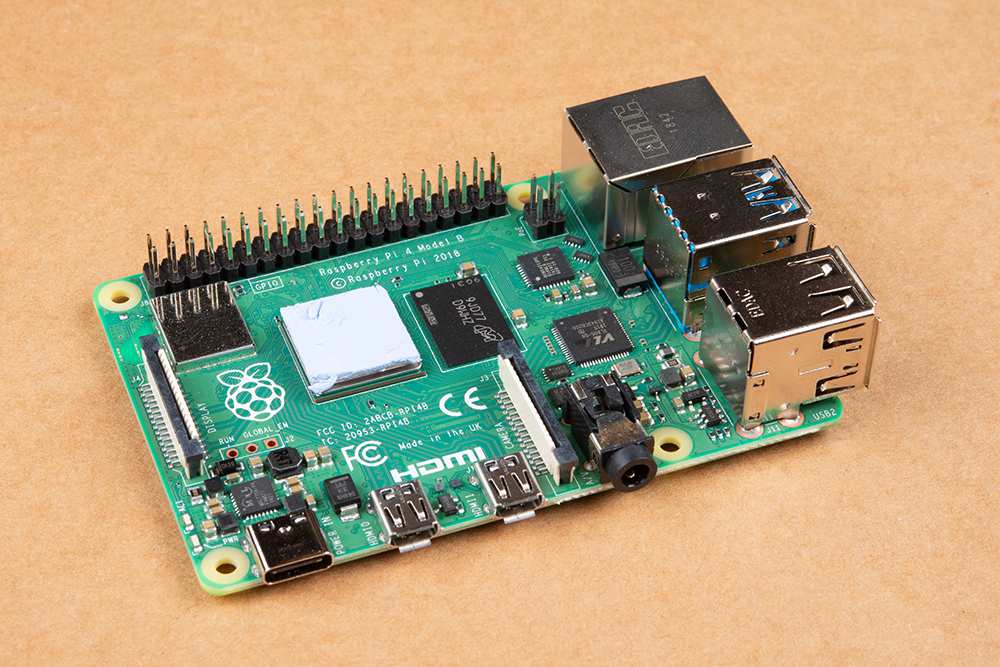
Attach desired consumer computer equipment. At a minimum to get up and running or navigate through the Pi, we recommend using a monitor, keyboard, and mouse. The following images will use a Pi without an enclosure to show where to connect the peripherals.
Monitor
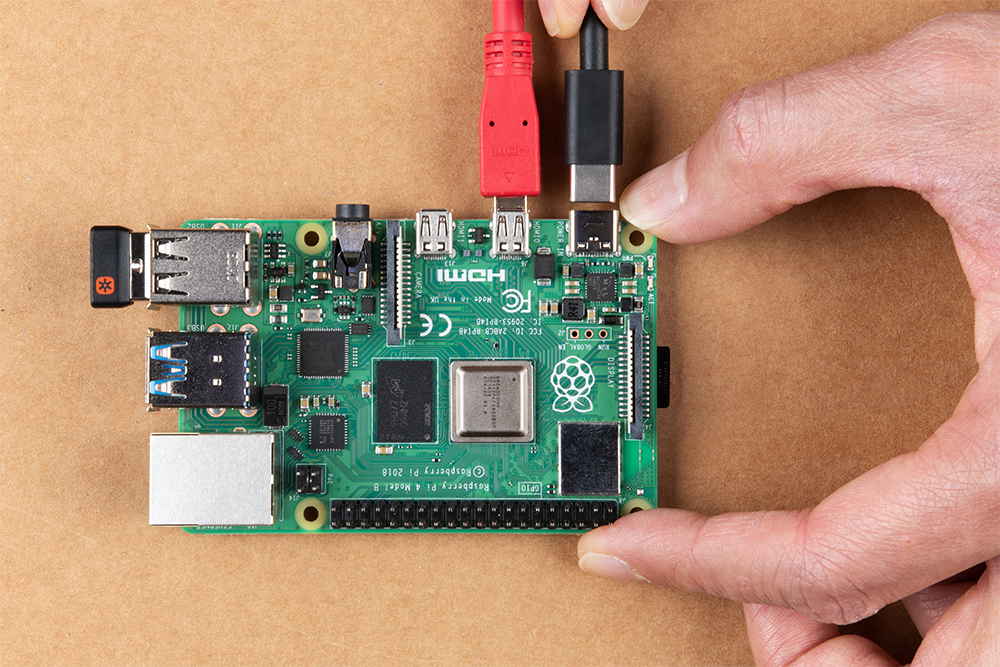
Using a monitor with a HDMI port [3], insert the HDMI end of the cable to the connector. Then connect the mini-HDMI end of the cable to the connector. Note that the Pi 4 has two mini-HDMI outputs. You will need to connect to the HDMI0 port. closest to the USB-C connector.
 |
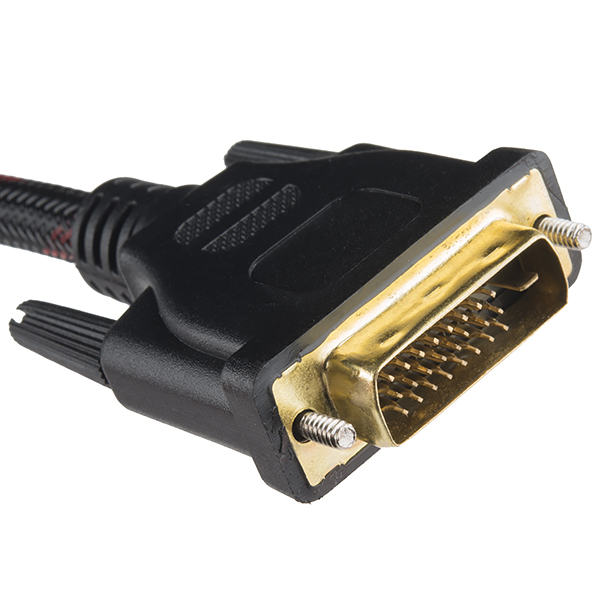 |
| VGA adapter | DVI adapter |
Keyboard and Mouse
Connect a keyboard and mouse to the USB ports. In this case, we were using a wireless keyboard and mouse that had a USB dongle. While you can insert the HID device into any USB port, we recommend connecting it to the USB 2.0 port so that you have the faster USB 3.0 ports (with blue) are available for certain devices (i.e. flash drives).

If you are using a wireless keyboard/mouse combo, the wireless USB dongle that is included maybe hidden in the battery compartment. If you are using the Logitech K400 Plus, flip it over and slide the compartment for the battery holder off.
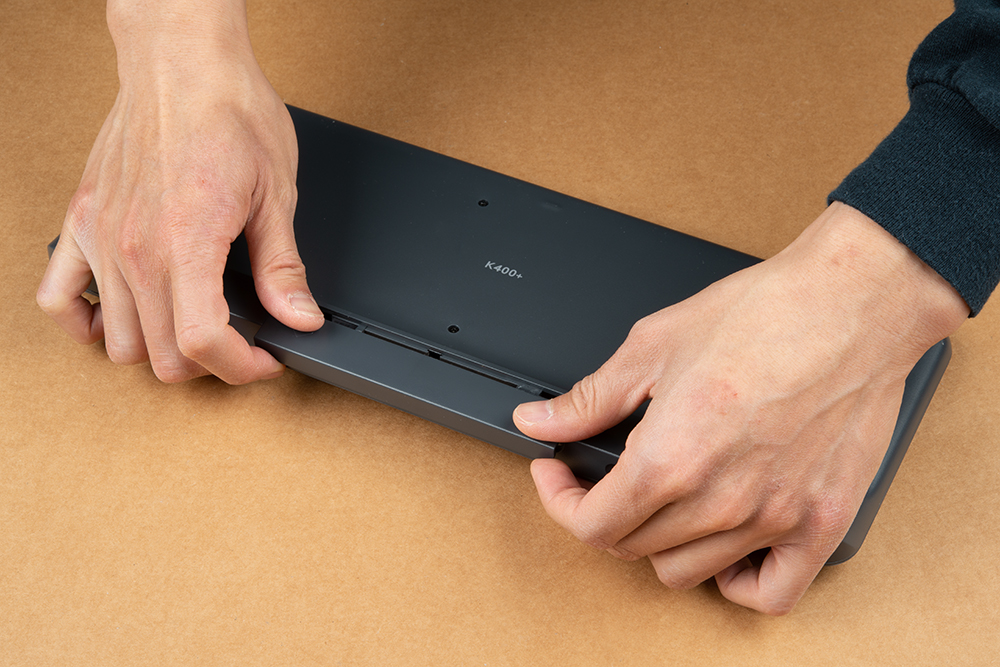
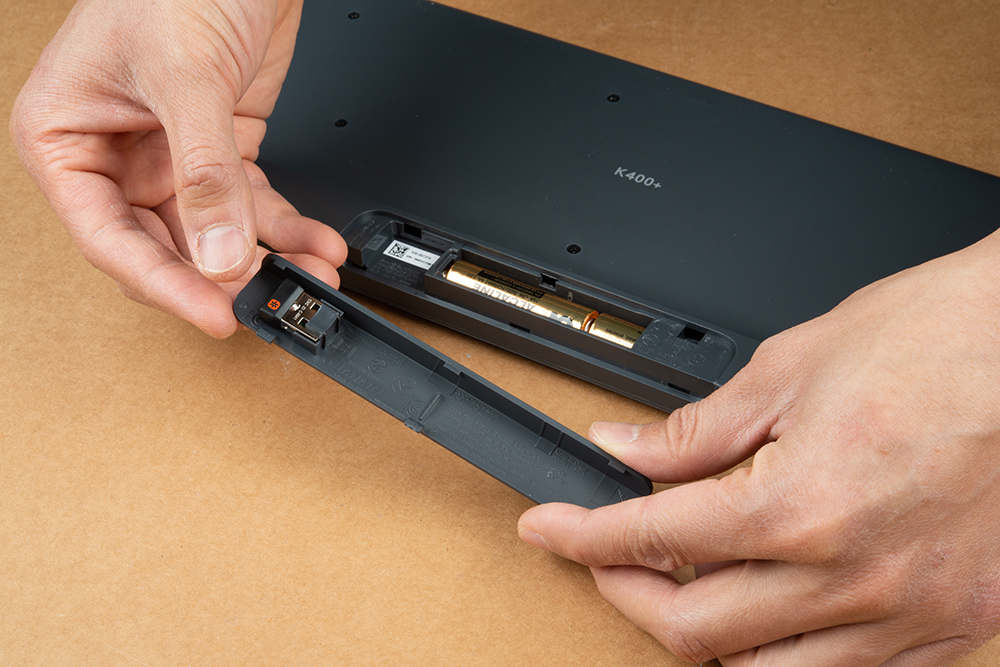
Flipping over the cover, you'll notice that the dongle is attached inconspicuously on the back. Grab the wireless dongle from the back to insert into the Pi's USB port and slide the cover back on the Logitech K400 Plus.
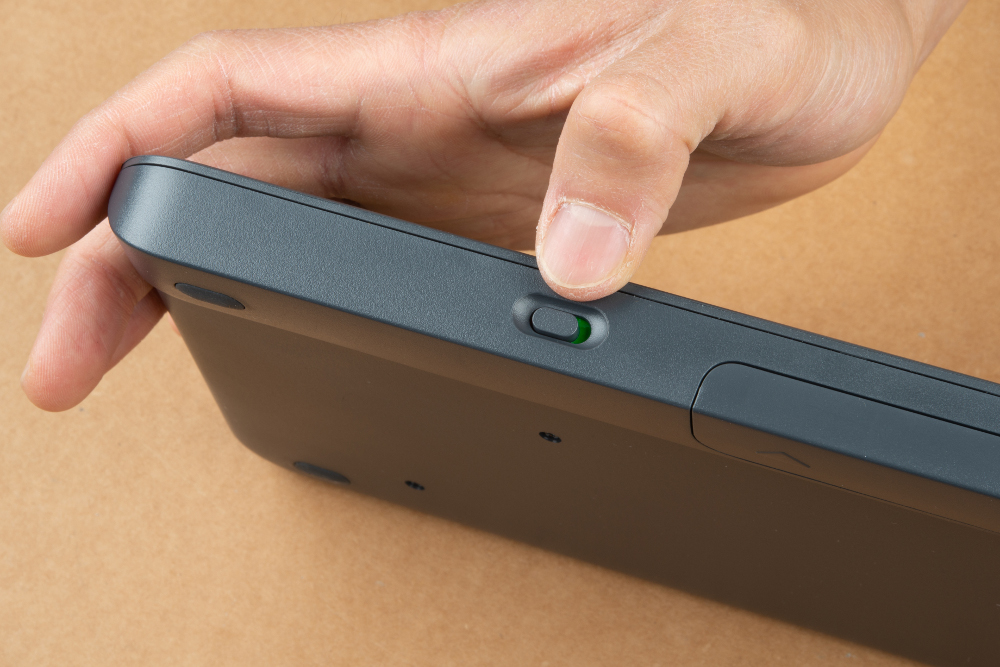
To power the keyboard, make sure to flip the power switch to the green position on the side of the Logitech K400 Plus. Feel free to flip the power switch back to the red position to remove power.
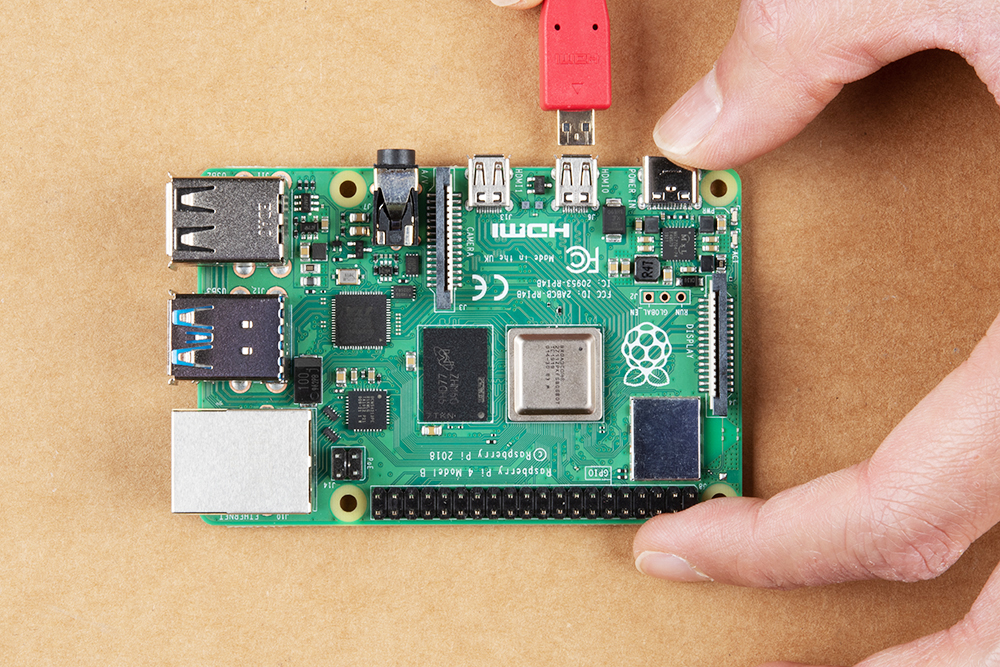
Power Supply
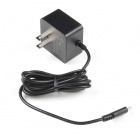
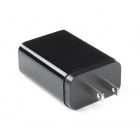
If you have not already, make sure that you inserted the microSD card into the microSD socket. Once everything is connected, insert the power supply [4]!
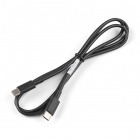
USB 2.0 C to C Cable - 1m
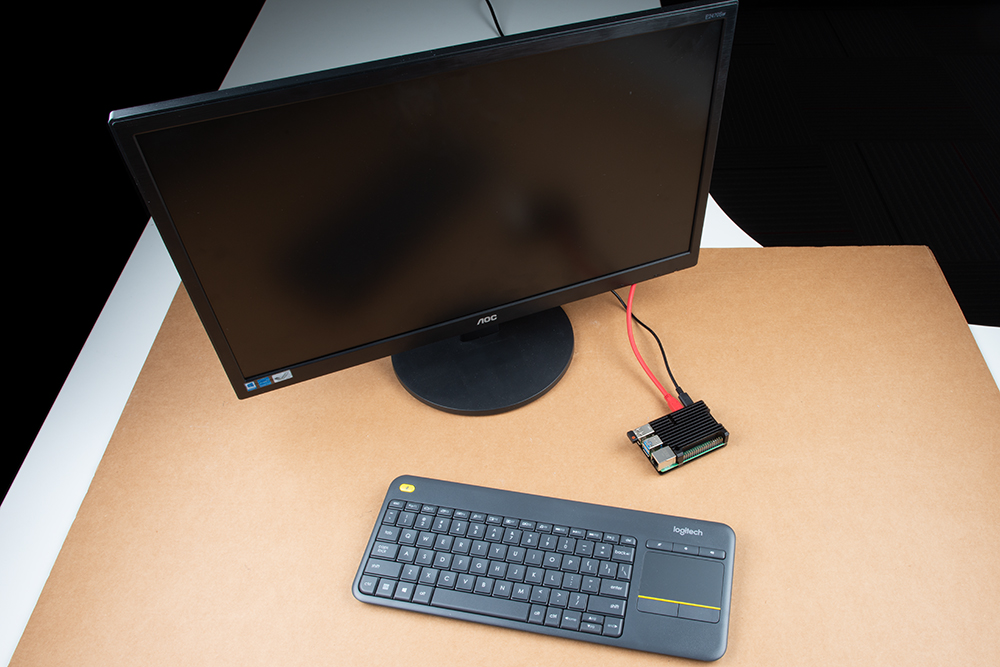
CAB-16395Completed Setup
At this point, your setup should look similar to the images below to get the Pi up and running. You could add ethernet, a second monitor, headphones, speakers, or a camera depending on your setup as well!
 |
 |
Connecting Hardware
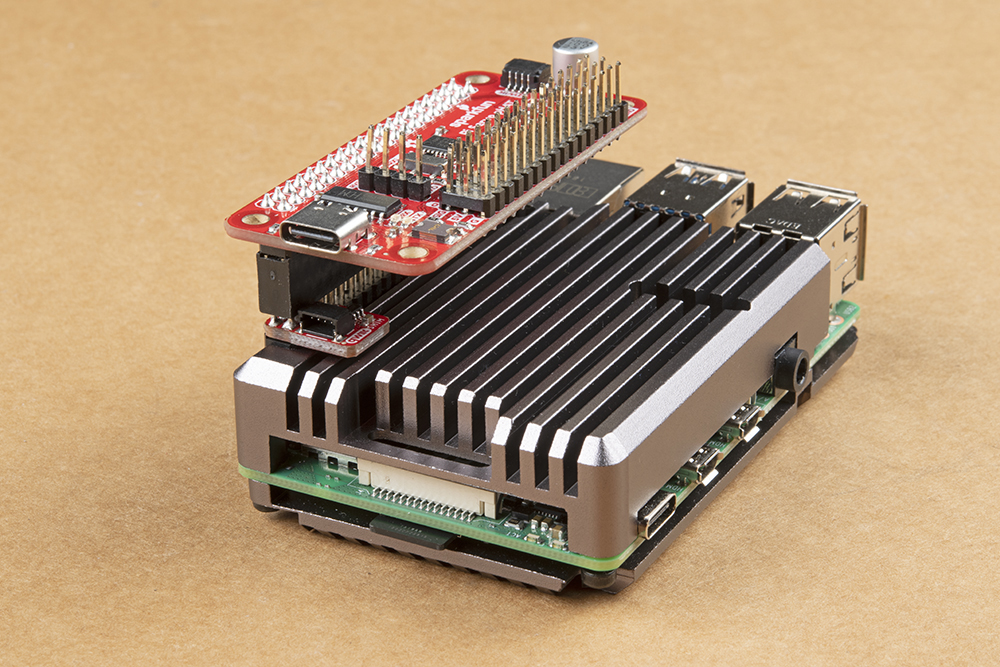
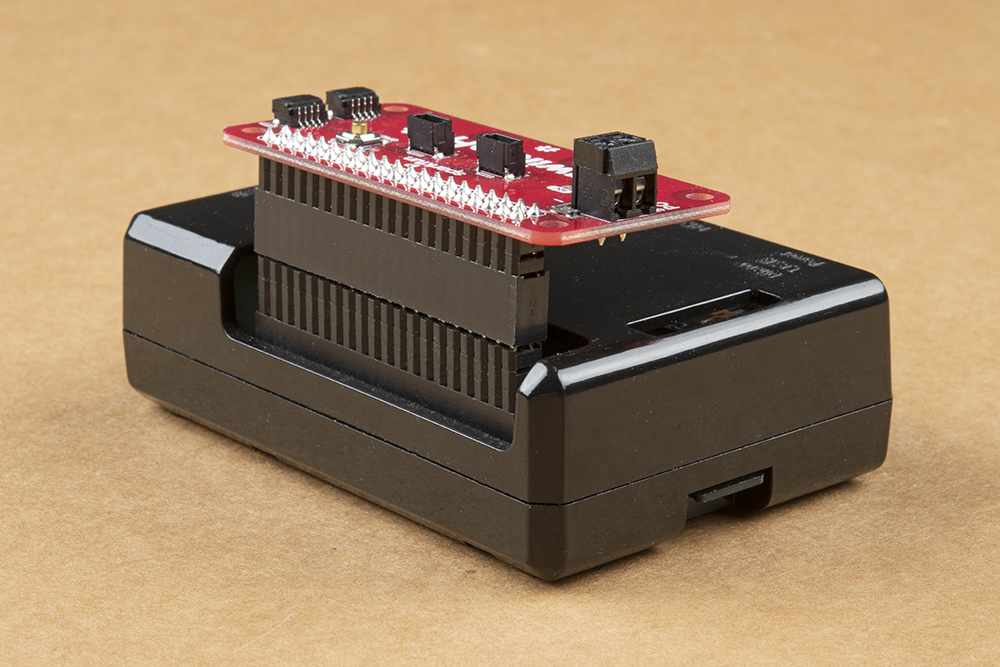
Need easy access to the GPIO pins on the board? If you ordered a Qwiic cable, Qwiic enabled device, and any of the kits, take a look at the Qwiic SHIM [5] to quickly access the I2C pins. If you are looking to use certain I2C devices with Python, we recommend taking a look at the Qwiic SHIM Kit or Qwiic Starter Kit for Raspberry Pi to get started.
Qwiic SHIM for Raspberry Pi Hookup Guide
Qwiic SHIM Kit for Raspberry Pi Hookup Guide
If you included the Pi Wedge with prototyping parts in your order or the Hardware Starter Kit, check out the associated tutorial for the Pi Wedge[5] to easily access the GPIO pins on a breadboard. We recommend taking a look at the Raspberry gPIo tutorial to get started with LEDs and buttons. If you decide to go headless, you can use the 3.3V FTDI to configure or control your Pi via serial.
Preassembled 40-pin Pi Wedge Hookup Guide
Raspberry gPIo
Headless Raspberry Pi Setup
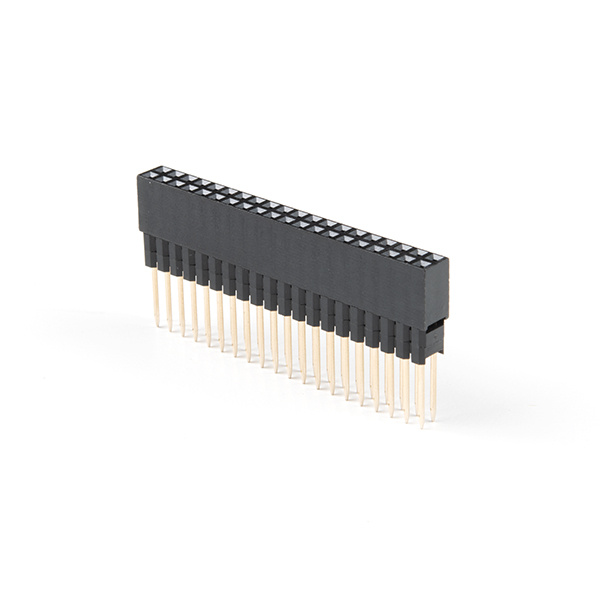
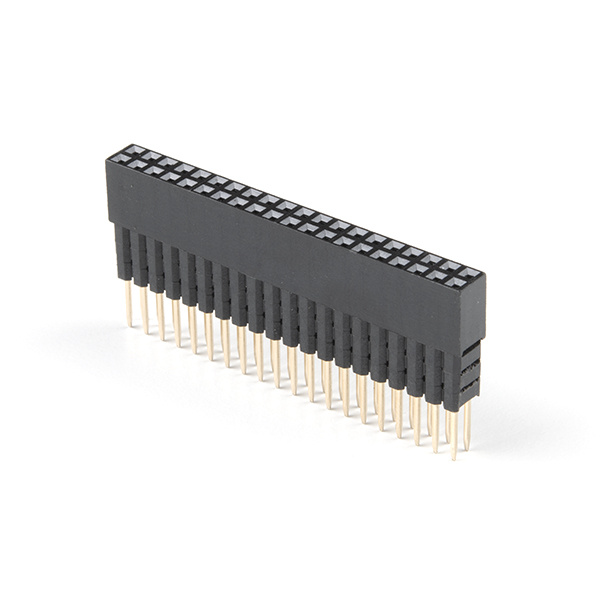
 |
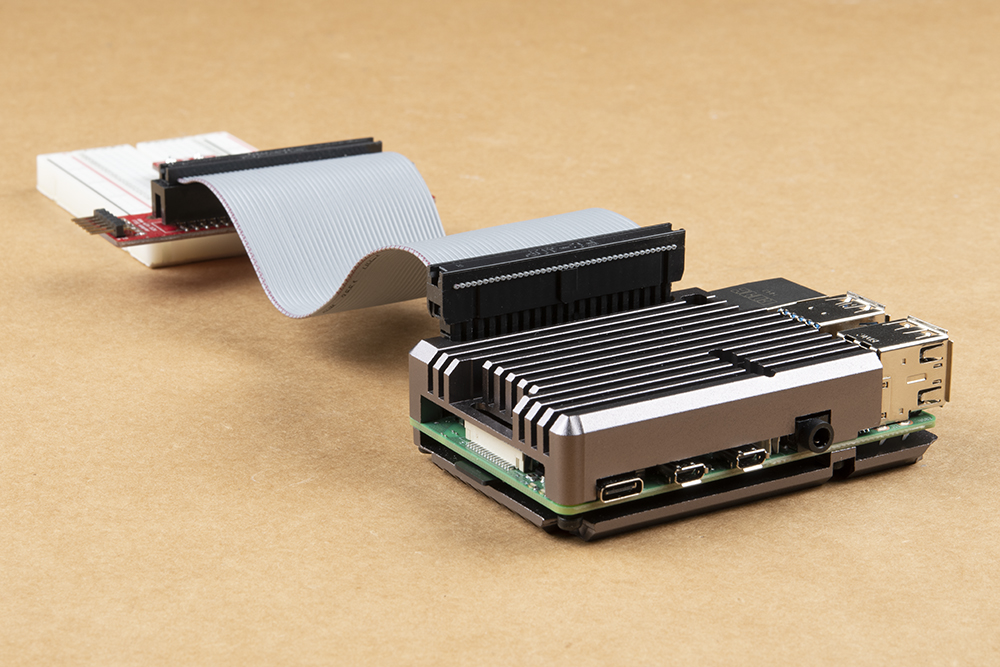 |
| Extension Header with 9.80mm Pin Length is Used to Help Stack the Qwiic SHIM and Pi Servo HAT on a Pi 4 with Heat Sink | Extension Header with 7.30mm Pin Length is Used to Help Connect the Pi Wedge's IDC Cable to the Pi 4 with Heat Sink |
Methods of Working with the Pi
Once the Pi is configured, there are a few methods of using it depending on if you want to use it like a desktop or manage it remotely.
This section covers using the Pi in the following ways
- Using HDMI-out with Monitor -- Operate your Pi like a desktop computer.
- Headless without a Monitor
- Using the serial terminal -- Some functionality.
- Using SSH -- Operate through a network linked to another computer.
- Using VNC -- Control the Pi's graphical desktop remotely over the Internet using a computer. This is useful if you decide to remotely connect to a Pi that may or may not be connected to a monitor.
Using HDMI-out with a Monitor
If this is the first time you are booting NOOBS, you'll need to connect your Raspberry Pi to a monitor and follow the installer. In the window, select Raspbian Full [RECOMMENDED] and click on the button to Install. You'll need to be patient as the software installs the OS to the microSD card. Once finished, click on OK. This will restart the Pi.
PIXEL Desktop (GUI)
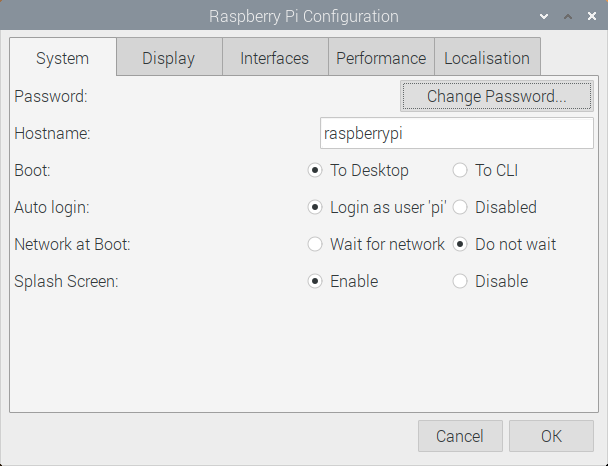
By selecting NOOBS with Raspbian, it automatically logs in and starts a graphical user interface. Once the desktop installs, follow the wizard to configure your Raspberry Pi! You'll need to configure the settings based on your region, monitor, keyboard, Internet settings, and password. It is best to have the Pi check for updates and restart for the changes to take effect.
If you ever need to update the settings, just head to the Raspberry Pi Start Menu > Preferences > Raspberry Pi Configuration.
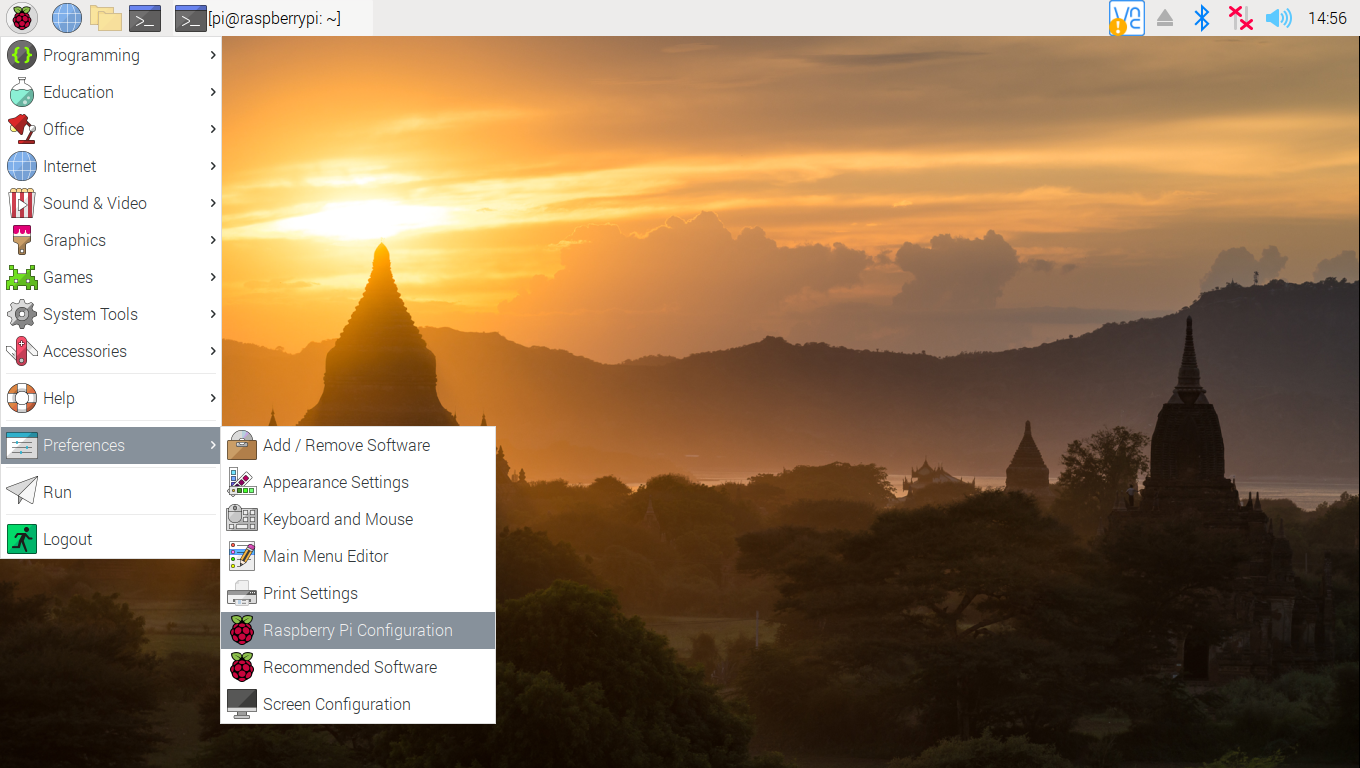
A window will pop up allowing you to easily update the region, monitor, keyboard, password, and turn on any peripherals.
As for the Internet settings, simply click on the "Wireless & Wired Network icon" in the menu bar. This should be by the clock on the upper right corner of the screen. Then select the network and enter its respective password.
Command Line Interface (CLI)
If configured to boot to shell, log in with the following credentials:
username: pi
password: raspberry
Then, enter in the command line to enter a graphical environment should you decide to take advantage of the desktop-type menu-driven operating system.
language:bash
startx
If you need to get back to text land, you can either
- Log off through the Task Bar Menu
- drops back to the shell, closing down the X window system
- Open xterm from the Task Bar
- opens a shell in a graphical window
- Use CTRL+ALT+1 through CTRL+ALT+8
- gives you a number of shells, with 7 being the graphic environment (if loaded).
Remember, shutdown with the task bar menu or enter the following command from a shell, and wait for the system to halt before removing power [6].
language:bash
sudo shutdown -h now
Raspberry Pi Safe Reboot and Shutdown Button
Headless without a Monitor
As an alternative, you can also log into the Pi as a "headless" computer. This is basically a Raspberry Pi without a monitor, keyboard, or mouse. You can decide to connect to the Pi using a serial UART or SSH. For advanced users, you will need to turn on the interfaces before you can take advantage of these setups.
Headless Raspberry Pi Setup
How to Use Remote Desktop on the Raspberry Pi with VNC
Configuring the Pi
This section goes over configuring the keyboard, wired, and wireless internet.
The Raspbian distribution comes defaulted to European hardware. With US keyboards, the " (quotation mark) symbol is replaced by @ (commercial at) and our number sign # is replaced by the European pound sign £. This can make it aggravating when trying to #define things.
PIXEL Desktop (GUI)
The easiest method of configuring the Pi is using the PIXEL desktop. For those that need to adjust the settings again after the initial setup, check below!
Configuring the Keyboard Layout
To configure the keyboard layout again, head to the Task Bar Menu by clicking the Pi Start Menu > Preferences > Raspberry Pi Configuration > Localisation > Set Keyboard....

Configuring the Internet Interfaces
Raspbian does a good job of configuring wireless networks automatically. By default, DHCP is configured so that the Pi will receive an IP address when a network cable is plugged it to the Ethernet port or when a wireless network is connected.
To use the graphical network tool, right click on the icon on the right side of the task bar, and click "WiFi Networks (dhcpcdui) Settings". Then, select the interface desired (wlan0 or eth0) to disable the DHCP and set your own IP, if necessary.
To connect to a wireless network, click on the icon, select the desired network, and enter the password.
Hovering over the icon will bring up a status of wlan0 and eth0 that also shows the IP address.
Command Line Interface (CLI)
For advanced users using the command line, you can use the CLI to adjust the settings. Open a Terminal Window to configure the Raspberry Pi.
Configuring the Keyboard Layout
Invoke the config tool with the following command in the command line:
language:bash
sudo raspi-config
Then take the following actions to change the keyboard settings. We'll change the settings to US in the following example. If you are in another region, just select the option that best fits your preferences:
- Set the default locale for the system
- Select "Internationalisation Options"
- Select "Change Locale"
- Deselect en_GB.UTF-8 UTF-8
- Select en_US.UTF-8 UTF-8, (Ok)
- Set default to en_US.UTF-8, (Ok)
- Change the keyboard layout -- from the Internationalisation Options menu,
- Change Keyboard Layout
- Leave set as: Generic 105-key (Intl) PC (Ok)
- Select Other (Ok)
- Select English (US) (Ok)
- Select English (US) (Ok)
- Select default (Ok)
- Select No compose key (Ok)
- Set Ctrl+Alt+Bksp function (Ok)
- Finish with the dialog and get back to the shell
- Try the " and # keys at the prompt.
We recommend restarting the Pi at this point to ensure that the changes take effect.
Changing Your Password
Type the following command to change the password.
language:bash
sudo passwd
You will be prompted to enter your new password. Type in your new password, and your Pi will be that much more secure from unwanted visitors.
Configuring the Internet Interfaces
At this time, the network configuration works out of the box so there's really nothing to configure, but in case something goes awry, here's the basics of what can be played with and a known-working configuration to compare with.
A configuration file, interfaces, configures both wired and wireless devices. Enter the following command into a terminal to edit the interfaces file.
language:bash
sudo nano /etc/network/interfaces
Replace "nano" with "leafpad" if you prefer graphics. Here's what our Pi 3 is using:
language:bash
# interfaces(5) file used by ifup(8) and ifdown(8)

# Please note that this file is written to be used with dhcpcd
# For static IP, consult /etc/dhcpcd.conf and 'man dhcpcd.conf'

# Include files from /etc/network/interfaces.d:
source-directory /etc/network/interfaces.d

auto lo
iface lo inet loopback

iface eth0 inet manual

allow-hotplug wlan0
iface wlan0 inet manual
    wpa-conf /etc/wpa_supplicant/wpa_supplicant.conf

allow-hotplug wlan1
iface wlan1 inet manual
    wpa-conf /etc/wpa_supplicant/wpa_supplicant.conf
By default, this file is set up to get its configuration from /etc/wpa_supplicant/wpa_supplicant.conf, which is really the proper place for wifi information. Here are the contents:
language:bash
ctrl_interface=DIR=/var/run/wpa_supplicant GROUP=netdev
update_config=1

network={
        ssid="myNetworkSSID"
        psk="mySuperSecurePassword"
        key_mgmt=WPA-PSK
}
Applying the Changes
Sometimes the link should be cycled for a new configuration to take. Rather than shutting down the pi and restarting, use ifdown and ifup to bring the link down and back up.
For wireless connections, use
language:bash
sudo ifdown wlan
and
language:bash
sudo ifup wlan0
For wired connections, use
language:bash
sudo ifdown eth0
and
language:bash
sudo ifup eth0
Updating Software
Software packages are constantly updated. Luckily, Linux uses a package manager. All we have to do is tell our package manager to update everything, and then sit back and watch. Make sure to update the image so that we have the latest distribution. Enter the following commands in the command line individually to update your image.
language:bash
sudo apt-get update
This will go fetch the latest package information and tell the package manager what needs to be updated.
language:bash
sudo apt-get upgrade
This will download and upgrade all the packages. Please note that this upgrade will take a while. It will also prompt you if this is really what you want to do, the correct answer is "Y".
upgrade to dist-upgrade, the apt-get tool will automatically update or remove any unnecessary dependencies.
sudo apt-get dist-upgradeIf needed, type the following command to restart.
language:bash
sudo reboot
What's the difference between apt vs apt-get?
The apt-get command is older and has more functionality. It's meant for system use, low level interfaces, or scripts. The tool is backward compatible and predictable.
The
apt command is newer, user friendly, and includes a progress bar as the packages are installed. The apt command combines commonly used functions from apt-get, apt-cache, and apt-config into one simplified tool. There may be additional options and output. It's meant to be for the Linux user and high level interfaces. The tool is continually being developed and commands may change in the future.
Overall, both
apt and apt-get function the same. However, the syntax is slightly different between the two.
Over time, you'll start accumulating old packages during updates. To save space and remove unnecessary packages that were automatically installed that are no longer needed, you can enter the following command. It will also prompt you if this is really what you want to do, the correct answer is "Y".
language:bash
sudo apt-get autoremove
Then clear the package cache by entering the following command.
language:bash
sudo apt-get clean
Other Useful Linux Commands
A few other useful commands for use in the terminal command line:
pwd- Print Working Directory, if you're not sure what folder you are in this will tell you where you are in the filesystem.ls- List, this will show you the contents of the folder. To show all files, including hidden ones, typels -ato show all files/folders. Alternatively, typingls -alwill show you all files/folders as well as their permission settings.cd- this is how you change directories.cd foldername- will move you to that folder.cd ..- will back you up one level.cd ~- will take you back to your home directory.
passwd- this will allow you to change your passwordman- this stands for manual. Type man before a command to get a summary of how to use it.nano- this will open a basic text editor that is fairly easy to use.
At this point you should be interacting with your Raspberry Pi like you would any other computer. You can teach yourself the finer points of Linux, learn Python, program the GPIO pins, setup a minecraft server, build a network storage system, game console, or media center, or just surf the web.
Troubleshooting
Having issues getting the Raspberry Pi to work? Check out this sticky note from the Raspberry Pi Foundation's forum for basic troubleshooting.
Having problems with a piece of SparkFun hardware designed for the Raspberry Pi and interfacing it? Try checking out the SparkFun forums to see if we can assist.
Resources and Going Further
Raspberry Pi Accessories
If you are looking to add additional features, check out the accessories to power your Raspberry Pi remotely, build a homemade motion-activated security system, or go retro by building your own arcade controller to emulate classic video games!
SparkFun PiRetrocade
KIT-14007
Here are some links to our other Pi resources.
- Raspberry Pi Foundation
- Getting Started with the Raspberry Pi
- Product Brief (PDF)
- Schematic (PDF)
- Mechanical Drawing (PDF)
- Documentation
- Projects
- Pi Foundation Forums
- Raspberry Pi Forums: Is Your Pi Not Booting? - Basic troubleshooting tips and solutions for a Raspberry Pi that is not booting up.
- The gPIo tutorial
- The SPI and I2C tutorial
Need some inspiration? Check out these tutorials and projects.
Single Board Computer Benchmarks
SD Cards and Writing Images
Qwiic Distance Sensor (VL53L1X, VL53L4CD) Hookup Guide
SparkFun Photodetector (MAX30101) Hookup Guide
Or check out some of these blog posts for ideas.