Python Programming Tutorial: Getting Started with the Raspberry Pi
Hello, World!
One of the coolest features of Python is that it is an interpreted language (OK, in reality, Python scripts are first compiled to some bytecode, and that bytecode is interpreted). This means that we don't need to run a separate compile step (i.e. translate our program into machine code) in order to run our program. In fact, we can even run the interpreter in what's known as interactive mode. This will allow us to test out commands one line at a time!
To start, we'll tell Python to print the phrase, "Hello, World!" to the terminal. We'll do this first from the interpreter and then we'll create a file and run it as a program. This will show you two of the main ways to interact with Python.
If you are curious about where the phrase "Hello, World!" comes from, this Wikipedia article gives a brief yet fascinating history.
Getting Started with the Interpreter
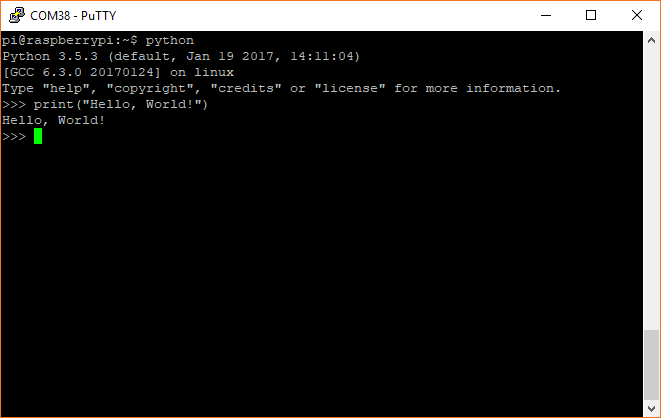
From a terminal, enter the following commend to start the Python interpreter:
language:bash
python
You should be presented with a different command prompt, consisting of 3 greater-than signs >>>.
Type the following command:
language:bash
print("Hello, World!")
Once you press enter, you should see the phrase Hello, World! repeated back to you.
And that's it! You just ran your first Python program!
Exit out of the interpreter by entering:
language:bash
exit()
Running a Python Program from a File
You can individually enter and run commands one line at a time in the Python interpreter, which is incredibly useful for trying out different commands (or using it as a calculator!). Often, you will want to save your commands together in one or more files so that you can run them all at once.
The simplest way to do this is to create a file from the terminal, although you are welcome to use the Raspbian graphical editor, Leafpad, as well (found under Accessories > Text Editor when you click on the Raspberry Pi icon in the top left).
Still in a terminal, enter the command:
language:bash
nano hello.py
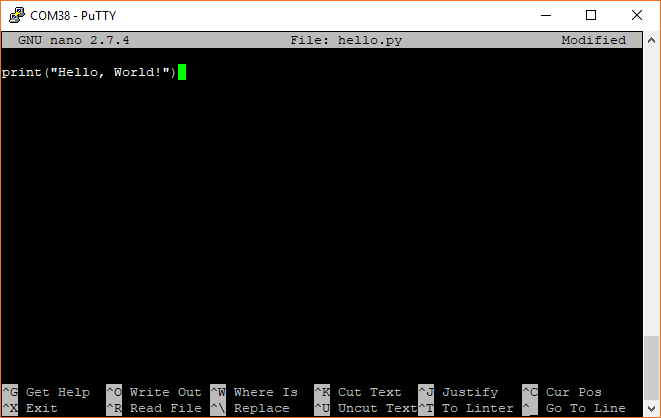
This creates a file named hello.py in your home directory (/home/pi) and starts editing it with the nano program.
In this file, enter the following on the first line:
language:bash
print("Hello, World!")
Save and exit (ctrl+x followed by y and then enter). Back in the Linux command prompt, enter the command:
language:bash
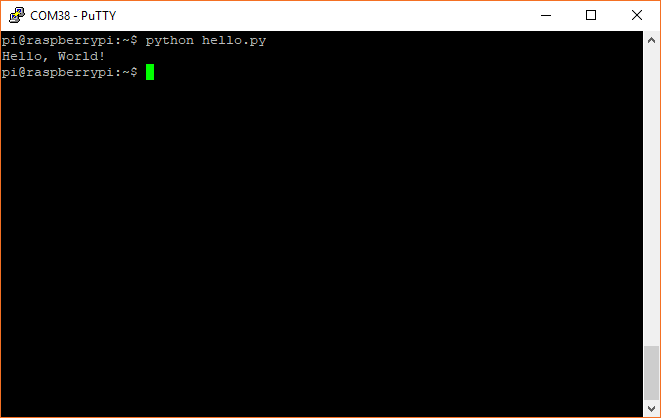
python hello.py
This should run the code found in the file hello.py. In our case, you should see the iconic phrase Hello, World! printed out in the console.
clear command.To summarize what we just did, you can use the python command on its own to begin an interactive interpreter session that allows you to type commands in real time. If you specify a file, such as python <FILE>.py, the Python interpreter will run the commands found in the file without giving you an interactive session.
Note that the filename suffix .py is not required for the interpreter to run the code found inside. However, it can be very helpful to keep your files organized so that when you see a file ending in .py, you will know that it contains Python code. The .py suffix is also necessary when making modules, which we'll cover later.
Development Environments
The simplest way to create Python programs is to write your code in a text editor (e.g. nano, vim, emacs, Midnight Commander, Leafpad, etc.), save it, and then run it from the terminal with the command python <FILE>.py. You are welcome to continue working through this guide using a text editor and command line.
Some users prefer to use an integrated development environment (IDE) when developing code. IDEs offer a number of benefits including syntax highlighting, code completion, one-click running, debugging hints, etc. However, most IDEs require a graphical interface to use, which means you will need to be on the full desktop version of Raspbian.
IDLE
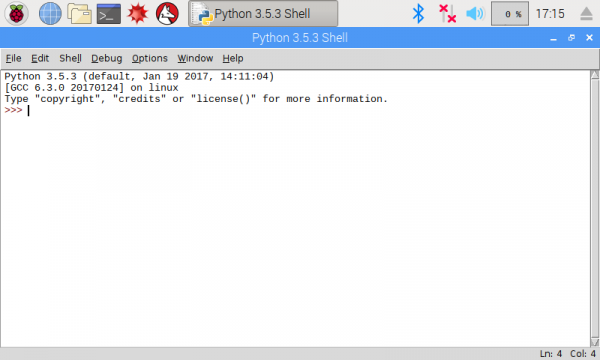
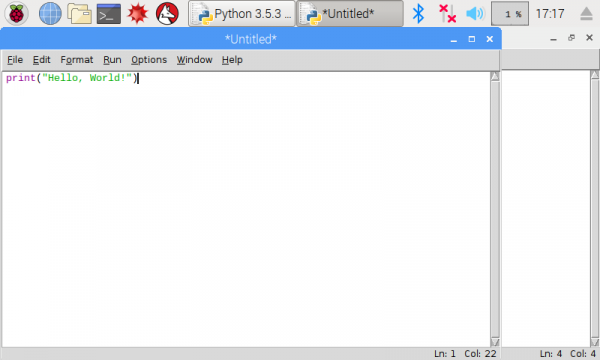
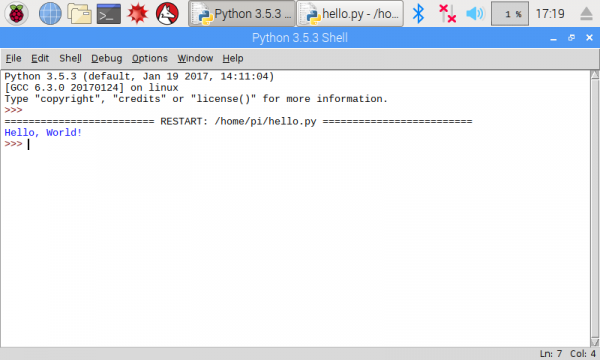
IDLE is the default Python editor that has been available on Raspbian for many generations. The good news is that it has a built-in interpreter, which allows you to run commands one at a time to test code. The bad news is that it doesn't show line numbers, and it only works with Python (but you're only here for Python anyway, right?).
Open IDLE by selecting the Raspberry Pi logo in the top-left, and click Programming > Python 3 (IDLE). You should be presented with the Python interactive interpreter.
To write a program, go to File > New File. Enter in your code.
Click File > Save As... to save your code to a Python file (don't forget the .py suffix!). Click Run > Run Module to run your program.
Geany
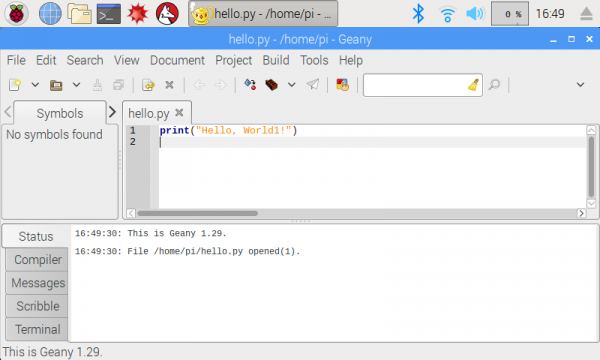
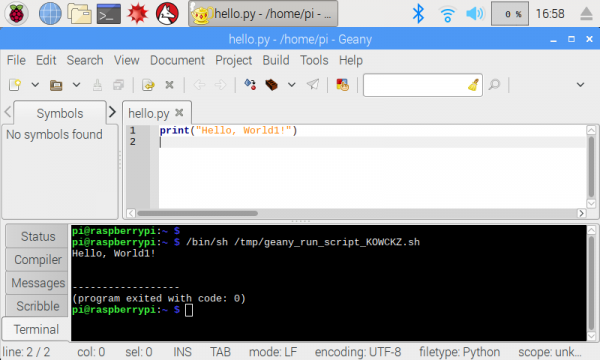
Geany is a great, beginner-friendly IDE that works with many different languages. However, it does not start up with a Python interactive interpreter. You can open Geany up by click on the Raspberry Pi logo in the top-left, and selecting Programming > Geany. Write your code in the file editor pane.
Save your code, making sure the filename ends with .py.
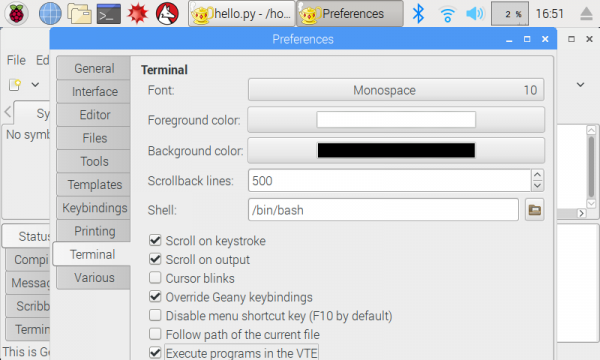
By default, Geany will attempt to open a new window to show the output of your code, which may or may not work on the Raspberry Pi. We can change it to run in the Terminal pane. Click Edit > Preferences. Select the Terminal tab and click to enable Execute programs in the VTE. Press enter to save and close the Preferences window.
Click Build > Execute (or click the paper airplane icon) to run your code. You should see the output of your program appear in the Terminal pane of Geany.
Thonny
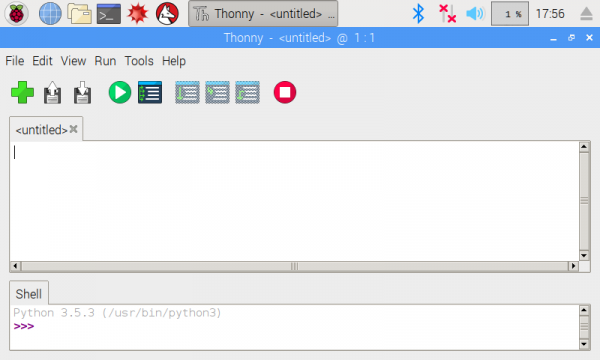
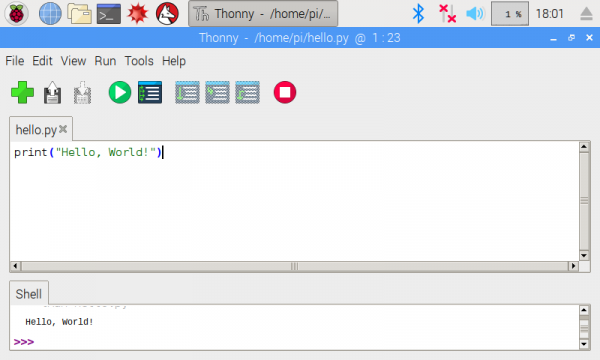
Finally, Thonny is another great, easy-to-use IDE that comes pre-loaded on Raspbian. It focuses on Python and has an interactive environment when you load the program. Start Thonny by clicking on the Raspberry Pi icon followed by Programming > Thonny Python IDE.
Write your program in the top pane, click File > Save as... to save it, and click Run > Run current script to execute the program. Output will appear in the bottom interpreter pane.
