Python Programming Tutorial: Getting Started with the Raspberry Pi
 Shawn Hymel
Configure Your Pi
Regardless of whether you are using the full desktop or a headless setup, you will need to perform some basic configuration steps on your new Raspberry Pi installation. These steps can be easily performs from a terminal (a text input/output environment).
Full Desktop: You should be automatically logged into the X windows manager (otherwise known as the desktop). To open a terminal, simply click on the Terminal icon on the top left of the desktop. You should be immediately presented with a command prompt in a terminal window.
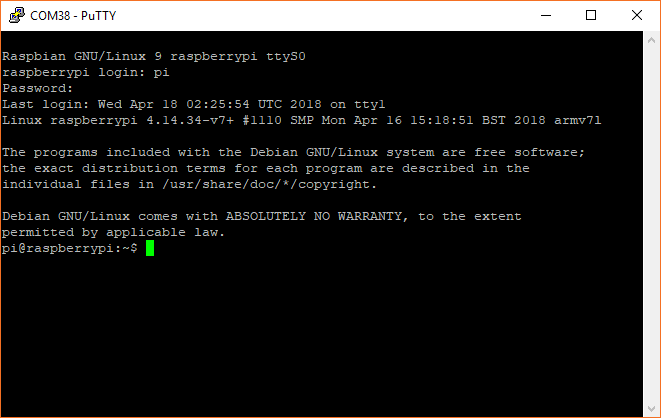
Headless: With a headless setup, everything you do will be through a terminal. When you connect to your Pi through Serial or SSH, you will be presented with a login prompt on the terminal. Enter the default credentials:
- Username: pi
- Password: raspberry
You will be presented with a command prompt.
Run the Config Tool
From your command prompt, enter the command:
language:bash
sudo raspi-config
If asked to enter a password, type out the default password: raspberry.
You will be given several options on how to configure your Raspberry Pi.
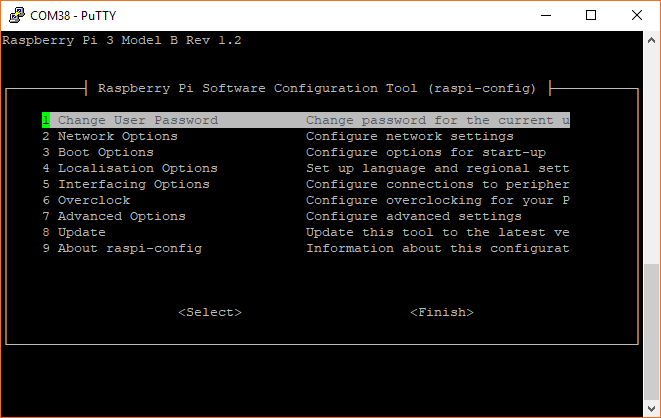
- Use the arrow keys to select 1 Change User Password and follow the on-screen prompts to change your default password.
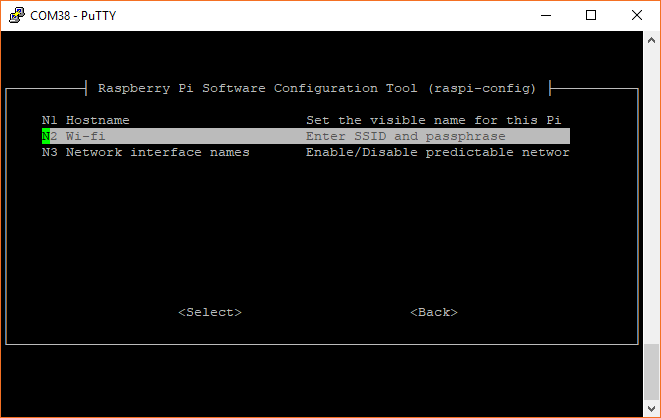
- Next, select 2 Network Options
- In the following screen, select N2 Wi-fi, and follow the prompts to connect your Pi to a local WiFi network (assuming you have one available).
Select 4 Localisation Options to bring up the keyboard and time zone options.
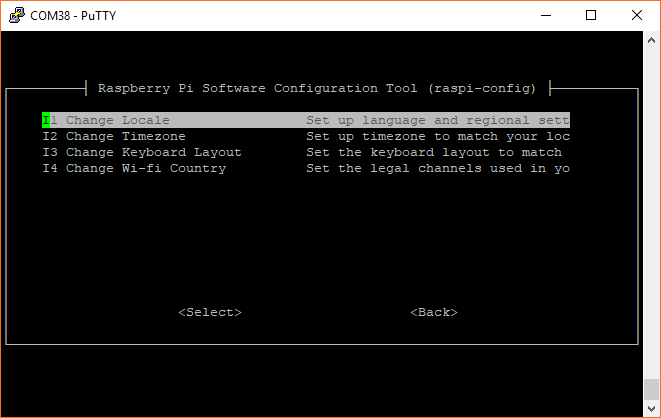
- Select I1 Change Local
- Scroll down to highlight en_GB.UTF-8 UTF-8, and press the spacebar to deselect it (the asterisk '*' will disappear)
- Scroll to find your language/country and press space to select it (an asterisk '*' will appear next to your selection)
- If you live in Great Britain, you can just leave en_GB.UTF-8 UTF-8 selected
- If you live in the United States, you will probably want to select en_US.UTF-8 UTF-8.
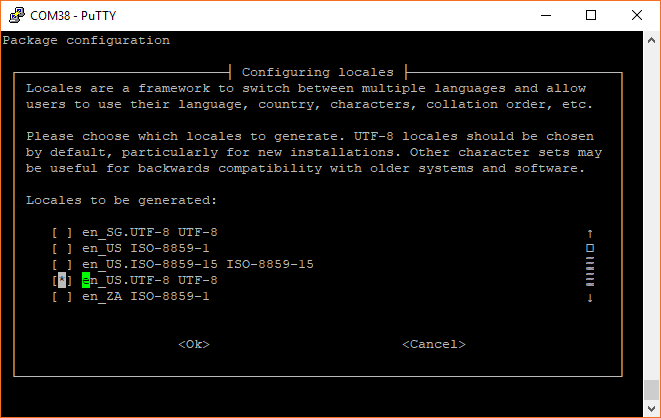
- Press enter to save the changes
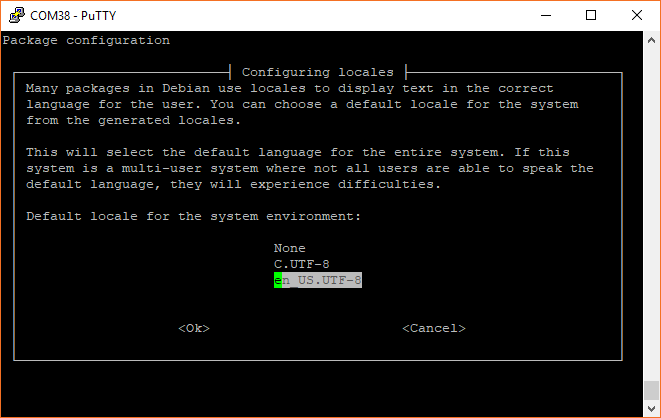
- On the next screen, highlight your chosen localization option (e.g. en_US.UTF-8 if you're in the United States) and press enter.
- Go back into the 4 Localisations Options, and select I2 Change Timezone
- Follow the prompts to select your timezone.
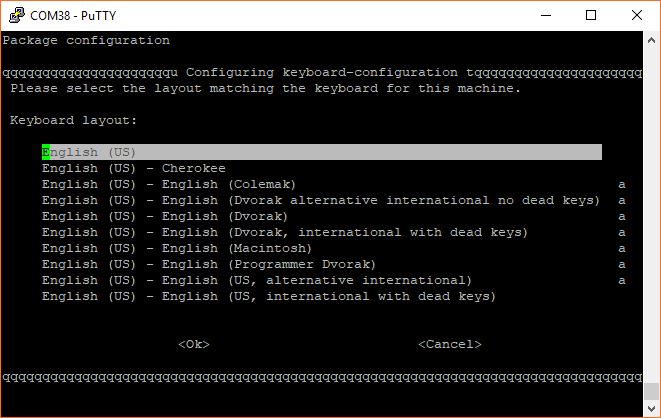
- Back in 4 Localisations Options, select I3 Change Keyboard Layout
- Choose your preferred layout (the default Generic 105-key (Intl) PC seems to work well in most situations)
- On the next screen, select the layout for your language/country
- If you live in Great Britain, you can leave English (UK) selected. Otherwise, select Other, press enter, and follow the prompts to select your language/country. If you live in the United States, select English (US), and on the next screen, scroll up to highlight English (US). Press enter.
- Leave The default for the keyboard layout selected, and press enter
- Once again, leave the default No compose key selected, and press enter
- Leave No selected when asked about using Control+Alt+Backspace, and press enter
- After a few moments, you will be dropped back into the main Configuration Tool menu.
Select 5 Interfacing Options.
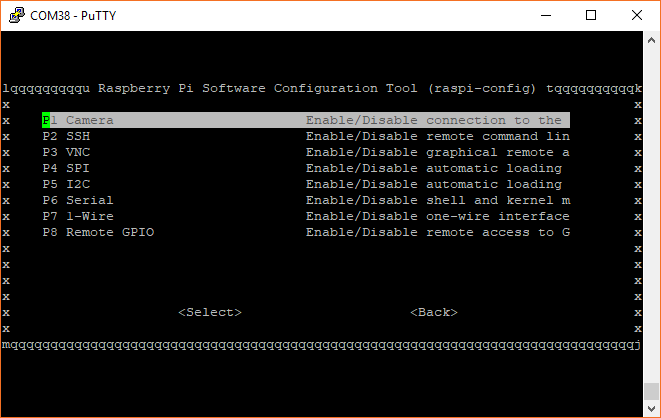
- Feel free to enable the Camera interface and SSH if you think you'll need them
- Select SPI, select yes on the following screen, press enter
- Repeat for I2C
- Repeat for Serial
Back in the main screen, select 7 Advanced Options.
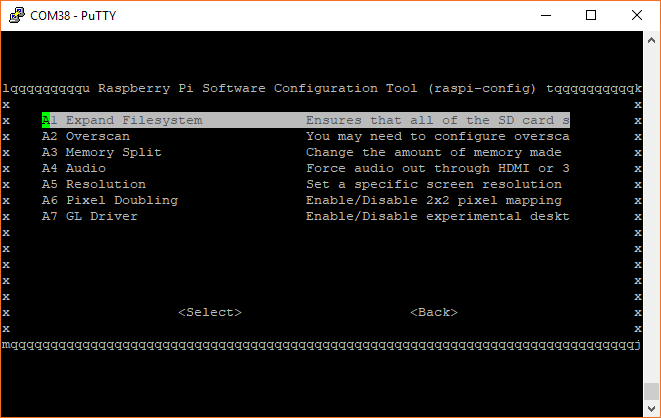
- Select A1 Expand Filesystem, and press enter
- Go back into 7 Advanced Options, select A4 Audio, highlight 1 Force 3.5mm ('headphone') jack, and press enter
- Use the right arrow key to select Finish, and press enter. If asked to reboot, select Yes and press enter. Wait while your Raspberry Pi restarts.
If you are using a Serial or SSH terminal, log back in using the username pi and the password you created earlier.
Use Python 3
By default, Raspbian (Stretch version April 2018 and earlier) uses Python 2. However, versions 2 and 3 come installed by default. We just have to make 1 minor change so that the Pi uses Python 3 whenever we type python into a terminal.
In a terminal window, enter the following command:
language:bash
python --version
You should see which version is being used by default. For example, you might see Python 2.7.13. If you see that your OS is using Python 2 by default, you'll need to change it to use the Python 3 installation. We want to this so that Python 3 is used every time we log in.
Enter the command:
language:bash
nano ~/.bashrc
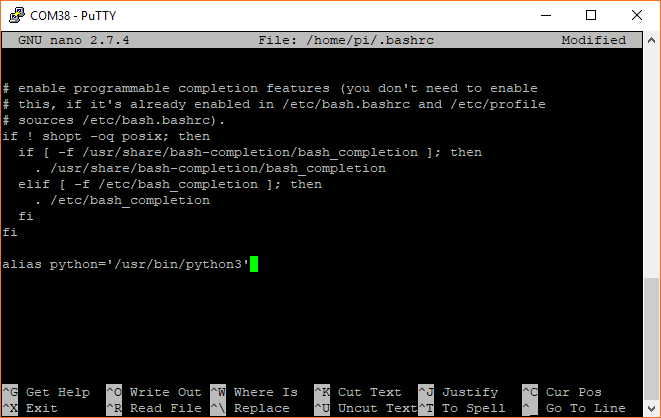
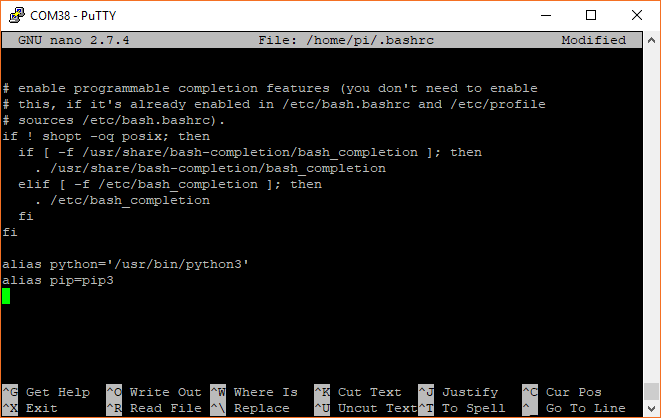
.bashrc is a file that resides in the user's home directory (the user pi in this case). The file acts as a shell script that is run each time that specific user opens a terminal (or logs in over SSH, Serial, etc.). It can help to customize the user environment, and you will likely see a number of other commands already in there.
Scroll down to the bottom, and add the following command to the file:
language:bash
alias python='/usr/bin/python3'
Exit out of nano by pressing ctrl+x, press the y key when prompted if you want to save the file, and press the enter key.
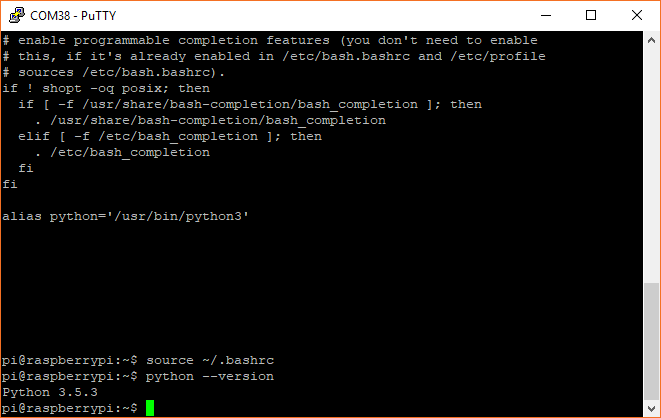
Instead of logging out and logging back in again to run the new command, you can simply run the contents of the .bashrc script by entering:
language:bash
source ~/.bashrc
Now, check the version of Python again:
language:bash
python --version
You should see some version of Python 3 being used.
Install pip
Full Desktop: If you are using the full desktop version of Raspbian, you should have pip already installed.
Headless: If you are using Raspbian Lite, the Python package manager, pip, does not come pre-installed. As a result, you will need to install it with the commands:
language:bash
sudo apt-get update
sudo apt-get install python3-pip
Press y when prompted.
Note that to use pip for Python 3, you will need to use the command pip3. However, we can modify the .bashrc file to use pip instead of pip3, as the rest of the tutorial will show examples using pip:
language:bash
nano ~/.bashrc
Scroll down to the bottom, and add the following command to the file:
language:bash
alias pip=pip3
Exit out of nano with ctrl+x, press y and enter. Run the .bashrc script with:
language:bash
source ~/.bashrc
You should now be able to install Python packages using the pip command.