SIK Experiment Guide for the Arduino 101/Genuino 101 Board (Chinese)
This Tutorial is Retired!
This tutorial covers concepts or technologies that are no longer current. It's still here for you to read and enjoy, but may not be as useful as our newest tutorials.
 D___Run___
 实验 17:使用 LCD
简介
在本实验中,您将学习如何使用 LCD。LCD(液晶显示器)是一种简单的屏幕,可以显示命令、少量信息或是来自传感器的读数 -- 所有这些都取决于如何对开发板进行编程。在此电路中,您将学习在项目中采用 LCD 的基础知识。
所需部件
您需要以下部件:
- 1x 实验电路板
- 1x Arduino 101 或 Genuino 101 开发板
- 1x 电位计
- 1x 3.3V LCD
- 16x 跳线
没有 SIK?
如果您要执行本实验,但又没有 SIK,那么我们建议您使用这些部件:


您还需要一个 Arduino 101 或 Genuino 101 开发板。

Arduino 101
DEV-13787
Genuino 101
DEV-13984LCD 屏幕简介

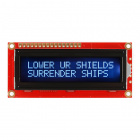
101 SIK 包含一个液晶显示器 (LCD) 屏幕。此屏幕类似于在微波仪器、汽车中的仪表板上或德州仪器语音训练机(年纪大的朋友可能记得)上可能找到的屏幕。LCD 屏幕是显示来自 101 开发板的数据或信息的好地方,而不必将它连接到笔记本电脑。
此 LCD 屏幕总共具有 32 个可能字符空间,它们按网格排列,包含两行,每行 16 个字符。LCD 通过一个库进行控制,从而可更加容易地将它与 101 开发板结合使用。接线似乎有点让人望而却步,不过这是值得尝试的挑战。
专业提示:对 LCD 屏幕进行接线时,从 LCD 针脚的一侧开始,朝着中央进行运行。遇到空缺的针脚之后,切换到另一侧,并重复过程。此方法可帮助防止意外缺失针脚或错误接线。
硬件接线
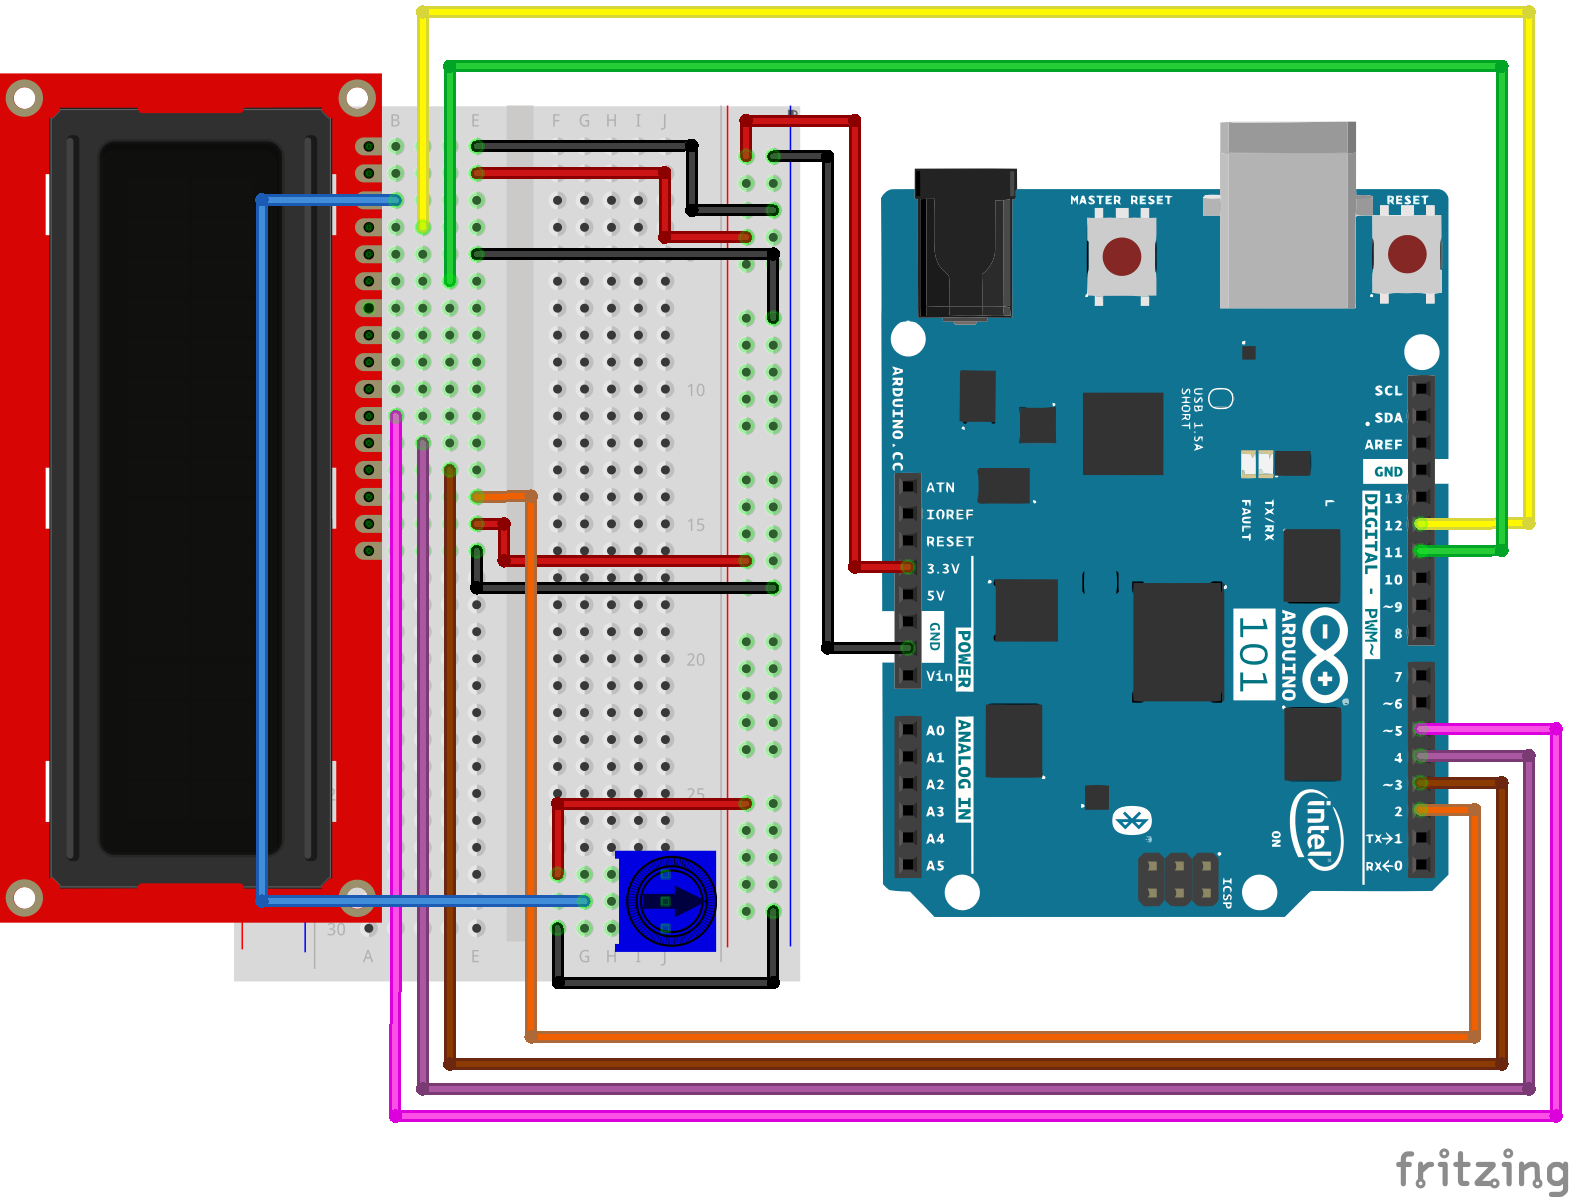
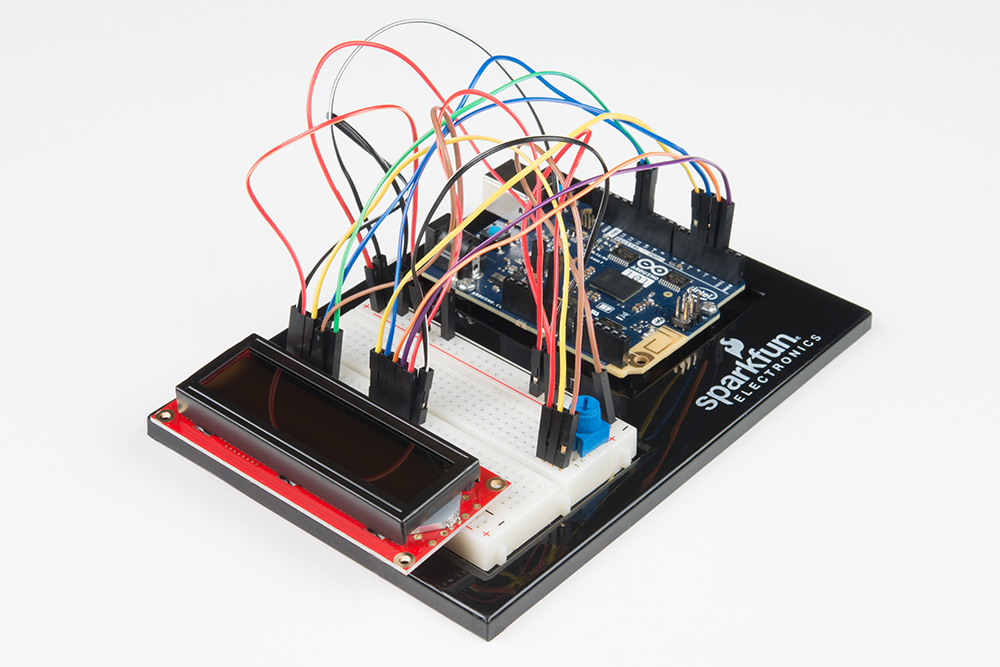
是否准备好开始对每个部件进行接线?请查看下面的接线图以了解如何连接每个部件。
| 极化组件 | 请特别注意组件用于指示如何在实验电路板上放置它的标记。极化组件只能按一个方向连接到电路。 |
实验的接线图
打开草图
在计算机上打开 Arduino IDE 软件。采用 Arduino 语言进行编码可控制电路。通过访问您先前下载并置于“示例”文件夹中的“101 SIK 指南代码”,来打开用于电路 17 的代码。
要打开该代码,请转到:文件 > 示例 > 101 SIK 指南代码 > Circuit_17
还可以将以下代码复制并粘贴到 Arduino IDE 中。点击“上传”,然后查看发生的情况!
language:cpp
/*
SparkFun Inventor's Kit
Example sketch 17

LIQUID CRYSTAL DISPLAY (LCD)

  This sketch will show you how to connect an LCD to your Arduino
  and display any data you wish.

This sketch was written by SparkFun Electronics,
with lots of help from the Arduino community.
This code is completely free for any use.
Visit https://www.sparkfun.com/products/12060 for SIK information.
Visit http://www.arduino.cc to learn more about Arduino.
*/

// Load the LiquidCrystal library, which will give us
// commands to interface to the LCD:

#include

// Initialize the library with the pins we're using.
// (Note that you can use different pins if needed.)
// See http://arduino.cc/en/Reference/LiquidCrystal
// for more information:

LiquidCrystal lcd(12,11,5,4,3,2);

void setup()
{
  // The LiquidCrystal library can be used with many different
  // LCD sizes. We're using one that's 2 lines of 16 characters,
  // so we'll inform the library of that:

  lcd.begin(16, 2);

  // Data sent to the display will stay there until it's
  // overwritten or power is removed. This can be a problem
  // when you upload a new sketch to the Arduino but old data
  // remains on the display. Let's clear the LCD using the
  // clear() command from the LiquidCrystal library:

  lcd.clear();

  // Now we'll display a message on the LCD!

  // Just as with the Arduino IDE, there's a cursor that
  // determines where the data you type will appear. By default,
  // this cursor is invisible, though you can make it visible
  // with other library commands if you wish.

  // When the display powers up, the invisible cursor starts
  // on the top row and first column.

  lcd.print("hello, world!");

  // Adjusting the contrast (IMPORTANT!)

  // When you run the sketch for the first time, there's a
  // very good chance you won't see anything on the LCD display.
  // This is because the contrast likely won't be set correctly.
  // Don't worry, it's easy to set, and once you set it you won't
  // need to change it again.

  // Run the sketch, then turn the potentiometer until you can
  // clearly see the "hello, world!" text. If you still can't
  // see anything, check all of your connections, and ensure that
  // the sketch was successfully uploaded to the Arduino.
}

void loop()
{
  // You can move the invisible cursor to any location on the
  // LCD before sending data. Counting starts from 0, so the top
  // line is line 0 and the bottom line is line 1\. Columns range
  // from 0 on the left side, to 15 on the right.

  // In additon to the "hello, world!" printed above, let's
  // display a running count of the seconds since the Arduino
  // was last reset. Note that the data you send to the display
  // will stay there unless you erase it by overwriting it or
  // sending an lcd.clear() command.

  // Here we'll set the invisible cursor to the first column
  // (column 0) of the second line (line 1):

  lcd.setCursor(0,1);

  // Now we'll print the number of seconds (millis() / 1000)
  // since the Arduino last reset:

  lcd.print(millis()/1000);

  // TIP: Since the numeric data we're sending is always growing
  // in length, new values will always overwrite the previous ones.
  // However, if you want to display varying or decreasing numbers
  // like a countdown, you'll find that the display will leave
  // "orphan" characters when the new value is shorter than the
  // old one.

  // To prevent this, you'll need to erase the old number before
  // writing the new one. You can do this by overwriting the
  // last number with spaces. If you erase the old number and
  // immediately write the new one, the momentary erase won't
  // be noticeable. Here's a typical sequence of code:

  // lcd.setCursor(0,1);   // Set the cursor to the position
  // lcd.print("       "); // Erase the largest possible number
  // lcd.setCursor(0,1);   // Reset the cursor to the original position
  // lcd.print(millis()/1000); // Print our value

  // NEXT STEPS:

  // Now you know the basics of hooking up an LCD to the Arduino,
  // and sending text and numeric data to the display!

  // The LCD library has many commands for turning the
  // cursor on and off, scrolling the screen, etc. See:
  // http://arduino.cc/en/Reference/LiquidCrystal
  // for more information.

  // Arduino also comes with a number of built-in examples
  // showing off the features of the LiquidCrystal library.
  // These are locted in the file/examples/LiquidCrystal menu.

  // Have fun, and let us know what you create!
  // Your friends at SparkFun.
}
要注意的代码
#include<liquidcrystal.h></liquidcrystal.h>
这段代码指示 Arduino IDE 包含用于简单 LCD 显示器的库。如果没有它,则任何命令都无法起作用,因此请确保包含它!
lcd.print(“hello, world!”);
这是您首次在屏幕上显示内容。您可能需要调整对比度以使其可见。转动电位计,直到您可以清晰地看到文本。
lcd.clear();
是的,您猜对了。此方法用于清除打印到 LCD 上的任何数据。
lcd.setCursor(0,1);
如果您靠近观察,便会注意到,每个字符周围都有一个小框,这些框位于 2x16 网格中。此方法中的第一个数字是列(从零开始计数...必须习惯这一点!),第二个数字是行。因此,此值为 0,1 表示第一列、第二行。
应看到的情况
最初,您应看到“hello, world!”这些词在 LCD 上弹出。请记住,如果无法清晰地辨认这些词,可以使用电位计调整对比度。如果您遇到任何问题,请确保代码正确并仔细检查连接。另请查看下面的“故障诊断”部分。
故障诊断
屏幕空白或完全亮起
通过旋转电位计来调整对比度。如果未进行正确调整,则您无法阅读文本。
完全不运行
仔细检查代码,特别是您是否包含了 LCD 库。
屏幕闪烁
仔细检查实验电路板和 101 开发板的连接。