SIK Experiment Guide for the Arduino 101/Genuino 101 Board (Chinese)
This Tutorial is Retired!
This tutorial covers concepts or technologies that are no longer current. It's still here for you to read and enjoy, but may not be as useful as our newest tutorials.
 D___Run___
 实验 14:使用压电式蜂鸣器
简介
在本实验中,我们将再次跨越数字世界与模拟世界之间的鸿沟。我们将使用一个压电式蜂鸣器,它会在您对它施加电压时发出小的“咔哒”声(尝试一下!)。这本身并不非常令人兴奋,但是如果您每秒打开和关闭电压数百次,则压电式蜂鸣器会发出某种音调。并且如果您将一系列音调串在一起,那么您便可创作出音乐!此电路和草图将发出一种经典音调。我们绝不会令您失望!
我们还添加了一个与蜂鸣器串联的按钮。为什么?因为每个好的声音生成器都需要一个静音按钮!要听到使用蜂鸣器从 101 开发板播放的歌曲,您需要按下按钮不放。要使蜂鸣器静音,只需松开按钮。
所需部件
您需要以下部件:
- 1x 实验电路板
- 1x Arduino 101 或 Genuino 101 开发板
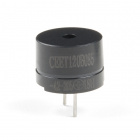
- 1x 压电式蜂鸣器
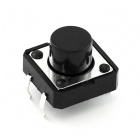
- 1x 按钮
- 5x 跳线
没有 SIK?
如果您要执行本实验,但又没有 SIK,那么我们建议您使用这些部件:


您还需要一个 Arduino 101 或 Genuino 101 开发板。

Arduino 101
DEV-13787
Genuino 101
DEV-13984压电式蜂鸣器简介
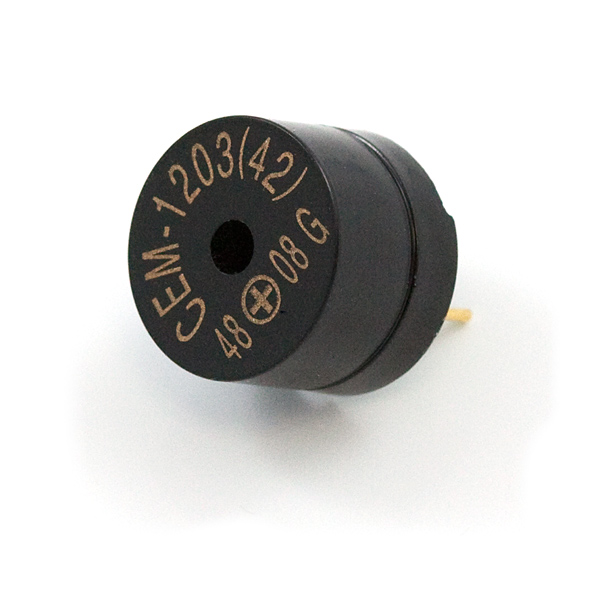
蜂鸣器是一个小型组件,其中有一片会在您对它施加电压时移动的金属。这种运动会产生小声音,或“咔哒”声。如果您打开和关闭电压的速度足够快,则会听到不同的蜂鸣声、尖叫声、唧唧声和嗡嗡声。您将使用 PWM 控制打开和关闭压电的速度 -- 进而控制从蜂鸣器发出的音频频率。通过调整 PWM 可以从蜂鸣器发出合理音符。
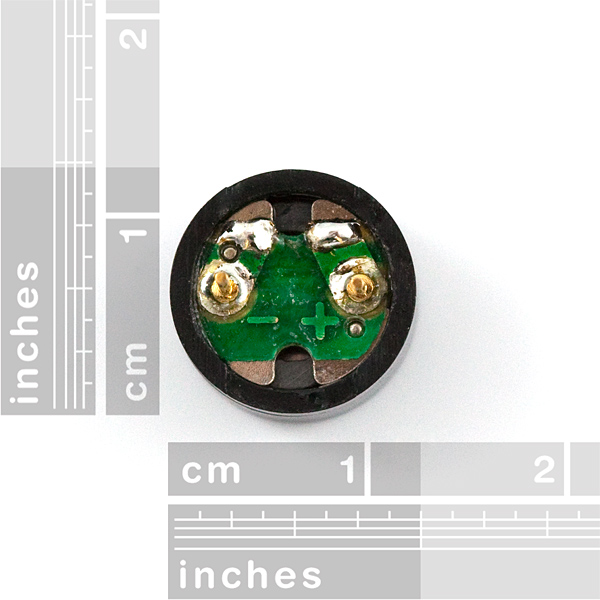
如果翻转蜂鸣器并查看底部,则您会看到一个针脚旁具有 (+)。该针脚连接到从 PWM 针脚发出的信号。另一个针脚应接地。
硬件接线
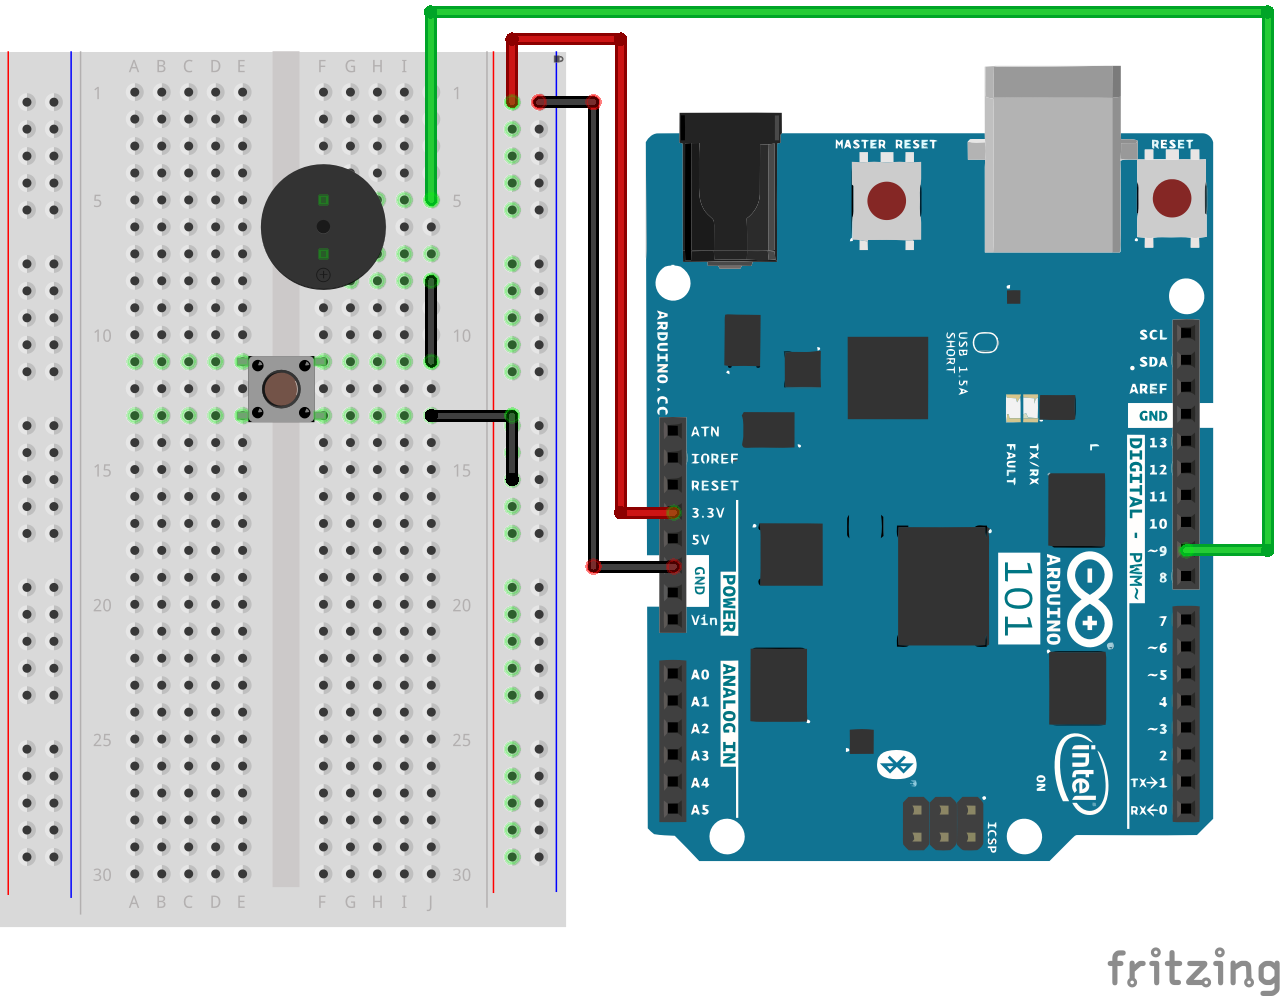
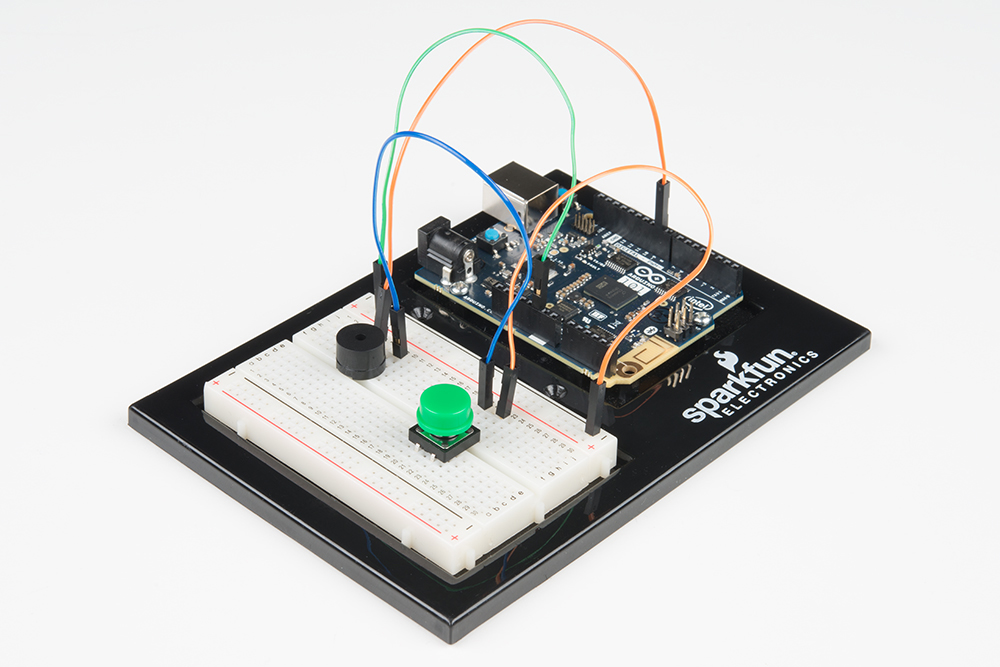
是否准备好开始对每个部件进行接线?请查看下面的接线图以了解如何连接每个部件。
| 极化组件 | 请特别注意组件用于指示如何在实验电路板上放置它的标记。极化组件只能按一个方向连接到电路。 |
实验的接线图
打开草图
在计算机上打开 Arduino IDE 软件。采用 Arduino 语言进行编码可控制电路。通过访问您先前下载并置于“示例”文件夹中的“101 SIK 指南代码”,来打开用于电路 14 的代码。
要打开该代码,请转到:文件 > 示例 > SIK 指南代码 > Circuit_14
还可以将以下代码复制并粘贴到 Arduino IDE 中。点击“上传”,然后查看发生的情况!
language:cpp
/*
SparkFun Inventor's Kit
Example sketch 14

BUZZER

  Use the buzzer to play a song!

This sketch was written by SparkFun Electronics,
with lots of help from the Arduino community.
(This sketch was originally developed by D. Cuartielles for K3)
This code is completely free for any use.
Visit http://learn.sparkfun.com/products/2 for SIK information.
Visit http://www.arduino.cc to learn more about Arduino.

*/

/*
This sketch uses the buzzer to play songs.
The Arduino's tone() command will play notes of a given frequency.
We'll provide a function that takes in note characters (a-g),
and returns the corresponding frequency from this table:

  note  frequency
  c     262 Hz
  d     294 Hz
  e     330 Hz
  f     349 Hz
  g     392 Hz
  a     440 Hz
  b     494 Hz
  C     523 Hz

For more information, see http://arduino.cc/en/Tutorial/Tone
*/

const int buzzerPin = 9;

// We'll set up an array with the notes we want to play
// change these values to make different songs!

// Length must equal the total number of notes and spaces

const int songLength = 18;

// Notes is an array of text characters corresponding to the notes
// in your song. A space represents a rest (no tone)

char notes[] = "cdfda ag cdfdg gf "; // a space represents a rest

// Beats is an array of values for each note and rest.
// A "1" represents a quarter-note, 2 a half-note, etc.
// Don't forget that the rests (spaces) need a length as well.

int beats[] = {1,1,1,1,1,1,4,4,2,1,1,1,1,1,1,4,4,2};

// The tempo is how fast to play the song.
// To make the song play faster, decrease this value.

int tempo = 150;

void setup()
{
  pinMode(buzzerPin, OUTPUT);
}

void loop()
{
  int i, duration;

  for (i = 0; i < songLength; i++) // step through the song arrays
  {
    duration = beats[i] * tempo;  // length of note/rest in ms

    if (notes[i] == ' ')          // is this a rest?
    {
      delay(duration);            // then pause for a moment
    }
    else                          // otherwise, play the note
    {
      tone(buzzerPin, frequency(notes[i]), duration);
      delay(duration);            // wait for tone to finish
    }
    delay(tempo/10);              // brief pause between notes
  }

  // We only want to play the song once, so we'll pause forever:
  while(true){}
  // If you'd like your song to play over and over,
  // remove the above statement
}

int frequency(char note)
{
  // This function takes a note character (a-g), and returns the
  // corresponding frequency in Hz for the tone() function.

  int i;
  const int numNotes = 8;  // number of notes we're storing

  // The following arrays hold the note characters and their
  // corresponding frequencies. The last "C" note is uppercase
  // to separate it from the first lowercase "c". If you want to
  // add more notes, you'll need to use unique characters.

  // For the "char" (character) type, we put single characters
  // in single quotes.

  char names[] = { 'c', 'd', 'e', 'f', 'g', 'a', 'b', 'C' };
  int frequencies[] = {262, 294, 330, 349, 392, 440, 494, 523};

  // Now we'll search through the letters in the array, and if
  // we find it, we'll return the frequency for that note.

  for (i = 0; i < numNotes; i++)  // Step through the notes
  {
    if (names[i] == note)         // Is this the one?
    {
      return(frequencies[i]);     // Yes! Return the frequency
    }
  }
  return(0);  // We looked through everything and didn't find it,
              // but we still need to return a value, so return 0.
}
要注意的代码
char notes[] = "cdfda ag cdfdg gf ";
char names[] = {'c','d','e','f','g','a','b','C'};
到目前为止,我们只处理了数值数据,但是 Arduino 还可以处理文本。字符(单个、可打印、字母、数字和其他符号)具有自己的类型,称为“char”。使用字符数组时,可以在双引号之间进行定义(也称为“字符串”),或是定义为单引号字符的列表。
tone(pin, frequency, duration);
Arduino 有许多有用的内置命令,其中一个是 tone() 函数。此函数按特定频率驱动输出针脚,从而十分适合于驱动蜂鸣器和扬声器。如果您为它提供持续时间(以毫秒为单位),则它会播放音调,然后停止。如果您没有为它提供持续时间,则它会永远保持播放音调(但是您可以使用另一个函数 noTone() 停止它)。
应看到的情况
应看到的情况 -- 好吧,看不到任何情况!应听到的声音 -- 好吧,一开始什么也听不到!但是如果您在草图完成上传之后立即按下按钮不放,则您应该能够听到歌曲。如果您在中途听到歌曲或是感觉它似乎未在播放,请按重置按钮,然后按下按钮。
如果它未运行,请确保正确装配了电路以及验证了代码并将它上传到开发板,或查看“故障诊断”部分。
故障诊断
无声音
由于压电蜂鸣器的大小和形状特点,您可能容易错过实验电路板上的正确孔。尝试仔细检查其位置。
此外,仔细检查以确保按钮的接线正确。如果其接线错误,则无论您是否按下按钮,电路都绝不会完整。
似乎只播放了歌曲的一部分
当您按住按钮时,您可能只听到了歌曲的一部分。要再次开始歌曲,请在按下静音按钮不放的同时,按 101 开发板上的“主重置”按钮。
感觉失望
代码的编写方式能让您方便地添加自己的歌曲。前进吧,摇滚起来!