SIK Experiment Guide for Arduino - V3.3
This Tutorial is Retired!
View the updated tutorial: SparkFun Inventor's Kit Experiment Guide - v4.0
Experiment 13: Using Relays
Introduction
In this circuit, we are going to use some of the lessons we learned in experiment 12 to control a relay. A relay is basically an electrically controlled mechanical switch. Inside that harmless looking plastic box is an electromagnet that, when it gets a jolt of energy, causes a switch to trip. In this circuit, you’ll learn how to control a relay like a pro – giving your Arduino even more powerful abilities!
Parts Needed
You will need the following parts:
- 1x RedBoard + USB mini-B Cable or Arduino Uno R3 + USB A-to-B Cable
- 1x Breadboard
- 14x Jumper Wires
- 2x 330Ω Resistor
1x NPN transistor 1x Diode 1N4148 2x LEDs - 1x Relay (SPDT)
Suggested Reading
Before continuing on with this experiment, we recommend you be familiar with the concepts in the following tutorial:
Hardware Hookup
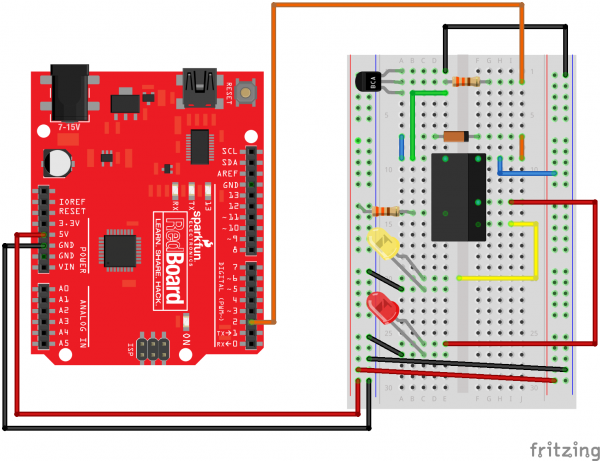
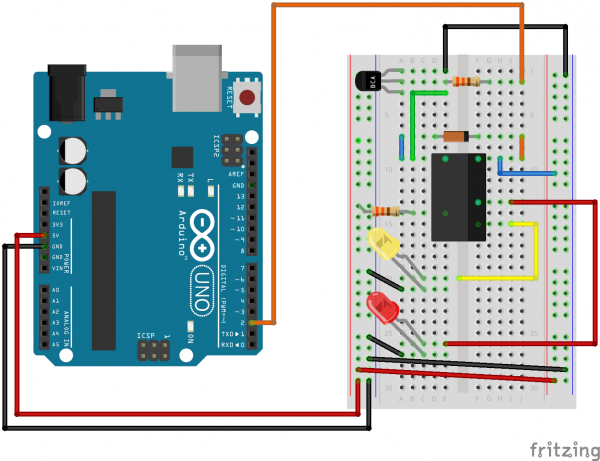
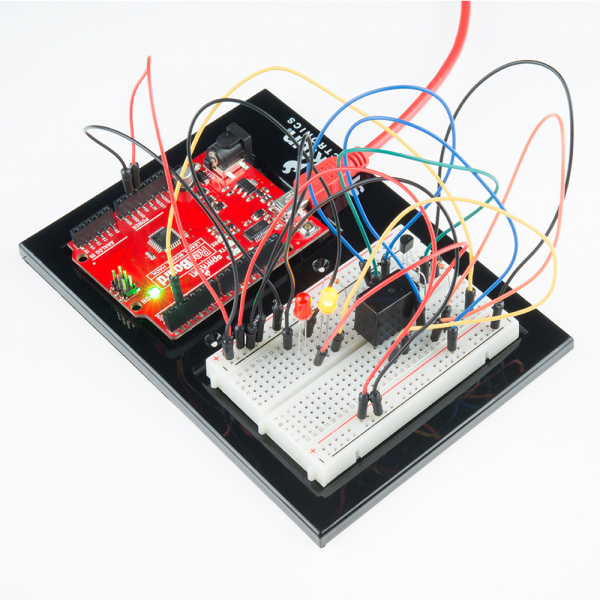
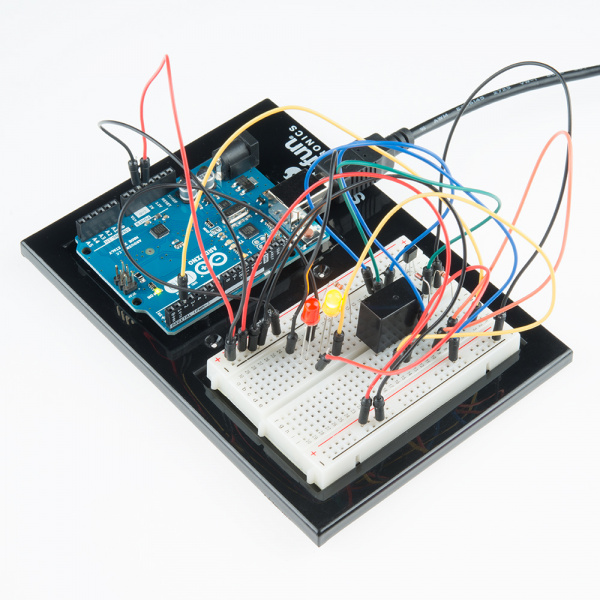
Ready to start hooking everything up? Check out the Fritzing diagram below, to see how everything is connected.
| Polarized Components | Pay special attention to the component’s markings indicating how to place it on the breadboard. Polarized components can only be connected to a circuit in one direction. |
Fritzing Diagram for RedBoard
Fritzing Diagram for Arduino
Open the Sketch
Open Up the Arduino IDE software on your computer. Coding in the Arduino language will control your circuit. Open the code for Circuit 13 by accessing the “SIK Guide Code” you downloaded and placed into your “Examples” folder earlier.
To open the code go to: File > Examples > SIK Guide Code > SIK_circuit13_relays
You can also copy and paste the following code into the Arduino IDE. Hit upload, and see what happens!
language:cpp
/********************************************************************
 * SparkFun Inventor's Kit
 * Example sketch 13
 *
 * RELAYS
 *
 * A relay is a electrically-controlled mechanical switch. It has an
 * electro-magnetic coil that either opens or closes a switch. Because
 * it is a physical switch, a relay can turn on and off large devices
 * like BIG motors, spot lights, and lamps.
 *
 * To create enough current to excite the electro-magnet, we need to use
 * the transistor circuit from the last example. Each time we excite the relay
 * you should hear an audible clicking sound of the switch.
 *
 * This sketch was written by SparkFun Electronics,
 * with lots of help from the Arduino community.
 * This code is completely free for any use.
 *
 * Visit http://learn.sparkfun.com/sik for SIK information.
 * Visit http://www.arduino.cc to learn about the Arduino.
 *
 * Version 2.0 6/2012 MDG
 * Version 2.1 8/2014 BCH
 *******************************************************************/

const int relayPin = 2;     // This pin drives the transistor (which drives the relay)
const int timeDelay = 1000; // delay in ms for on and off phases

// You can make timeDelay shorter, but note that relays, being
// mechanical devices, will wear out quickly if you try to drive
// them too fast.


void setup()
{
  pinMode(relayPin, OUTPUT);  // set pin as an output
}


void loop()
{
  digitalWrite(relayPin, HIGH);  // turn the relay on

  delay(timeDelay);              // wait for one second

  digitalWrite(relayPin, LOW);   // turn the relay off

  delay(timeDelay);              // wait for one second
}
Code To Note
digitalWrite(relayPin, HIGH);
When we turn on the transistor, which in turn energizes the relay's coil, the relay's switch contacts are closed. This connects the relay's COM pin to the NO (Normally Open) pin. Whatever you've connected using these pins will turn on. (Here we're using LEDs, but this could be almost anything.)
digitalWrite(relayPin, LOW);
The relay has an additional contact called NC (Normally Closed). The NC pin is connected to the COM pin when the relay is OFF. You can use either pin depending on whether something should be normally on or normally off. You can also use both pins to alternate power to two devices, much like railroad crossing warning lights.
What You Should See
You should be able to hear the relay contacts click, and see the two LEDs alternate illuminating at 1-second intervals. If you don't, double-check that you have assembled the circuit correctly, and uploaded the correct sketch to the board. Also, see the troubleshooting section.
Real World Application
Garage door openers use relays to operate. You might be able to hear the clicking if you listen closely.
Troubleshooting
LEDs Not Lighting
Double-check that you've plugged them in correctly. The longer lead (and non-flat edge of the plastic flange) is the positive lead.
No Clicking Sound
The transistor or coil portion of the circuit isn't quite working. Check the transistor is plugged in the right way.
Not Quite Working
The included relays are designed to be soldered rather than used in a breadboard. As such you may need to press it in to ensure it works (and it may pop out occasionally).
When you’re building the circuit be careful not to mix up the temperature sensor and the transistor, they’re almost identical.


