AzureWave Thing Plus (AW-CU488) Hookup Guide
 QCPete,
  bboyho
 Example 5: Qwiic Micro OLED
Required Materials
To follow along with this part of the tutorial, you will need the following materials. You may not need everything though depending on what you have. Add it to your cart, read through the guide, and adjust the cart as necessary.


Hardware Hookup
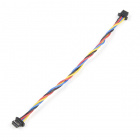
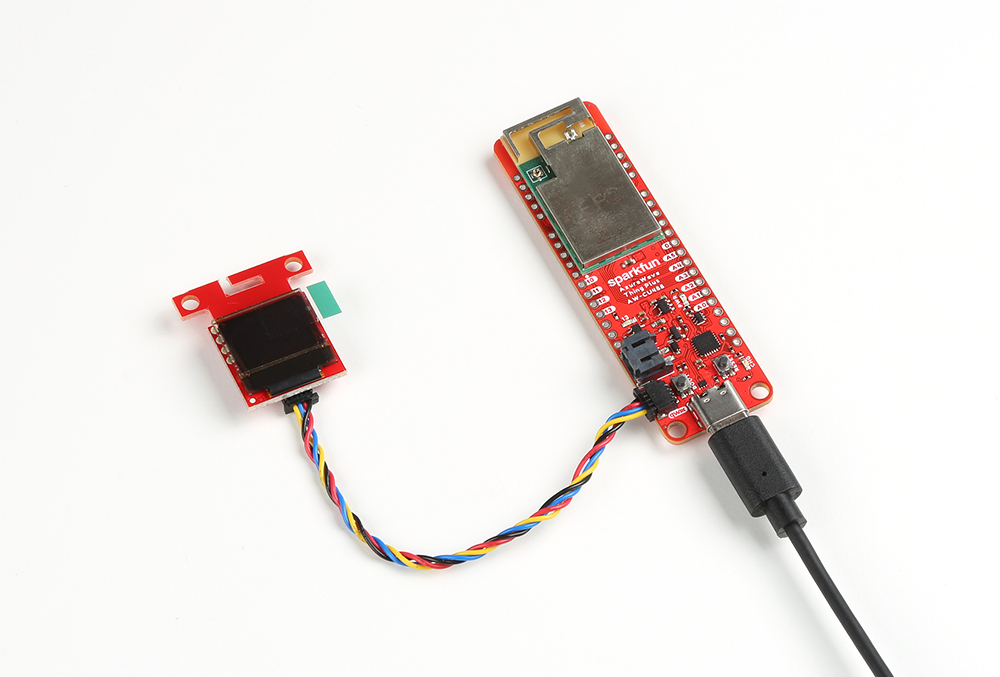
To connect the Qwiic Micro OLED, simply insert a Qwiic cable between the display and the AzureWave Thing Plus (AW-CU488). Then connect a USB C cable between the AzureWave Thing Plus (AW-CU488) and your computer's COM port.
Installing The Arduino Library
Note: This example assumes you are using the latest version of the Arduino IDE on your desktop. If this is your first time using Arduino, please review our tutorial on installing the Arduino IDE. If you have not previously installed an Arduino library, please check out our installation guide.
First, you'll need to download and install the SparkFun Micro OLED library. You can install this library automatically in the Arduino IDE's Library Manager by searching for "Micro OLED Breakout". Or you can manually download it from the GitHub repository. Also, make sure to download the Qwiic example sketches, which we will be reviewing in this tutorial.
Arduino Code | Example 10: MultiDemo v13
Let's upload the sketch to display graphics and characters on the Qwiic Micro OLED. From the menu, select the following: File > Examples > Examples from Custom Libraries | SparkFun Micro OLED Breakout > Example 10 MultiDemo_v13.
Or you can copy and paste the following code in the Arduino IDE. Select the correct board definition from the menu (in this case, Tools > Boards > AW-CU488 Thing Plus (RTL8721DM)). Then select the correct COM port that the board enumerated to (in this case, it was COM21). Hit upload button.
language:c
/*
  SFE_MicroOLED Library Demo
  Paul Clark @ SparkFun Electronics
  Original Creation Date: December 11th, 2020

  This sketch uses the MicroOLED library to show all the functionality built into the library
  using the begin function defined in version v1.3 of the library - which allows different
  TwoWire ports and custom I2C addresses to be used.

  If you are using the standard Micro OLED display, its I2C address will be 0x3D or 0x3C
  depending on how you have the D/C or ADDR jumper configured.

  Hardware Connections:
    This example assumes you are using Qwiic. See the SPI examples for
    a detailed breakdown of connection info.

  Want to support open source hardware? Buy a board from SparkFun!
  https://www.sparkfun.com/products/13003
  https://www.sparkfun.com/products/14532

  This code is beerware; if you see me (or any other SparkFun employee) at the
  local, and you've found our code helpful, please buy us a round!

  Distributed as-is; no warranty is given.
*/

#include <Wire.h>
#include <SFE_MicroOLED.h> //Click here to get the library: http://librarymanager/All#SparkFun_Micro_OLED

#define PIN_RESET 9

/*
// This is the old way of instantiating oled. You can still do it this way if you want to.
#define DC_JUMPER 1
MicroOLED oled(PIN_RESET, DC_JUMPER); // I2C declaration
*/

// From version v1.3, we can also instantiate oled like this (but only for I2C)
MicroOLED oled(PIN_RESET); // The TwoWire I2C port is passed to .begin instead

void setup()
{
  delay(100);
  Wire.begin(); // <-- Change this to (e.g.) Qwiic.begin(); as required
  //Wire.setClock(400000); // Uncomment this line to increase the I2C bus speed to 400kHz


/*
  // This is the old way of initializing the OLED.
  // You can still do it this way if you want to - but only
  // if you instantiated oled using: MicroOLED oled(PIN_RESET, DC_JUMPER)
  oled.begin();    // Initialize the OLED
*/


  // This is the new way of initializing the OLED.
  // We can pass a different I2C address and TwoWire port
  oled.begin(0x3D, Wire);    // Initialize the OLED


/*
  // This is the new way of initializing the OLED.
  // We can pass a different I2C address and TwoWire port
  oled.begin(0x3C, Qwiic);    // Initialize the OLED
*/


  oled.clear(ALL); // Clear the display's internal memory
  oled.display();  // Display what's in the buffer (splashscreen)

  delay(1000); // Delay 1000 ms

  oled.clear(PAGE); // Clear the buffer.

  randomSeed(analogRead(A0) + analogRead(A1));
}

void pixelExample()
{
  printTitle("Pixels", 1);

  for (int i = 0; i < 512; i++)
  {
    oled.pixel(random(oled.getLCDWidth()), random(oled.getLCDHeight()));
    oled.display();
  }
}

void lineExample()
{
  int middleX = oled.getLCDWidth() / 2;
  int middleY = oled.getLCDHeight() / 2;
  int xEnd, yEnd;
  int lineWidth = min(middleX, middleY);

  printTitle("Lines!", 1);

  for (int i = 0; i < 3; i++)
  {
    for (int deg = 0; deg < 360; deg += 15)
    {
      xEnd = lineWidth * cos(deg * PI / 180.0);
      yEnd = lineWidth * sin(deg * PI / 180.0);

      oled.line(middleX, middleY, middleX + xEnd, middleY + yEnd);
      oled.display();
      delay(10);
    }
    for (int deg = 0; deg < 360; deg += 15)
    {
      xEnd = lineWidth * cos(deg * PI / 180.0);
      yEnd = lineWidth * sin(deg * PI / 180.0);

      oled.line(middleX, middleY, middleX + xEnd, middleY + yEnd, BLACK, NORM);
      oled.display();
      delay(10);
    }
  }
}

void shapeExample()
{
  printTitle("Shapes!", 0);

  // Silly pong demo. It takes a lot of work to fake pong...
  int paddleW = 3;  // Paddle width
  int paddleH = 15; // Paddle height
  // Paddle 0 (left) position coordinates
  int paddle0_Y = (oled.getLCDHeight() / 2) - (paddleH / 2);
  int paddle0_X = 2;
  // Paddle 1 (right) position coordinates
  int paddle1_Y = (oled.getLCDHeight() / 2) - (paddleH / 2);
  int paddle1_X = oled.getLCDWidth() - 3 - paddleW;
  int ball_rad = 2; // Ball radius
  // Ball position coordinates
  int ball_X = paddle0_X + paddleW + ball_rad;
  int ball_Y = random(1 + ball_rad, oled.getLCDHeight() - ball_rad); //paddle0_Y + ball_rad;
  int ballVelocityX = 1;                                             // Ball left/right velocity
  int ballVelocityY = 1;                                             // Ball up/down velocity
  int paddle0Velocity = -1;                                          // Paddle 0 velocity
  int paddle1Velocity = 1;                                           // Paddle 1 velocity

  //while(ball_X >= paddle0_X + paddleW - 1)
  while ((ball_X - ball_rad > 1) &&
         (ball_X + ball_rad < oled.getLCDWidth() - 2))
  {
    // Increment ball's position
    ball_X += ballVelocityX;
    ball_Y += ballVelocityY;
    // Check if the ball is colliding with the left paddle
    if (ball_X - ball_rad < paddle0_X + paddleW)
    {
      // Check if ball is within paddle's height
      if ((ball_Y > paddle0_Y) && (ball_Y < paddle0_Y + paddleH))
      {
        ball_X++;                       // Move ball over one to the right
        ballVelocityX = -ballVelocityX; // Change velocity
      }
    }
    // Check if the ball hit the right paddle
    if (ball_X + ball_rad > paddle1_X)
    {
      // Check if ball is within paddle's height
      if ((ball_Y > paddle1_Y) && (ball_Y < paddle1_Y + paddleH))
      {
        ball_X--;                       // Move ball over one to the left
        ballVelocityX = -ballVelocityX; // change velocity
      }
    }
    // Check if the ball hit the top or bottom
    if ((ball_Y <= ball_rad) || (ball_Y >= (oled.getLCDHeight() - ball_rad - 1)))
    {
      // Change up/down velocity direction
      ballVelocityY = -ballVelocityY;
    }
    // Move the paddles up and down
    paddle0_Y += paddle0Velocity;
    paddle1_Y += paddle1Velocity;
    // Change paddle 0's direction if it hit top/bottom
    if ((paddle0_Y <= 1) || (paddle0_Y > oled.getLCDHeight() - 2 - paddleH))
    {
      paddle0Velocity = -paddle0Velocity;
    }
    // Change paddle 1's direction if it hit top/bottom
    if ((paddle1_Y <= 1) || (paddle1_Y > oled.getLCDHeight() - 2 - paddleH))
    {
      paddle1Velocity = -paddle1Velocity;
    }

    // Draw the Pong Field
    oled.clear(PAGE); // Clear the page
    // Draw an outline of the screen:
    oled.rect(0, 0, oled.getLCDWidth() - 1, oled.getLCDHeight());
    // Draw the center line
    oled.rectFill(oled.getLCDWidth() / 2 - 1, 0, 2, oled.getLCDHeight());
    // Draw the Paddles:
    oled.rectFill(paddle0_X, paddle0_Y, paddleW, paddleH);
    oled.rectFill(paddle1_X, paddle1_Y, paddleW, paddleH);
    // Draw the ball:
    oled.circle(ball_X, ball_Y, ball_rad);
    // Actually draw everything on the screen:
    oled.display();
    delay(25); // Delay for visibility
  }
  delay(1000);
}

void textExamples()
{
  printTitle("Text!", 1);

  // Demonstrate font 0. 5x8 font
  oled.clear(PAGE);     // Clear the screen
  oled.setFontType(0);  // Set font to type 0
  oled.setCursor(0, 0); // Set cursor to top-left
  // There are 255 possible characters in the font 0 type.
  // Lets run through all of them and print them out!
  for (int i = 0; i <= 255; i++)
  {
    // You can write byte values and they'll be mapped to
    // their ASCII equivalent character.
    oled.write(i);  // Write a byte out as a character
    oled.display(); // Draw on the screen
    delay(10);      // Wait 10ms
    // We can only display 60 font 0 characters at a time.
    // Every 60 characters, pause for a moment. Then clear
    // the page and start over.
    if ((i % 60 == 0) && (i != 0))
    {
      delay(500);           // Delay 500 ms
      oled.clear(PAGE);     // Clear the page
      oled.setCursor(0, 0); // Set cursor to top-left
    }
  }
  delay(500); // Wait 500ms before next example

  // Demonstrate font 1. 8x16. Let's use the print function
  // to display every character defined in this font.
  oled.setFontType(1);  // Set font to type 1
  oled.clear(PAGE);     // Clear the page
  oled.setCursor(0, 0); // Set cursor to top-left
  // Print can be used to print a string to the screen:
  oled.print(" !\"#$%&'()*+,-./01234");
  oled.display(); // Refresh the display
  delay(1000);    // Delay a second and repeat
  oled.clear(PAGE);
  oled.setCursor(0, 0);
  oled.print("56789:;<=>?@ABCDEFGHI");
  oled.display();
  delay(1000);
  oled.clear(PAGE);
  oled.setCursor(0, 0);
  oled.print("JKLMNOPQRSTUVWXYZ[\\]^");
  oled.display();
  delay(1000);
  oled.clear(PAGE);
  oled.setCursor(0, 0);
  oled.print("_`abcdefghijklmnopqrs");
  oled.display();
  delay(1000);
  oled.clear(PAGE);
  oled.setCursor(0, 0);
  oled.print("tuvwxyz{|}~");
  oled.display();
  delay(1000);

  // Demonstrate font 2. 10x16. Only numbers and '.' are defined.
  // This font looks like 7-segment displays.
  // Lets use this big-ish font to display readings from the
  // analog pins.
  for (int i = 0; i < 25; i++)
  {
    oled.clear(PAGE);           // Clear the display
    oled.setCursor(0, 0);       // Set cursor to top-left
    oled.setFontType(0);        // Smallest font
    oled.print("A0: ");         // Print "A0"
    oled.setFontType(2);        // 7-segment font
    oled.print(analogRead(A0)); // Print a0 reading
    oled.setCursor(0, 16);      // Set cursor to top-middle-left
    oled.setFontType(0);        // Repeat
    oled.print("A1: ");
    oled.setFontType(2);
    oled.print(analogRead(A1));
    oled.setCursor(0, 32);
    oled.setFontType(0);
    oled.print("A2: ");
    oled.setFontType(2);
    oled.print(analogRead(A2));
    oled.display();
    delay(100);
  }

  // Demonstrate font 3. 12x48. Stopwatch demo.
  oled.setFontType(3); // Use the biggest font
  int ms = 0;
  int s = 0;
  while (s <= 5)
  {
    oled.clear(PAGE);     // Clear the display
    oled.setCursor(0, 0); // Set cursor to top-left
    if (s < 10)
      oled.print("00"); // Print "00" if s is 1 digit
    else if (s < 100)
      oled.print("0"); // Print "0" if s is 2 digits
    oled.print(s);     // Print s's value
    oled.print(":");   // Print ":"
    oled.print(ms);    // Print ms value
    oled.display();    // Draw on the screen
    ms++;              // Increment ms
    if (ms >= 10)      // If ms is >= 10
    {
      ms = 0; // Set ms back to 0
      s++;    // and increment s
    }
  }
}

void loop()
{
  //pixelExample();  // Run the pixel example function
  lineExample();  // Then the line example function
  shapeExample(); // Then the shape example
  textExamples(); // Finally the text example
}

// Center and print a small title
// This function is quick and dirty. Only works for titles one
// line long.
void printTitle(String title, int font)
{
  int middleX = oled.getLCDWidth() / 2;
  int middleY = oled.getLCDHeight() / 2;

  oled.clear(PAGE);
  oled.setFontType(font);
  // Try to set the cursor in the middle of the screen
  oled.setCursor(middleX - (oled.getFontWidth() * (title.length() / 2)),
                 middleY - (oled.getFontHeight() / 2));
  // Print the title:
  oled.print(title);
  oled.display();
  delay(1500);
  oled.clear(PAGE);
}
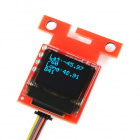
Once uploaded, check out the Qwiic Micro OLED. You should see the SparkFun logo followed by the demo! Try adding a sensor, modifying the code, and displaying the sensor values on the screen.