SparkFun GPS-RTK Dead Reckoning ZED-F9R Hookup Guide
Contributors:
 bboyho,
  Elias The Sparkiest
bboyho, Elias The Sparkiest Resources and Going Further
Now that you've successfully got your GPS receiver up and running, it's time to incorporate it into your own project! For more information, check out the resources below:
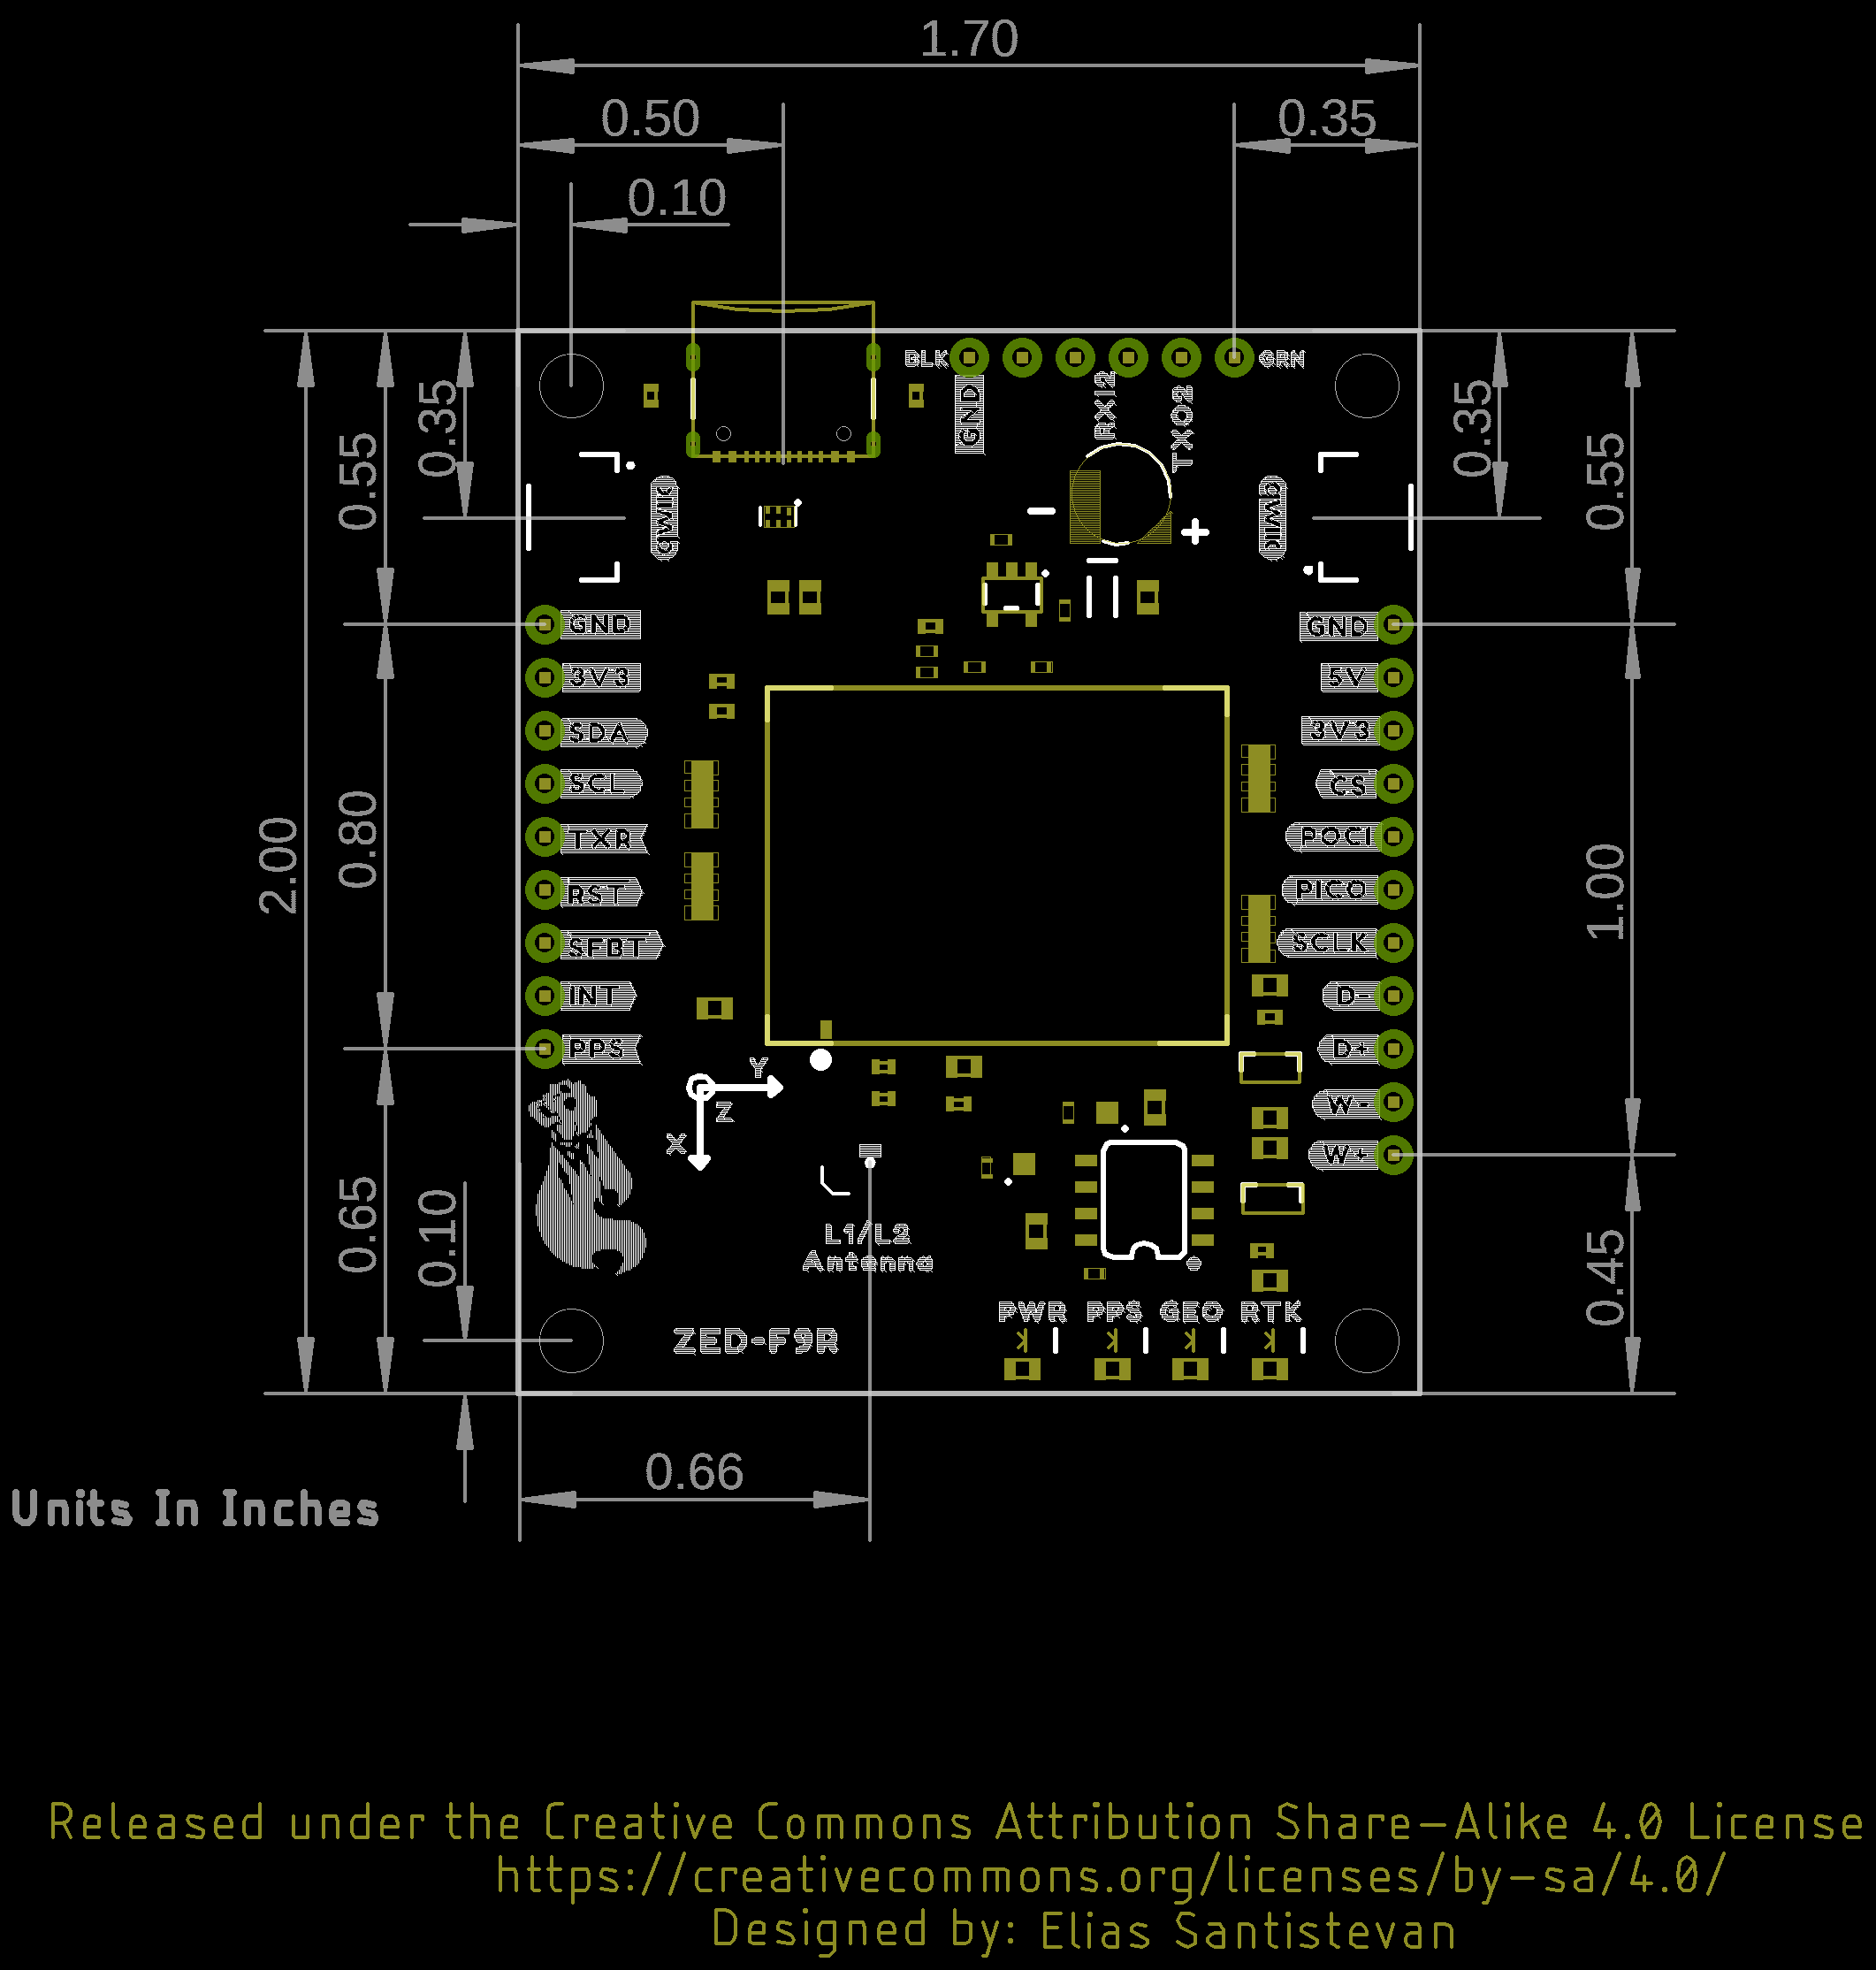
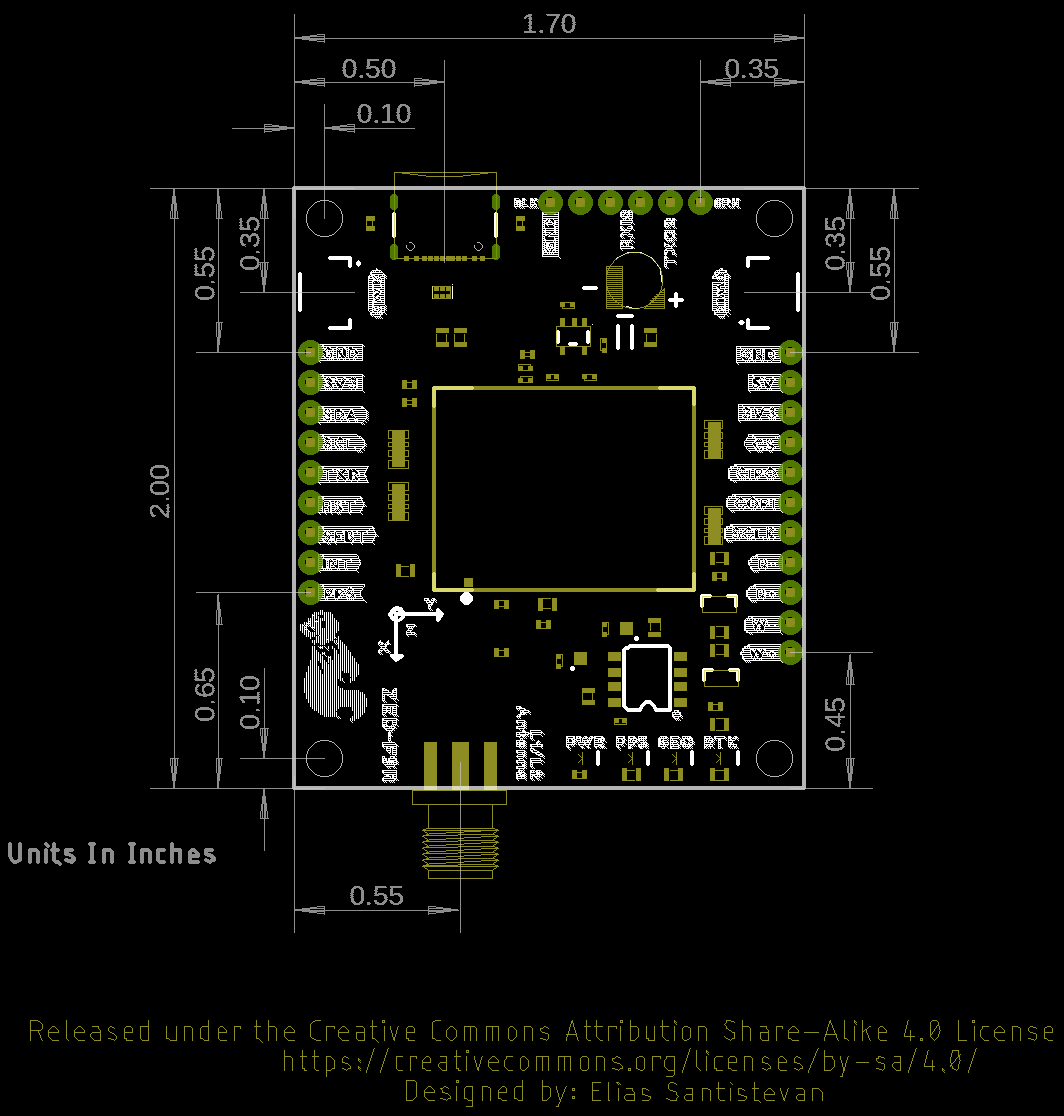
- SparkFun u-Blox ZED-F9R Breakout
- u.FL Version, v1.2
- SMA Version, v1.1
- GitHub
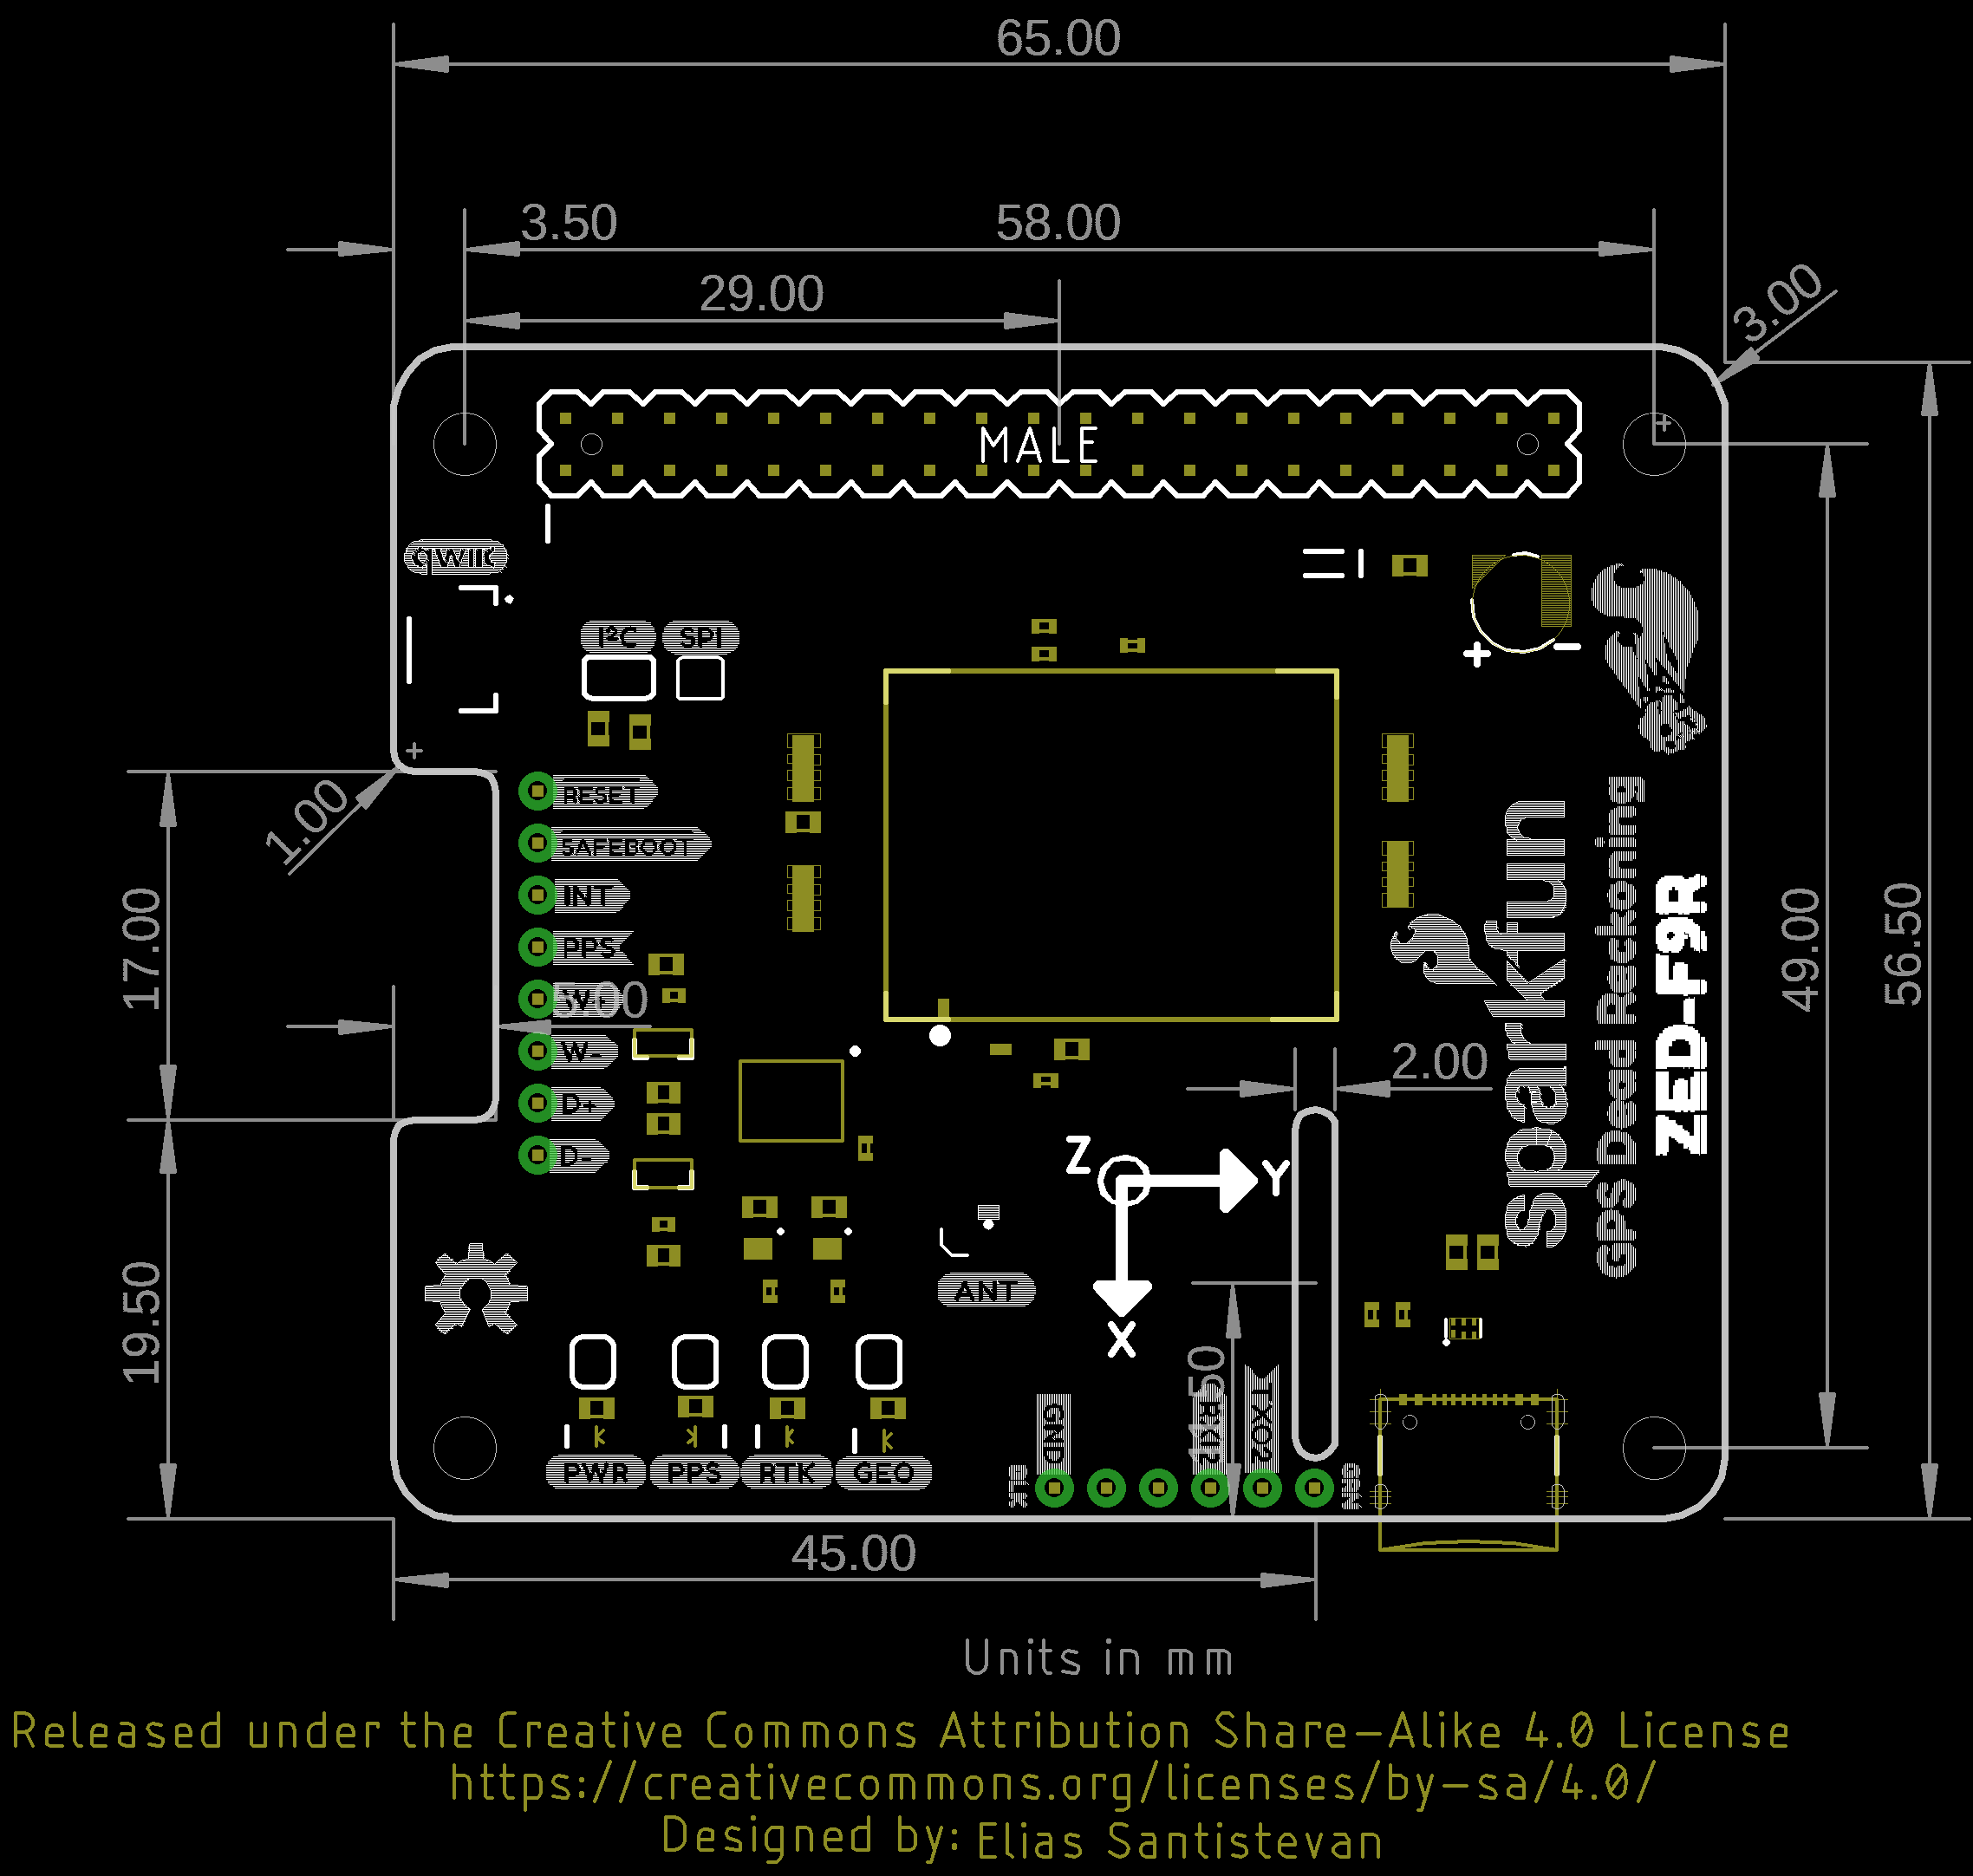
- SparkFun u-Blox ZED-F9R pHAT
- u-blox Module Documentation
- SFE Product Showcase
Are you looking for a GPS receivers? Check out the following GPS boards from the SparkFun catalog!
Note: If you are looking for more of a packaged solution, check out the RTK Express Plus! The ZED-F9R is built in with the ESP32. Users can take advantage of the software to easily connect to a correction source via ESP32's Bluetooth.
 Retired
SparkFun RTK Express Plus Kit
GPS-18589
Need some inspiration for your next project? Check out some of these related tutorials:
GPS Logger Shield Hookup Guide
How to assemble and hookup the SparkFun GPS Logger Shield. Never lose track of your Arduino again!
SparkFun GPS Breakout (ZOE-M8Q and SAM-M8Q) Hookup Guide
The SparkFun ZOE-M8Q and SAM-M8Q are three similarly powerful GNSS boards, but with different project applications. We'll compare both GNSS receivers before getting each up and running.
Setting up a Rover Base RTK System
Getting GNSS RTCM correction data from a base to a rover is easy with a serial telemetry radio! We'll show you how to get your high precision RTK GNSS system setup and running.
MicroMod Update Tool Hookup Guide
Follow this guide to learn how to use the MicroMod Update Tool to interact directly with the UART on the MicroMod Asset Tracker's SARA-R5. Using this board you can talk directly to the module using u-blox's m-center software as well as update the firmware using EasyFlash.
Or check out this blog post for ideas.