SparkFun GPS-RTK Dead Reckoning ZED-F9R Hookup Guide
 bboyho,
  Elias The Sparkiest
Dead Reckoning Overview
As mentioned in the "What is Dead Reckoning?" section, the u-blox F9R module has an internal inertial measurement unit or IMU for short. The IMU calculates position based on the last GNSS refresh and its own movement data points. To use the SparkFun GPS-RTK Dead Reckoning Board, there are a few guidelines to orienting and mounting the module to a vehicle that are outlined from u-blox. For more detailed information, check out the integration manual for mounting.
Orientation for the SparkFun Dead Reckoning
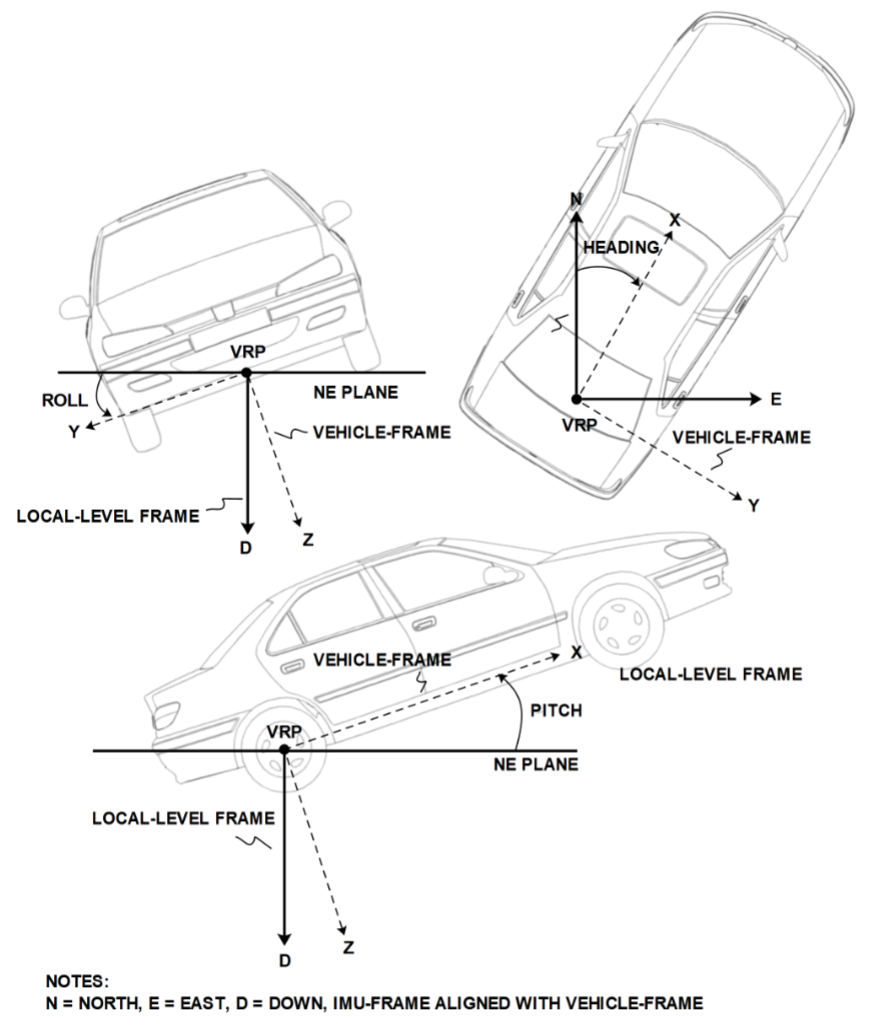
The SparkFun Dead Reckoning adheres to two particular frames of reference: one frame of reference for the car and the second a geodetic frame of reference anchoring it to the globe. The latter, known as the local level frame uses the following as its' axes:
- X-axis points to the North
- Y-axis points to the East
- Z-axis uses the right hand system by pointing down.
This frame will be referred to by its acronym NED (North-East-Down) in the image below.
The second frame of references is the Body-Frame reference and uses the following as its' axes.
- X-axis points to the front of the vehicle
- Y-axis points to the right of the vehicle
- Z-axis uses the right hand system by pointing down.
You can reference the Body-Frame axes directly on the SparkFun Dead Reckoning ZED-F9R breakout board by looking for the silkscreen with the xyz axis.
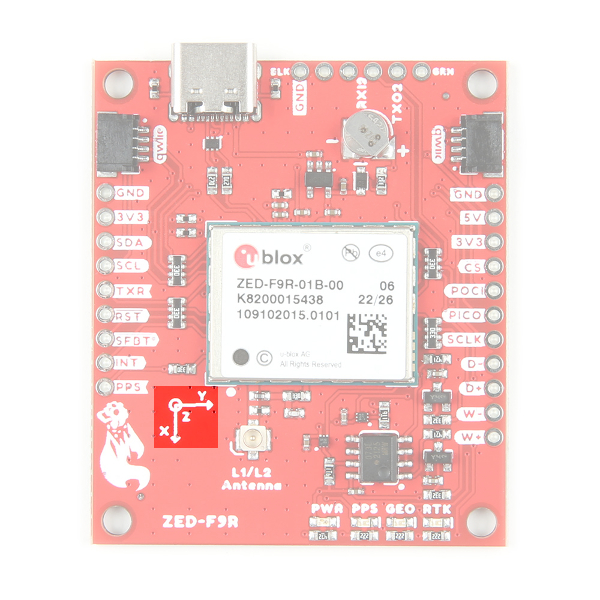 |
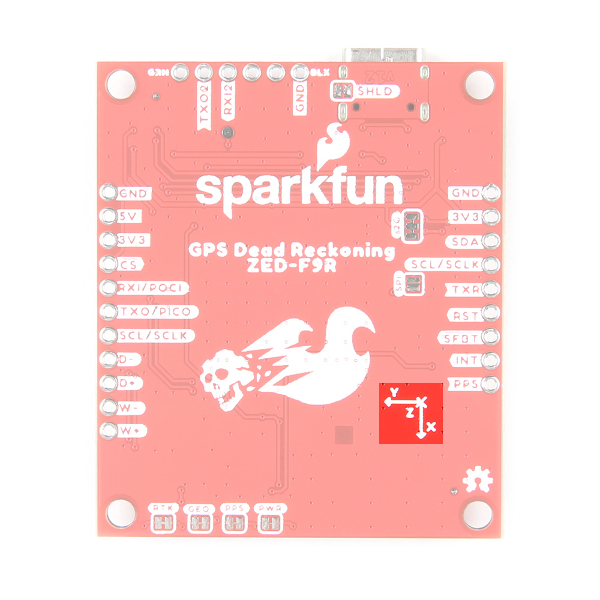 |
| Top View with the Axis for Reference | Bottom View with the Axis for Reference |
Additionally, you can find the xyz axis for reference on both sides of the pHAT.
 |
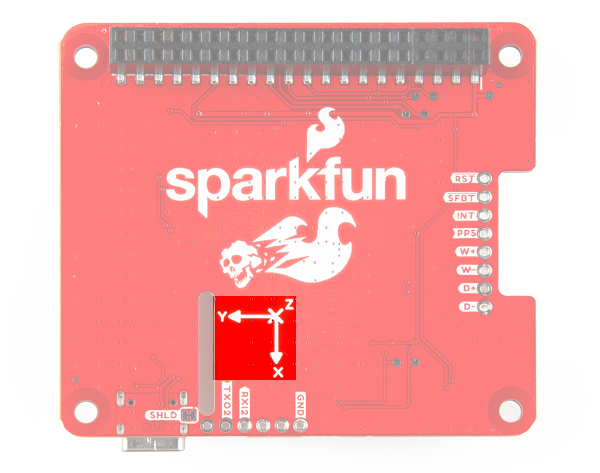 |
| Top View with the Axis for Reference | Bottom View with the Axis for Reference |
Vehicle Attitude
The transformation of the vehicle within these two frames are given as heading, pitch, and roll. In the datasheet these three angles are called the vehicle's attitude. Below is an image that illustrates how all of these elements fit together.
Mounting the SparkFun Dead Reckoning ZED-F9R
The only guideline here is that the SparkFun Dead Reckoning is stable within 5 degrees, and of course that the X-axis points towards the front of the car as mentioned above.

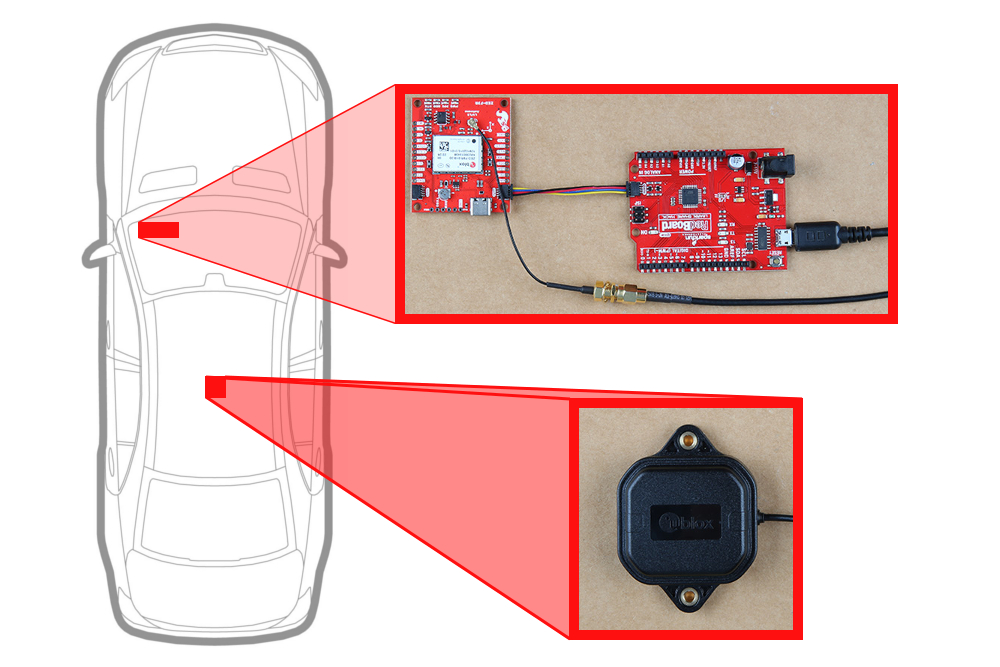
With the physical boards mounted, it will look similar to the following image.
 |
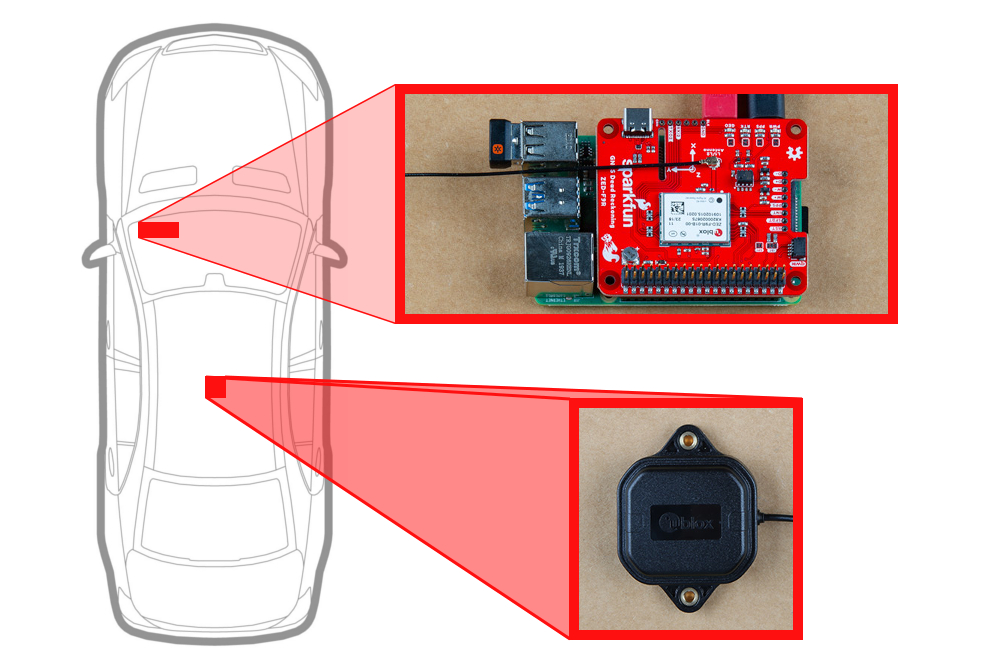 |
| ZED-F9R Orientation | ZED-F9R pHAT's Orientation |
In the image above the SparkFun Dead reckoning is seen in the front, driver's side of the car and it may be tempting to think that this is also a necessary requirement. However, it can be mounted anywhere within the vehicle (or RC-car, or boat). Keep in mind that the pitch and roll is relative to the SparkFun Dead Reckoning's position.
Calibration
After you've mounted the SparkFun Dead Reckoning ZED-F9R, there is still a calibration phase to complete that must satisfy the following movements:
- First, the car needs to be stopped with the engine turned on.
- Secondly, the car must do left and right hand turns.
- Lastly, the car must reach a speed over 30 km/h.
In SparkFun's u-blox Arduino library, SparkFun has included the calibration example, that prints out the module's calibration status.