SparkFun GPS-RTK Dead Reckoning ZED-F9R Hookup Guide
 bboyho,
  Elias The Sparkiest
Arduino Example Code
Example 1 - Calibrate Sensor
Now that the GPS-RTK SparkFun Dead Reckoning is mounted and oriented correctly with regards to the vehicle, it's time to calibrate the sensor. To do this, a few movements with the vehicle must be done all while maintaining good GNSS reception.
- First, the car needs to be stopped with the engine turned on.
- Secondly, the car must do left and right hand turns.
- Lastly, the car must reach a speed over 30 km/h.
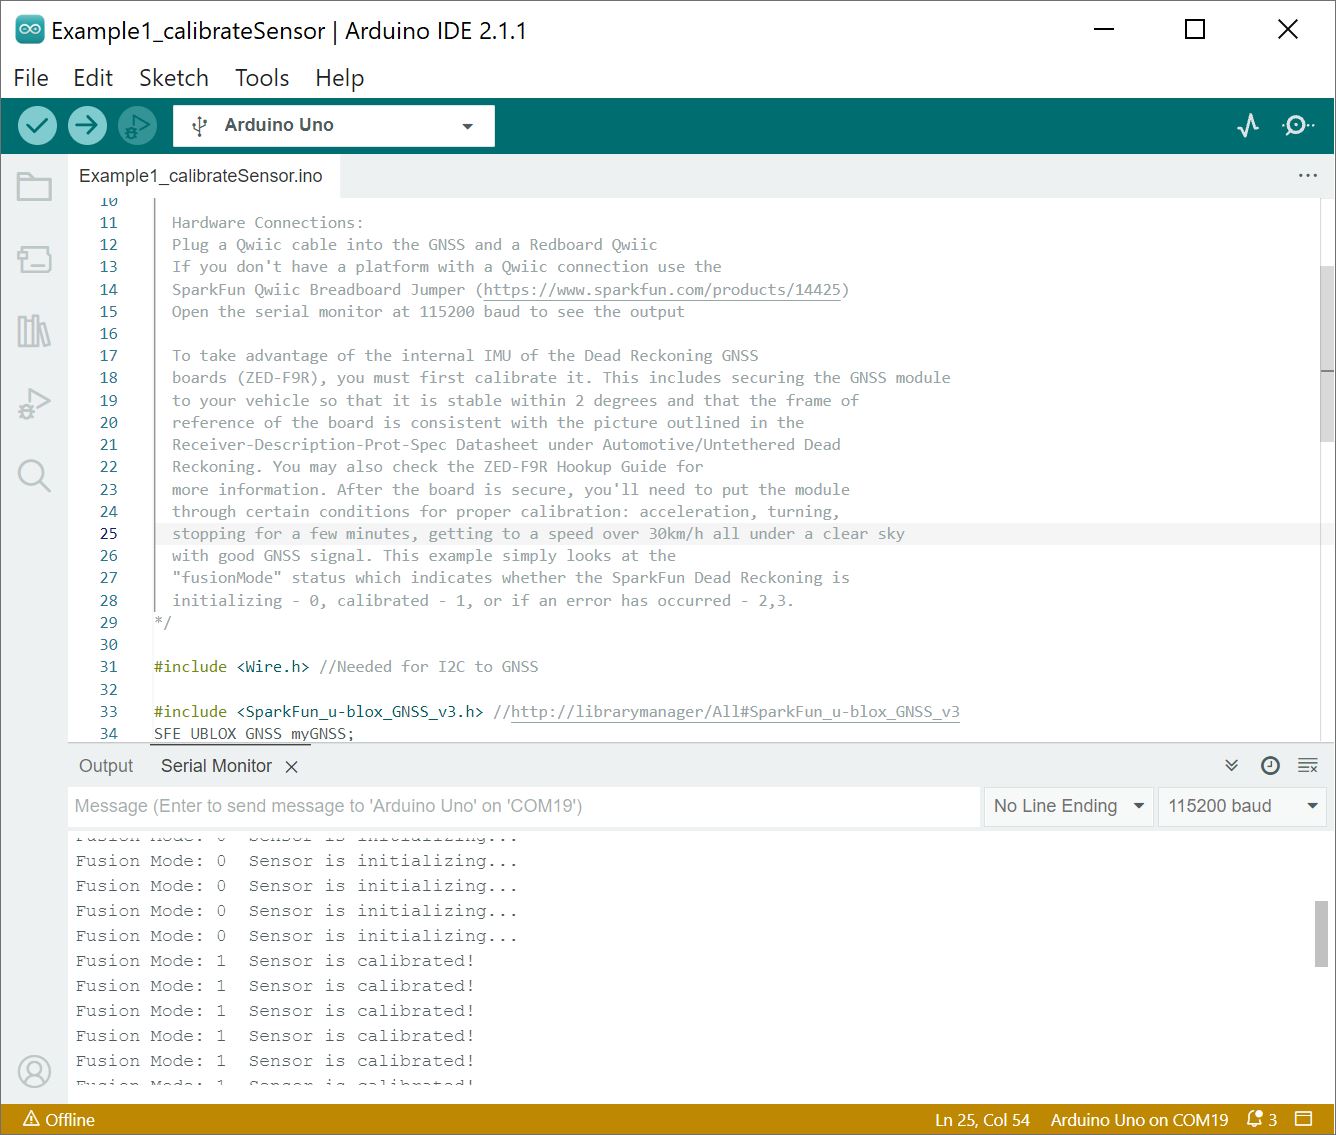
For the first example (located in File Examples > SparkFun u-blox GNSS Arduino Library > Dead Reckoning > Example1_calibrateSensor), the calibration status will be printed to the Arduino's serial monitor to indicate when calibration is ongoing and when it has completed.
If you have not already, select your Board (in this case the Arduino Uno), and associated COM port. Upload the code to the board and and set the serial monitor to 115200 baud. Perform those fancy maneuvers (while obeying the traffic laws) before parking your car in a safe location. Then turn your engine off before checking the status!
You should see a message indicating that the ZED-F9R's sensor is calibrated (e.g. Fusion Mode: 1 Sensor is calibrated!). If you do not, try driving around with the board once again!
Example 2 - IMU Data
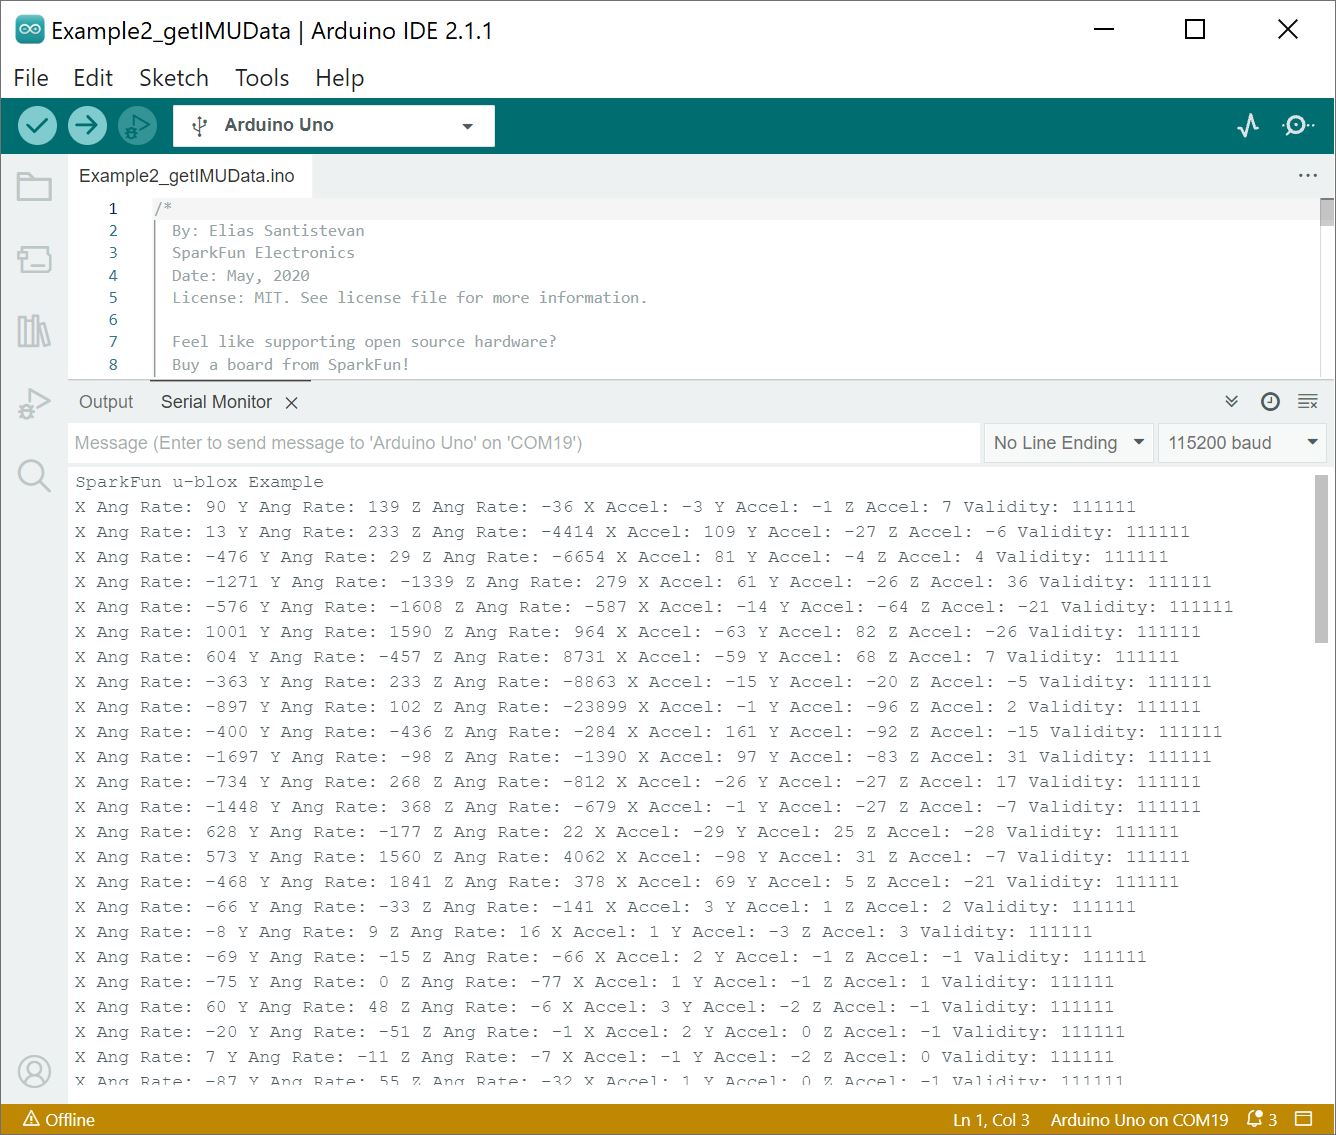
After you have your sensor calibrated (see example1), you can now poll the internal IMU to see what data is being fed to the GNSS calculations. Open the second example (located in File Examples > SparkFun u-blox GNSS Arduino Library > Dead Reckoning > Example2_getIMUData) to follow along! First, the sketch checks to see that the board is calibrated before it attempts to read IMU data.
If you have not already, select your Board (in this case the Arduino Uno), and associated COM port. Upload the code to the board and set the serial monitor to 115200 baud. This may be a good time to bring a friend along to drive if you decide to actively monitor the output. Otherwise, check out the data after taking the board for a stroll. Try driving around as the board senses the car's movement. Then park in a safe location with the engine turned off before inspecting the data.
Below is an example output shows the ZED-F9R mounted on a car that was initially parked on the side of a neighborhood. We took it for a stroll by accelerating, decelerating, turning around, accelerating again in the other direction, decelerating, and parking again.
Try grabbing a DataLogger or a microcontroller with a built-in microSD card. Then adjust the code to output the sensor data as CSV with timestampes and saving them to a memory card. Once the data is imported into a spreadsheet, try graphing the values to visualize the readings.
Example 3 - Get Sensor Status
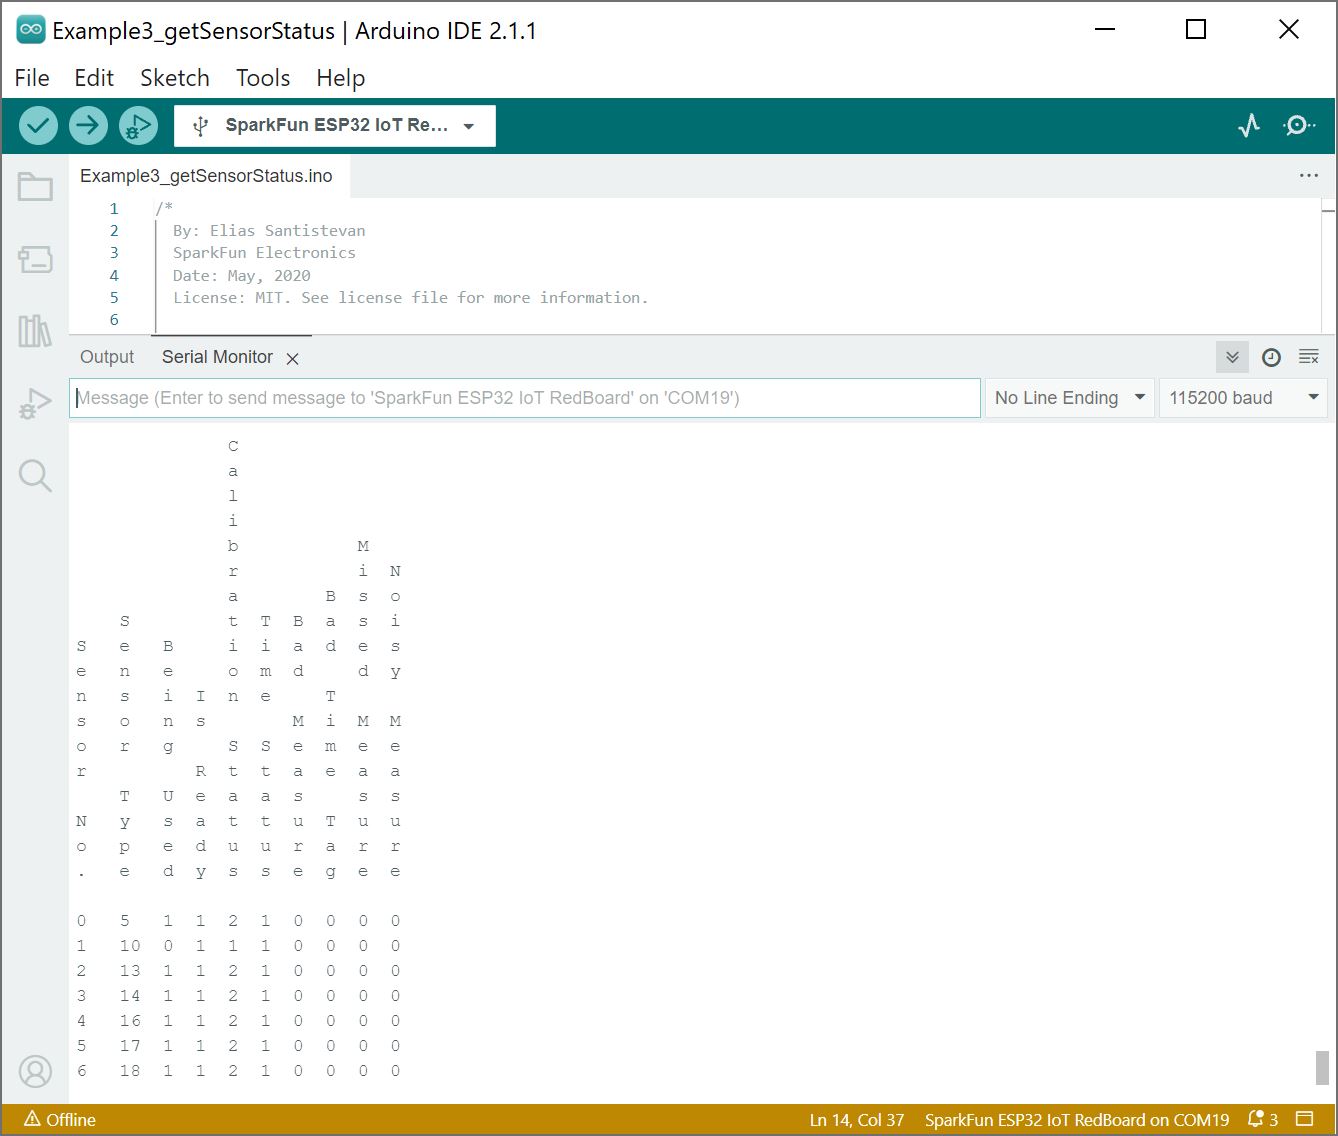
This example is used primarily as a diagnostic sketch. What sensors are currently being used, are they functioning correctly, are the measurements being listed as bad or non-existent? Example 3 helps diagnose these various issues. Open the third example in the library (located in File Examples > SparkFun u-blox GNSS Arduino Library > Dead Reckoning > Example3_getSensorStatus).
If you have not already, select your Board (in this case the ESP32 IoT RedBoard), and associated COM port. Upload the code to the board and set the serial monitor to 115200 baud. Below is an example output after getting the sensor status. To decipher the readings, we recommend checking out the u-blox ZED-F9R's receiver interface description on page 71 under the section labeled "3.11.5.1 External sensor fusion status" for more information.
Example 4 - Vehicle Dynamics
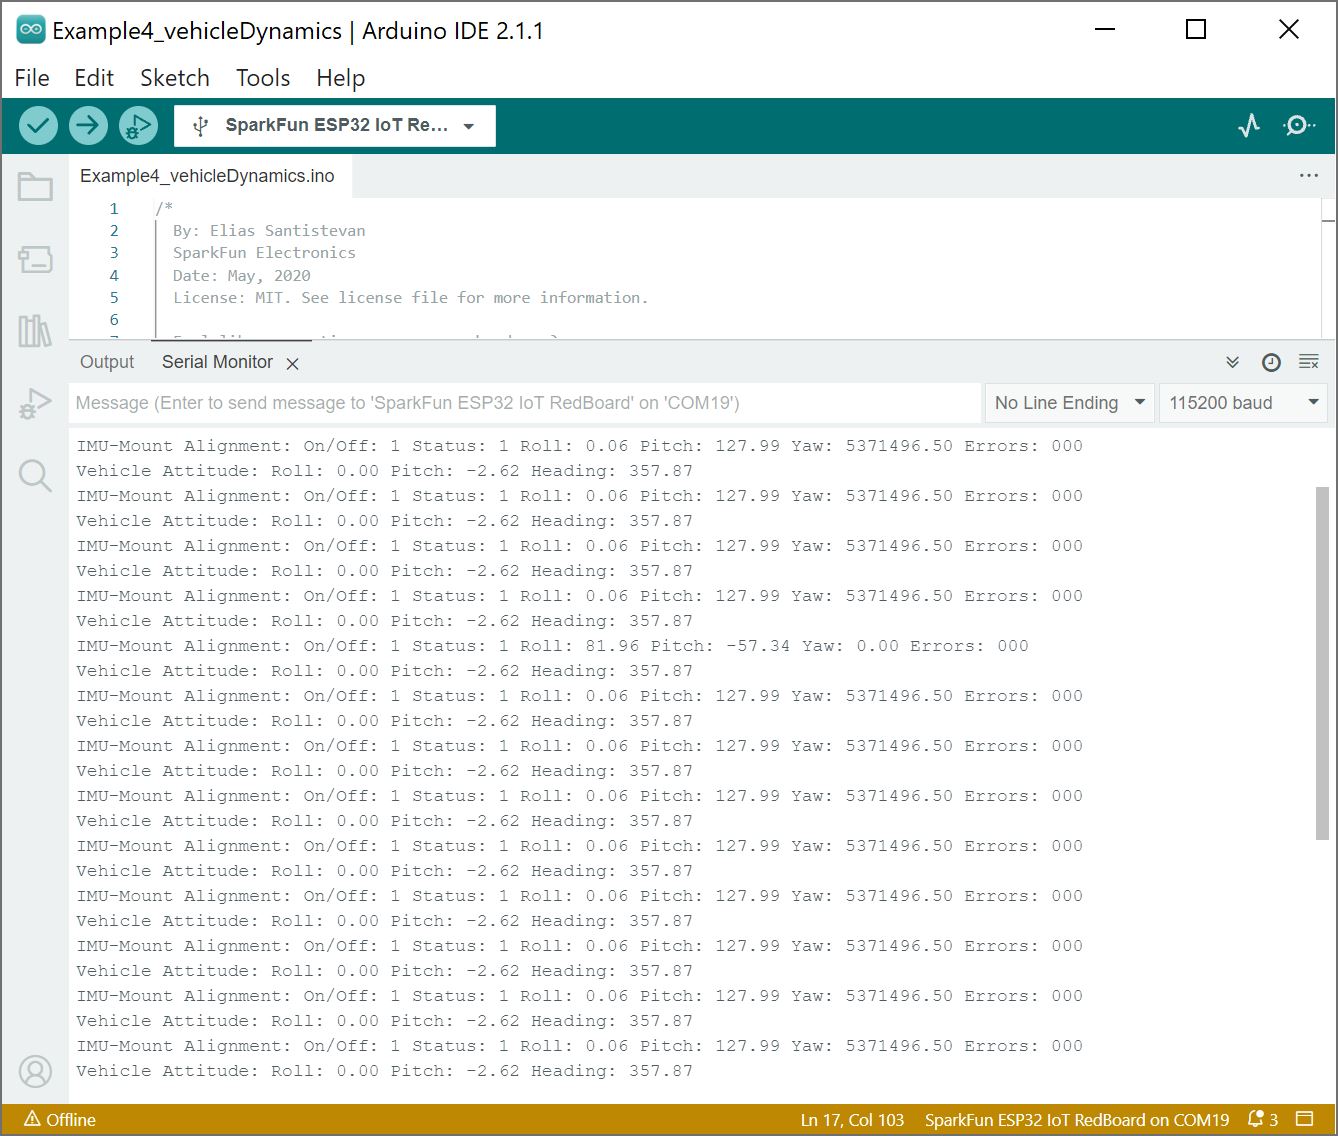
The vehicle attitude is a termed coined by u-blox that encompasses three measurements: vehicle pitch, vehicle roll, and vehicle heading. Much like the other example sketches, this one checks to make sure that the SparkFun Dead Reckoning ZED-F9R has been calibrated before pulling data. If the SparkFun Dead Reckoning ZED-F9R has indeed been calibrated, then it gets the relevant information by calling myGNSS.getVehAtt(). As in Example 2, the data is stored within a struct called vehAtt. Open the fourth example in the library (located in File Examples > SparkFun u-blox GNSS Arduino Library > Dead Reckoning > Example4_vehicleDynamics).
If you have not already, select your Board (in this case the ESP32 IoT RedBoard), and associated COM port. Upload the code to the board and set the serial monitor to 115200 baud. This may be a good time to bring a friend along to drive if you decide to actively monitor the output. Otherwise, check out the data after taking the board for a stroll. Try driving around as the board senses the car's movement. Then park in a safe location with the engine turned off before inspecting the data. Below is an example output of the vehicle dynamics with the car parked.
ZED-F9P Example Folder
Once the ZED-F9R is calibrated, you will be able to use a few of the ZED-F9P examples. Note that the ZED-F9R is not able to act as a base station so a few of the examples may not apply. You'll also need to feed RTCM correction data to the ZED-F9R if you decide to utilize the RTK feature. For more information, check below.