SparkFun GPS-RTK Dead Reckoning ZED-F9R Hookup Guide
 bboyho,
  Elias The Sparkiest
 Hardware Assembly (pHAT)
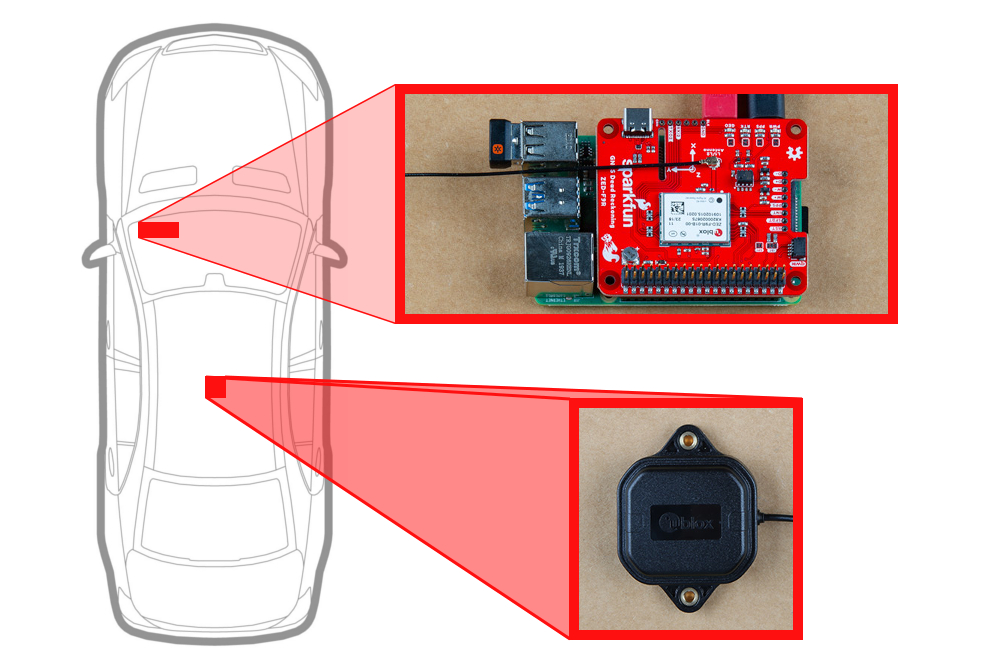
To get started with your ZED-F9R pHAT, simply plug it into the headers on the Raspberry Pi as shown below. Then connect the necessary peripherals, u.FL connnector to SMA cable, and GPS/GNSS patch antenna. If you need tips on plugging in the U.FL connector, then check out our U.FL tutorial. For secure connections, you may want to add tape or some hot glue for the u.FL cable to provide some strain relief to prevent the cable from disconnecting.
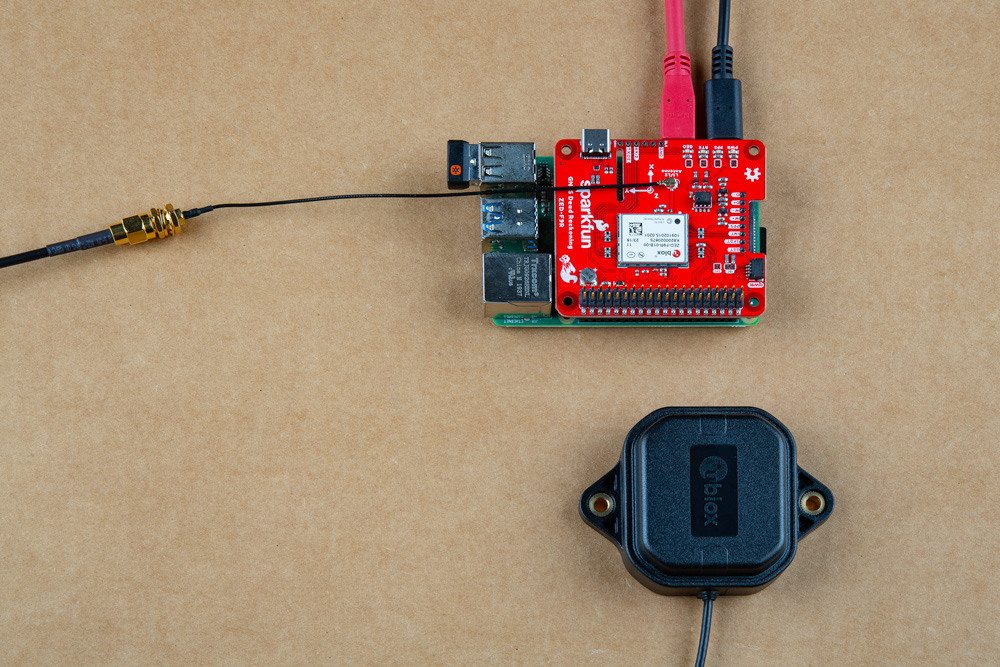
Make sure to secure the board above a vehicle's dashboard using some tape or sticky tack when prototyping and testing. For best signal reception, it is suggested to guide the antenna from the inside of the car and through a window before attaching the GPS on top of a car.
Adding a RTCM Correction Source
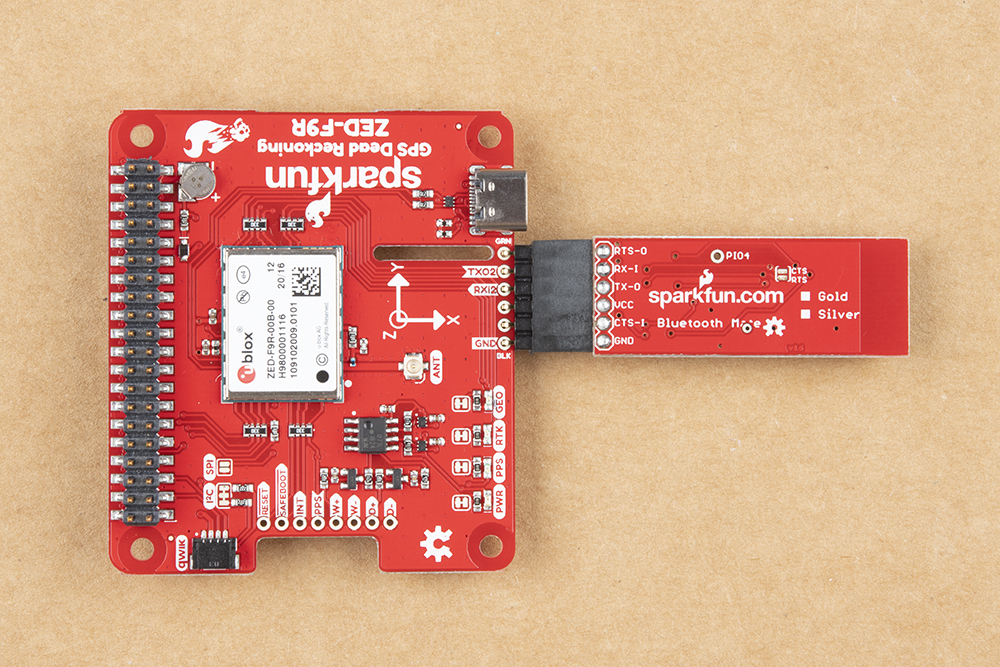
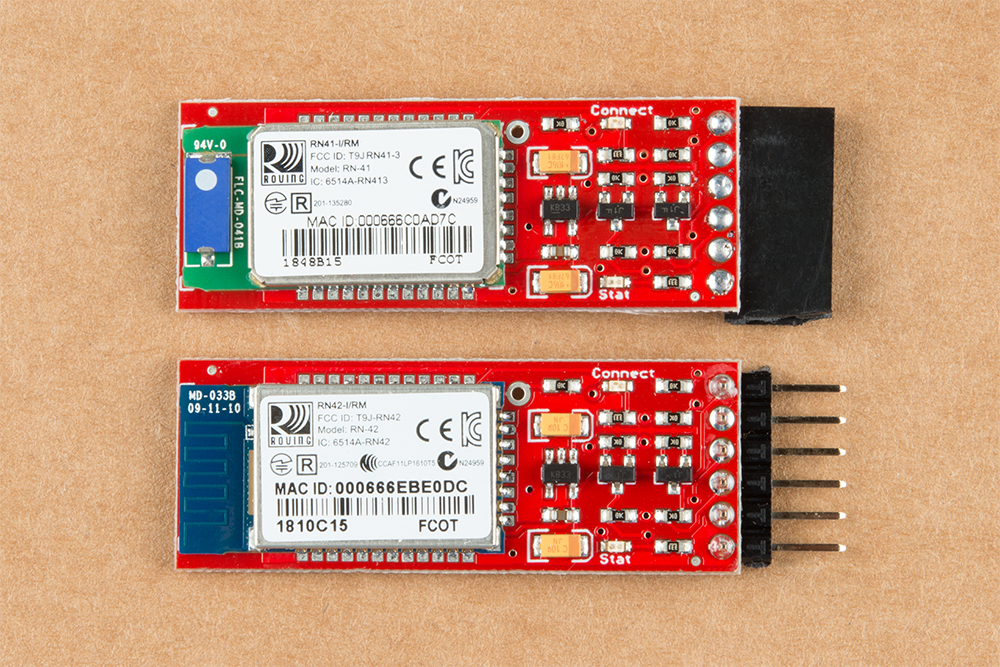
As explained earlier for the breakout board, there are a few methods of adding a RTCM correction source. If you have been following along with our GPS-RTK and GPS-RTK2, you can pipe correction data from a wireless network, LoRa, or cellular network. The following example uses the Bluetooth Mate to connect to an Android phone's app. Depending on your personal preference, you can choose a female header or a male header for the Bluetooth Mate. We opted for the female header.
For a low profile, we decided to use 1x6 right angle, male headers. Depending on your application, you can use straight, male headers. As a result, the design of the breakout requires the top of the Bluetooth Mate to face the ZED-F9P. When ready, solder the male headers to the breakout board. In this case, the headers were inserted from the top and soldered on the bottom.
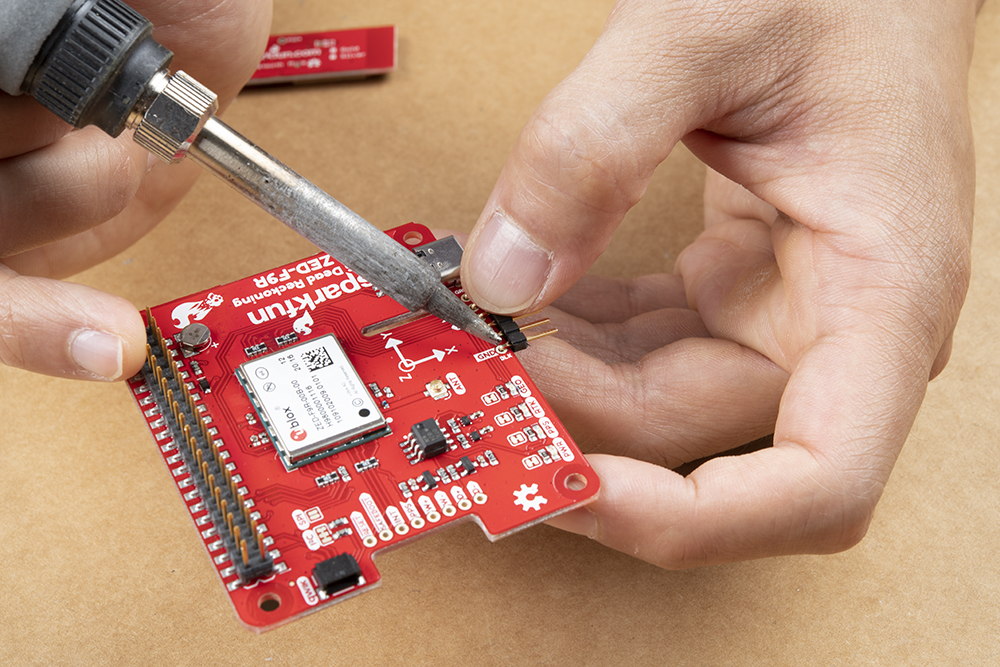
Make sure to connect GND to GND, Rx to Tx, and Rx to Tx by following the silkscreen. Below is an example of what to expect before the pins are soldered. When you are finished soldering the board and cleaning the joints, make sure to stack the board back on the Raspberry Pi.