SIK Experiment Guide for the Arduino 101/Genuino 101 Board
 D___Run___
Download and Setup the Arduino Software
Download the Arduino IDE
In order to get your 101 up and running, you'll need to download the newest version of the Arduino software first from www.arduino.cc (it's free and open source!). This software, known as the Arduino IDE, will allow you to program the board to do exactly what you want. It’s like a word processor for writing programs. With an internet-capable computer, open up your favorite browser, and go to Arduino download page.
Check out our Installing Arduino IDE tutorial to see in detail how to install the Arduino IDE on your computer.
Adding Your Board to the Arduino IDE
Since the advent of Arduino version 1.6.2, Arduino has made it much easier to add and update what boards you can program with the Arduino IDE. This has been made possible by the Boards Manager. The Arduino 101 is not part of the standard core set of boards that come with the original download of the Arduino IDE, so you will have to add it through the Boards Manager.
To access the Boards Manager, open the Arduino IDE. From the dropdown menu at the top select Tools > Board > Boards Manager.... This will bring up the Boards Manager as shown below.
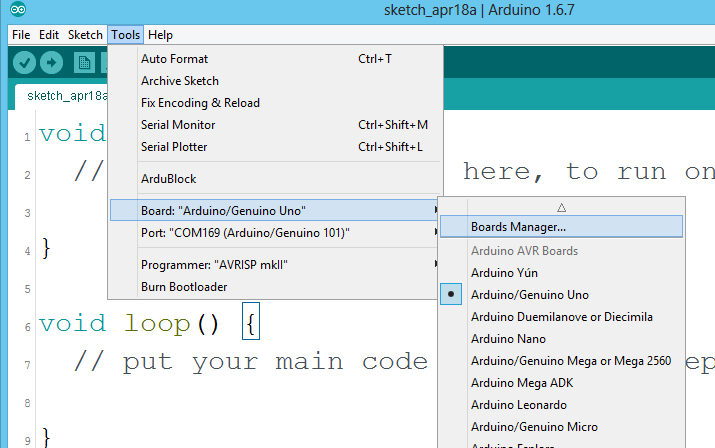

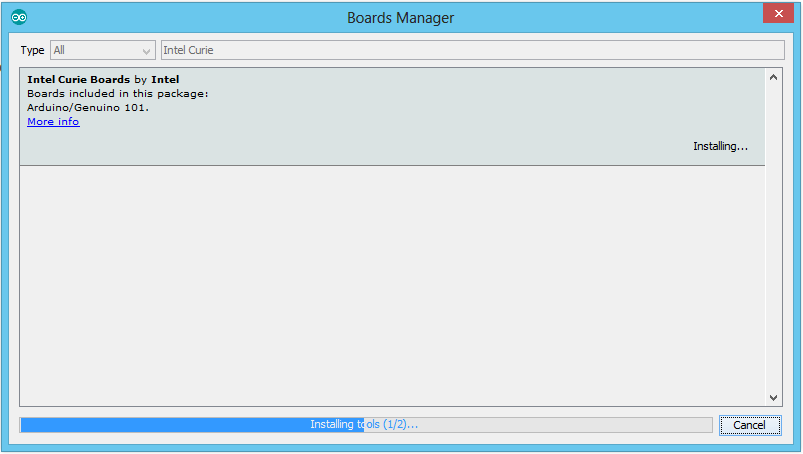
In the Boards Manager search for "Intel Curie." This should bring up one option, which, at this time, is the 101. Select this option and click "Install." Depending on the speed of your network connection, this may take a few minutes. This process is downloading the drivers your computer will need for the board as well as the example code, libraries and board definitions. A number of dialogue boxes will pop up asking you for permission to install drivers and make changes to certain files; go ahead and accept those.
Once this process is complete, we recommend fully closing your Arduino IDE and reopening it. Once it is open and ready, you can plug your 101 into your computer using a USB cable.
Connect Your 101 to Your Computer
Use the USB cable provided in the SparkFun Inventor's Kit (SIK) to connect the 101 board to one of your computer’s USB inputs.
Getting Started in the Arduino IDE
Now, it's finally time to open up the Arduino software. You'll be presented with a window that looks something like this:
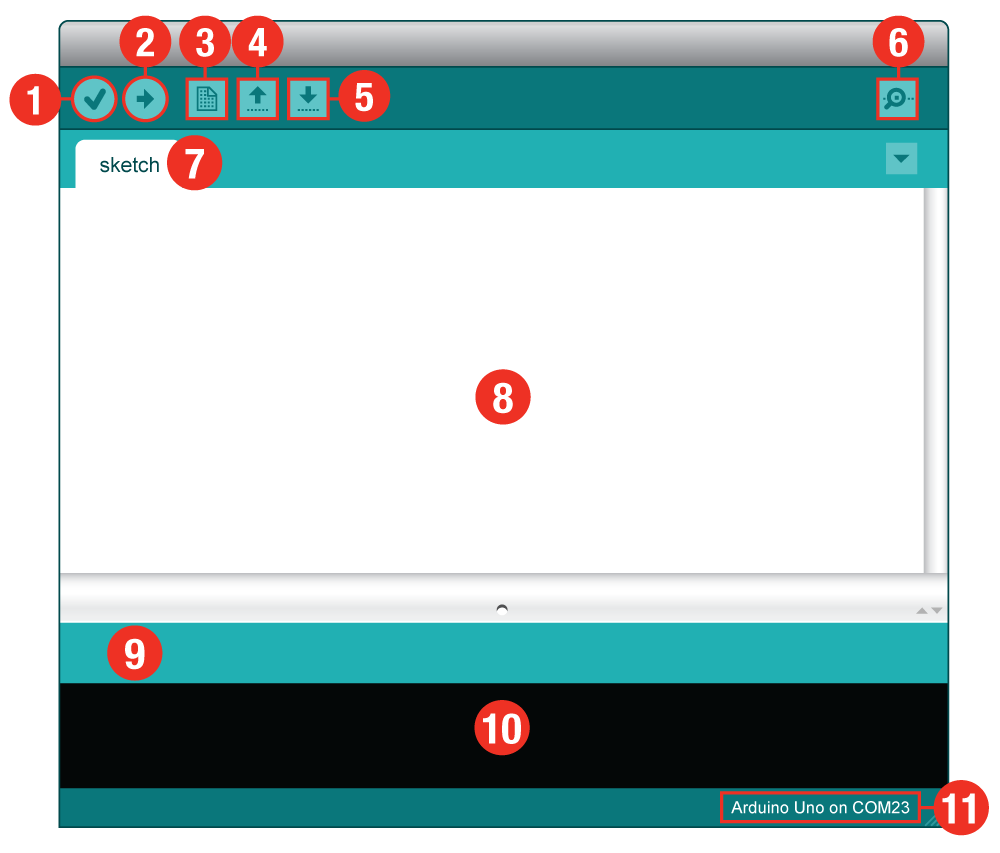
- Verify: Compiles and approves your code. It will catch errors in syntax (like missing semicolons or parentheses).
- Upload: Sends your code to the 101 board.
- New: This buttons opens up a new code window tab.
- Open: This button will let you open up an existing sketch.
- Save: This saves the currently active sketch.
- Serial Monitor: This will open a window that displays any serial information your 101 board is transmitting. It is very useful for debugging.
- Sketch Name: This shows the name of the sketch you are currently working on.
- Code Area: This is the area where you compose the code for your sketch.
- Message Area: This is where the IDE tells you if there were any errors in your code.
- Text Console: The text console shows complete error messages. When debugging, the text console is very useful.
- Board and Serial Port: Shows you what board and the serial port selections.
Select Your Board: Arduino/Genuino 101
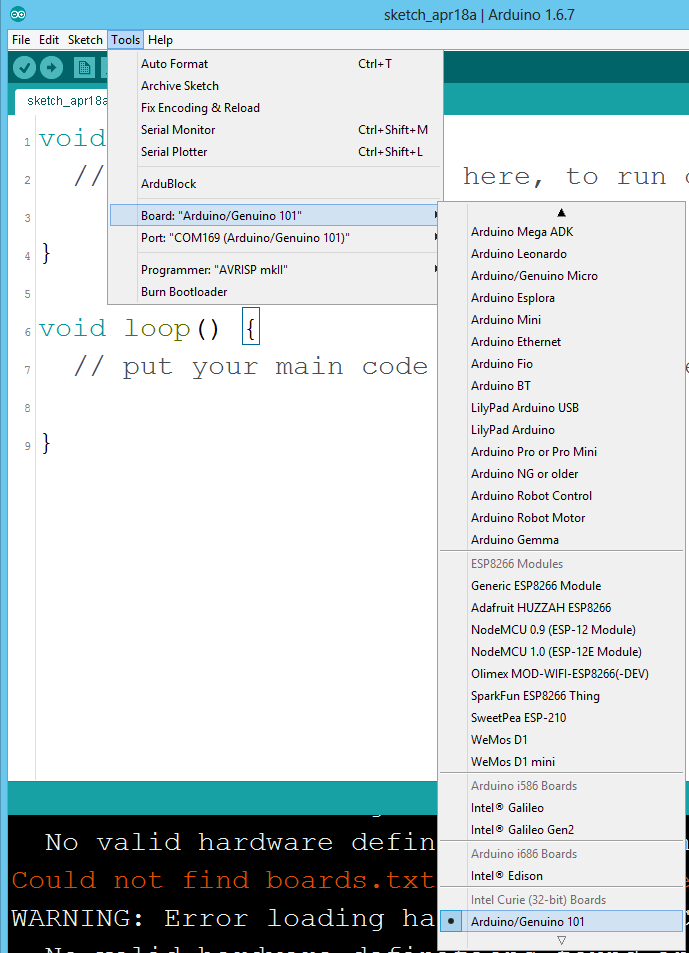
Before we can start jumping into the experiments, there are a few adjustments we need to make. This step is required to tell the Arduino IDE which of the many Arduino boards we have. Go up to the Tools menu. Then hover over Board and make sure Arduino/Genuino 101 is selected.
Select a Serial Port
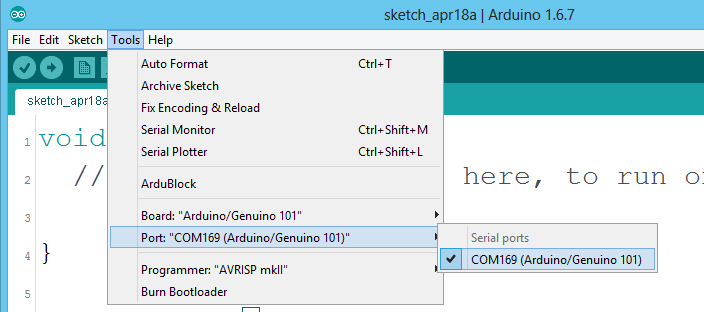
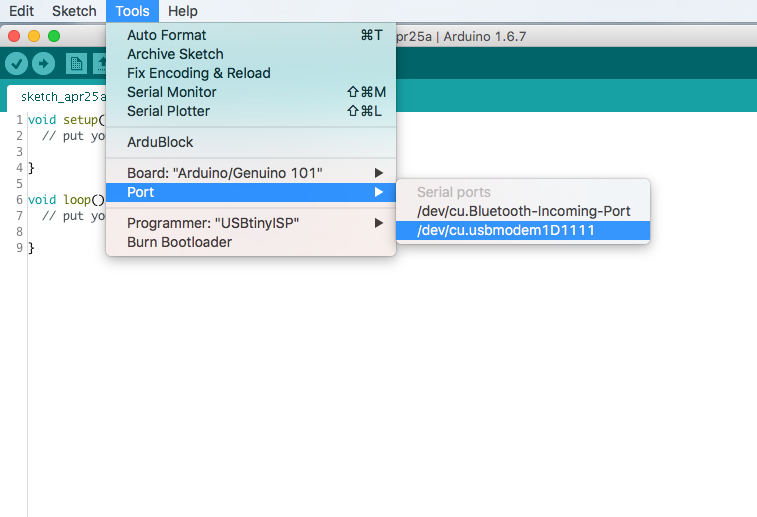
Next up we need to tell the Arduino IDE to which of our computer's serial ports the 101 is connected. Again,, go up to Tools, hover over Port, and select your 101's serial port. This will have Arduino 101 next to the port number in parentheses.
Window Users: This is likely to be COM3 or higher (COM1 and COM2 are usually reserved for hardware serial ports). If there are multiple COM ports available, the 101 is likely the highest numbered port in the list. To be certain, you can also disconnect your 101 and reopen the menu; the entry that disappears should be the 101. Reconnect the board and select that serial port.
Mac Users: Select the serial device of the 101 from the Tools, then hover over Port. On the Mac, this should be something with /dev/tty.usbmodem or /dev/tty.usbserial in it.
Linux Users: Please visit the Arduino Learning Linux section to learn more about Arduino on Linux.
Download Arduino Code
You are so close to to being done with setup! Download the SIK Guide Code. Click the following link to download the code:
Unzip and copy “101_SIK_Guide_Code” into the “examples” folder in the Arduino folder.
Window Users: Unzip the file “101_SIK_Guide_Code.” It should be located in your browser’s “Downloads” folder. Right click the zipped folder and choose “unzip.” Copy the “SIK Guide Code” folder into Arduino’s folder named “examples.”
Mac Users: Unzip the file “101_SIK_Guide_Code.” It should be located in your browser’s “Downloads” folder. Right click the zipped folder and unzip. Find “Arduino” in your applications folder. Right click (ctrl + click) on “Arduino.” Select “Show Package Contents.” Then, click through folders Contents > Resources > Java > Examples. Copy the “101 SIK Guide Code” folder into Arduino’s folder named “examples.”