SIK Experiment Guide for the Arduino 101/Genuino 101 Board
Experiment 21: Using the On-Board Bluetooth Low Energy (BLE)
Introduction
Here we are at the final experiment, and you have come full circle back to a single LED. This time the experiment has a twist! Instead of just blinking this lonely LED, you will control it through your phone or tablet!
The 101 board has Bluetooth Low Energy (BLE) built in. What that means for you is that you can start to control the 101 board from your phone. BLE uses a service/property-based approach to device communication. This approach makes developing across multiple devices easier in the long run, but if you are new to it, it can be quite daunting. This experiment covers loading an app to your device that will help with the communication, and we will go through an example sketch that uses BLE.
This is your final experiment, but in no way are you done learning about the 101 board. We highly recommend checking out the Arduino website for more information on the 101 board and how the supporting materials evolve and improve.
Parts Needed
You will need the following parts:
- 1x Breadboard
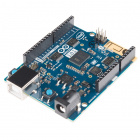
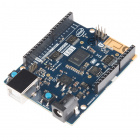
- 1x Arduino 101 or Genuino 101 board
- 1x LED
- 1x 100Ω Resistor
- 3x Jumper Wires
Didn't Get the SIK?
If you are conducting this experiment and didn't get the SIK, we suggest using these parts:
You will also need either an Arduino 101 OR Genuino 101 board.
Arduino 101
DEV-13787Genuino 101
DEV-13984Suggested Reading
Before continuing with this experiment, we recommend you be familiar with the concepts in the following tutorials:
Introducing Bluetooth Low Energy (BLE)
Bluetooth Low Energy (BLE) is a relatively newer communication protocol using Bluetooth. BLE is increasingly employed in wearable and Internet of Things (IoT) applications where power management is a concern, and your device needs to be able to communicate with a broad range of devices such as phones, cars and other BLE devices.
To standardize the communication protocol with a multitude of devices, BLE uses a General Attribute (GATT)-based system, which uses a hierarchy of what are called services based on the device function. For example, a Fitbit may have a heart rate service as well as a pedometer service. Each service can be assigned attributes. These attributes hold the raw data for the service.
An example attribute would be to communicate information about the device that it is communicating with as well as what data is important for a given service. In the example of a Fitbit, the number of steps or your pulse may be an attribute. The big idea is that there are services that allow devices to know what to expect from each other and to get on the same page so they can share attributes back and forth. In its simplest form, GATT allows devices to make assumptions about one another and get down to the important stuff ... sharing information you are trying to communicate.
**Note: BLE is built into the Curie module on the 101 board, and there is no wiring required beyond connecting what you want to control through BLE. **
Hardware Hookup
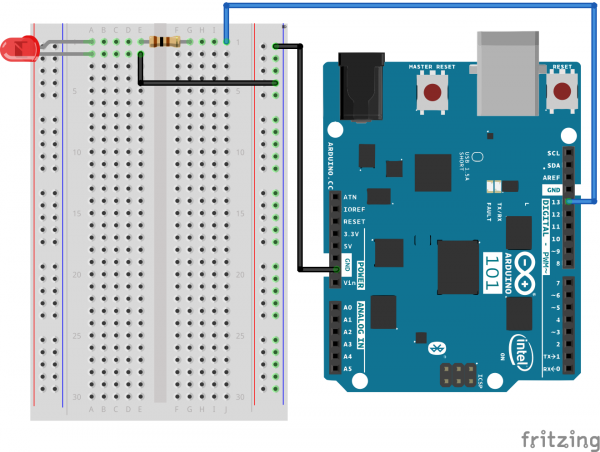
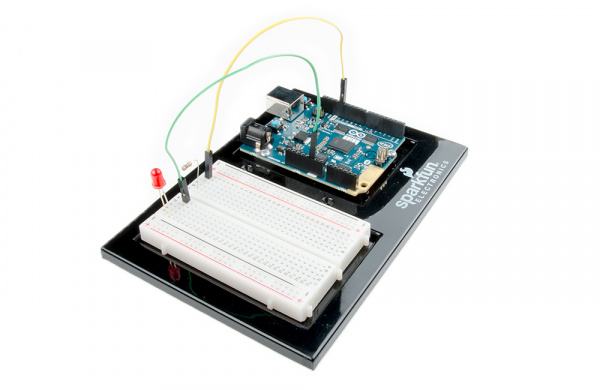
Ready to start hooking everything up? Check out the wiring diagram below to see how everything is connected.
| Polarized Components | Pay special attention to the component’s markings indicating how to place it on the breadboard. Polarized components can only be connected to a circuit in one direction. |
Wiring Diagram for the Experiment
Installing the BLE App
To get you up and running with using BLE with the Arduino 101 we recommend using the nRF Master Control Panel App. It is available for both Android and iOS devices, and the best part is that it's free!
To download the app go to either the Google Play store or the Apple App store and search for nRF. There are a number of other tools by nRF that we highly recommend you play with after getting BLE up and running, but for now we just need the Master Control Panel. Search, download and install the app -- then you're ready to go!
Open the Sketch
Open the Arduino IDE software on your computer. Coding in the Arduino language will control your circuit. Open the code for Circuit 21 by accessing the “101 SIK Guide Code” you downloaded and placed into your “Examples” folder earlier.
To open the code go to: File > Examples > 101 SIK Guide Code > Circuit_21
You can also copy and paste the following code into the Arduino IDE. Hit upload, and see what happens!
language:cpp
/*
SparkFun Inventor's Kit
Example sketch 21

BASIC BLE CONTROL

Turn an LED on and off using BLE and either a phone or tablet. Android and iOS devices only!

Based off of the BLE LED example written by Intel Corporation and included with the Curie BLE Arduino Library.

*/

 #include <CurieBLE.h>

BLEPeripheral blePeripheral;  // BLE Peripheral Device (the board you're programming)
BLEService ledService("19B10000-E8F2-537E-4F6C-D104768A1214"); // BLE LED Service


//set BLE characteristic
       BLEUnsignedCharCharacteristic switchCharacteristic("19B10001-E8F2-537E-4F6C-D104768A1214", BLERead | BLEWrite);

const int ledPin = 13; // pin to use for the LED

 void setup()
{
 // set LED pin to output mode
  pinMode(ledPin, OUTPUT);

  // set advertised local name and service UUID:
  blePeripheral.setLocalName("101 Board");
  blePeripheral.setAdvertisedServiceUuid(ledService.uuid());

  // add service and characteristic:
   blePeripheral.addAttribute(ledService);
   blePeripheral.addAttribute(switchCharacteristic);

   // set the initial value for the characeristic:
    switchCharacteristic.setValue(0);

   // begin advertising BLE service:
   blePeripheral.begin();
 }

void loop()
{
  // listen for BLE peripherals to connect:
 BLECentral central = blePeripheral.central();

 // if a central is connected to peripheral:
  if (central)
  {
   // while the central is still connected to peripheral:
    while (central.connected())
    {
      // if the remote device wrote to the characteristic,
      // use the value to control the LED:
      if (switchCharacteristic.written())
      {
          // any value other than 0, turn on the LED
         if (switchCharacteristic.value())
         {
         digitalWrite(ledPin, HIGH);
         }
      //else turn the LED off
       else
      {
      digitalWrite(ledPin, LOW);
      }
      }
     }
    }
  }
Code to Note
BLEService ledService("19B10000-E8F2-537E-4F6C-D104768A1214");
BLE is service based, and a number of services are predefined with a custom string called a Universally Unique Identifier (UUID). This string is 16 bytes long and, as the name states, is universally unique. This is instantiating the BLEService object ledService with a specific UUID.
switchCharacteristic("19B10001-E8F2-537E-4F6C-D104768A1214", BLERead | BLEWrite);
Characteristics and attributes are bundled underneath services. You can create characteristics with their own UUIDs and set them to readable, writable, or both. We opted for both. Notice that the characteristic UUID is one digit different from the Service UUID.
blePeripheral.setLocalName("101 Board");
You can name your 101 by using the setLocalName() method. You pass it a string in quotes. We recommend making this something that you can easily identify as yours, especially if you are using the 101 in the classroom.
   blePeripheral.setAdvertisedServiceUuid(ledService.uuid());

   // add service and characteristic:
   blePeripheral.addAttribute(ledService);
   blePeripheral.addAttribute(switchCharacteristic);

   // set the initial value for the characeristic:
   switchCharacteristic.setValue(0);

   // begin advertising BLE service:
   blePeripheral.begin();
In this chunk of code we add a service to our peripheral, then bind or add attributes to the peripheral. We add the ledService and control it through the switchCharacteristics. We finally set the starting value of the switchCharacteristics to 0 and start up the peripheral.
From there in the loop function we make sure there is a connection between our peripheral and a central device (a phone). While we have a connection, we check if there is a characteristic present and if it has been written to. If there is a value other than 0, we turn the LED on; if there is no value, or the value is 0, the LED is turned off.
What You Should See
Open up your Bluetooth connections on your device and start the Master Control Panel app. Scan for devices, select your 101, and connect to it.
Once it connects, open up the unknown service and select the switchvalue. Click on the upload logo (arrow pointing up). This will bring up a dialog box. Enter a number other than 0 and click send.
The LED should turn on! Bring up the same dialog box, enter the number 0 and click send. The LED should turn off.
Troubleshooting
LED Not Lighting Up
You know the drill: check your wiring, check to see if the LED is inserted backward.
Not Able to Connect to the 101's Bluetooth
Make sure that your sketch uploaded! You have to upload the sketch for the BLE signal to be broadcast from the 101 board.
Still Not Working
Try restarting your phone's or tablet's Bluetooth and scanning for local devices again.


