SIK Experiment Guide for the Arduino 101/Genuino 101 Board
 D___Run___
 Experiment 14: Using a Piezo Buzzer
Introduction
In this experiment, we will again bridge the gap between the digital world and the analog world. We'll be using a piezo buzzer that makes a small "click" when you apply voltage to it (try it!). By itself that isn't terribly exciting, but if you turn the voltage on and off hundreds of times a second, the piezo buzzer will produce a tone. And if you string a bunch of tones together, you've got music! This circuit and sketch will play a classic tune. We'll never let you down!
We have also added a button in series with the buzzer. Why? Because every good noise maker needs a mute button! To hear the song being played from your 101 board using the buzzer you need to press and hold the button down. To mute the buzzer, just release the button.
Parts Needed
You will need the following parts:
- 1x Breadboard
- 1x Arduino 101 or Genuino 101 board
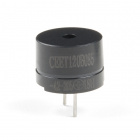
- 1x Piezo Buzzer
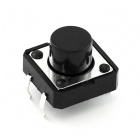
- 1x Push Button
- 3x Jumper Wires
Didn't Get the SIK?
If you are conducting this experiment and didn't get the SIK, we suggest using these parts:


You will also need either an Arduino 101 OR Genuino 101 board.

Arduino 101
DEV-13787
Genuino 101
DEV-13984Introducing the Piezo Buzzer
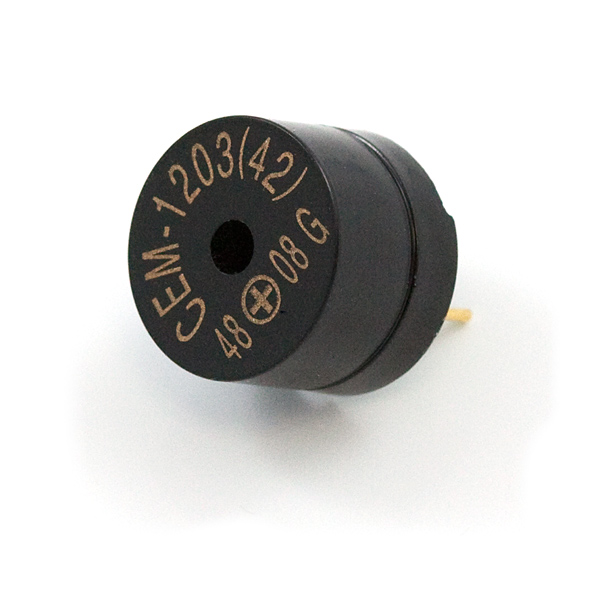
The buzzer is a small component with a piece of metal in it that moves when you apply a voltage across it. This motion causes a small sound, or "click." If you turn the voltage on and off fast enough, you get different beeps, squeals, chirps and buzzes. You will use PWM to control the speed of turning the piezo on and off -- and, in turn, the audio frequency coming out of the buzzer. Adjusting the PWM enables you to get legitimate notes out of the buzzer.
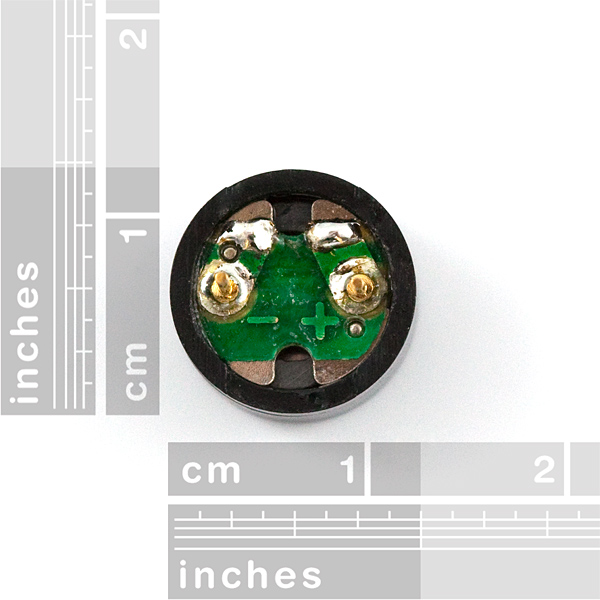
If you flip the buzzer over and look at the bottom, you will see that one pin has a (+) next to it. That pin gets connected to a signal from a PWM pin. The other pin should be connected to ground.
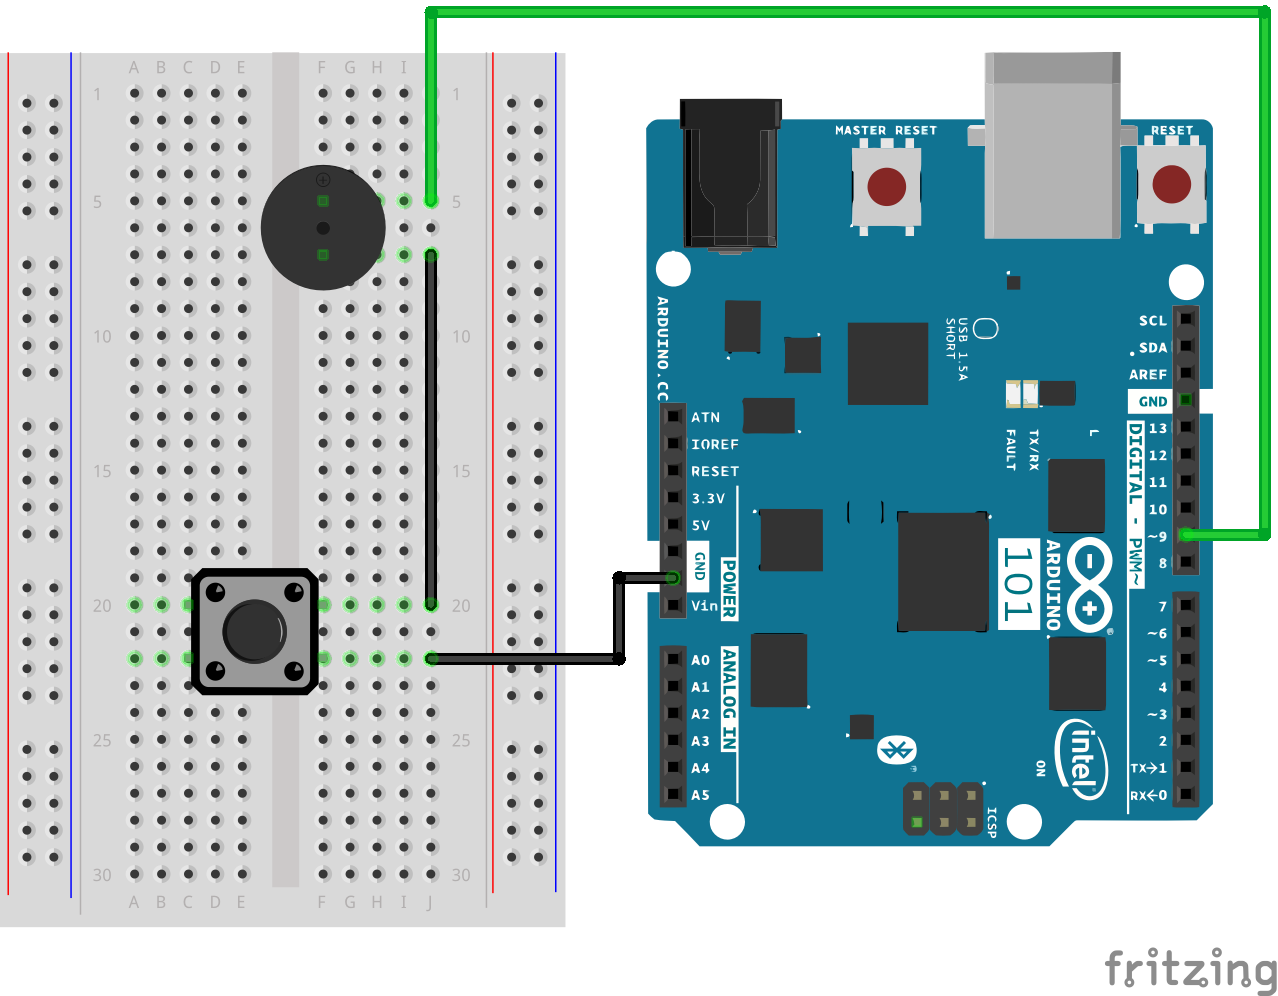
Hardware Hookup
Ready to start hooking everything up? Check out the wiring diagram below to see how everything is connected.
| Polarized Components | Pay special attention to the component’s markings indicating how to place it on the breadboard. Polarized components can only be connected to a circuit in one direction. |
Wiring Diagram for the Experiment
Open the Sketch
Open the Arduino IDE software on your computer. Coding in the Arduino language will control your circuit. Open the code for Circuit 14 by accessing the “101 SIK Guide Code” you downloaded and placed into your “Examples” folder earlier.
To open the code go to: File > Examples > SIK Guide Code > Circuit_14
You can also copy and paste the following code into the Arduino IDE. Hit upload, and see what happens!
language:cpp
/*
SparkFun Inventor's Kit
Example sketch 14

BUZZER

  Use the buzzer to play a song!

This sketch was written by SparkFun Electronics,
with lots of help from the Arduino community.
(This sketch was originally developed by D. Cuartielles for K3)
This code is completely free for any use.
Visit http://learn.sparkfun.com/products/2 for SIK information.
Visit http://www.arduino.cc to learn more about Arduino.

*/

/*
This sketch uses the buzzer to play songs.
The Arduino's tone() command will play notes of a given frequency.
We'll provide a function that takes in note characters (a-g),
and returns the corresponding frequency from this table:

  note  frequency
  c     262 Hz
  d     294 Hz
  e     330 Hz
  f     349 Hz
  g     392 Hz
  a     440 Hz
  b     494 Hz
  C     523 Hz

For more information, see http://arduino.cc/en/Tutorial/Tone
*/

const int buzzerPin = 9;

// We'll set up an array with the notes we want to play
// change these values to make different songs!

// Length must equal the total number of notes and spaces

const int songLength = 18;

// Notes is an array of text characters corresponding to the notes
// in your song. A space represents a rest (no tone)

char notes[] = "cdfda ag cdfdg gf "; // a space represents a rest

// Beats is an array of values for each note and rest.
// A "1" represents a quarter-note, 2 a half-note, etc.
// Don't forget that the rests (spaces) need a length as well.

int beats[] = {1,1,1,1,1,1,4,4,2,1,1,1,1,1,1,4,4,2};

// The tempo is how fast to play the song.
// To make the song play faster, decrease this value.

int tempo = 150;


void setup()
{
  pinMode(buzzerPin, OUTPUT);
}


void loop()
{
  int i, duration;

  for (i = 0; i < songLength; i++) // step through the song arrays
  {
    duration = beats[i] * tempo;  // length of note/rest in ms

    if (notes[i] == ' ')          // is this a rest?
    {
      delay(duration);            // then pause for a moment
    }
    else                          // otherwise, play the note
    {
      tone(buzzerPin, frequency(notes[i]), duration);
      delay(duration);            // wait for tone to finish
    }
    delay(tempo/10);              // brief pause between notes
  }

  // We only want to play the song once, so we'll pause forever:
  while(true){}
  // If you'd like your song to play over and over,
  // remove the above statement
}


int frequency(char note)
{
  // This function takes a note character (a-g), and returns the
  // corresponding frequency in Hz for the tone() function.

  int i;
  const int numNotes = 8;  // number of notes we're storing

  // The following arrays hold the note characters and their
  // corresponding frequencies. The last "C" note is uppercase
  // to separate it from the first lowercase "c". If you want to
  // add more notes, you'll need to use unique characters.

  // For the "char" (character) type, we put single characters
  // in single quotes.

  char names[] = { 'c', 'd', 'e', 'f', 'g', 'a', 'b', 'C' };
  int frequencies[] = {262, 294, 330, 349, 392, 440, 494, 523};

  // Now we'll search through the letters in the array, and if
  // we find it, we'll return the frequency for that note.

  for (i = 0; i < numNotes; i++)  // Step through the notes
  {
    if (names[i] == note)         // Is this the one?
    {
      return(frequencies[i]);     // Yes! Return the frequency
    }
  }
  return(0);  // We looked through everything and didn't find it,
              // but we still need to return a value, so return 0.
}
Code to Note
char notes[] = "cdfda ag cdfdg gf ";
char names[] = {'c','d','e','f','g','a','b','C'};
Up until now we've been working solely with numerical data, but the Arduino can also work with text. Characters (single, printable, letters, numbers and other symbols) have their own type, called "char." When you have an array of characters, it can be defined between double-quotes (also called a "string"), OR as a list of single-quoted characters.
tone(pin, frequency, duration);
One of Arduino's many useful built-in commands is the tone() function. This function drives an output pin at a certain frequency, making it perfect for driving buzzers and speakers. If you give it a duration (in milliseconds), it will play the tone, then stop. If you don't give it a duration, it will keep playing the tone forever (but you can stop it with another function, noTone() ).
What You Should See
What you should see -- well, nothing! What you should hear -- well, nothing to start with! But you should be able to hear a song if you press and hold the button down as soon as the sketch finishes the upload. If you catch the song halfway through or you feel as though it isn't playing, press the reset button and hold down the press button.
If it isn't working, make sure you have assembled the circuit correctly and verified and uploaded the code to your board, or see the Troubleshooting section.
Troubleshooting
No Sound
Given the size and shape of the piezo buzzer it is easy to miss the right holes on the breadboard. Try double checking its placement.
Also, double check to make sure the push button is wired correctly. If you miswired it, then the circuit will never be completed whether you press the button or not.
It Seems to Be Only Playing Part of the Song
You may only catch part of the song by the time you press and hold the button. To start the song over again press the MASTER RESET button on the 101 board while holding the mute button down.
Feeling Let Down and Deserted
The code is written so you can easily add your own songs. Go forth and rock on!