Digital Sandbox Arduino Companion
1. Exploring Blink
Well, that last experiment was certainly boring. Let's make the Sandbox actually do something. When faced with a new platform, a coder’s first task is to write a “Hello, world” program. Usually a “Hello, world” program actually prints those comforting words on a screen. The Digital Sandbox doesn’t give us a screen to print words on, but we do have LEDs! Wonderful, blinky, bright, shiny LEDs. Instead of printing words, let’s blink an LED to say “Hello, world.”
Background Information
This experiment digs into the anatomy of the blinking an LED. We can customize an LED blink with a combination of two Arduino functions -- digitalWrite([pin], [HIGH/LOW]) and delay([milliseconds]).
This experiment introduces the concept of digital output. We call the Sandbox's LEDs "outputs," because it's an effect that the board produces.
The term "digital" means that the output can only take one of two states: ON or OFF. We may also refer to those two opposing states as HIGH/LOW or 1/0. When an output connected to an LED is HIGH, the LED turns on. When the output is LOW, the LED turns off.
Active Parts
Code Components
This time we introduce two functions required to turn an LED on and off.
Digital Output: digitalWrite([pin], [HIGH/LOW])
The digitalWrite() function is used to set the digital state of a pin to either HIGH or LOW.
We'll learn more about the first parameter -- pin -- in the next experiment. For now, we're simplying toying around with the second parameter -- the digital value of the pin.
When a pin goes HIGH, it outputs a voltage of about 5V. That's enough energy to push current through an LED and illuminate it. When a pin goes LOW, it outputs 0V. In this configuration, that doesn't allow any power to run through the LED, so it turns off.
Millisecond Delay: delay([ms])
The Digital Sandbox runs code so fast that sometimes we need to slow it down with a delay. This function will halt the Sandbox from doing anything for a specified number of milliseconds. There are 1000 milliseconds (ms) in a second, so delaying for 1000ms will stop for one second.
Sketch and Experiment
Here's the sketch. Check out the comments in the sketch to gain a more thorough understanding of what's happening. Alternatively, open up the Sandbox_01_Exploring_Blink.ino sketch.
language:c
    // Sandbox 01: Exploring Blink

/* When faced with a new platform, a coder’s first task is to write a “Hello,
   world” program. Usually a “Hello, world” program actually prints those
   comforting words on a screen. The Digital Sandbox doesn’t give us a screen to
   print words on, but we do have LEDs! Wonderful, blinky, bright, shiny LEDs.
   Instead of printing words, let’s blink an LED to say “Hello, world.”

   This experiment introduces some of the most basic functions in the Arduino
   language: digitalWrite([pin], [HIGH/LOW]) and delay([milliseconds]).
   Used together, these functions can be used to control an LED and time!
*/

// Nothing to do in the setup this time. But the function still has to be there!
void setup()
{
}

// Our loop function will blink the LED over-and-over-and-over.
void loop()
{
    digitalWrite(13, HIGH); // Set pin 13 HIGH (3.3-5V)
    delay(1000);            // Wait 1000 ms (1 second)
    digitalWrite(13, LOW);  // Set pin 13 LOW (0V)
    delay(1000);            // Wait 1000 ms (1 second)
}
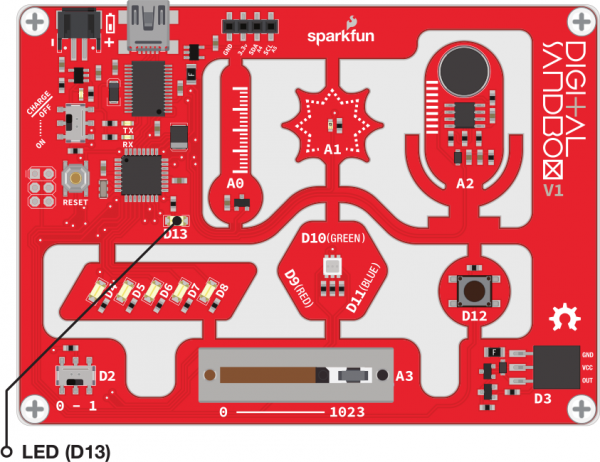
Upload the sketch to your Sandbox, and take note of the small, yellow-ish LED labeled "D13". Is it blinking? How fast is it blinking?
Your Turn!
Now it's time to modify the code to create your own riff on the experiment.
Here are some changes we recommend trying this time around. Feel free to explore the code on your own. Make some errors and debug them using the error output window.
Try modifying the value in the
delay()function. Make it lower than1000. How short can you make the delays and still notice a blink? Ten milliseconds? One millisecond?What happens if you take the
delay()functions out of the sketch? You can quickly remove a function by commenting it out. Try this for yourloop():
language:c
void loop()
    {
      digitalWrite(13, HIGH);
      //delay(1000);
      digitalWrite(13, LOW);
      //delay(1000);
    }
Comments are a great tool for deleting a line of code without actually deleting it.
