STK-node
Experiment 7: Thermometer
Introduction
Note: If you ARE using the Chrome App you will skip any console commands and run the example code directly in the app
A temperature sensor is exactly what it sounds like – a sensor used to measure ambient temperature. In this experiment you will learn about controllers in Johnny-Five. Controllers are a way that Johnny-Five makes using specific sensors easier. A number of sensors and actuators that have a controller attached to them fall underneath their own component object class, in this case the Thermometer class.
Parts Needed
You will need the following parts:
- 1x Breadboard
- 1x SparkFun RedBoard
- 3x Jumper Wires
- 1x TMP36 Temperature Sensor
Didn't Get the Tinker Kit?
If you are conducting this experiment and didn't get the Tinker Kit, we suggest using these parts:

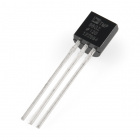
Temperature Sensor - TMP36
SEN-10988Introducing the TMP36 Temperature Sensor
The TMP36 is a low-voltage, precision centigrade temperature sensor. It provides a voltage output that is linearly proportional to the Celsius temperature. It also doesn’t require any external calibration to provide typical accuracies of ±1°C at +25°C and ±2°C over the −40°C to +125°C temperature range. The output voltage can easily convert to temperature using the scale factor of 10 mV/°C.
If you are looking at the flat face with text on it, the center pin is your signal pin; the left-hand pin is supply voltage (5V in this tutorial), and the right-hand pin connects to ground.
In Johnny-Five the TMP36 falls under the Thermometer Object class. Other than the obvious, that it is a thermometer, the reason that the class exists and we dont just use the Sensor class is that a thermometer has a unit of measure, degrees and Fahrenheit, Celcius or if you are an uber nerd, Kelivn. The Thermometer class does all of the math for us to calculate the temperature from the raw sensor value we would normally get from the basic Sensorclass. This makes hooking up certain sensors and using them easier and faster to useful data. Let's check this out in action!
Hardware Hookup
Ready to start hooking everything up? Check out the wiring diagram below to see how everything is connected.
| Polarized Components | Pay special attention to the component’s markings indicating how to place it on the breadboard. Polarized components can only be connected to a circuit in one direction. |
Please note: The temperature sensor can only be connected to a circuit in one direction. See below for the pin outs of the temperature sensor -- TMP36.
Wiring Diagram for the Experiment
Writing the Script
Remember to Setup Your Project Directory!
From your `SIK` directory make sure that create a new project directory for this experiment and create an empty project by typing in the following commands while in your `SIK` directory.
mkdir exp_07;cd exp_07;
npm init -y;
npm install johnny-five
Once done you will have created a project directory, moved into it, created an npm project and installed Johnny-Five. Wahoo!
description...
language:javascript
const five = require('johnny-five');

const board = new five.Board();

board.on('ready', ()=>{

   const temp = new five.Thermometer({
      pin: 'A0',
      controller: 'TMP36'
   });

   temp.on('change', ()=>{
      var tempF = temp.fahrenheit;
      console.log('Temperature: ', tempF);
   });
});
Code to Note
language:javascript
const temp = new five.Thermometer({
      pin: 'A0',
      controller: 'TMP36'
   });
The thermometer object class allows you to set a controller. This accepts the model name of supported temperature sensors as a string. The idea behind a controller is that the calibration and the math to get the data from raw values to an actual temperature is done for you.
language:javascript
var tempF = temp.fahrenheit;
To read the temperature you can read either the fahrenheit, celcius or the kelvin parameter of the thermometer object. We stored it in a variable within the event function before logging it.
temp.F or temp.C instead if typing them out! What You Should See
You should be able to read the temperature your temperature sensor is detecting on the serial monitor in the Arduino IDE. If it isn't working, make sure you have assembled the circuit correctly and verified and uploaded the code to your board, or see the Troubleshooting section.
language:console
Temperature: 76
Temperature: 78
Temperature: 80
Temperature: 82
Temperature: 79
....
Troubleshooting
TMP36 is really hot!
Unplug your circuit immediately and check your wiring! You have hooked the TMP36 up backwards!
Now I get odd readings...
If you leave your TMP36 plugged in backwards for too long or you give it too much voltage you may damage it and cause it to malfunction.
Still No Success
A broken circuit is no fun. Send us an email, and we will get back to you as soon as we can: techsupport@sparkfun.com
Exploring Node.js
OK, so you now have access to reading the temperature, what now? Well, you could log it to a file as you did in Experiment 5. But, then you dont have access to it anywhere else. What if you wanted to see your log from your phone? Enter data.sparkfun.com!
phant is a modular logging tool developed by SparkFun Electronics for collecting data from the Internet of Things. phant is the open source software that powers data.sparkfun.com.
To get started with phant check out this guide to creating and setting up a data channel.
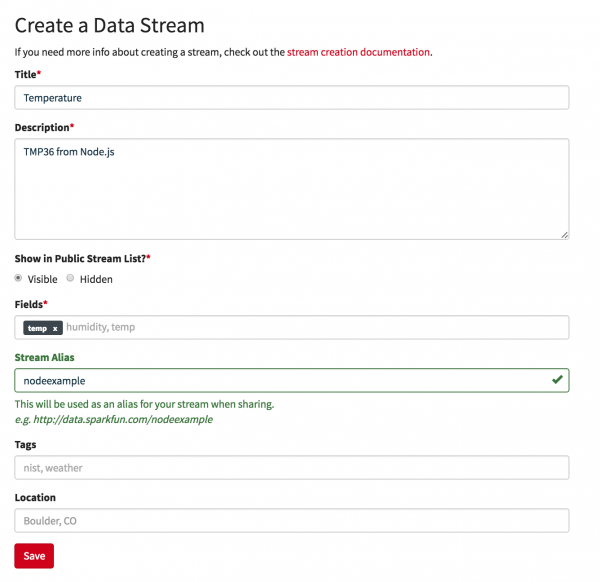
Create a channel by clicking the create button from the data.sparkfun.com home page. Fill out the form as shown here with your title and descript being different, but the field being the same.
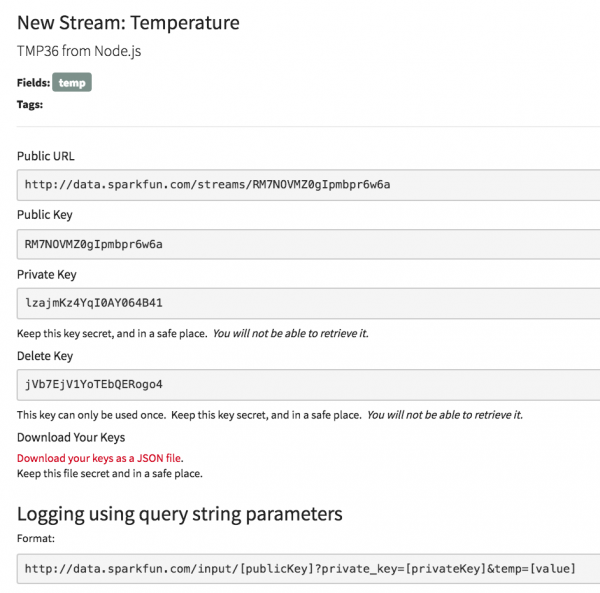
When you save the form data.sparkfun.com will assign you a set of keys. A public key, a private key and a delete key. It will also give you an example URL for submitting data via an http request.
You will need your keys to interact with this, so be sure to email them to yourself!
With your channel now all setup, let's add some code to your original script for it to make an http request to your feed and report the temperature.
Request with data.sparkfun.com
Before we jump into code we need to install the request module. This module simplifies how to make http requests to other sites. You can install the module by running the following command in your console.
npm install request
With the module installed, let's now create a new file and call it "temp_phant.js" with the following command in your console.
touch temp_phant.js
Now open your temp_phant.js file in your text editor and type or copy and paste the following code into it.
language:javascript
const five = require('johnny-five');
const request = require('request');

const privKey = '<your private key>';
const pubKey = '<your public key>';

board.on('ready', ()=>{
   const temp = new five.Thermometer({
      pin: 'A0',
      controller: 'TMP36',
      freq: 10*1000
    });

   temp.on('data', ()=>{
      var tempF = temp.F;

      var logString = 'http://data.sparkfun.com/input/'+pubKey+'?'+'private_key='+privKey+'&temp='+String(tempF);

      request(logString, (error,res, body)=>{
         console.log(body);
      });
   });
});
Make sure you save your file and then run it by using the following command.
node temp_phant.js
Now after the script starts you should get the following log in your console.
language:console
1 success
As long as your script is running the room temperature will be reported to data.sparkfun.com every 10 seconds. Open a new browser window and navigate to your feeds public feed by typeing the following URL.
https://data.sparkfun.com/streams/
You should see a new row in the table get added every 10 seconds as shown below. Pretty cool!
Now that you have this up and running, you can log data to the web for others to use! To learn more about Phant or install your own local Phant click the button bellow.


