STK-node
Experiment 3: LEDs
Introduction
Note: If you ARE using the Chrome App you will skip any console commands and run the example code directly in the app
Now that you've gotten your LED to blink on and off, it's time to up the stakes a little bit – by connecting six LEDs at once. We'll also give your RedBoard a little test by creating various lighting sequences.
Along with controlling the LEDs, you’ll learn a few programming tricks that keep your code neat and tidy!
You will need the following parts:
- 1x Breadboard
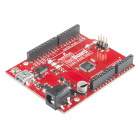
- 1x SparkFun RedBoard
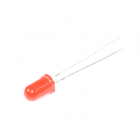
- 6x LEDs
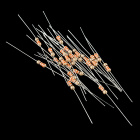
- 6x 330Ω Resistors
- 7x Jumper Wires
Didn't Get the Tinker Kit?
If you are conducting this experiment and didn't get the Tinker Kit, we suggest using these parts:
Resistor 330 Ohm 1/6 Watt PTH - 20 pack
COM-11507Hardware Hookup
Ready to start hooking everything up? Check out the wiring diagram and hookup table below to see how everything is connected.
| Polarized Components | Pay special attention to the component’s markings indicating how to place it on the breadboard. Polarized components can only be connected to a circuit in one direction. |
Wiring Diagram for the Experiment
Writing the Script
Remember to Setup Your Project Directory!
From your `SIK` directory make sure that create a new project directory for this experiment and create an empty project by typing in the following commands while in your `SIK` directory.
mkdir exp_03;cd exp_03;
npm init -y;
npm install johnny-five
Once done you will have created a project directory, moved into it, created an npm project and installed Johnny-Five. Wahoo!
Create a new javascript file called "multiBlink.js" with the following command.
touch multiBlink.js
Now, open your multiBlink.js file with your text editor and type out or copy and paste the following code.
language:javascript
const five = require('johnny-five');

const board = new five.Board();

board.on('ready', ()=>{
    const leds = new five.Leds([4,5,6,7,8,9]);

    board.loop(1000,()=>{
    for(var x = 0; x <= leds.length-1; x++){
    leds[x].on();
    }
    leds.off();
    });
});
Code to Note
language:javascript
const leds = new five.Leds([4,5,6,7,8,9]);
When creating a plural object, or an object that groups a bunch of components (such as the Leds object) you pass the pin numbers as an array.
language:javascript
for(var x = 0; x <= leds.length-1; x++){
    leds[x].on();
    }
We use a for() loop to iterate through the array of leds starting with 0 (the first led in the array) and work our way to the last Led, which happens to be the length of the array minus one. I know it's odd, but when you count 0 as the first spot the length of the array is off by one when we use it in this way.
language:javascript
leds[x].on();
To reference a single led in the array you can specify it by its index. Instead of x this could be 0 for the first led in the array, or 3 for the fourth led.
What You Should See
This is similar to Experiment 1, but instead of one LED, you should see all the LEDs blink. If they don't, make sure you have assembled the circuit correctly and verified and uploaded the code to your board, or see the Troubleshooting section.
Troubleshooting
One LED is not working
Make sure that you check the direction of the LED!
Still not working!
Sometimes its best to take things apart and rebuild! There are a lot of wires and components, there may be a faulty jumper wire or LED, try replacing them
Still No Success
A broken circuit is no fun. Send us an email, and we will get back to you as soon as we can: techsupport@sparkfun.com
Exploring Node.js
You have a huge input at your finger tips! Your keyboard. We take it for granted every day. When you stop and think about it, the amount of information we input into our computers through the keyboard and mouse is astounding.
We can capitalize on your keyboard as an input in Node.js with the keypress module! Install the keypress module with the following command.
npm install keypress
Using keys as an input
Make any Node ReadableStream emit "keypress" events
With your LEDs in a line it makes sense to control how many are lit up in a line with your arrow keys. Every time you press the UP key we want to turn on an LED and every time you press the DOWN key we want to subtract or turn off one of the LEDs.
Let's create a new javascript file and try this out. Create a new file by typing the following command into your console.
touch leds_key.js
Now, open up your new leds_key.js file and type out or copy and paste the following code.
language:javascript
const five = require('johnny-five');
const keypress = require('keypress');

const board = new five.Board();

keypress(process.stdin);

board.on('ready', ()=>{

  const leds = new five.Leds([4,5,6,7,8,9]);

  var index= -1;
  console.log('Press the Up and Down arrow keys!');
  // listen for the "keypress" event
  process.stdin.on('keypress', function (ch, key) {
    console.log(key.name);
    if (key && key.ctrl && key.name == 'c') {
      process.stdin.pause();
    }

    if(key.name == 'up'){
      index++;
    }
    else if(key.name == 'down'){
      index--;
    }

    if(index > 6){
      index = 6;
    }

    if(index < -1){
      index = -1;
    }

    leds[index].toggle();
    });
  });

  process.stdin.setRawMode(true);
  process.stdin.resume();
Make sure that you have saved your file. Once you do go ahead and run this script from the console by typing the following command.
node leds_key.js
Once the script starts you should be prompted by the console to press the up and down arrow keys on your keyboard. When you press the up arrow the LEDs will start to light up as a bar graph. When you press the down key the bar graph should get shorted as leds turn off as shown in the video. Sweet!
You can learn more about the keypress module and how to use it beyond this example at its NPM page.


