STK-node
 D___Run___
 Experiment 2: Sensor
Introduction
Note: If you ARE using the Chrome App you will skip any console commands and run the example code directly in the app
In this circuit you will work with a potentiometer. You will learn how to use a potentiometer to control the timing of a blinking LED by reading a sensor and storing it as a variable, then using it as your delay timing.
Parts Needed
You will need the following parts:
- 1x Breadboard
- 1x SparkFun RedBoard
- 1x LED
- 1x 330Ω Resistor
- 7x Jumper Wires
- 1x Potentiometer
Didn't Get the Tinker Kit?
If you are conducting this experiment and didn't get the Tinker Kit, we suggest using these parts:


Resistor 330 Ohm 1/6 Watt PTH - 20 pack
COM-11507
Suggested Reading
Before continuing with this experiment, we recommend you be familiar with the concepts in the following tutorial:
Introducing the Potentiometer
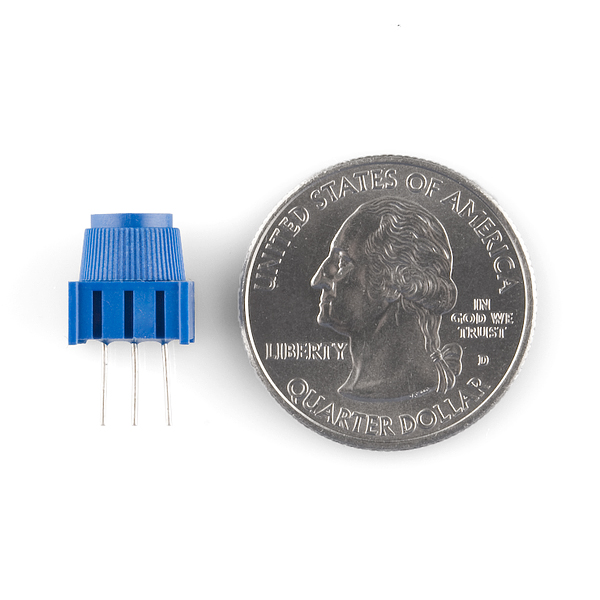
A potentiometer is a resistance-based analog sensor that changes its internal resistance based on the rotation of its knob. The potentiometer has an internal voltage divider enabling you to read the change in voltage on the center pin with a microcontroller (the RedBoard). To hook up the potentiometer, attach the two outside pins to a supply voltage (5V in this circuit) and ground. It doesn’t matter which is connected where, as long as one is connected to power, and the other to ground. The center pin is then connected to an analog input pin so the RedBoard can measure the change in voltage. When you twist the knob, the sensor reading will change!
Hardware Hookup
Ready to start hooking everything up? Check out the wiring diagram and hookup table below to see how everything is connected.
| Polarized Components | Pay special attention to the component’s markings indicating how to place it on the breadboard. Polarized components can only be connected to a circuit in one direction. |
Wiring Diagram for the Experiment

Reading the Sensor Values
Remember to Setup Your Project Directory!
From your `SIK` directory make sure that create a new project directory for this experiment and create an empty project by typing in the following commands while in your `SIK` directory.
mkdir exp_02;cd exp_02;
npm init -y;
npm install johnny-five
Once done you will have created a project directory, moved into it, created an npm project and installed Johnny-Five. Wahoo!
language:javascript
const five = require('johnny-five');

const board = new five.Board();

board.on('ready', ()=>{
   const sensor = new five.Sensor('A0');

   sensor.on('data', ()=>{
      var val = sensor.value;
      console.log('Sensor Value: ',val);
   });
});
Make sure you save your file and then run your script by typing the following command in your terminal.
node sensor.js
What You Should See
You shouldn't see anything happening physically on your board, but your terminal should start printing out information every 200 milliseconds (really fast!). This data should look something like this.
language:console
Sensor Value: 324
Sensor Value: 350
Sensor Value: 500
Sensor Value: 526
Sensor Value: 627
Sensor Value: 627
...
Code to Note
language:javascript
const sensor = new five.Sensor('A0');
Just like the Led object, we also have to create a Sensor object using the new constructor. With the Sensor object we pass it what pin it is attached to as a String, in this case since we are using an analog pin that is "A0".
language:javascript
sensor.on('data', ()=>{
   //do something cool!
});
The Sensor object has an event listener similar to the Board object. But, instead of listening for "ready" it is listening for either "data" or "change". The "data" event fires at a constant rate which you will explore more in Experiment 5. The "change" event is fired every time that the sensor value actually changes. So, if the potentiometer doesn't change and the value stays the same, the event doesn't happen.
The second part of the event listener is a callback function that is executed when the event is triggered.
language:javascript
var val = sensor.value;
When the event is triggered we can capture the sensor value by storing it in a variable. This variable (val) is a local variable, which means that it can only be used within the event callback function and nowhere else.
language:javascript
console.log("Sensor Value: ", val);
To view the variable value of val we log it to the console and concatenate it with the string of "Sensor Value: " to give more context to it.
Controlling Blink
But wait, there is an LED on our breadboard! Yep, you are right. Let's see how we can use the potentiometer and its value to change the interval of the blink() method.
Let's create a new javascript file and name it "sensor_led.js" by typing the following command.
touch sensor_led
Now open your sensor_led.js file and type out, or copy and paste the following script.
language:javascript
const five = require('johnny-five');

const board = new five.Board();

board.on('ready', ()=>{
   const sensor = new five.Sensor('A0');
   const led = new five.Led(13);

   sensor.on('change', ()=>{
      var interval = sensor.value;
      led.blink(interval);
   });
});
Once you are done, make sure to save the file and then run it with the following command in your terminal.
node sensor_led.js
Once you see the terminal run the code go ahead and twist the potentiometer and you should see something like this.
Troubleshooting
Getting Random Values
Make sure that you have wired the sensor up correctly and wired it to the pin you specified in your code, you may be reading the wrong pin
Getting only 0 or 1023
Check your circuit, you may have your analog pin wired directly to either ground or 5V
Cannot Find ...
If you get an error about not being able to find Johnny-Five or any other module make sure that you have installed them in your project using NPM!
Still No Success
A broken circuit is no fun. Send us an email, and we will get back to you as soon as we can: techsupport@sparkfun.com
Beyond Value
The Sensor object has a lot more to offer than a value and an event listener. Here are a few methods and some code snippets that may be helpful to you as you explore the Sensor class a bit more.
Scale
The value attribute gives us a number range that is 0-1203 which unless you are doing something in base 10 counting, seems pretty arbitrary. What if we want to deal with a sensor value in percentage (0-100%)? Enter the scale() method. The scale method takes the sensor value and scales it to a range of your choosing. Try this out...
Create a new file and name it "scale_sensor.js" by using the following command.
touch scale_sensor.js
Now, open your scale_sensor.js file in a text editor and type out or copy and paste the following code.
language:javascript
const five = require('johnny-five);

const board = new five.Board();

board.on('ready', ()=>{
   const sensor = new five.Sensor('A0');

   sensor.on('change', ()=>{
      var scaleVal = sensor.scaleTo(0,100);
      console.log('Scaled Value: ', scaleVal);
   });
});
Make sure you save and then run the script using the following command.
node scale_sensor.js
Once this runs it will log your scaled values to the console as shown here.
language:console
Scaled Value: 0
Scaled Value: 23
Scaled Value: 42
Scaled Value: 37
Scaled Value: 47
Scaled Value: 32
...
Within
The Sensor object also has the within() method. This method accepts two arguments. The first is the range that you are looking for the value to be within as an array of two numbers. Example: [100,1000]. The second argument is a callback function that is triggered when the sensor value falls with that range. Let's check it out in action using the LED!
Create a new javascript file called sensor_within.js using the following command.
touch sensor_within.js
Now open the new file in a test editor and type out or copy and paste the following code.
language:javascript
const five = require('johnny-five');
const board = new five.Board();

board.on('ready', ()=>{
   const sensor = new five.Sensor('A0');
   const led = new five.Led(13);

   sensor.on('data', ()=>{
      sensor.within([200,400], ()=>{
      led.on();
      });
      led.off();
   });
});
Make sure you save this file and then you can run it with the following command.
node sensor_within.js
Once your code runs turn your potentiometer and the LED will turn on at a certain point (when it enters the within range) and then turn off again when it exits that range.
Exploring Node.js
Just spitting numbers out through console.log() isn't the greatest practice and is just plain hard to read. What you really want is some sort of real-time bar graph so you can get a more visual reference without having to read all of those numbers. Fear not! Enter Barcli!
Barcli

Barcli is a simple tool for displaying real time data in the console. Multiple instances of barcli can be stacked to show multiple axes, sensors or other data sources in an easy to read horizontal bar graph. Barcli exists because I needed a way to visualize Johnny-Five sensor data quickly and easily. console.log is hard to read, especially if you have more than one datapoint to track.
So, how do we use barcli? Lets take a look!
First of all we need to install the Barcli module through npm. We do this by typing the following command into the console. (Make sure that you are still in your exp_2 project directory).
npm install barcli
This should install barcli locally and you should get an output similar to this in your console.
language:console
npm WARN package.json barcli_test@1.0.0 No description
npm WARN package.json barcli_test@1.0.0 No repository field.
npm WARN package.json barcli_test@1.0.0 No README data
barcli@0.0.23 node_modules/barcli
└── chalk@1.1.3 (escape-string-regexp@1.0.5, ansi-styles@2.2.1, supports-color@2.0.0, has-ansi@2.0.0, strip-ansi@3.0.1)
Don't worry about the package.json warnings, they are just reminders that there are things missing in your package.json file if you ever wanted to publish this project.
Now, create a new javascript file to use to test barcli out in. Do this by typing the following into your console.
touch barcli_sensor.js
Now open your barcli_sensor.js file with your text editor and type or cut and paste the following code into your empty file.
language:javascript
const five = require('johnny-five);
const barcli = require('barcli');

const board = new five.Board();

const graph = new barcli({
   label: 'Sensor Value',
   range: [0,1023]
   });

board.on('ready', ()=>{
   const sensor = new five.Sensor('A0');

   sensor.on('change', ()=>{
      var val = sensor.value;
      graph.update(val);
   });
});
Make sure you save your file and then run it with the following command.
node barcli_sensor.js
Once your code starts to run you should see a bargraph in your console. Go ahead and turn your potentiometer and see what happens!
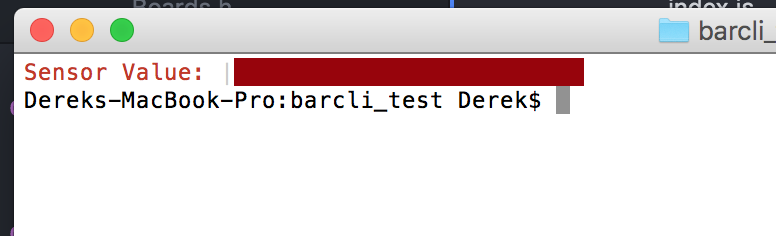
The graph moves in real time! pretty cool, huh? Now, if you ever want a more visual feedback for a sensor or any other variable when using Node.js you have a way to graph it!
You can learn more about how to use Barcli on its NPM page.