STK-node
 D___Run___
 Experiment 5: Sensor (With Shape)
Introduction
In Experiment 2, you got to use a potentiometer, which varies resistance based on the twisting of a knob and, in turn, changes the voltage being read by the analog input pin. In this circuit you’ll be using a photoresistor, which changes resistance based on how much light the sensor receives. You will read the light value of the room and have an LED turn on if it is dark and turn off if it is bright. That's right; you are going to build a night light!
Parts Needed
You will need the following parts:
- 1x Breadboard
- 1x SparkFun RedBoard
- 1x LED
- 1x 330Ω Resistor
- 7x Jumper Wires
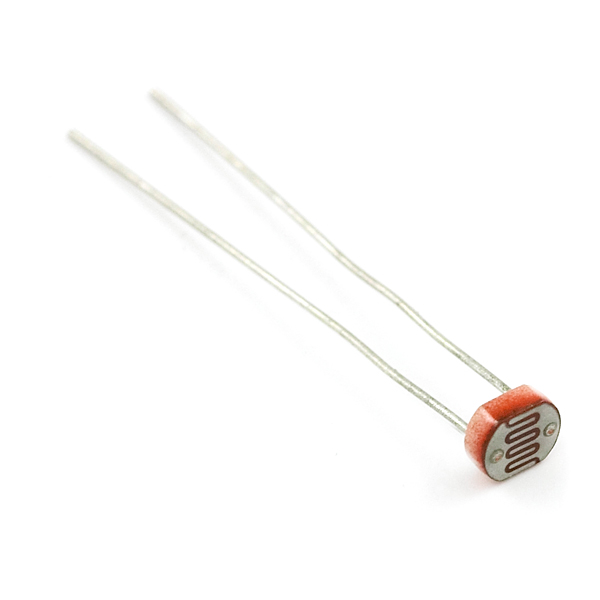
- 1x Photoresistor
- 1x 10K Resistor
Didn't Get the Tinker Kit?
If you are conducting this experiment and didn't get the Tinker Kit, we suggest using these parts:


Resistor 330 Ohm 1/6 Watt PTH - 20 pack
COM-11507
Introducing the Photoresistor
The photoresistor changes its resistance based on the light to which it is exposed. To use this with the RedBoard, you will need to build a voltage divider with a 10K Ohm resistor as shown in the wiring diagram for this experiment. The 101 board cannot read a change in resistance, only a change in voltage. A voltage divider allows you to translate a change in resistance to a corresponding voltage value.
The voltage divider enables the use of resistance-based sensors like the photoresistor in a voltage-based system. As you explore different sensors, you will find more resistance-based sensors that only have two pins like the photoresistor. To use them with your RedBoard you will need to build a voltage divider like the one in this experiment. To learn more about resistors in general, check out our tutorial on resistors and also our tutorial on voltage dividers.
Hardware Hookup
Ready to start hooking everything up? Check out the wiring diagram below to see how everything is connected.
| Polarized Components | Pay special attention to the component’s markings indicating how to place it on the breadboard. Polarized components can only be connected to a circuit in one direction. |
Wiring Diagram for the Experiment

Write your Script
Remember to Setup Your Project Directory!
From your `SIK` directory make sure that create a new project directory for this experiment and create an empty project by typing in the following commands while in your `SIK` directory.
mkdir exp_05;cd exp_05;
npm init -y;
npm install johnny-five
Once done you will have created a project directory, moved into it, created an npm project and installed Johnny-Five. Wahoo!
Create a new javascript file called "sensor_shape.js" by typing the following command into your console.
touch sensor_shape.js
Then, with your text editor open your sensor_shape.js file and either type out or copy and paste the following code into it.
language:javascript
const five = require('johnny-five');

const board = new five.Board();

board.on('ready', ()=>{
   const led = new five.Led(9);

   const sensor = new five.Sensor({
      pin: 'A0',
      freq: 500,
      threshold: 30
   });

   sensor.on('data', ()=>{
      console.log('data fire, it is: ', sensor.value);
   });

   sensor.on('change', ()=>{
      if(sensor.value >= 500){
         led.off();
      }
      else{
         led.on();
      }
   });
});
When you are done make sure you save the file and then run it from the console by typing the following command.
node sensor_shape.js
Code to Note
This may seem similar to when we covered the Sensor object, but in this case we want to take a deeper dive into the Sensors "shape" or the information that we can pass the Sensor object to give it further definition.
language:javascript
const sensor = new five.Sensor({
      pin: 'A0',
      freq: 500,
      threshold: 30
   });
Sensor shape consists of a number of things as an object. We can specify the pin number, the frequency we want to read the sensor, a threshold at which we would use it as a boolean value.
language:javascript
sensor.on('data', ()=>{
   console.log('data fire, it is: ', sensor.value);
});
The Sensor class has two different event listeners. One of them listens for the "data" event. This event is fired at the frequency that you specify in the freq value in the Sensor object.
language:javascript
sensor.on('change', ()=>{
  if(sensor.value >= 500){
         led.off();
      }
      else{
         led.on();
      }
   });
You have used the "change" event already, but we wanted to show that you can use both listeners in tandem, where you are doing something like logging data on the "data" event and then controlling the LED in the "change" event. You can use these events to your advantage!
What You Should See
You should see the LED turn on when it is darker and turn off when it is brighter. Try putting your hand over the sensor and then removing it. Also every 500 milliseconds you should have a log similar to this output in your console.
language:console
data fire, it is: 345
data fire, it is: 467
data fire, it is: 652
...
Troubleshooting
Random Values
You have a floating signal pin which means that your sensor is not hooked up correctly. Double check your wiring and especially where things are plugged in on your breadboard
Opposite values of what was expected
You will get a larger reading the more light that falls on the senor if 5V is connected to the sensor end of the voltage divider. If you are getting the opposite, swap your ground and 5V wires.
Still No Success
A broken circuit is no fun. Send us an email, and we will get back to you as soon as we can: techsupport@sparkfun.comExploring Node.js
Node.js as you have seen already has a huge community behind it and it seems like everyone has an API on NPM. So, it makes connecting your Johnny-Five projects to a service pretty easily. One service that I found is for creating and sending push notifications to your phone.
Notification with Instapush
Instapush is an online service that you need to sign up for, but it is painless and their user interface is really simple. To get started navigate to instapush.im and sign up for an account.
Your account for Instapush will need to be paired with an app on your phone. You can download the Instapush app for iOS or Android here.
Once you sign up for an account you will land on your user page. Click on the dashboard logo at the top of the page and then select the Apps tab from your options.
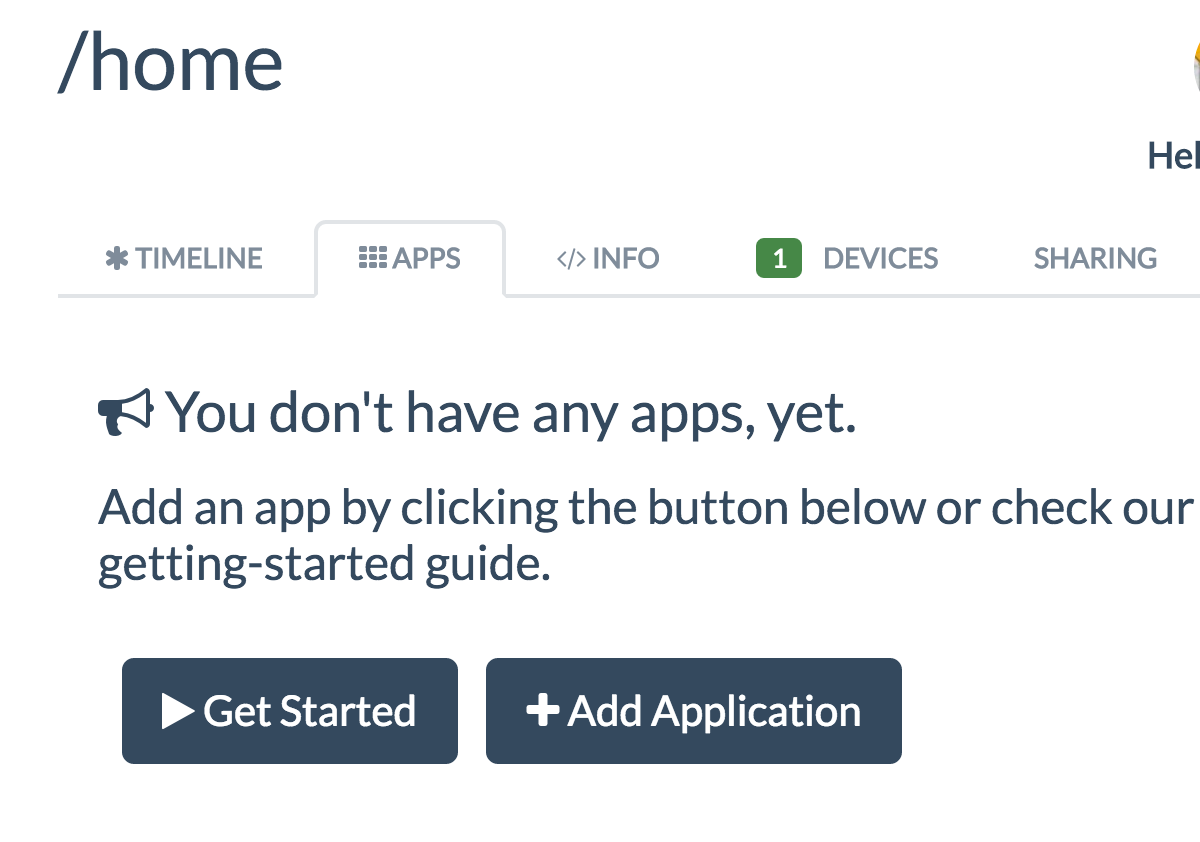
Click on "Add Application" to create a new application.
Name you application...
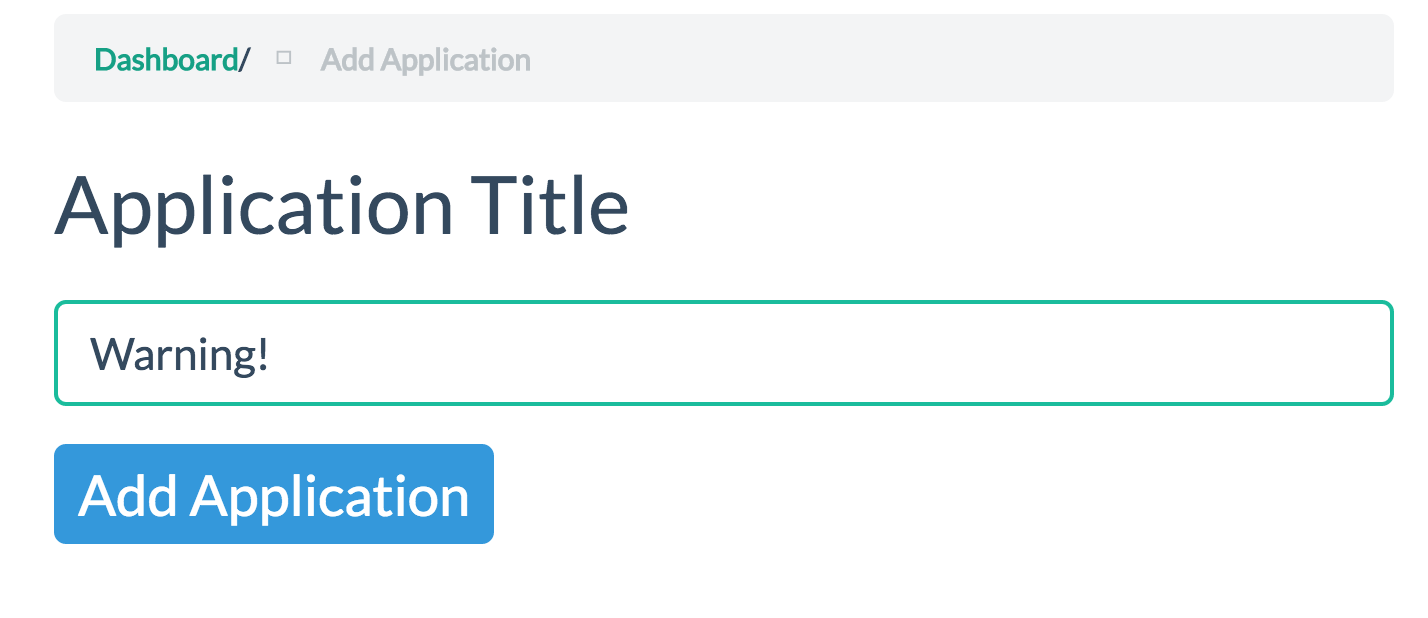
Now, it's time to add events to your application! Click on the "add Events". Instapush is events driven and we need to create an event to be triggered for us to actually get push requests.
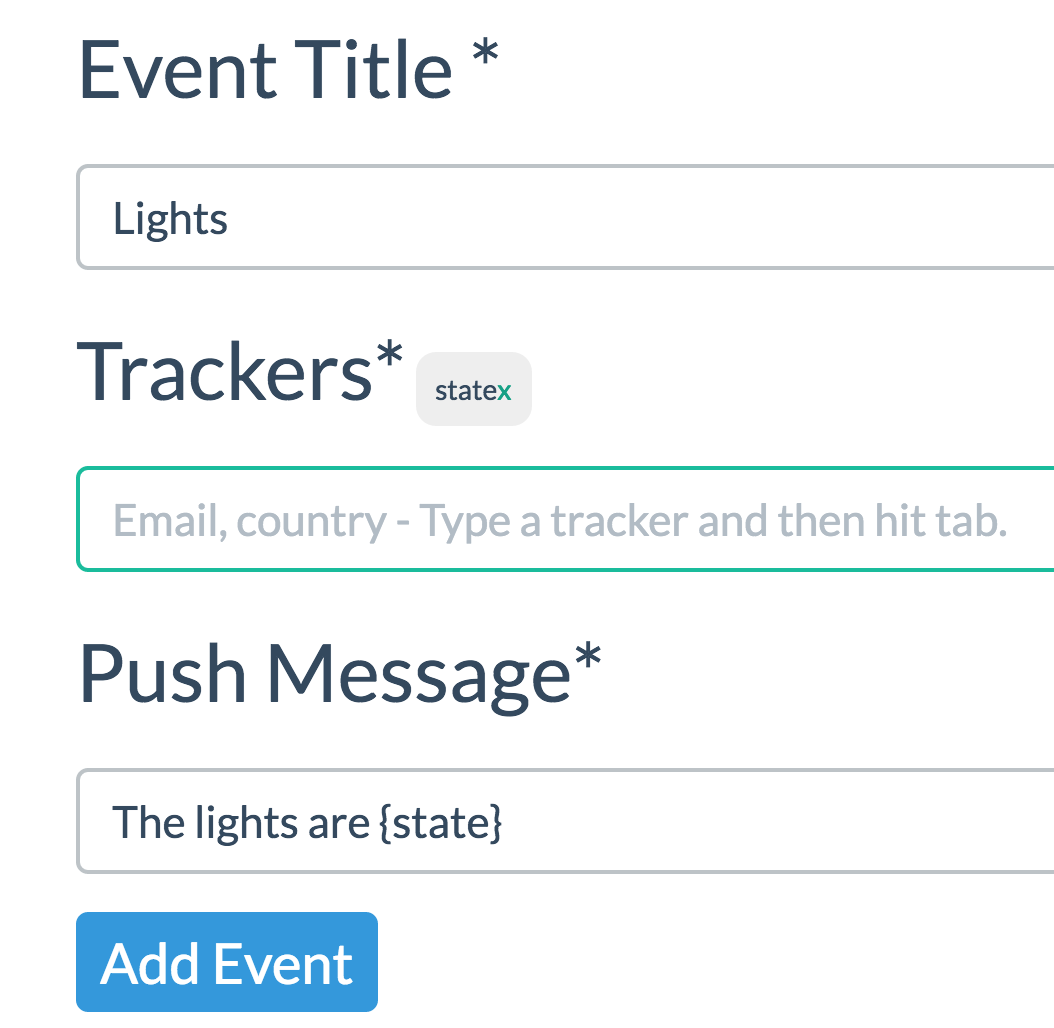
Each event has an Event Title, Trackers (parameters) and an actual notification message. The title is a well... title. For our project we will be tracking when the lights in a room are being turned on and off. So I gave the event title Lights. The trackers are the values you would want to pass to the message. In this case, I am going to have 2 of them. The first is "room" and the second will be "state". This allows for the app to scale beyond a very specific use case. You could see this expanding to every room in a house, though that's a lot of push notifications.
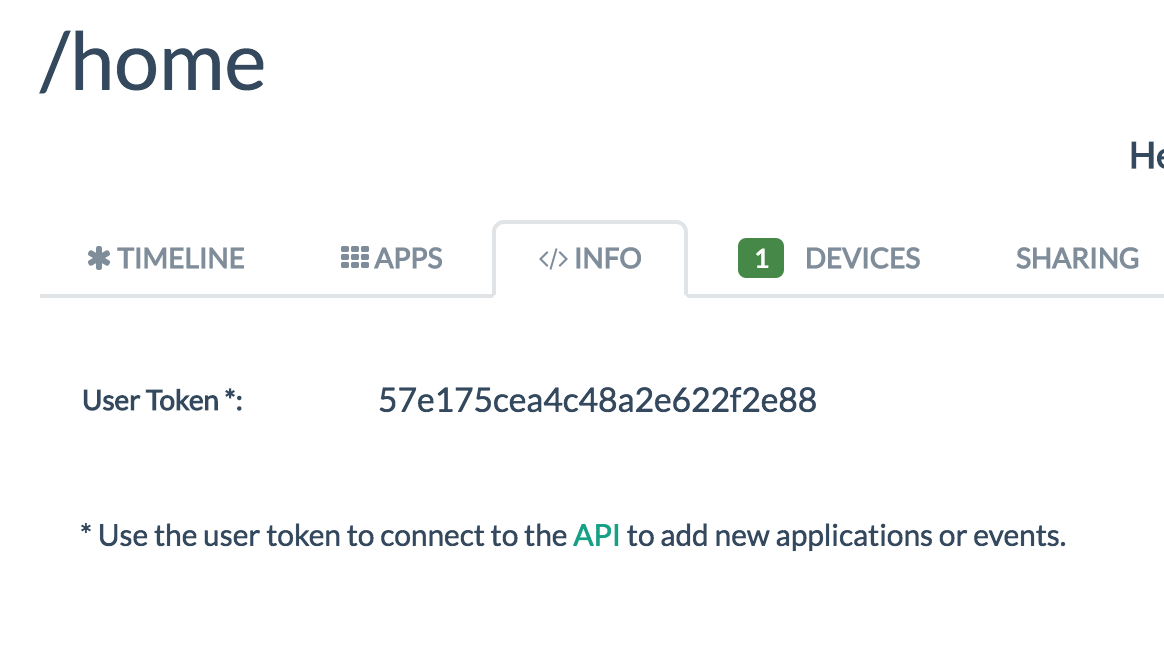
With that, you have created everything you need on their site. The only thing left is to collect some information. Your account is tied to a User Token, an Application ID and an Application Secret. You can find your User Token from the Info tab on yor dashboard
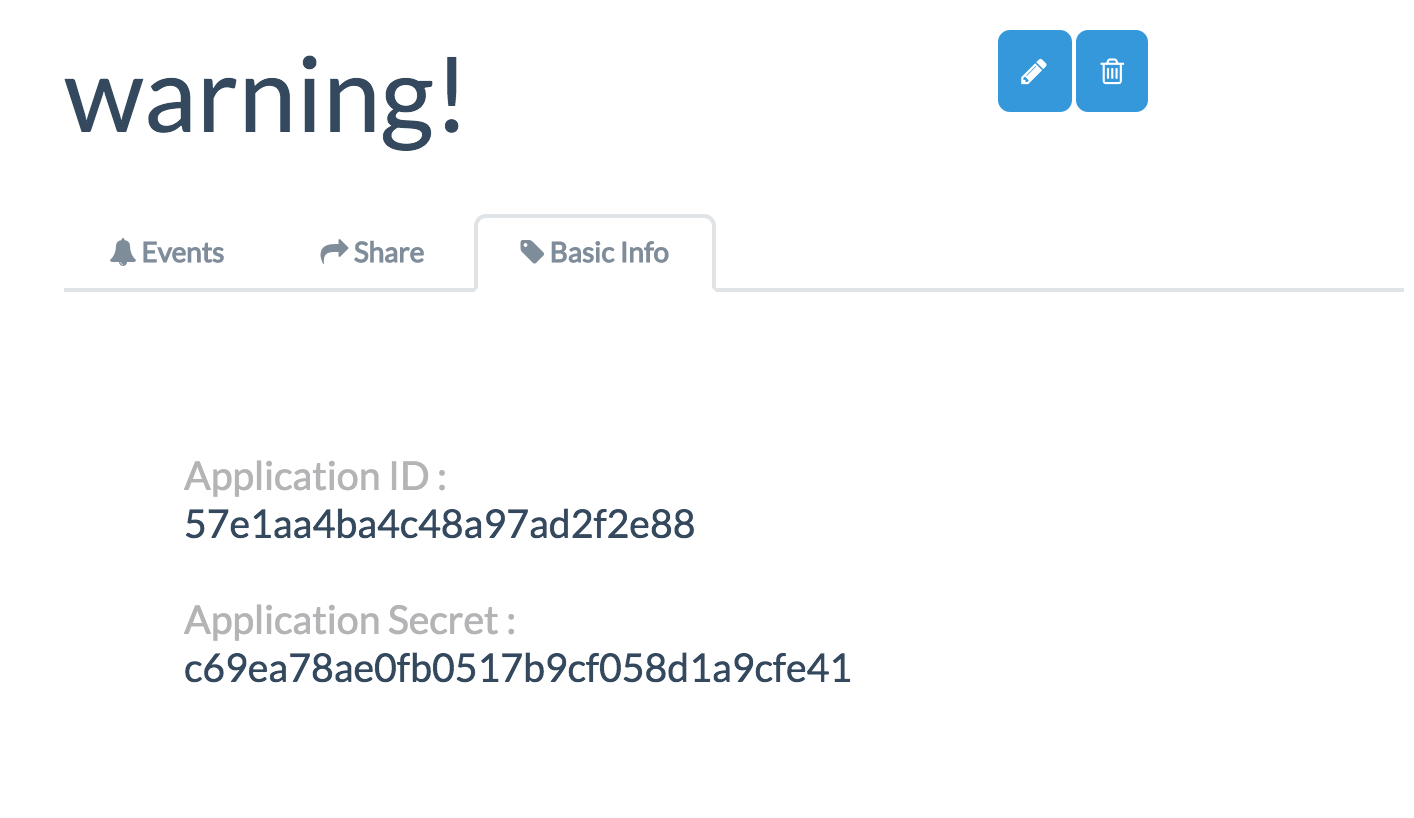
The App ID and Secret can be found on your applications dashboard under the Basic Info tab.
Now you are ready to write some code!
To use Instapush with Node.js we need to install the instapush module by typing the following command.
That's it! Now let's create a new project javascript file by typing the following into our console.
touch sensor_push.js
Now go ahead and open your new file with your text editor and type out or copy and paste the following code into it. Be sure to add your Token, App ID and App secret to your instapush.settings()
language:javasctipt
const instapush = require('instapush');
const five = require('johnny-five');

const board = new five.Board();

instapush.settings({
  token:'<your user token>',
  id:'<your app id>',
  secret:'<your app seceret>',
});

console.log('waiting for push notification');

board.on('ready', ()=>{

   const light = new five.Sensor({
      pin: 'A0',
      freq: 10* 1000
   });

   light.on('change', ()=>{
      if(light.val >= 900){
         instapush.notify({"event":"Warning!","trackers":{"room":"bedroom"},{"state":"on"}} ,(err, response)=>{
console.log(response);
         });
      }
      else if(light.val <= 400){
        instapush.notify({"event":"Warning!","trackers":{"room":"bedroom"},{"state":"off"}} ,(err, response)=>{
console.log(response);
        });
      }
   });
});
OK, now make sure you save this file and then run it by typing the following command in the console.
node sensor_push.js
Nothing should physically happen with your project. Go ahead turn your lights off. Your console should get this output.
{
"msg": "Notification Sent Succesfully",
"error": false,
"status": 201
}
Nice! Now check your phone. You should get a push notification that looks something like this.
With that you now have a way to track things happening real time with your phone. This could be your garage door opening, your oven being on, even the temperature somewhere. Pretty cool!
Now go! Create all of the push notifications you want! If you want to learn more about how to use the Instapush module you can learn more on its NPM page.