STK-node
 D___Run___
 Experiment 6: LED.RGB
Introduction
Note: If you ARE using the Chrome App you will skip any console commands and run the example code directly in the app
You know what’s even more fun than a blinking LED? Changing colors with one LED. In this circuit, you’ll learn how to use an RGB LED to create unique color combinations. Depending on how bright each diode is, nearly any color is possible!
Parts Needed
You will need the following parts:
- 1x Breadboard
- 1x SparkFun RedBoard
- 1x Common Cathode RGB LED
- 3x 330Ω Resistors
- 6x Jumper Wires
Didn't Get the Tinker Kit?
If you are conducting this experiment and didn't get the Tinker Kit, we suggest using these parts:


Resistor 330 Ohm 1/6 Watt PTH - 20 pack
COM-11507
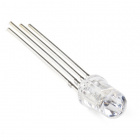
Introducing the Red Green Blue (RGB) LED
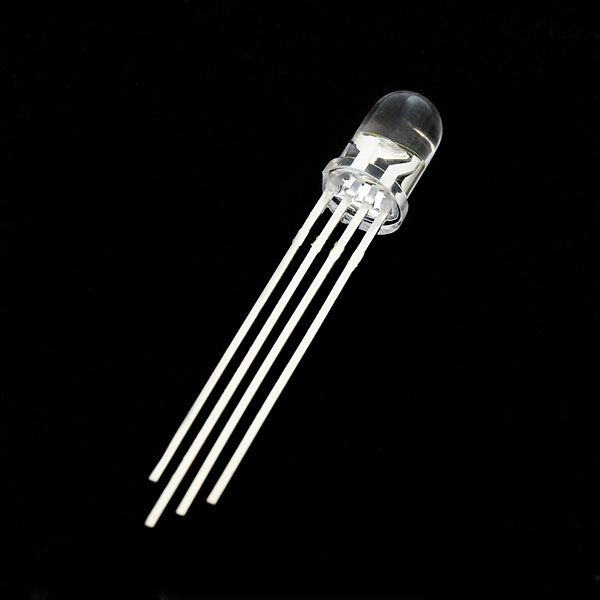
The Red Green Blue (RGB) LED is 3 LEDs in one. The RGB has four pins with each of the three shorter pins controlling an individual color: red, green or blue. The longer pin of the RGB is the common ground pin. You can create a custom colored LED by turning different colors on and off to combine them. For example, if you turn on the red pin and green pin, the RGB will light up as yellow.
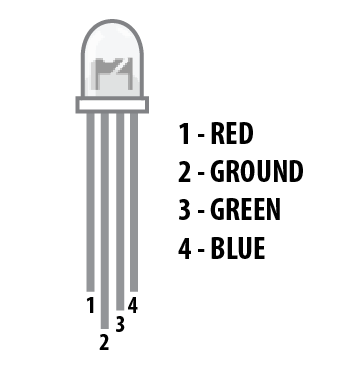
But which pin is which color? Pick up the RGB so that the longest pin (common ground) is aligned to the left as shown in the graphic below. The pins are Red, Ground, Green and Blue -- starting from the far left.
Hardware Hookup
Ready to start hooking everything up? Check out the wiring diagram and hookup table below to see how everything is connected.
| Polarized Components | Pay special attention to the component’s markings indicating how to place it on the breadboard. Polarized components can only be connected to a circuit in one direction. Polarized components are highlighted with a yellow warning triangle in the table below. |
Wiring Diagram for the Experiment

Writing the Script
Remember to Setup Your Project Directory!
From your `SIK` directory make sure that create a new project directory for this experiment and create an empty project by typing in the following commands while in your `SIK` directory.
mkdir exp_06;cd exp_06;
npm init -y;
npm install johnny-five
Once done you will have created a project directory, moved into it, created an npm project and installed Johnny-Five. Wahoo!
Create a new file called "rgb.js" by typing the following command into your command line prompt.
touch rgb.js
Now open your rgb.js file with a text editor and either type out or copy and paste the following code into it.
language:javascript
const five = require('johnny-five');
const board = new five.Board();

board.on('ready', ()=>{
   const rgb = new five.Led.RGB({
      pins: {
         red: 5,
         green: 6,
         blue: 9
         },
      isAnode: false
   });

   rgb.color(255,0,0);
   board.wait(2000, ()=>{
      rgb.color('green');
      board.wait(2000, ()=>{
         rgb.color(##0000ff);
      });
   })
});
Code to Note
language:javascript
rgb.color(255,0,0);
You can specify the color of the RGB Led by using an RGB value, where each value is a range from 0 to 255. The first number is the red value, the second is green and the last is blue.
language:javascript
rgb.color('green');
You can also specify the color by name, similar to the basic color naming convention in HTML.
language:javascript
rgb.color(##0000ff);
Finally, you can specify the color by its hexidecimal value as well. This is great for matching the color of the LED to an specific color of your choice.
What You Should See
You should see your LED turn on, but this time in new, crazy colors! If it doesn't, make sure you have assembled the circuit correctly and verified and uploaded the code to your board, or see the Troubleshooting section.

Troubleshooting
Unexpected Colors
Check your wiring and pin numbers of the RGB. Remember that ground is the long leg of the LED!
RGB Not Working
Make sure you have the RGB in the correct orientation to the wiring diagram. It is just like any other LED and is polarized!
Seeing Red?
The red spectrum tends to run brighter than the other colors. Try adding a bit higher current limiting resistor to it, or if you don't have one, use a lower red value in your RGB values.
Still No Success
A broken circuit is no fun. Send us an email, and we will get back to you as soon as we can: techsupport@sparkfun.com
Manipulating Color beyond Color()
The RGB led also has all of the basic Led methods available to it such as the following.
rgb.on()
rgb.off()
rgb.blink()
rgb.fade()
You can also control the brightness of the led with the rgb.intensity() method which accepts a 0 to 255 value with 0 being off and 255 being full brightness.
Exploring Node.js
Node.js is javascript running on the "back end", or on servers. Well, what is it serving? Node.js makes serving web content super easy with a few lines of code. To make things even easier there is a module called Express that makes building web applications and handling http requests and responses even easier.
In this experiment you learned the basics of how to control an RGB. Lets now add a layer to that and control the RGBs color using an http request to set the color.
Express

Fast, unopinionated, minimalist web framework
As stated earlier we will be using Express. We will install Express through our trusty npm interface in the console. To install express navigate to your project directory and type the following command.
npm install express
Now, to create a new javascript file called "rgb_express.js" use the following command.
touch rgb_express.js
Use your text editor to open your new file and type out or copy and paste the following code into it.
language:javascript
const five = require('johnny-five');
const express = require('express');

const app = express();
const board = new five.Board();

board.on('ready', ()=>{
  const rgb = new five.Led.RGB({
    pins: {
      red: 9,
      green: 10,
      blue: 11
    },
    anode: false
  });

  app.get('/colors/:red-:green-:blue', (req,res)=>{

    var red = req.params.red;
    var green = req.params.green;
    var blue = req.params.blue;

    rgb.color(red,green,blue);

    res.end('Color requested: '+ req.params.red+','+req.params.green+','+req.params.blue);
    console.log('color received!');
  });
});

app.listen(8080, ()=>{
  console.log('listening on 8080');
});
Make sure you have saved your file and then run it from the console by typing the following command.
node rgb_express.js
The console will return with the following output...
language:console
listening on 8080
1475710622808 Device(s) /dev/cu.usbserial-DN01DHUL
1475710622815 Connected /dev/cu.usbserial-DN01DHUL
1475710626127 Repl Initialized
>> color received!
color received!
Now, open your browser and navigate to http://localhost:8080/colors/255-0-0. Your browser should return the following simple web page and your RGB should turn red.
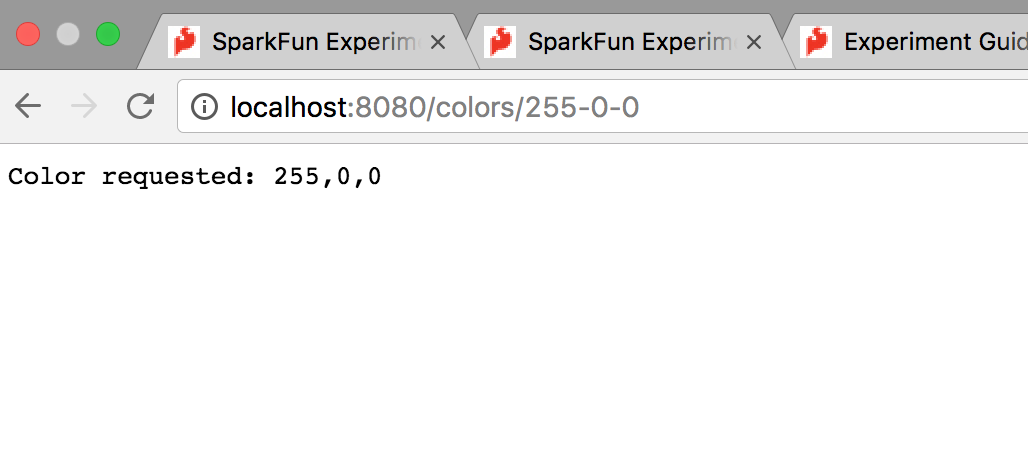
To change the color of your RGB in this way you change the ending part of the URL as an RGB value that is separated by a dash (-) rather than a comma. So, green would be 0-255-0. Each time you change the value and hit Enter, your browser will respond with the RGB value and the RGB color will change. Pretty cool, huh?!
Code to Note
To briefly cover Express like this is a bit of a shame, but we have circuits to build and code to write. If you are curious about Express and the ins and outs of it, check out their documentation here. But, we will take a look a quick look at how we accomplished this marvel.
language:javascript
const express = require('express');

const app = express();
Just like any other module express is added to your program using the require() statement. We can then create an instance of express (const app = express();).
language:javascript
app.get('/colors/:red-:green-:blue', (req,res)=>{
//do cool things when you get ...
});
Express does a lot of the leg work for us. In essence, by using Express we are creating an http server that will be listening to different requests and their types. Probably the most popular type of request is the GET request; which the basic type of request you can send by typing in a URL into your browser.
the app.get() method is essentially an event listener that reacts to a get request to the server. In this case when it gets the route or path of "/colors/:red-:green-:blue".
language:javascript
var red = req.params.red;
var green = req.params.green;
var blue = req.params.blue;
In our situation you may notice that the request URL has something odd. There are colons in front of the color names. That is to notate them as parameters that a user can pass and Express can use them as input data attached to the request or req object. We can access these values in the ways above. In short, the URL looks like the following: /colors/:red-:green-:blue. We can pass our app data by replacing the :red, :green and :blue parameters with 0-255 values like your original example for red. /colors/255-0-0.
language:javascript
res.end('Color requested: '+ req.params.red+','+req.params.green+','+req.params.blue);
    console.log('color received!');
Once we have captured the RGB values from the parameters and set the color of the RGB Express sends a response using the res.end() method. We simply send it the RGB value as a string and that gets printed in the browser. Not flashy by any means, but efficient.
language:javascript
   app.listen(8080, ()=>{
  console.log('listening on 8080');
});
Lastly, but not last (remember its asychrnous) by all means, we tell Express to listen on port 8080 and then log that information to the console.
To learn more about Express and how you can use in a much more indepth way you can start with its NPM page.