STK-node
 D___Run___
 Experiment 4: Button
Introduction
Note: If you ARE using the Chrome App you will skip any console commands and run the example code directly in the app
Up until now, we’ve focused mostly on outputs. Now we’re going to go to the other end of the spectrum and play around with inputs. In Experiment 2, we used an analog input to read the potentiometer. In this experiment, we’ll be reading one of the most common and simple inputs – a push button – by using a digital input. We will use it to control leds.
Parts Needed
You will need the following parts:
- 1x Breadboard
- 1x SparkFun RedBoard
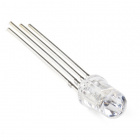
- 1x RGB LED
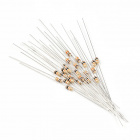
- 3x 330Ω Resistor
- 8x Jumper Wires
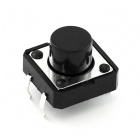
- 1x Push Button
- 1x 10K Resistors
Didn't Get the Tinker Kit?
If you are conducting this experiment and didn't get the Tinker Kit, we suggest using these parts:


Resistor 330 Ohm 1/6 Watt PTH - 20 pack
COM-11507Suggested Reading
Before continuing with this experiment, we recommend you be somewhat familiar with the concepts in these tutorials:
Introducing the Push Button
A momentary push button closes or completes the circuit only while it is being pressed. The button has four pins, which are broken out into two sets of two pins. When you press down on the button and get a nice "click," the button bridges the two sets of pins and allows current to flow through the circuit.
How do you know which pins are paired up? The buttons included in this kit will only fit across the breadboard ditch in one direction. Once you get the button pressed firmly into the breadboard (across the ditch), the pins are horizontally paired. The pins toward the top of the breadboard are connected, and the pins toward the button of the breadboard are connected.
Hardware Hookup
Ready to start hooking everything up? Check out the wiring diagram and hookup table below to see how everything is connected.
| Polarized Components | Pay special attention to the component’s markings indicating how to place it on the breadboard. Polarized components can only be connected to a circuit in one direction. |
Wiring Diagram for the Experiment

Digital Input
Previously we've used the analog pins for input; now we'll use the digital pins for input as well. Because digital pins only know about high (on) and low (off) signals, they're perfect for interfacing to pushbuttons and switches that also only have "on" and "off" states.
We'll connect one side of the pushbutton to ground, and the other side to a digital pin. When we press down on the pushbutton, the pin will be connected to ground, and therefore will be read as a low signal by the RedBoard.
But wait -- what happens when you're not pushing the button? In this state, the pin is disconnected from everything, which we call "floating." What will the pin read as, then -- HIGH or LOW? It's hard to say, because there's no solid connection to either 5V or ground. The pin could read as either one.
To deal with this issue, we'll connect a small (10K, or 10,000 Ohm) resistance between the signal pin and 5V. This "pull-up" resistor will ensure that when you're NOT pushing the button, the pin will still have a weak connection to 5 volts, and therefore read as HIGH.
Write the Script
Remember to Setup Your Project Directory!
From your `SIK` directory make sure that create a new project directory for this experiment and create an empty project by typing in the following commands while in your `SIK` directory.
mkdir exp_04;cd exp_04;
npm init -y;
npm install johnny-five
Once done you will have created a project directory, moved into it, created an npm project and installed Johnny-Five. Wahoo!
Create a new javascript file called "button.js" with the following command.
touch button.js
Now, open your button.js file in your text editor and either type out or copy and paste the following code.
language:javascript
const five = require('johnny-five');

const board = new five.Board();

board.on('ready', ()=>{

   const button = new five.Button({
      pin: 10,
      isPullup: false,
      holdtime: 500,
      invert: true
      });
   button.on('press', ()=>{
      console.log('The button is pressed');
   });

   button.on('release', ()=>{
      console.log('the button is released');
   });

   button.on('hold', ()=>{
      console.log('The button is being held down!'
   });
});
Code to Note
language:javascript
const button = new five.Button({
      pin: 10,
      isPullup: false,
      holdtime: 500,
      invert:true
      });
The button object is created like any other Johnny-Five object class, but this time there is a bit more information that goes along with it. Instead of just a pin number we pass it an object of information that includes the pin number, if the pin is internally pulled up and also how long we would like to set holdtime, which is what it says, how long are we defining a "hold" event. The final property is invert, which means that it will flip the logic of the circuit. Since we are pulling the input pin up This information being passed is called the objects shape; it defines the object more than just a pin number.
language:javascript
button.on('press', ()=>{
      //do something cool!
   });
The button object has three different event listeners attached to it. You can set your code to listen for a button "press" event, a "release" event or a "hold" event. These event listeners can all be present in your code as we demonstrated in this example which allows you more freedom of choice as how you can use a button and what happens in each individual callback.
What You Should See
You should see the LED turn on if you press either button, and off if you press both buttons. (See the code to find out why!) If it isn't working, make sure you have assembled the circuit correctly and verified and uploaded the code to your board, or see the Troubleshooting section.
language:console
 The button is pressed
 The button is released
 The button is pressed
 The button is released
 The button is being held down!
 ....
Input to Output
A console log is a great thing, but in the end we want to be able to control a physical thing with a button press, release or hold. You probably noticed that there is an RGB Led in the circuit that we did not use in this first script. Let's take a look at a simple example that leverages the event listeners attached to the button object and control the RGB Led.
First off, let's create a new javascript file and name it "button_rgb.js" from the console using the following command.
touch button_rgb.js
Now open your empty button_leds.js file with your text editor and type or copy and paste the following code.
language:javascript
const five = require('johnny-five');

const board = new five.Board();

board.on('ready', ()=>{
   const rgb = new five.Leds([9,10,11]);
   const button = new five.Button({
      pin: 10,
      isPullup: false,
      holdtime: 500,
      invert: true
     });

   button.on('press', ()=>{
      rgb[1].on();
   });

   button.on('release', ()=>{
      rgb[1].off();
   });

   button.on('hold', ()=>{
      rgb[2].blink(100);
      }
   });
});
Make sure you save your file and then run it from the console by entering the following command.
node button_rgb.js
What You Should See
You shouldn't see anything at first. Go ahead and press the button, then release it. When you press the button one color of RGB should turn on. When you release the button it should turn off. If you hold the button down for longer that half of a second you should see a different color blink at 100ms.
Troubleshooting
Logic is backawards
Are you getting a pushed event when you aren't pressing anything? You have your LED pulled up or down opposite of the logic in your code. set your `invert` property to the opposite of what you currently have
Intermitent button presses
You have a floating signal which means your button circuit is not pulled up or pulled down. You need to wire your signal pin to Ground or 5V with a 10k Ohm resistor
Still No Success
A broken circuit is no fun. Send us an email, and we will get back to you as soon as we can: techsupport@sparkfun.com
Exploring Node.js
Controlling LEDs are all good, but what about other things?
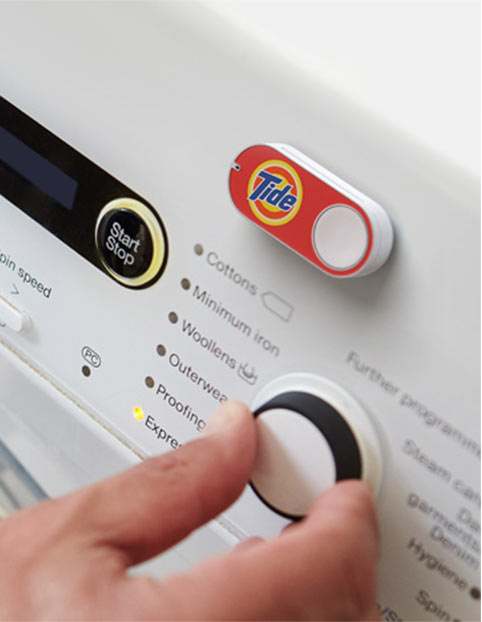
We all have seen the Amazon Dash Button that allows you to order something from Amazon at the press of a button. Well, let's take a look at how we can build something similar... a takeout button that sends a text message to someone to see if they would pick up takeout for you. Are ready to be lazy? Yeah, me too! Let's pull on the elastic banded pajama pants, laze on the couch and press a button!
IFTTT Takeout? Button
NodeJS module that will connect with the IFTTT maker channel
If you have never heard of the wonderful service called If This Than That you are missing out. IFTTT makes interconnecting your online services (Twitter,email, google docs, your phone, etc) to each other to simplify your life through automation. It has also become one of the leading platforms for developing IoT services as well. We are going to write a script that will text a friend, spouse, significant other to grab some takeout on their way home.
Setting up IFTTT
First off, you need to create an account with IFTTT. Go ahead and go here and sign up for IFTTT. Don't worry it's free!
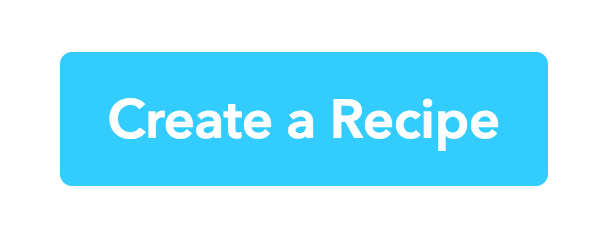
Once you have signed up for an account click on "My Recipees" at the top of your window and then click "Create Recipe".
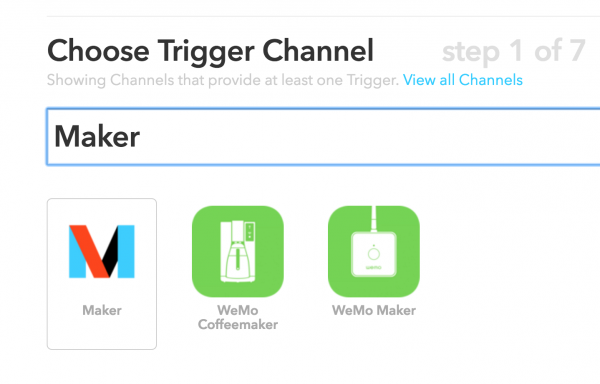
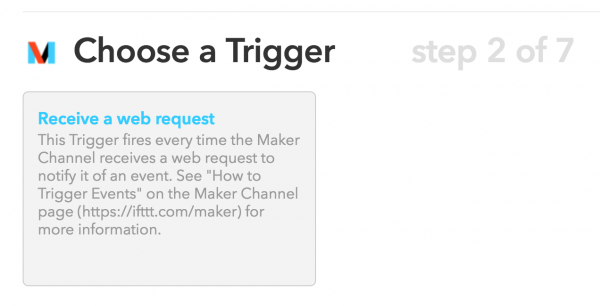
From here, search for "Maker" channel and follow the screen captures below to create a recipe for sending a text message (Android) to someone when a Maker event is triggered.

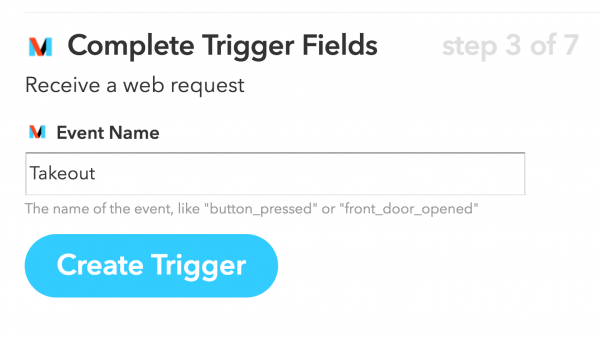

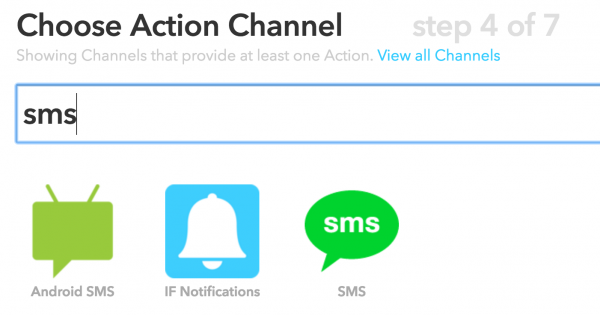
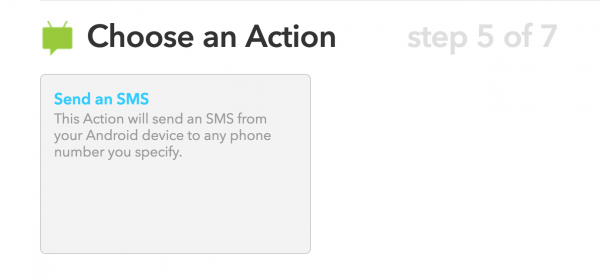
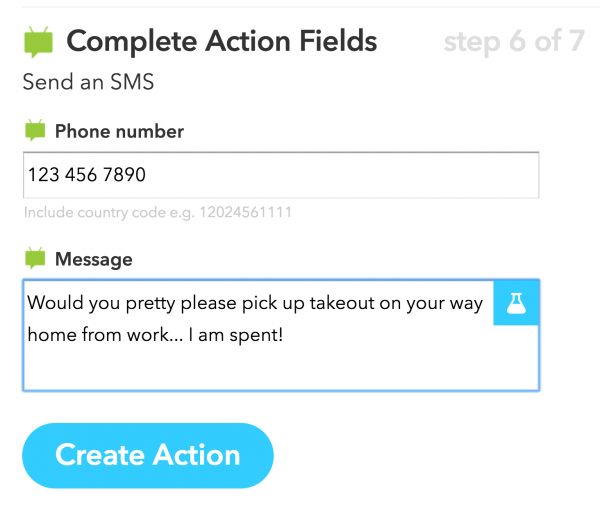

Node.js Code
Now that you have a recipe, it's time to write some code to make it all work with the original button circuit you built.
But, before we dive into knocking out code, we need to install the IFTTT Maker Channel module for Node.js. In your project directory for this experiment type the following command to install the module.
npm install npm i node-ifttt-maker
Now, once that is complete create a new javascript file called "takeout.js" with the following command.
touch takeout.js
Now open your takeout.js file with a text editor and type or copy and paste the following code into it.
language:javascript
const five = require('johnny-five');
const ifttt = require('node-ifttt-maker');

const board = new five.Board();
const takeout = new ifttt('<Your Maker Key>');


board.on('ready', ()=>{
   const button = new five.Button({
      pin: 10,
      isPullup: false,
      holdtime: 500
      }
    });

   button.on('hold', ()=>{
      takeout.request({event: 'takeout',method: 'GET'}, (error)=>{
      if(error){
          console.log(error);
          }
          else{
      console.log('message sent');
      }
      });
   });
});
Few! That's a lot of code! Notice that the ifttt object needs a Maker Key from you. To get your maker key go to https://ifttt.com/maker while you are logged in and it should bring up your maker dashboard with your key on it. Copy and paste that key into your code as a string (inside of quotes).
Now, make sure your code is saved and run your project from the console by typing the following.
node takeout.js
Once the project starts up, you should be able to press and hold the button for at least half a second and then it will send a text message to the phone number you entered into your recipe.
Now, sit back, pick your favorite movie and wait for the General Tzao to show up!
If you want to explore the node-ifttt-maker module a bit more you can find out more about it on its NPM page.