SparkFun Qwiic Micro (SAMD21E) Hookup Guide
 M-Short,
  Elias The Sparkiest,
  bboyho
 Introduction
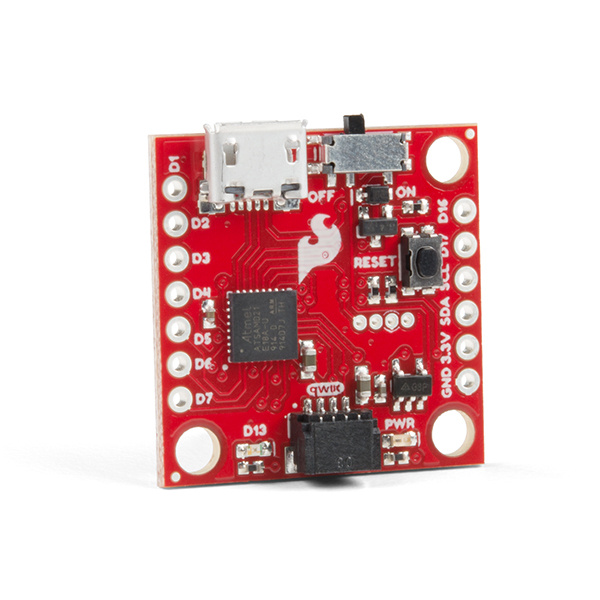
Looking for a one square inch sized microcontroller to use with the Qwiic system? At it's heart is the powerful and versatile ATSAMD21E18, which is an ARM Cortex M0+, 32-bit microcontroller, with 256KB of flash memory that can run at up to 48MHz. We've programmed it with an UF2 Bootloader making the Qwiic Micro easy to program whether you want to use Arduino or CircuitPython. In this hookup guide we'll walk through all of the features available on the SparkFun Qwiic Micro.
Required Materials
In addition to the Qwiic Micro, you'll also need a Micro-B Cable (as if you don't already have dozens in your USB cable drawer!). That's all you'll need to get started. You can also take advantage of its LiPo battery port with a single-cell Lithium Polymer battery. You may not need everything though depending on what you have. Add it to your cart, read through the guide, and adjust the cart as necessary.


Optional Materials
There are a few options to connect and power to the board depending on your project. If you are connecting a Qwiic sensor to the Qwiic connector, you'll need a Qwiic cable. For those that want access to the plated through hole pads on the side, you'll need to solder header pins or wires on the side for a secure connection. For anyone using a LiPo battery with the board, you'll need to solder the JST connector on the back.


JST Right Angle Connector - White
PRT-08612
Qwiic Cable - 50mm
PRT-14426Tools
Depending on your project, you may need a soldering iron, solder, and general soldering accessories to connect to the plated through hole pads on the side of the board.


Suggested Reading
Before continuing on with this tutorial, you may want to familiarize yourself with some of these topics if they’re unfamiliar to you. If you aren't familiar with the Qwiic system, we recommend reading here for an overview.
| Qwiic Connect System |