SparkFun Qwiic Micro (SAMD21E) Hookup Guide
Example 4: Flash Memory with SPIMemory
Installing the SPI Memory Arduino Library
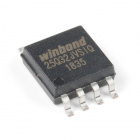
The following example shows you the basic way to start writing information to the optional flash memory that can be soldered to the underside of the SparkFun Qwiic Micro. The example simply shows you how to set up the code to interact with the flash chip and demonstrates this by writing a single number to an address space on it.
To begin you'll first need to download and install the SPIMemory Arduino Library. You can download it directly from the GitHub Repo or download a zip from the button below. If you've never installed a library before then follow our helpful tutorial here for directions on how to do it.
Example Code
The setup is a bit different than the example code supplied by the library because the flash is connected to a seperate SPI bus that is different then the default one broken out to the SparkFun Qwiic Micro's headers. At the top we use the library by calling SPIFlash and creating an instance of the library, calling it flash. Flash takes two arguments: the flash chip's chip select pin, and secondly the alternate SPI port to be used. Since the memory chip is on SPI1, we'll give it that but precede it with an ampersand as demonstrated: &SPI1.
language:c
#include "SPIMemory.h"

const int blinkLED = 13;
const int flashCS = 21; // Chip select for Flash

SPIFlash flash(flashCS, &SPI1); // Our Flash is on a different SPI bus

unsigned long addr = 0x01; // Random selection
byte data = 0x03; // Random data
In the setup, confirm we enable SPI1 bus with SPI1.begin() and that's all you need! Further into the setup, we erase the address that's going to be written to, and then write to it. We double check this was done correctly by reading that address to the serial monitor. Just make sure to set the baud rate at 115200 to view the output.
language:c
void setup(){

    SPI1.begin(); // Don't forget to begin SPI!
    flash.begin();
    SerialUSB.begin(115200);
    while(!SerialUSB) {} // Wait until the Serial Port is opened.
    SerialUSB.println("Hello!");

    if(flash.eraseBlock32K(addr)){ // Erase the blacok
        SerialUSB.println("Block erased.");
    }
    else
        SerialUSB.println("Error.");

    if(flash.writeByte(addr, data, true)){
        SerialUSB.println("Written: ");
        SerialUSB.println(flash.readByte(addr));
    }
    else
        SerialUSB.println("Nothing written");

    }

void loop(){

    digitalWrite(blinkLED, HIGH);
    delay(500);
    digitalWrite(blinkLED, LOW);
    delay(500);

}
