Contributors:
santaimpersonator,
 QCPete
 Introduction
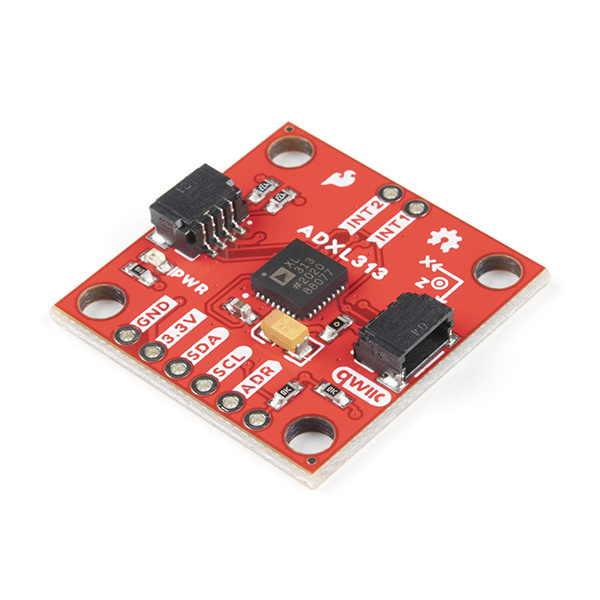
The SparkFun 3-Axis Digital Accelerometer Breakout - ADXL313 (Qwiic) is a Qwiic sensor that utilizes the ADXL313 accelerometer from Analog Devices. The ADXL313 is a low cost, low power, up to 13-bit resolution, 3-axis accelerometer with a 32-level FIFO stack capable of measuring up to ±4g.
SEN-17241
The SparkFun ADXL313 Breakout is a low power, high resolution (up to 13-bits) 3-axis accelerometer for measurement up to ±4g…
The ADXL313 can be used in applications like car alarms, hill start aid (HSA) systems, electronic parking brakes, and (black box) data recorders. Some of the specific features of the ADXL313 include:
- Embedded, patent pending FIFO technology minimizes host processor load
- Low noise performance
- Fixed 10-bit resolution for any g-range
- 10,000g survival rating
- Two configurable interrupt pins
- Including, built-in motion detection functions for activity/inactivity monitoring
- Self-test capability
Required Materials
The Qwiic 3-Axis Accelerometer does need a few additional items for you to get started. The RedBoard Qwiic will be used for the Arduino examples. A single board computer and the Qwiic pHAT are required for the Python examples (see note below). You may already have a few of these items, including the required Qwiic cable, so feel free to modify your cart based on your needs. Additionally, there are also alternative parts options that are available as well (click button below to toggle options).
KIT-15081
To make it even easier to get started, we've assembled this Qwiic Cable Kit with a variety of Qwiic cables from 50mm to 500mm…
DEV-15123
The SparkFun RedBoard Qwiic is an Arduino-compatible development board with a built in Qwiic connector, eliminating the need …
DEV-15945
The SparkFun Qwiic pHAT V2 for Raspberry Pi is the quickest and easiest way to make your way into the Qwiic ecosystem and sti…
CAB-10215
USB 2.0 type A to Micro-B 5-pin. This is a new, smaller connector for USB devices. Micro-B connectors are about half the heig…
Qwiic Compatible Microcontrollers:
DEV-15795
The SparkFun Qwiic Pro Micro adds a reset button, Qwiic connector, USB-C, and castellated pads to the miniaturized Arduino bo…
WRL-15663
The SparkFun ESP32 Thing Plus is the next step to get started with Espressif IoT ideations while still enjoying all the ameni…
DEV-14713
With a 32-bit ARM Cortex-M4F MCU, the SparkFun SAMD51 Thing Plus is one of our most powerful microcontroller boards yet!
DEV-15444
The RedBoard Artemis takes the incredibly powerful Artemis module from SparkFun and wraps it up in an easy to use and familia…
In addition we also offer, Qwiic compatible stackable shields for microcontrollers and pHATs for single board computers (like the
Raspberry Pi boards) that don't include a Qwiic connector.
DEV-14495
The SparkFun Qwiic Adapter provides the perfect means to make any old I2C board into a Qwiic enabled board.
DEV-16789
The SparkFun Qwiic Shield for Arduino Nano makes it so you can use SparkFun's Qwiic connect ecosystem with development boards…
DEV-16790
The SparkFun Qwiic Shield for Thing Plus makes it so you can use SparkFun's Qwiic connect ecosystem with development boards t…
DEV-17119
This shield provides an easy way to SparkFun's Qwiic ecosystem with your Teensy 4.0, 3.2, or LC board footprint.
DEV-14459
The SparkFun Qwiic HAT for Raspberry Pi is the quickest and easiest way to make your way into the Qwiic ecosystem and still u…
DEV-15945
The SparkFun Qwiic pHAT V2 for Raspberry Pi is the quickest and easiest way to make your way into the Qwiic ecosystem and sti…
DEV-15794
The SparkFun Qwiic SHIM for Raspberry Pi is a small, easily removable breakout that easily adds a Qwiic connector to your Ras…
DEV-15316
The SparkFun Servo pHAT for Raspberry Pi allows your Raspberry Pi to control up to 16 servo motors in a straightforward manne…
ROB-16328
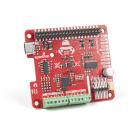
The Auto pHAT is an all in one package that focuses on quickly adding robot functionality and advanced support to your Raspbe…
DEV-16301
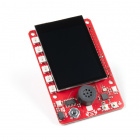
Feeling Fancy? The SparkFun Top pHAT is the fundamental machine learning add-on for Raspberry Pi or any 2x20 GPIO SBC!
Retired
You will also need a Qwiic cable to connect to your Qwiic ADXL313 accelerometer, choose a length that suits your needs.
PRT-14427
This is a 100mm long 4-conductor cable with 1mm JST termination. It’s designed to connect Qwiic enabled components together…
Retired
PRT-14426
This is a 50mm long 4-conductor cable with 1mm JST termination. It’s designed to connect Qwiic enabled components together …
Retired
PRT-14428
This is a 200mm long 4-conductor cable with 1mm JST termination. It’s designed to connect Qwiic enabled components together…
Retired
PRT-14429
This is a 500mm long 4-conductor cable with 1mm JST termination. It’s designed to connect Qwiic enabled components together…
Retired
Alternative Parts (Toggle)
WIG-14271
With Single-Board Computers (SBCs) on the rise, it is a good idea to have an easy way to interface with them. Operating on a …
DEV-16271
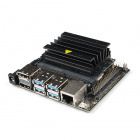
The NVIDIA® Jetson Nano™ Developer Kit V3 delivers the performance to run modern AI workloads at a small form factor, low …
Retired
KIT-14035
The pi-topCEED is a DIY desktop computer that helps you start learning how to code, create awesome devices and take your know…
Retired
KIT-16831
The Raspberry Pi 4 Basic Kit includes everything you'll need to get up and running with the new Raspberry Pi 4 8GB.
Retired
DEV-17244
The NVIDIA® Jetson Nano™ 2GB Developer Kit delivers the performance to run modern AI workloads at a small form factor, low…
Retired
KIT-17245
The release of the Jetson Nano™ 2GB Developer Kit, NVIDIA® empowers developers, researchers, students, and hobbyists to ex…
Retired
KIT-16389
With the release of the Jetson Nano Developer Kit (not included), NVIDIA® empowers developers, researchers, students, and ho…
Retired
Suggested Reading
If you're unfamiliar with serial terminals, jumper pads, or I2C be sure to checkout some of these foundational tutorials.
Installing an Arduino Library
How do I install a custom Arduino library? It's easy! This tutorial will go over how to install an Arduino library using the Arduino Library Manager. For libraries not linked with the Arduino IDE, we will also go over manually installing an Arduino library.
Logic Levels
Learn the difference between 3.3V and 5V devices and logic levels.
I2C
An introduction to I2C, one of the main embedded communications protocols in use today.
Serial Terminal Basics
This tutorial will show you how to communicate with your serial devices using a variety of terminal emulator applications.
How to Work with Jumper Pads and PCB Traces
Handling PCB jumper pads and traces is an essential skill. Learn how to cut a PCB trace, add a solder jumper between pads to reroute connections, and repair a trace with the green wire method if a trace is damaged.
RedBoard Qwiic Hookup Guide
This tutorial covers the basic functionality of the RedBoard Qwiic. This tutorial also covers how to get started blinking an LED and using the Qwiic system.
Qwiic pHAT for Raspberry Pi Hookup Guide
Get started interfacing your Qwiic enabled boards with your Raspberry Pi. The Qwiic pHAT connects the I2C bus (GND, 3.3V, SDA, and SCL) on your Raspberry Pi to an array of Qwiic connectors.
Arduino Shields v2
An update to our classic Arduino Shields Tutorial! All things Arduino shields. What they are and how to assemble them.
Raspberry Pi SPI and I2C Tutorial
Learn how to use serial I2C and SPI buses on your Raspberry Pi using the wiringPi I/O library for C/C++ and spidev/smbus for Python.
The Qwiic ADXL313 Accelerometer utilizes the Qwiic connect system. We recommend familiarizing yourself with the Logic Levels and I2C tutorials (above) before using it. Click on the banner above to learn more about our Qwiic products.
Note: First time Raspberry Pi users should also head over to the Raspberry Pi Foundation website and check out their quickstart guides:
We have also listed a few additional resources for users to familiarize themselves with the Raspberry Pi:
Note: First time Nvidia Jetson Nano users should also head over to the Nvidia website and check out their guides and tutorials:
