SparkFun Qwiic 3-Axis Accelerometer (ADXL313) Hookup Guide
 QCPete
Hardware Assembly
Arduino Examples
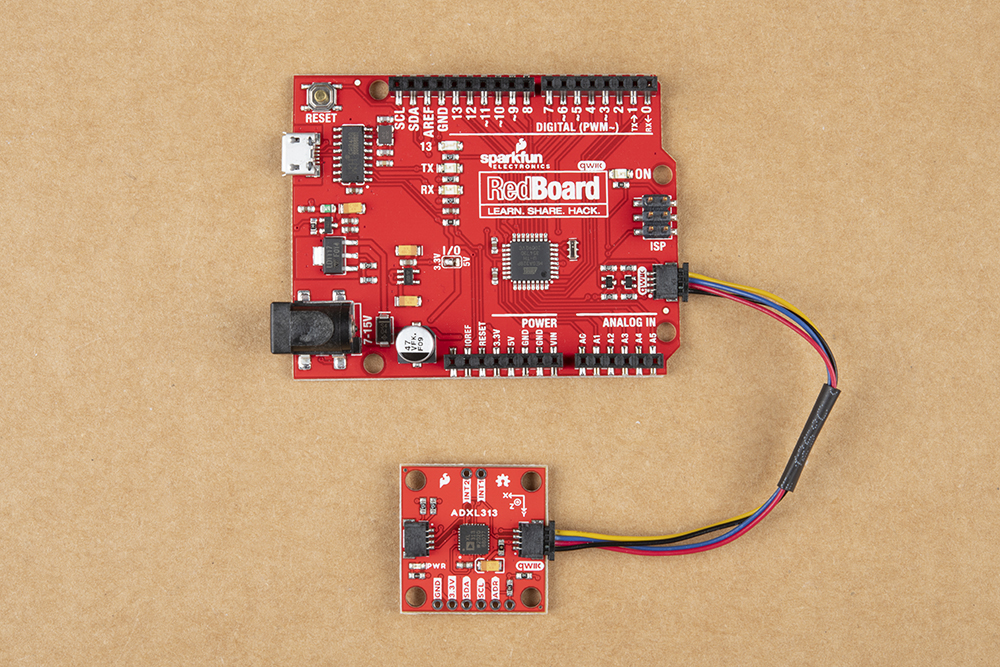
With the Qwiic connector system, assembling the hardware is simple. All you need to do is connect your SparkFun 3-Axis Digital Accelerometer Breakout - ADXL313 (Qwiic) to the RedBoard Qwiic with a Qwiic cable. Otherwise, you can use the I2C pins of your microcontroller; just be aware of logic levels.
Note: This tutorial assumes users are familiar with Arduino products and are using the latest stable version of the Arduino IDE on your desktop. If this is your first time using the Arduino IDE, please review our tutorial on installing the Arduino IDE.
Python Examples
With the Qwiic connector system, assembling the hardware is simple. In addition to the SparkFun 3-Axis Digital Accelerometer Breakout - ADXL313 (Qwiic), you will need: a Qwiic cable, a SparkFun Qwiic pHAT for Raspberry Pi, single board computer, monitor, and standard peripherals. (*If you are unfamiliar with the Qwiic pHAT, you can find the Hookup Guide here.)
There are two single board computer (SBC) options that we have tested on:
- Raspberry Pi setup with the Raspbian OS
- Jetson Nano running Nvidia's L4T image
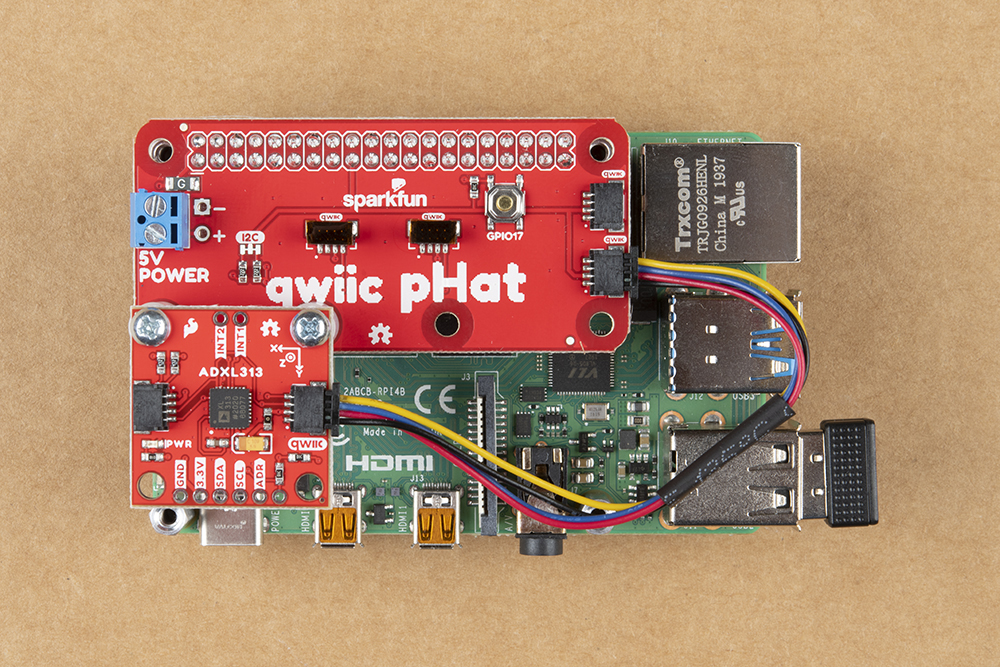
Raspberry Pi 4 (with Qwiic pHAT) connected the Qwiic ADXL313 Accelerometer.
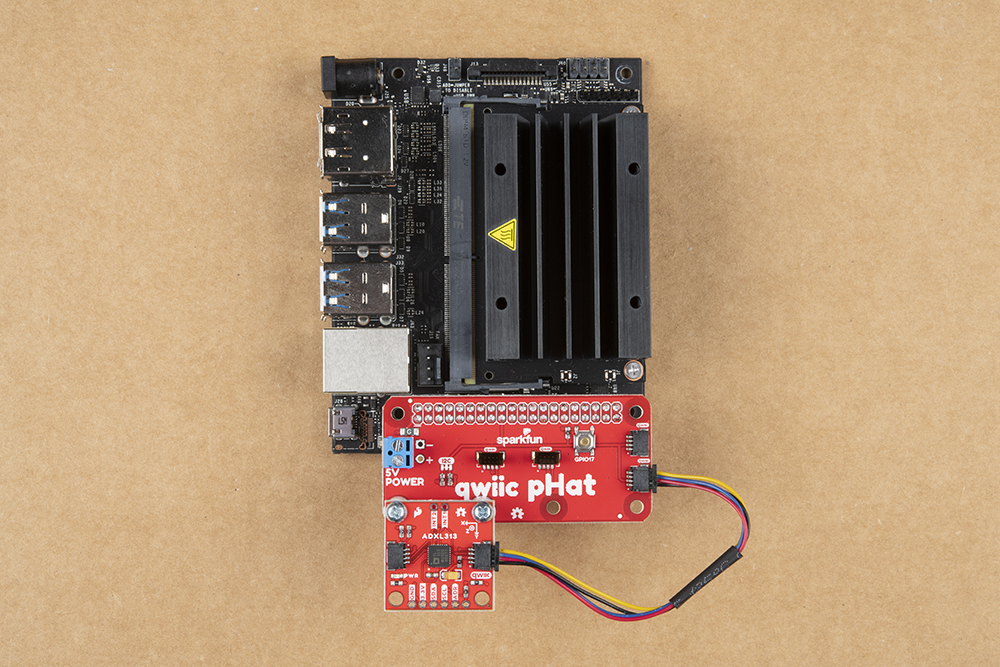 Jetson connected to the Qwiic ADXL313 Accelerometer.
Note: Don't forget to connect any necessary peripherals, such as a monitor, keyboard and mouse, and power supply to the single board computer.
Note: This tutorial assumes users are familiar with using a Raspberry Pi and have the latest version of Raspbian OS (full... with recommended software) your Raspberry Pi. You can download the latest version of the Raspbian OS from the Raspberry Pi Foundation website.
If this is your first time using a Raspberry Pi, please head over to the Raspberry Pi Foundation website to use their quickstart guides. We have listed a few of them here:
Note: This tutorial assumes users are familiar with using a Jetson Nano and you have the latest version of L4T OS your Jetson Nano. You can download the latest version of the L4T OS from the Jetson Download Center on Nvidia's website.
If this is your first time using a Jetson Nano, please head over to the Nvidia website to use their quickstart guides. We have listed a few of them here: