How to Build a DIY GNSS Reference Station
 Nate
Nate 
Gather Raw GNSS Data
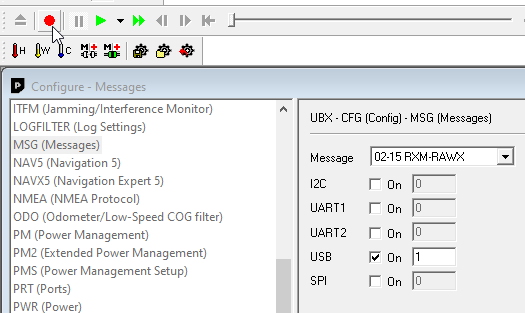
Once you’ve got the antenna into a location where it will not move or be moved we need to establish its location. Open u-center and verify that you can get a lock and see 25+ satellites with your ZED-F9P. Assuming you’ve got good reception, we now need to set the receiver to output raw data from the satellites.
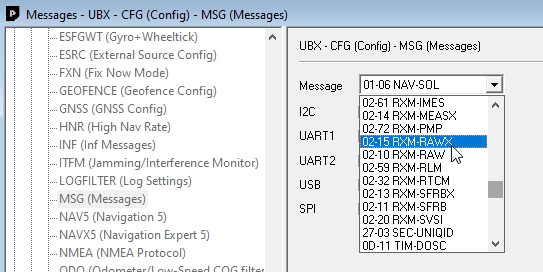
Once the RXM-RAWX message is enabled for USB, verify reception in the packet viewer.
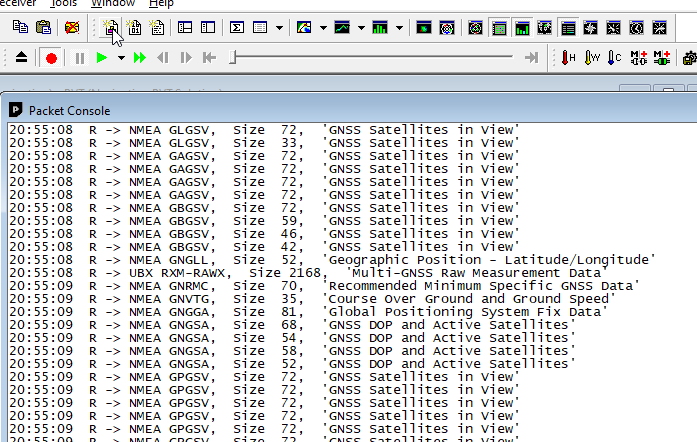
RAWX messages are binary so you won’t be able to see them in the text viewer.
Hit the record button. This will record all the data (NMEA, UBX, and RAWX) from the receiver to a *.ubx file. Allow this to run for 24 hours. Don’t worry if you go long but do realize that a 24 hour file will be ~300MB so don’t let it run for a month.

Capturing 6 hours is good, 24 is slightly better (note the logarithmic scale for position error in the graph above). Most PPP analyzation services will accept more than 24 hours of data but they may truncate it to 24 hours. If you capture 30 hours of RAWX data, that’s ok, we will show you how to trim a file that is too long.
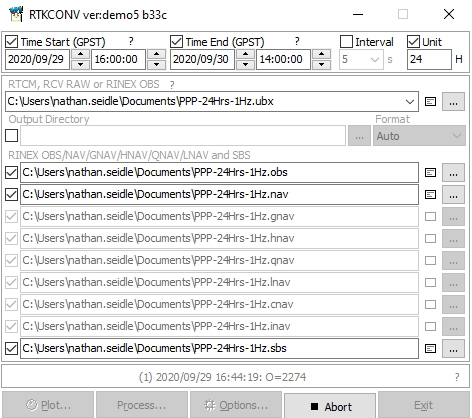
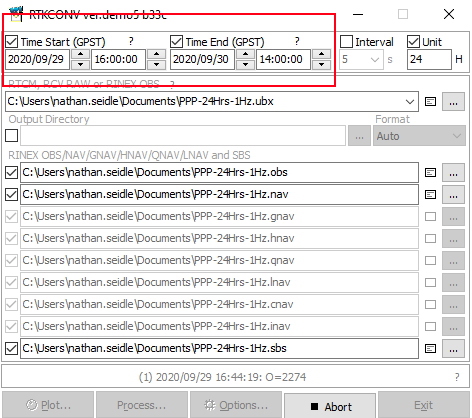
The 300MB UBX file will need to be converted to RINEX (Receiver Independent Exchange Format). The popular RTKLIB is here to help. We recommend the rtklibexplorer’s modified version of RTKLIB (available for download here) but you can obtain the original RTKLIB here. Open RTKCONV. Select your UBX file and hit ‘Convert’. Our 300MB file took ~30 seconds to convert. You should see an *.obs file once complete.
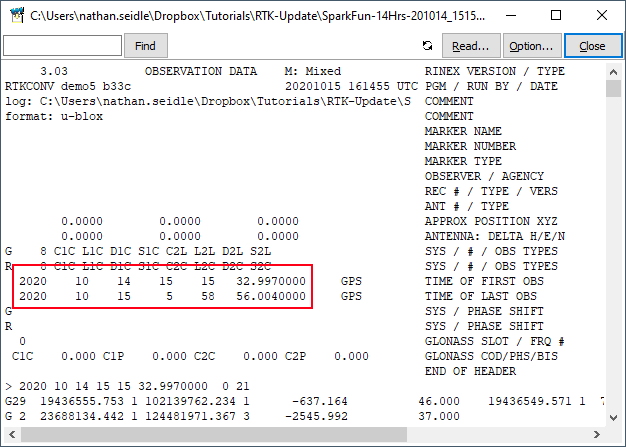
If your data file is 25 hours or a little more, that’s fine. If you need to cut your RINEX file down because it’s too large (or 40 hours long) you can trim the time window. Convert the entire file then click on the notepad icon to open the OBS file. You’ll see the GPS start time and stop time for this capture.
Using these times, you can limit the time window to whatever you need and re-convert the file.
Why don’t we crank up the fix rate? Moar is better!™
The ZED-F9P can go up to 30Hz. Why not get RAWX data at greater than 1Hz? Because nature doesn’t move that fast. Most PPP analyzation services will ignore anything greater than 1Hz. OPUS goes so far as to “decimate all recording rates to 30 seconds”. And, your OBS files will be monstrously large. If 24 hours is 300MB at 1Hz, it follows that 24 hours at 30Hz will be ~9 gig. So no, keep it at 1Hz.
We now need to pass the raw GNSS satellite data in RINEX format (*.obs) through a post processing center to try to get the actual location of the antenna. There are a handful of services but we’ve had great luck using the Canadian CSRS-PPP service. The US National Geodetic Service provides a service called OPUS but we found it to be frustratingly limited by file size and format issues. Your mileage may vary.
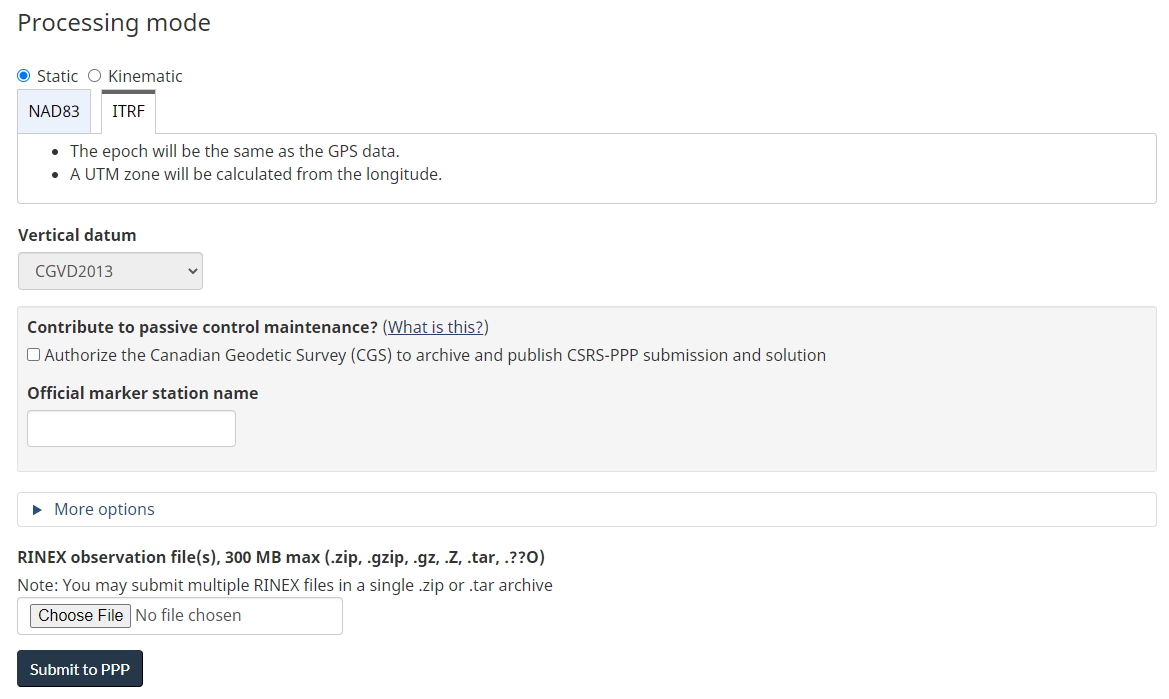
Zip your obs file then create an account with CSRS. Select ITRF then upload your file. Twiddle your thumbs for a few hours and you should receive an email that looks like this:
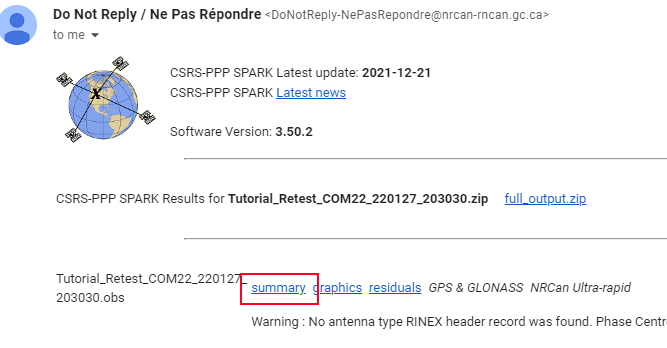
Click the 'Summary' link to open a summary of results. This summary contains the coordinates of your antenna in Geodetic, UTM, and Cartesian formats.
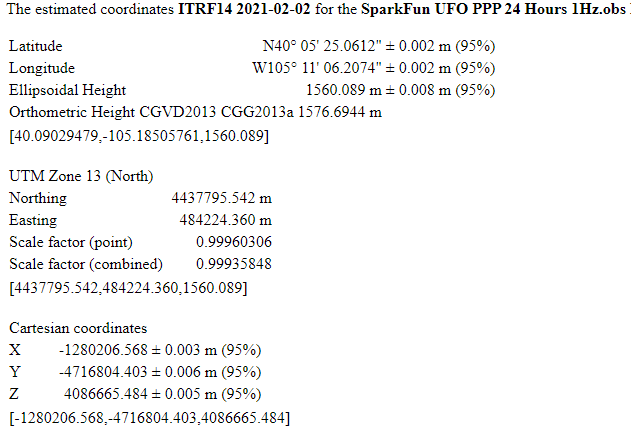
The email will also include a fancy PDF report of your antenna’s location but does not include the Cartesian coordinates we will need later.
If all goes well you should have a very precise location for your antenna. For u-blox receivers we are most interested in ECEF coordinates. ECEF is fascinating. Rather than lat and long, ECEF is the number of meters from the internationally agreed upon reference frame of the center of mass of the Earth. Basically, your ECEF coordinates are the distance you are from the center of the Earth. Neat.
Now that you’ve got the ECEF position of your antenna, let’s tell the ZED-F9P where its antenna is located with a few millimeters of accuracy.
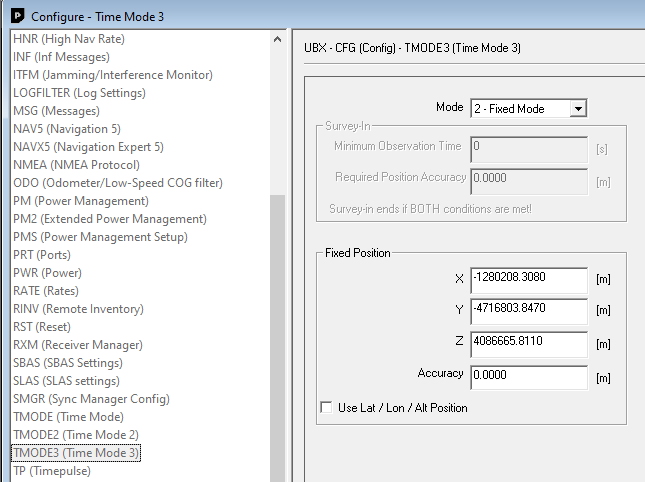
Return to the TMODE3 message and enter the ECEF coordinates from the report. Assuming this receiver is attached to a fixed antenna, we recommend saving these settings to BBR/Flash so that every time this receiver powers on it will immediately enter TIME mode and start outputting RTCM data.

Almost immediately following ECEF entry your module should begin outputting RTCM messages. Use the packet viewer to confirm. If you don’t see them be sure to check out the previous tutorial describing how to set up a base station. More than likely you have not enabled the required RTCM message. Again, be sure to save your setting to BBR/Flash so that at every power on, this receiver will begin broadcasting correction data without user intervention.