How to Build a DIY GNSS Reference Station
 Nate
Nate 
Caster Setup
Now that you have the Windows mini-PC setup, let’s talk casting. As previously mentioned, NTRIP is the industry standard for moving RTCM corrections over the internet. For our purposes we need to ‘cast’ from the base station and use a ‘client’ at the rover to get access to the caster.
There are a variety of options available:
- Use u-center’s built in Caster/Client
- Use STRSVR’s built in Caster
- Use STRSVR as the Server and RTK2GO as a Caster
There are a few ways to pipe data from the ZED-F9P to the internet. We’ll start with the easiest:
U-center as a Caster
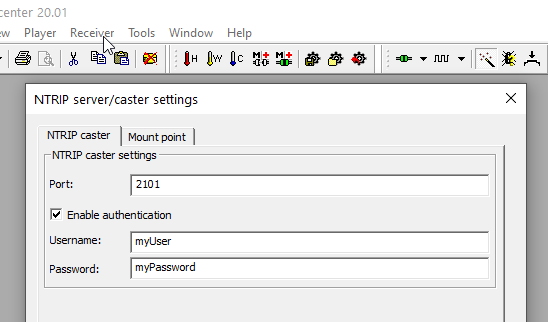
U-center has a very easy to use NTRIP caster. In terms of ease-of-use, this is by far the easiest (second only to using radios that require no configuration). Simply enter a user name, password, and mount point info and click ok. U-center will automatically configure the receiver to broadcast the RTCM sentences, and begin transmitting correction data over port 2101 to anyone who hits this PC’s IP address with the proper credentials (usually using an NTRIP client).
Pros:
- Crazy easy to set up.
Cons:
- You’ll need to poke a hole in your router for port 2101 (not the most secure).
- There is not currently a way to auto-start u-center in caster mode. This means that every time the mini-PC loses power or reboots you will need to log into the machine, open u-center, and restart the caster.
We recommend using u-center to ‘kick the tires’ of NTRIP. It’s very satisfying and a great learning experience to get correction data, but long term u-center is not our choice.
STRSVR as Caster
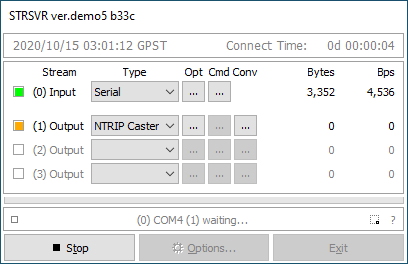
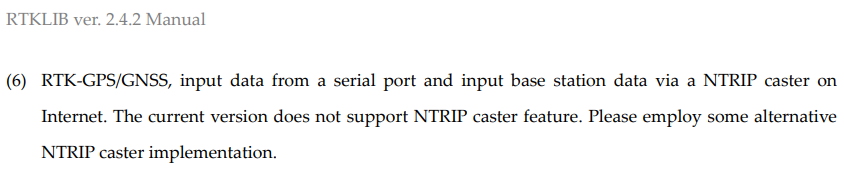
Really quick, and just because I lost a day trying to make this work: RTKLIB does not support NTRIP casting even though it displays it.
Pros:
- STRSVR can be auto-started
Cons:
- Caster doesn’t do anything
STRSVR and RTK2GO
The winner really is using STRSVR as a NTRIP Server (it’s confusing but this means to upload data to a server on the internet) and then RTK2GO as the NTRIP Caster.
There are a variety of Windows applications out there that claim to be an NTRIP caster. We found them to be generally terrible. The easiest solution is using RTK2GO. RTK2GO seems to be a pet project of SNIP. We recommend creating a mount point and a password through RTK2GO.com. Yes it looks spammy but we found it is the best solution.
Note: We quickly got banned from RTK2GO because, after completing our registration, we started STRSVR and pointed it at rtk2go.com with the temporary password. Very quickly (1-2 minutes) our account and password were active. Which means our broadcasting at RTK2GO with the temp password became invalid. After ~60 seconds of invalid connections by STRSVR (because the PW changed from temp to permanent) our IP was banned for a few minutes, then hours. Our recommendation is to just wait a few minutes. Do not connect STRSVR to RTK2GO using the temp password. Just wait for the confirmation email from RTK2GO, respond with the ‘yes I’m not a robot email’, and wait for the email from RTK2GO that says your mount point and password are valid. At that point, start STRSVR with your credentials.

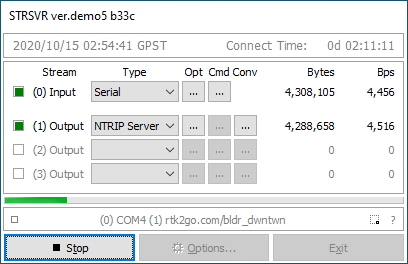
With your mount point and password point STRSVR at RTK2GO. Because we are pushing data to an NTRIP server we don't need to open port 2101 on our local network.
Then press ‘Start’. Within a few seconds the lights should turn green indicating that data from the ZED-F9P is correctly transmitting to RTK2GO. Good. Give yourself ~60 seconds and then open a browser and go to rtk2go.com:2101. This should show you the list of current mount points. Your mount point should be on there. If not, check that you have the correct PW entered, that the base is correctly set up with RTCM messages turned on, and in TIME mode.
Note: When you close STRSVR it will save these settings. If you run 'strsvr.exe -auto' it will start STRSVR and automatically start casting.

Congrats! You’re getting wonderfully close to the finish line. You are welcome to grab a surveyor setup, go out into the field, and use SW Maps to connect to your correction data using the built in NTRIP client. You can also use u-center to act as a client.
Advanced Trick - Add a Radio

Of course we have a 915MHz antenna on the roof of SparkFun. So why not hook it up? Unlike the small GNSS antenna in the previous section, this antenna has significant lightning protection.
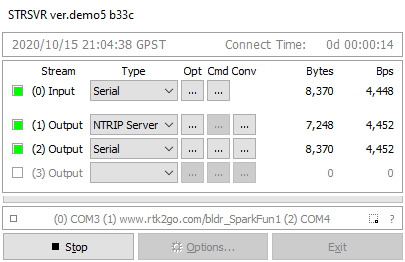
STRSVR is very powerful. You can pipe your RTCM data to multiple places, not just a NTRIP server. We attached a 100mW 915MHz radio to USB. It enumerated as a COM port. We can then add that COM port (remember to set the baud rate to 57600bps to match the radio) to STRSVR so that the RTCM data goes to both the NTRIP server and to the radio. This allows us to use a radio connection for local area RTK and swap to cellular if we get outside the range of the radio.
Why not solder the radio to UART2 like in the previous tutorial?
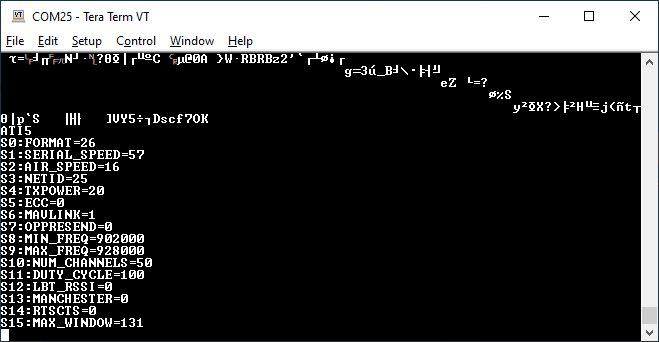
By connecting the radio to USB it allows us to configure the radio over a terminal window. If it was wired directly to the UART2 on the ZED-F9P the correction data would transmit, but this way we can modify the radio’s AIR_SPEED and other settings to get greater range.