Getting Started with the Red Hat Co.Lab Robot
 D___Run___,
  Gina Likins
Resources and Going Further
For more information about the moto:bit, check out the resources below:
We produce a number of other kits and carrier boards that you can hook up to your micro:bit to help take your projects to the next level. We have dedicated an entire page for you to explore where you can go from here with the micro:bit
Here is some further reading that may help you along in learning more about the world of electronics.
For more information on our micro:bit ecosystem, check out these tutorials:
micro:arcade Kit Experiment Guide
Getting Started with MicroPython and the SparkFun Inventor's Kit for micro:bit
How to Load MicroPython on a Microcontroller Board
Wireless Remote Weather Station with micro:bit
For more robot fun, check out our these other tutorials that use the micro:bit ecosystem.
micro:bot Kit Experiment Guide
Wireless Remote Control with micro:bit
Full Kit Contents List
If you haven't yet picked up one of the Red Hat Robotics kits and want to get started you can find the robot here
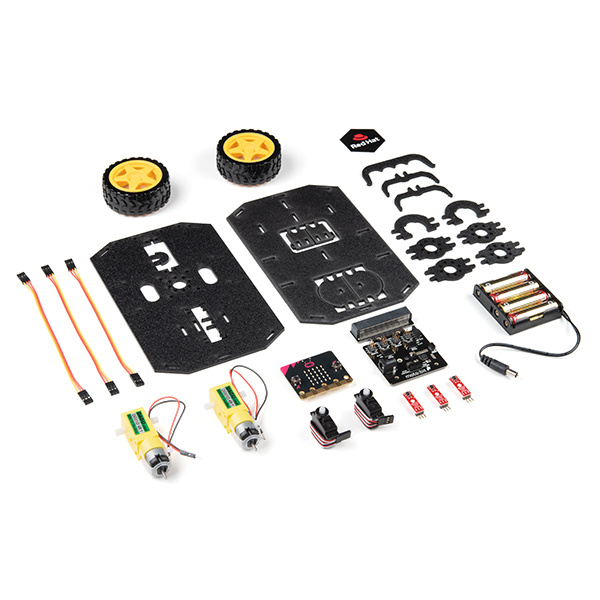
Red Hat Co.Lab Robot Kit
CUST-16424Things sometimes break or get lost, its part of making and tinkering! If you need to replace a part here is a list of the individual components that make up the Red Hat Robotics Kit from the SparkFun catalog.
Master Connection List
This table shows you how things are connected. On the left side of the table is the board (the moto:bit in this case), in the middle is the color jumper wire, and in the right column is the “far end” connection (either one of the motors or one of the Line Sensors). This is a kind of shorthand for the step-by-step instructions that tell you exactly where each end of each connection goes, so sometimes instructions will give you a table like this rather than step-by-step instructions
Left Line Sensor
| SparkFun moto:bit Pins | Jumper Wires | Left Line Follower Board |
|---|---|---|
| P0 | 3-Wire Jumper Cable - Yellow | OUT |
| 3.3V | 3-Wire Jumper Cable - Orange | VCC |
| GND | 3-Wire Jumper Cable - Red | GND |
Middle Line Sensor
| SparkFun moto:bit Pins | Jumper Wires | Center Line Follower Board |
|---|---|---|
| P1 | 3-Wire Jumper Cable - Yellow | OUT |
| 3.3V | 3-Wire Jumper Cable - Orange | VCC |
| GND | 3-Wire Jumper Cable - Red | GND |
Right Line Sensor
| SparkFun moto:bit Pins | Jumper Wires | Right Line Follower Board |
|---|---|---|
| P2 | 3-Wire Jumper Cable - Yellow | OUT |
| 3.3V | 3-Wire Jumper Cable - Orange | VCC |
| GND | 3-Wire Jumper Cable - Red | GND |
Left Motor
| SparkFun moto:bit Pins | Left Motor Jumper Wires |
|---|---|
| LEFT MOTOR - RED | Soldered on Motor Jumper Wire - RED |
| LEFT MOTOR - BLACK | Soldered on Motor Jumper Wire - BLACK |
Right Motor
| moto:bit Pins | Right Motor Jumper Wires |
|---|---|
| RIGHT MOTOR - RED | Soldered on Motor Jumper Wire - BLACK |
| RIGHT MOTOR - BLACK | Soldered on Motor Jumper Wire - RED |