Getting Started with the Red Hat Co.Lab Robot
 D___Run___,
  Gina Likins
Before You Start
Before starting any project, there are some steps to take to ensure that you don't hit any problems and that things go smoothly. Here's our recommendations to ensure a successful robot build.
Recommended Age and Prerequisite Skills
This activity is best suited for ages 10 and up.
There are no specific skills necessary to complete the project (and no prior knowledge of programming is assumed), though it takes a little bit of dexterity (or help from a patient adult) to assemble the chassis and connect the wires.
Time Requirements
Build - 1-2 hours
Programming - 1-2 hours
Tools and Materials
A computer -- with a web browser and access to the Internet OR a phone or tablet with the Microsoft MakeCode app on it.
Electrical tape, paint marker or another way to mark parts -- this makes it easier to keep track of them (not necessary, but helpful)
Slip-joint pliers -- useful to grip parts during assembly (not necessary, but helpful)
Project checklist
☑ Read Requirements and Assemble Tools
☐ Read the Instructions
☐ Identify the Parts
☐ Build Your Project
☐ Testing
☐ Show it off!
Read the Instructions
You know how people always say "Read all the instructions before starting?" It really does help. (Hint: try to familiarize and yourself with the parts you'll be using as you're reading through the instructions.)
Project checklist
☑ Read Requirements and Assemble Tools
☑ Read the Instructions (because you did, right?)
☐ Identify the Parts
☐ Build Your Project
☐ Testing
☐ Show it off!
Identify the Parts
Chefs lay out the tools and ingredients they need to make a dish before they even start cooking because it helps them save time and avoid mistakes. This is called mise en place, a French term that means "everything in its place."
When you're working on an engineering project, doing your own mise en place will help you too. You've already assembled your tools and materials, and read the instructions, so the remaining step is to lay out your "ingredients," or the parts of your project.
As you're reading the instructions, lay each part out all the parts on your worktable, placing all parts of the same type together and counting them.
Why?
Well, unfortunately, sometimes instructions don’t do a great job of specifying which of the somewhat-similar-but-slightly-different parts you should use on a given step (and sometimes there aren’t pictures to help out). But if the instructions call for a certain number of that part, you can sometimes use the number of each part you received to help you figure out which part to use.
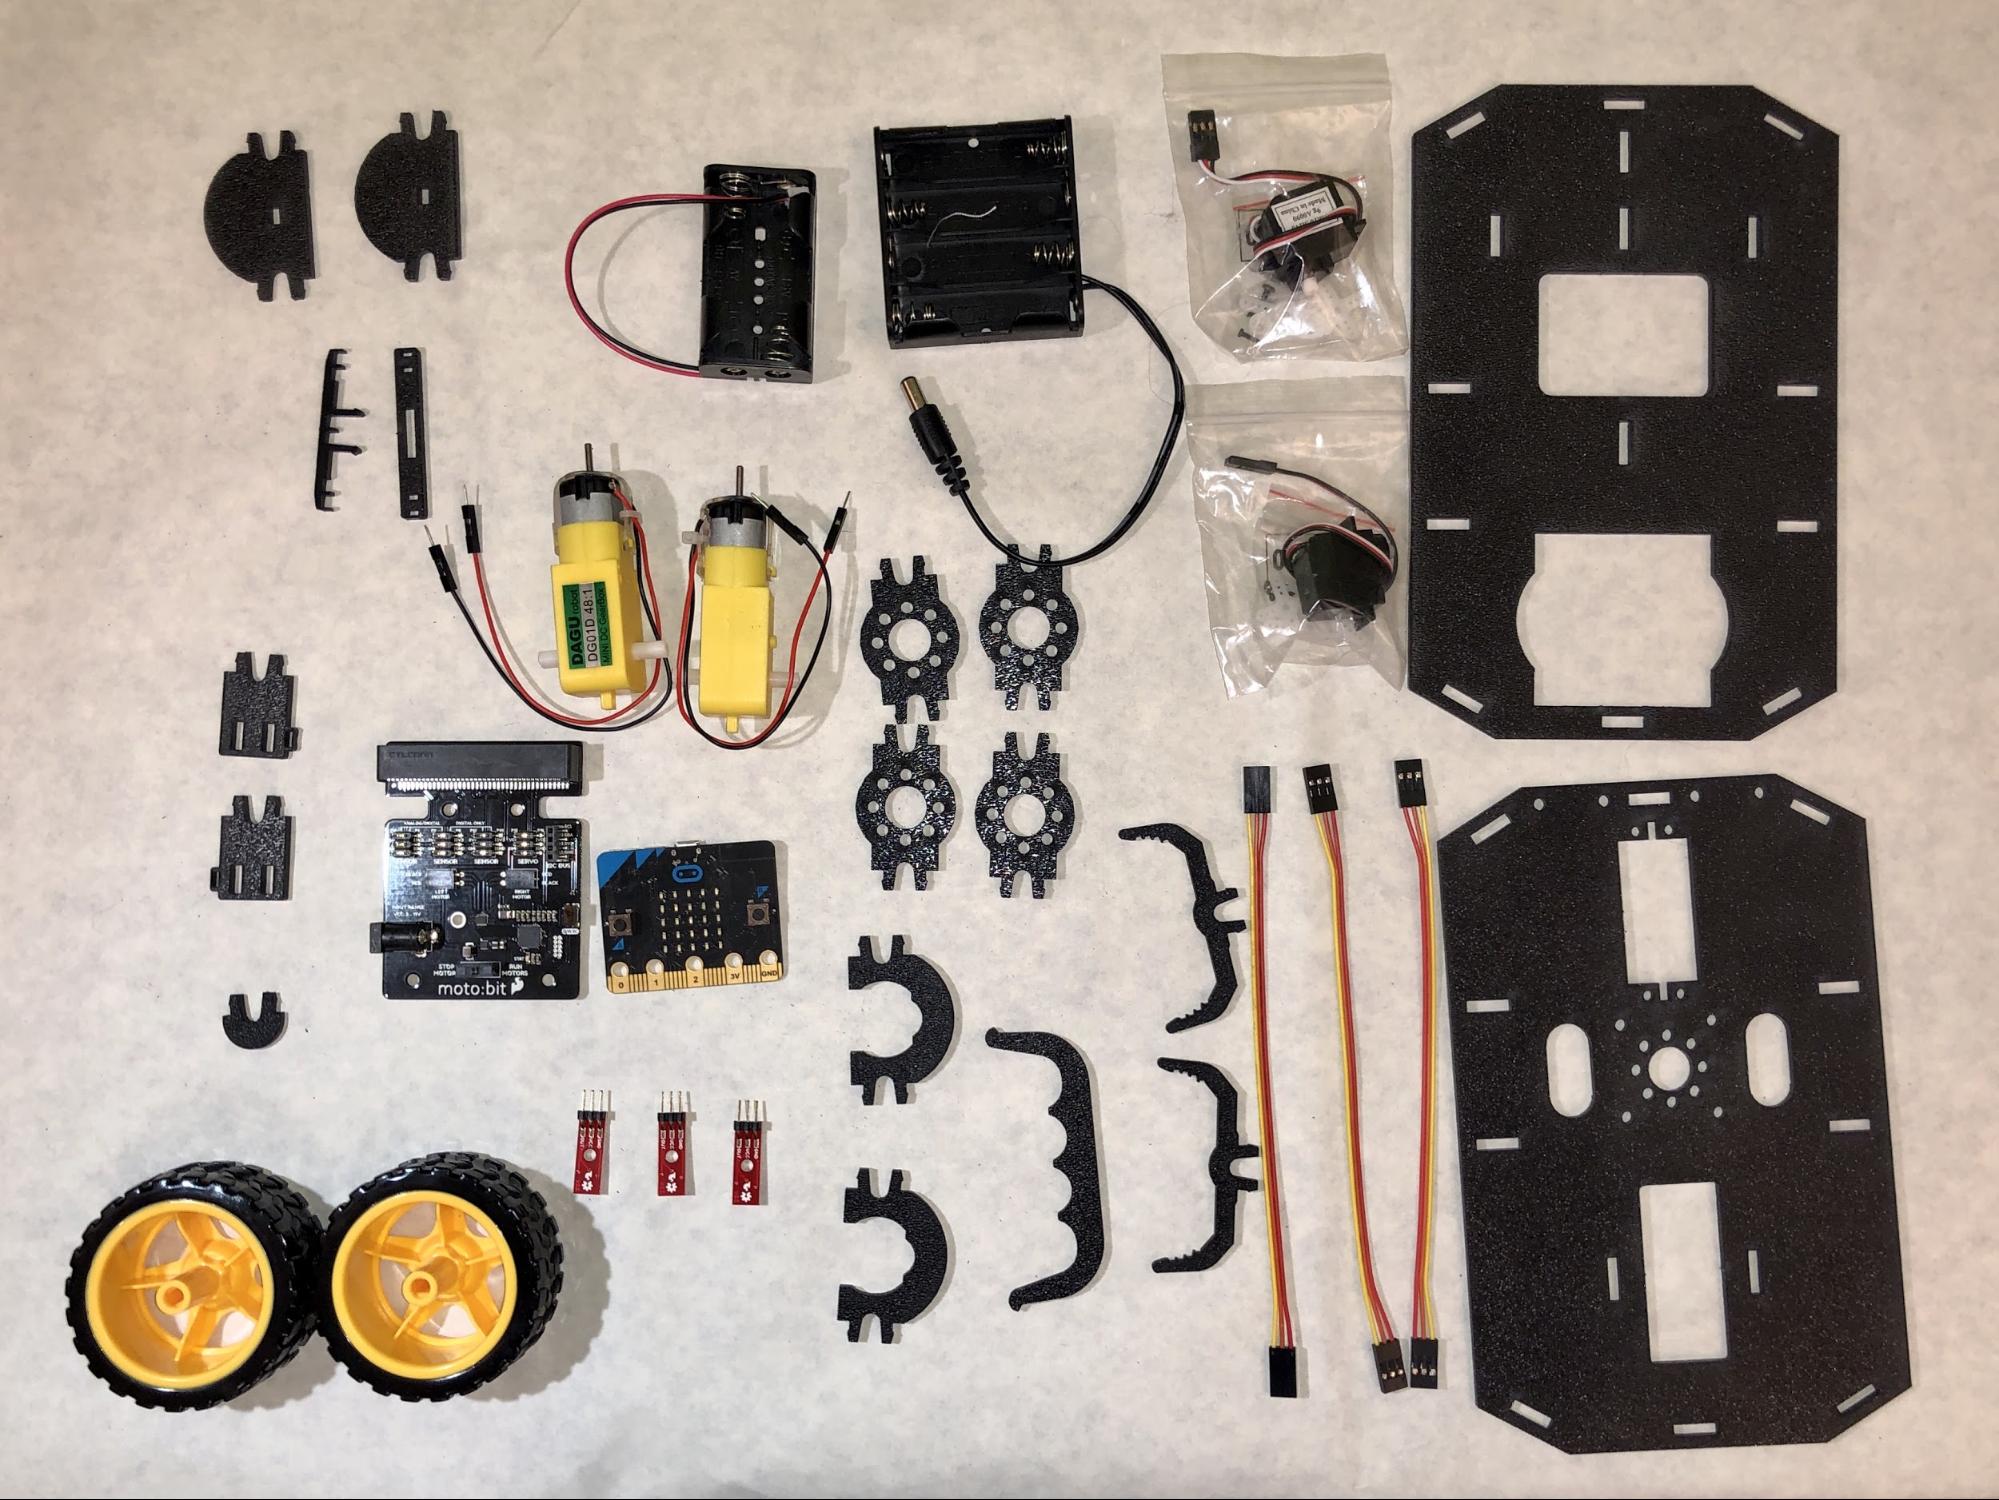
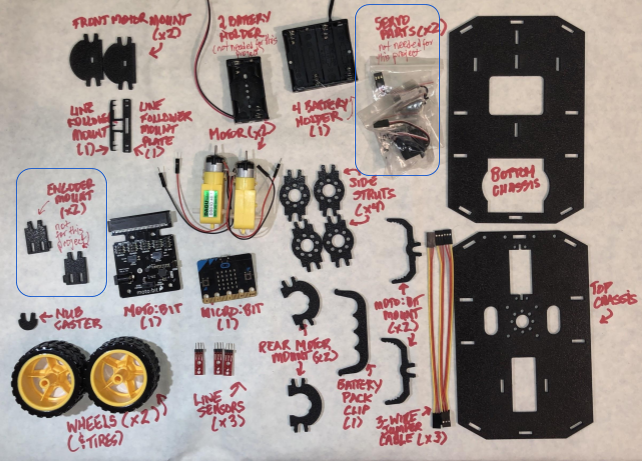
Take a look at this picture, which should show almost the same pieces you have (you will also have some cool stickers, a 6” microUSB cord, 4 AA batteries, and 2 AAA batteries):
Suppose the instructions said:
Attach one side strut to each of the four corners of the bottom chassis.
(Don’t worry, these instructions will be more clear than that, we hope!)
Even if you didn’t know which part was supposed to be the “side strut” (and how could you?), you could figure it out because there’s only one part that you have four of!
This process also helps in case the manufacturer made a mistake and you’re missing a piece -- it’s easier if you find this out before you’re very-nearly-done and excited to show off your cool project.
I even like to label my parts as I'm laying them out. It saves me a lot of time hunting around on my desk if everything is laid out and labeled with its name. I use a sheet of paper on top of my desk, which both helps protect my table and gives me a place to label my parts.
The final result looks something like this:
Your Robot's Major Systems
Your robot's anatomy has several major systems, which are similar to the ones that humans have:
brains -- your robot has a main brain, the micro:bit, and a "helper brain," the moto:bit, that allows the robor to do more.
a chassis - the "skeleton" of the robot that everything else (like the motors, wheels, and brains) gets attached to
the drive assembly - Not all robots move, but yours does, and "drive assembly" is the technical term for the parts of the robot that allow it to move (the motors and wheels). This is sort of like your muscle system.
sensors -- that allow your robot to "see." We'll add those sensors in this tutorial, but we'll program them and put them into use in a later tutorial.
Let’s look a little more closely at the major parts -- organs, if you will -- of your robot's anatomy before we start building.
The micro:bit
Find your micro:bit -- the "brains" of your robot. The micro:bit is packed with functionality (some of which we'll use in later tutorials). Check out the Resources and Going Further section to learn more about this microcontroller and what you can do with it.
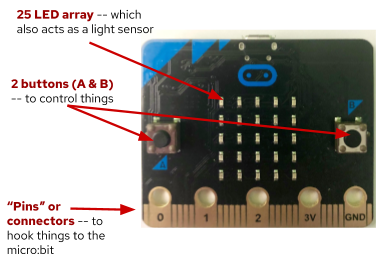
For now, though, take a look at the features on the front
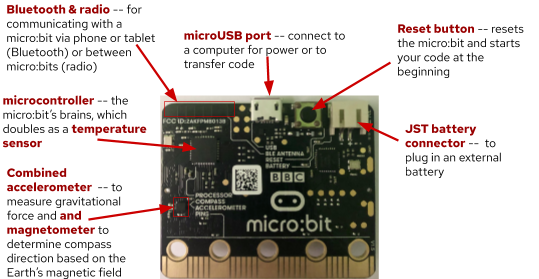
and the back...
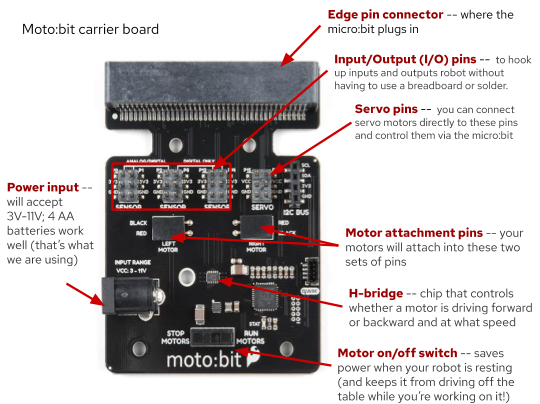
The SparkFun moto:bit
The micro:bit is pretty powerful on its own, but it can do even more when you plug it into the moto:bit, a "carrier board" which acts like a helper brain. The moto:bit can communicate with motors and can relay information from sensors back to the micro:bit. It also has a power jack that lets you attach a larger battery pack, that both allows your robot to range untethered as well as giving it the extra power the motors need.
This picture identifies the parts of the moto:bit that will be important while building your robot.
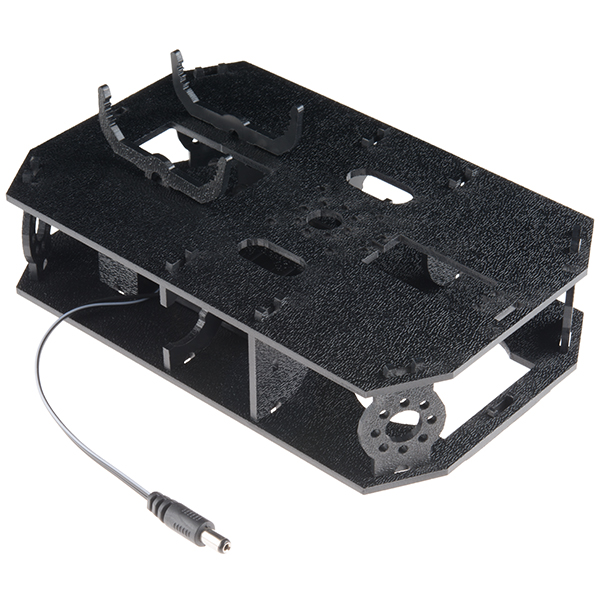
Robot Chassis
Your robot's chassis (its "skeleton") is made out of laser-cut plastic parts that we're going to put together.
But before we can put the chassis together we need to snap out a few small parts from the two main pieces of the chassis.
You should end up with seven new-and-shiny pieces, like these...

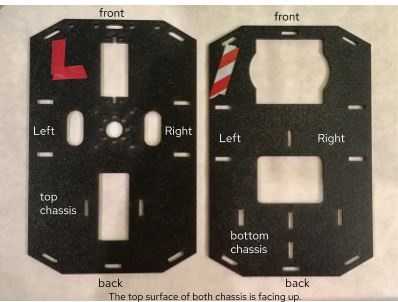
A Note on Orientation
Along with laying out, counting, identifying, and labeling all the parts in advance, I also like to do whatever I can to make things a little easier when I assemble projects. One way that I do that is by giving myself some obvious orientation clues when I’m working with parts that I might have a chance to put on upside down or backwards.
The robot instructions reference (see the picture below) * the Top Chassis and the Bottom Chassis * the “front” of the robot (the end the front bumper would be on if it had one) and the "back" * the “top” of each chassis (the textured side) and the "bottom" (the smooth side) * and the Left and Right of each chassis, which is relative to the “front”
In order to help me avoid mistakes when assembling my robot, I mark the pieces that look similar so I can easily tell the top from the bottom, the front from the back, and the left from the right.
This video shows how I marked the orientation of the chassis parts for my robot:
You can mark your parts to show the orientation in any number of ways -- by writing on one corner of each piece with a paint pen, adding a sticker, or using some tape. The important thing is to do it consistently -- if you’re marking the upper lefthand corner, do that on all the pieces. Or if you’re using a green mark to indicate the top of the part and red to indicate the bottom, do that on all the pieces.
My robot ended up looking like this:
Since you have the neat stickers that came with your robot, you could use one of them to mark the front left corner (and remember which one you used!), put the other on the right front corner, then use a piece of tape to mark the Lower Chassis front left corner.
This may sound like a lot to do before you start, but if you’ve ever tried to put something together and you can’t find the right part -- or worse, you had the right part, but you put it in the wrong place or upside-down -- this will make sense.
Project checklist
☑ Read Requirements and Assemble Tools
☑ Read the Instructions (because you did, right?)
☑ Identify the Parts
☐ Build Your Project
☐ Testing
☐ Show it off!