Getting Started with the Red Hat Co.Lab Robot
 D___Run___,
  Gina Likins
Code: Give Your Robot Instructions
One of the (many) cool things about the micro:bot (and by extension, your robot), is that you can learn to control it (to program it) in several ways. We’re going to use MakeCode, which is a open source, block-based language: if you’re familiar with Scratch, it’s very similar.
MakeCode can be run in your browser or in an app (Android, iPhone or iPad). We’re going to work with the browser-based version, as it’s the easiest to set up.
Using Microsoft MakeCode
If you’ve never used MakeCode, start by visiting one of these two sites to learn the basics: how to write programs for the micro:bit, and how to connect to a micro:bit and transfer your code so that it can run.
SparkFun’s guide -- has more detail about what the different tools in the MakeCode Editor do and how the in-browser simulator works. A better choice if you prefer to read All The Directions before getting started on a project.
The Micro:bit site guide -- has a couple short videos and some brief information about how to get started with the micro:bit. If you prefer to jump right in and figure things out as you go this might be more up your alley.
No matter which introduction you choose, though, you’ll need to complete one additional step in order to access your robot’s full potential…
Installing the moto:bit MakeCode Package
In order to take advantage of the motor:bit’s full functionality, SparkFun has created an “extension,” which is a file that contains code to -- you guessed it -- extend the functionality of the original code base.
To install or add a new extension to your MakeCode toolbox (the list of different block groups), click on "Advanced" and then on "Add Extensions." This should be the last item on the list.
From here you can search for "moto-bit," and it should show up as a public extension in the list. Go ahead and click on it.
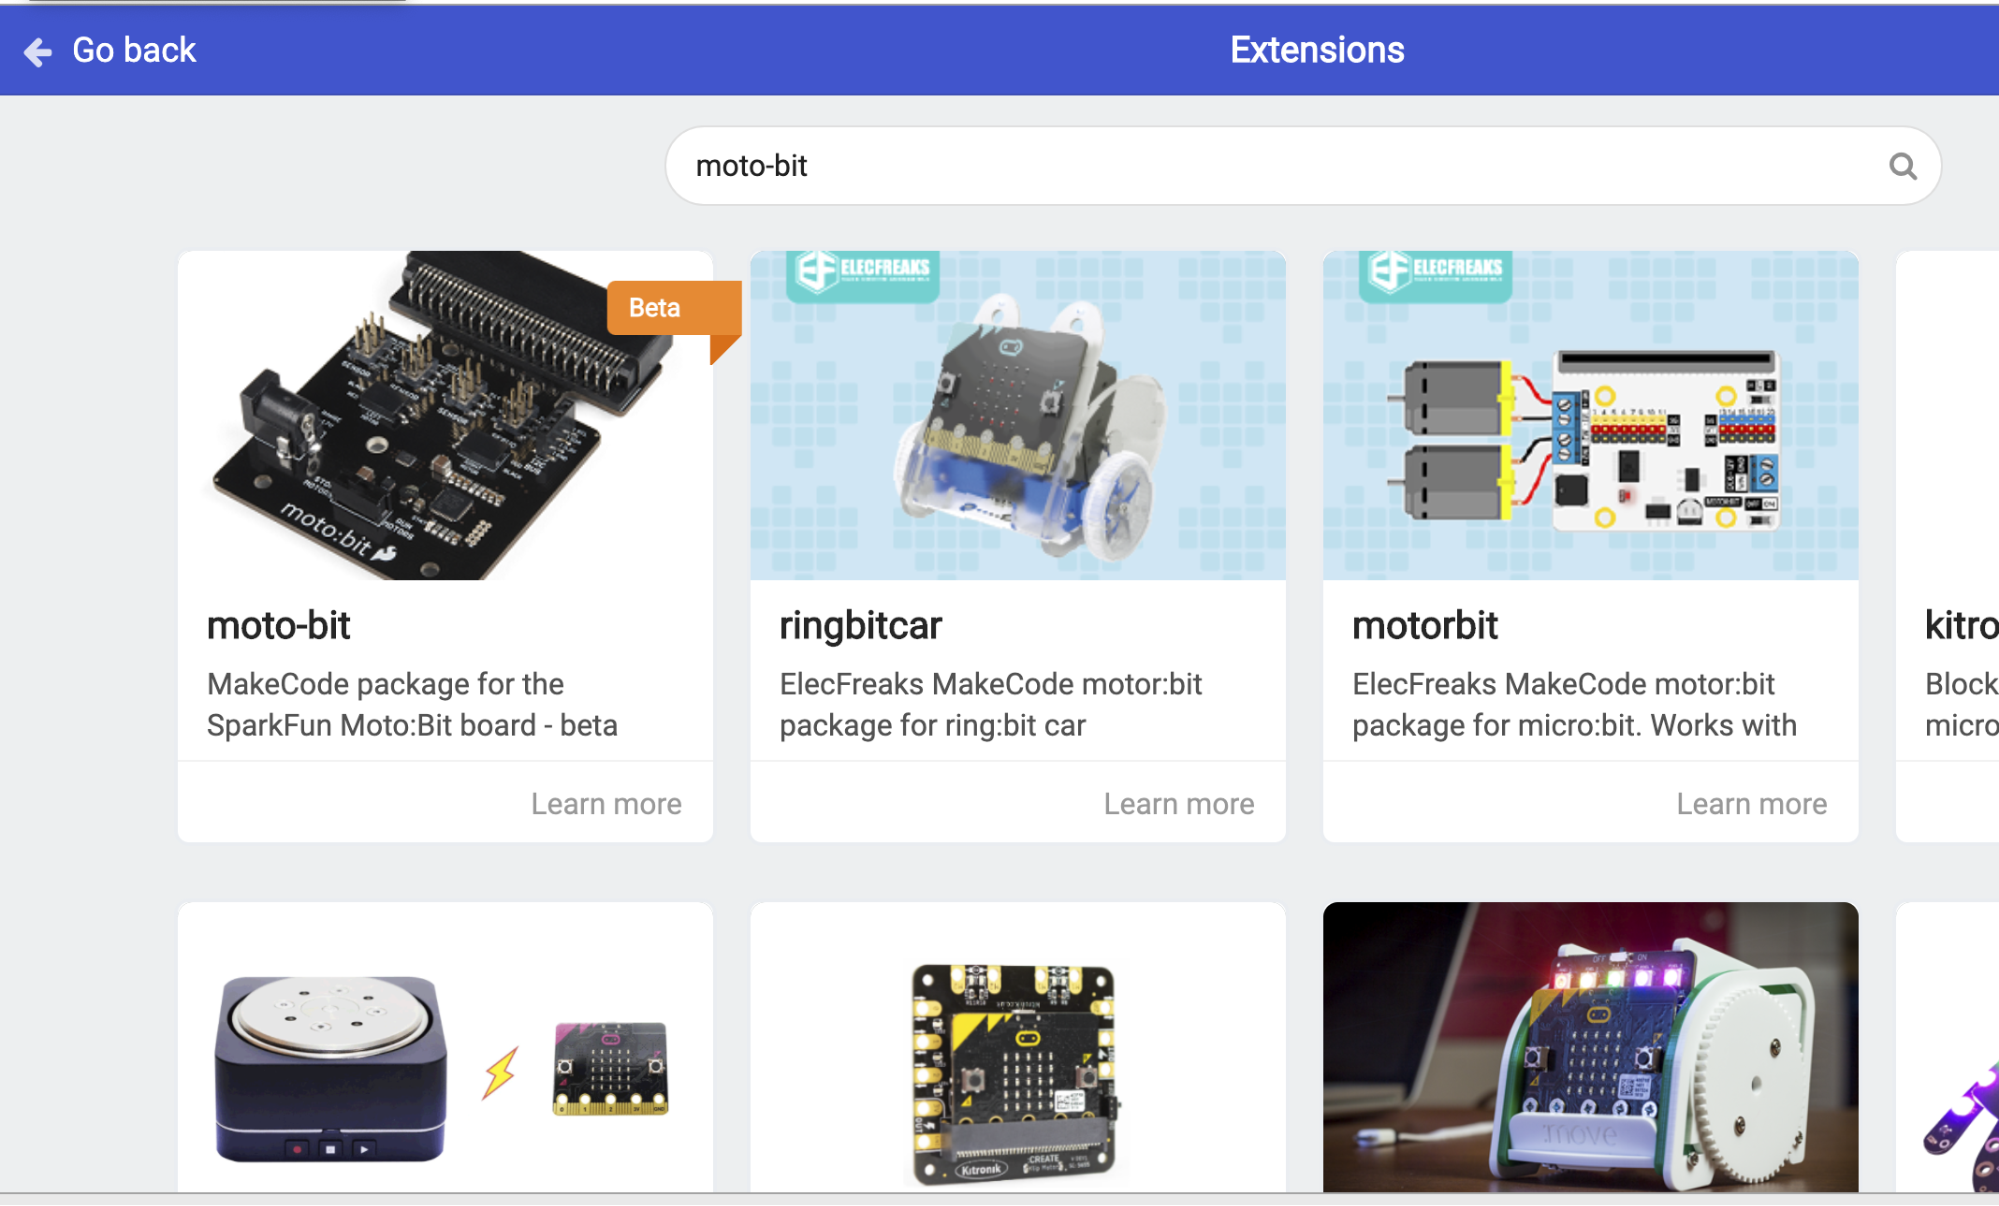
This will add all of the blocks to your toolbox. When you look at your toolbox you should see:
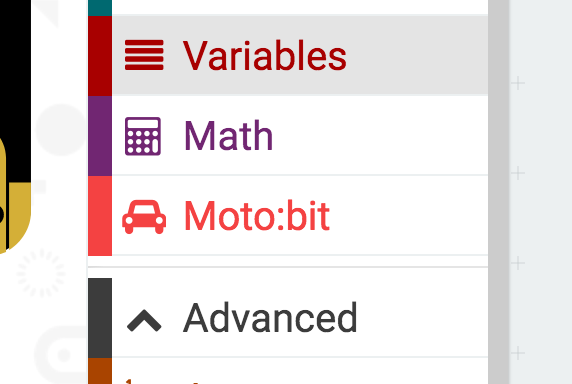
Great! You have now installed the moto:bit extension and are ready to use the board as well as the components that come in the micro:bot kit.
Load Sample Code Onto Your Bot!
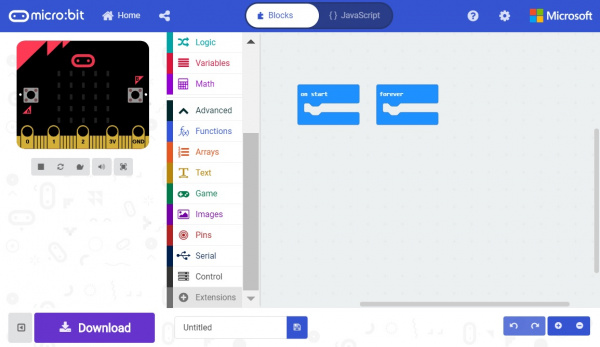
We are going to use Microsoft MakeCode to program the micro:bit. Please open a browser window and navigate to makecode.microbit.org. This should open the MakeCode environment that you used to install the moto:bit package in. (If you need to install the moto:bit package, follow the instructions to add the extension to MakeCode above.)
Or (a shortcut): if you click small square with the arrow in the upper righthand corner of the code window below it will open the code we’re going to use to get your robot running right in a new window:
Let’s look at what the code is doing...
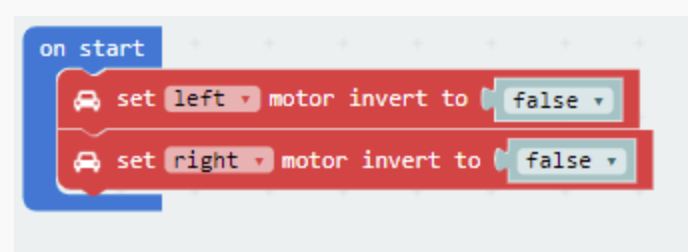
On Start
The code starts by setting each motor channel in the on start code block. Depending on how the motors are wired to the moto:bit, your micro:bot may drive in the opposite direction than what you would expect. The set ____ motor invert to ____ provides the option to switch the motor wires in code without physically rewiring the motors to the moto:bit. Set the left or right motor that you would like to invert. If you want the motor to drive in the opposite direction relative to your setup, select either true or false.
Don’t worry about this section right now -- we’ll come back to it when we see how your motors are working.
On Button Pressed
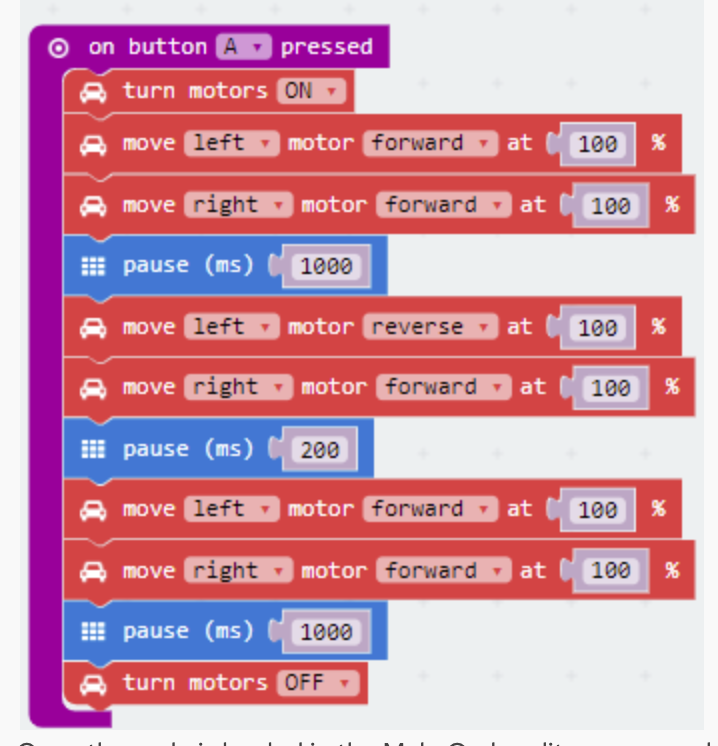
The on button __ pressed code block is an event function. Any code blocks that are placed inside of the block will only execute when that event happens. In this block, when the A button is pressed on your micro:bit your robot will start moving. When it gets to the end of the program it will stop again until you press the A button again.
Turn Motors
The turn motors __ gives you the ability to turn the motors ON or OFF in software. They are naturally OFF, so anytime you want to drive motors, you need to set them to ON. A good practice is to turn them OFF when your robot completes its task or should not be moving for long periods of time, as this saves batteries and wasted power consumption.
Move Motors At
The move ____ motor _______ at _ % block is the basis of the moto:bit software package. You use this block by selecting the values in the drop down menu:
You use this block by selecting the values in the drop down menu:
- which motor you want to control (
RIGHTorLEFT) - its direction (
FORWARDorREVERSE) - the throttle / power percentage you would like the motor to spin at (
0-100%)
For your 'bot to move forward you need to have both motors drive in the same direction.
To turn in place, or pivot, you set the motor directions opposite each other, so if one is set to go forward the other is set to go in reverse. (In the sample code, the middle two lines that say move _ left motor _ reverse _ at _ 100% and move _ right motor _ forward _ at _ 100% is a pivot turn.)
To figure out whether this code will make your robot turn to the right or to the left, stand with your arms straight out to the side, like a capital T. Now, pretend your left arm is the left motor, and your right arm is the right motor.
Now, while still keeping your arms in that capital T-shape, move your right hand forward -- like you were trying to reach something in front of you (this is like executing the move _ right motor _ forward command) -- and at the same time, move your left arm backwards (which is like move _ left motor _ reverse). If you kept that capital-T shape, what direction did your body turn?
Pause
To understand what pause does, it’s useful to remember that once you turn a motor on it won’t stop running until you turn it off.
The other thing that’s helpful is to know that this pause (ms) ___ doesn’t mean “stop what you’re doing for this amount of time” (like pushing the pause button on a music player would). Instead, it’s more like “wait this long before doing anything else.”
So, the ON and move ____ motor _______ at _ % blocks makes your motors start moving, then the pause block makes your robot wait for the length of the pause before doing anything else. And while it’s waiting for the time allocated to the pause command to pass, it just keeps on doing what it was doing before (driving).
If you want your robot to drive forward for 1 second, you set the robot's motors to drive forward and then pause for 1000 milliseconds (= 1 second) and then have the motors do something else, like stop.
Transfer the Code
Ok, now that you’ve got the code in the MakeCode editor, we need to transfer it to your robot. First, click the Download button to download the code, which will be a .hex file, to your computer.
Before transferring the code to the micro:bit, make sure the switch on the moto:bit is set to “off".
Then, use the microUSB cord to connect the micro:bit to your computer. The robot should show up as a type of device (like a drive) in your Finder.
To transfer the code to your robot, drag the .hex file onto your robot in the finder. The yellow light on the back of the micro:bit will flash rapidly while the code transfers.