Cryptographic Co-Processor ATECC508A (Qwiic) Hookup Guide
 QCPete
Example 6: Challenge
This example shows how to setup a "challenge and response" for authentication between two systems. This is one way to add more security to your communication channel. More specifically, it prevents attackers from intercepting a message and sending it at a later time. This doesn't seem like such a bad thing, but timing of a message is sometimes equally as important as the message itself. Once such interception attack was called the RollJam, and could be used to maliciously open garage doors and unlock cars. After completing this example, you will be able to defend your projects against this type of attack!
Hardware Hookup
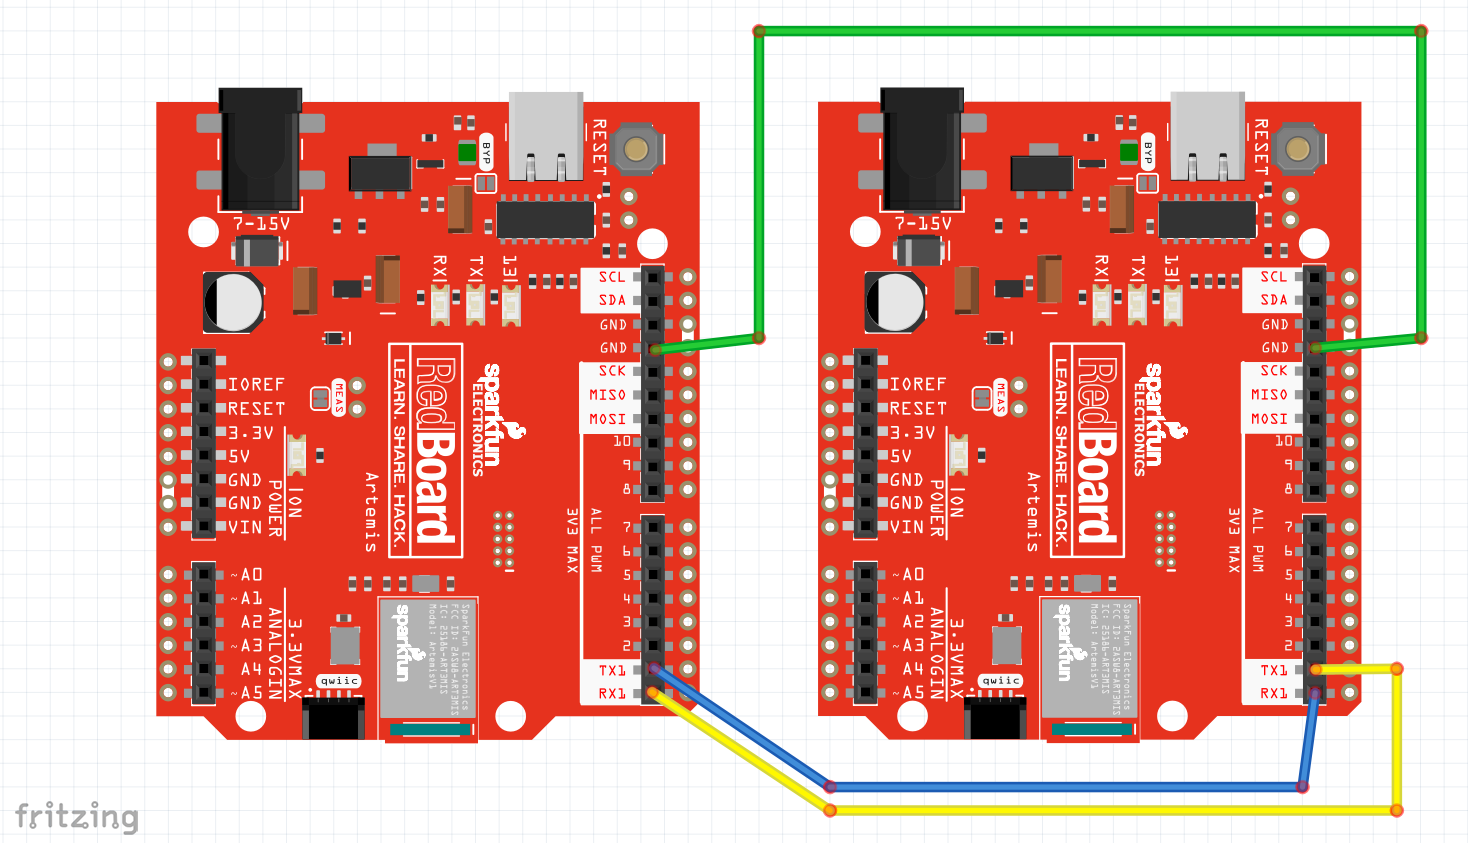
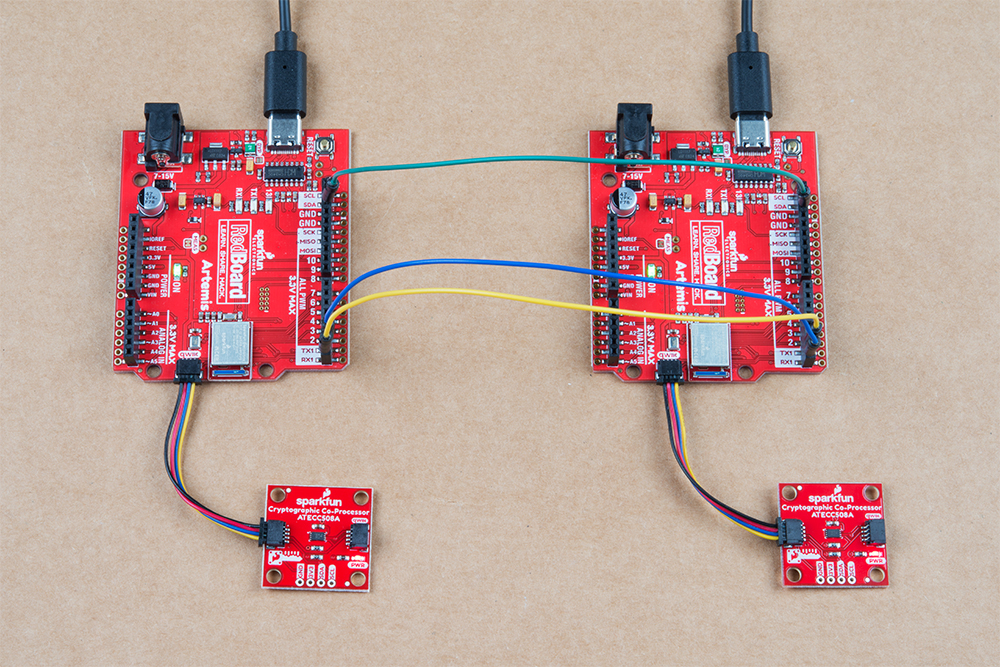
For Example6_Challenge, you will need to setup two Artemis boards (each with their own co-processors) and connect a few jumper wires between Alice and Bob.
Connect the following pins like so:
| Alice (left) | Bob (right) |
|---|---|
| GND | GND |
| TX1 | RX1 |
| RX1 | TX1 |
Note, you're setup will also need to include a co-processor on each side connected via qwiic cables, and should look something like this:
Code Setup
Like Example 4, this also requires two unique sketches and setups. You will need to use both Example6_Challenge_Alice.ino and Example6_Challenge_Bob.ino.
Again, you will need to copy Alice's public key from her serial terminal, and then paste it into the top of Bob's sketch. Then upload Bob's sketch and watch both terminals.
Example6_Challenge_Alice.ino and Example6_Challenge_Bob.ino working in conjunction. For any new authentication cycle, Alice will initiate. User must reset Alice and send a "y" over serial at 115200.
Bob will create a new random array of 32 bytes (this will be called a token - aka NONCE).
It is also known as a "time-to-live token", because it will become invalid after a set amount of time.
Bob sends the token to Alice.
Alice will sign the token using her private ECC key, then send the signature to Bob.
Bob will use the token, the signature, and Alice's Public Key to verify everything.
By creating a new random token, Bob now has the ability to control how long he thinks that token should be valid. This means that if an attacker intercepted the message, and they tried to send it later, it would no longer be valid.
Bob will also invalidate the token after a set amount of time. For our example it will be 150ms. This prevents any attacker from intercepting the message, and hanging on to it for later use. So if Alice doesn't respond within the set window of time (150ms), then Bob will clear out the token, and Alice must ask for another.
Because the token is unique every time, that means that Alice's signature will be unique every time. This prevents an attacker from trying to impersonate Alice by recording communications, and then later sending one.