Cryptographic Co-Processor ATECC508A (Qwiic) Hookup Guide
Example 3: Verify
This Example shows how to verify a signature. In order for the co-processor to do this, it needs three things:
- Public Key (of the sender)
- Message
- Signature
If you have just completed Example2_sign, then you should remember seeing these 3 things printed out on the serial terminal. Before uploading Example3_verify.ino, please ensure you update the public key, message and signature at the top of the sketch.
Also very important: you will need to rename the publicKey[64] array at the top to publicKeyExternal[64]. This is what we will use to verify the message and signature, and so we must clarify that it is external.
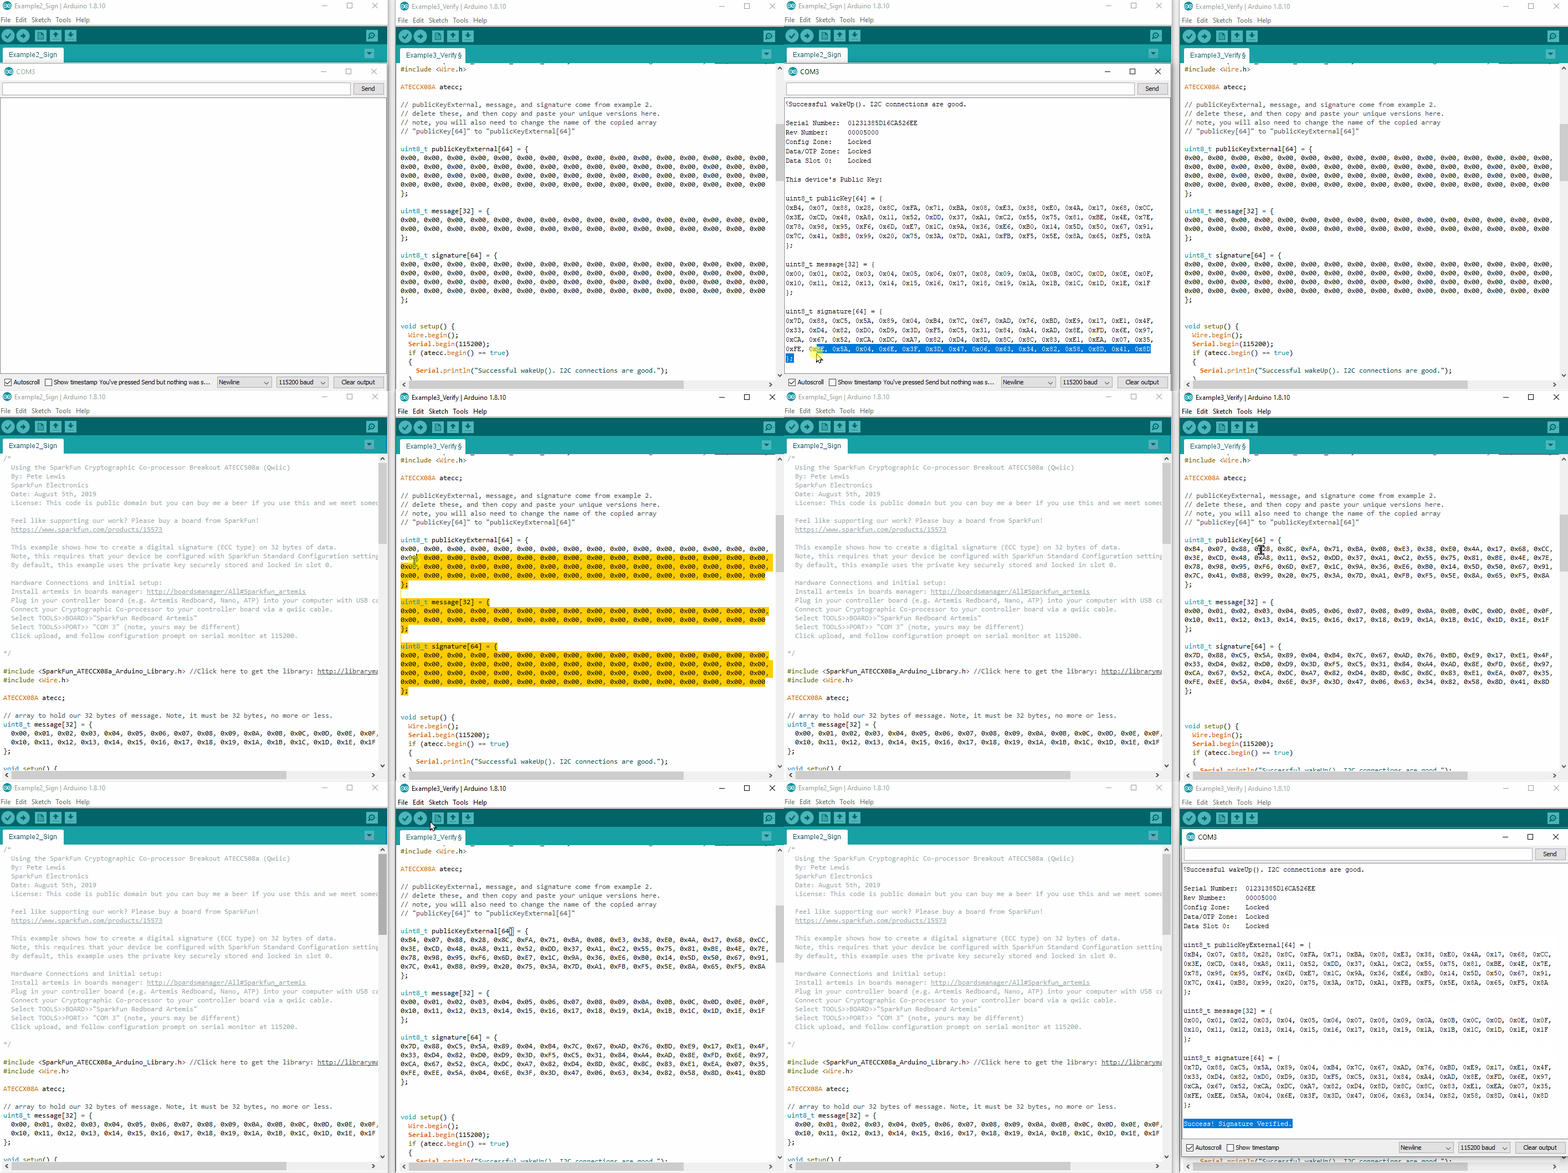
Before uploading Example3_Verify.ino, we encourage you to click on the .gif below and watch a couple times. This can help show exactly what to do.
publicKey[64], message[32], and signature[64] from the output of Example2_sign.ino to operate Example3_Verify.ino. (Click to Enlarge) The Code
The fresh code that you see when you open up Example3_Verify.ino has place holders. Notice how all the bytes in each array is simply a bunch of 0x00s.
language:c
uint8_t publicKeyExternal[64] = {
0x00, 0x00, 0x00, 0x00, 0x00, 0x00, 0x00, 0x00, 0x00, 0x00, 0x00, 0x00, 0x00, 0x00, 0x00, 0x00,
0x00, 0x00, 0x00, 0x00, 0x00, 0x00, 0x00, 0x00, 0x00, 0x00, 0x00, 0x00, 0x00, 0x00, 0x00, 0x00,
0x00, 0x00, 0x00, 0x00, 0x00, 0x00, 0x00, 0x00, 0x00, 0x00, 0x00, 0x00, 0x00, 0x00, 0x00, 0x00,
0x00, 0x00, 0x00, 0x00, 0x00, 0x00, 0x00, 0x00, 0x00, 0x00, 0x00, 0x00, 0x00, 0x00, 0x00, 0x00
};

uint8_t message[32] = {
0x00, 0x00, 0x00, 0x00, 0x00, 0x00, 0x00, 0x00, 0x00, 0x00, 0x00, 0x00, 0x00, 0x00, 0x00, 0x00,
0x00, 0x00, 0x00, 0x00, 0x00, 0x00, 0x00, 0x00, 0x00, 0x00, 0x00, 0x00, 0x00, 0x00, 0x00, 0x00
};

uint8_t signature[64] = {
0x00, 0x00, 0x00, 0x00, 0x00, 0x00, 0x00, 0x00, 0x00, 0x00, 0x00, 0x00, 0x00, 0x00, 0x00, 0x00,
0x00, 0x00, 0x00, 0x00, 0x00, 0x00, 0x00, 0x00, 0x00, 0x00, 0x00, 0x00, 0x00, 0x00, 0x00, 0x00,
0x00, 0x00, 0x00, 0x00, 0x00, 0x00, 0x00, 0x00, 0x00, 0x00, 0x00, 0x00, 0x00, 0x00, 0x00, 0x00,
0x00, 0x00, 0x00, 0x00, 0x00, 0x00, 0x00, 0x00, 0x00, 0x00, 0x00, 0x00, 0x00, 0x00, 0x00, 0x00
};
You will need to delete these and paste in your own unique arrays. You could type them in manually, but it will be much easier to copy and paste them from the terminal output from Example 2.
Also note, when you highlight text within an Arduino serial monitor window, you must use the keyboard to actually copy them (Ctrl + C). It won't let you right-click to copy.
And the actual verification of the signature happens as a single function call. It is located at the bottom of setup().
language:c
// Let's verirfy!
if (atecc.verifySignature(message, signature, publicKeyExternal)) Serial.println("Success! Signature Verified.");
else Serial.println("Verification failure.");
atecc.verifySignature(message, signature, publicKeyExternal) is the actual call. This function will return a boolean true if all three things are good, and a false if something doesn't add up. If you change a single bit in any three of the arguments, then it won't verify.
Two nice things to thing about:
The only place in the world that could create the signature that will verify (using this public key) is inside your one unique co-processor. No one else in the world would ever be able to impersonate it. Pretty cool huh!
If any of the message was changed (even just a single bit flipped), then this verification would fail. This means that you can be very confident that the message was transmitted and received properly. In this way it is acting as a very robust checksum. It also means that if someone actually intercepted this message, they won't be able to change anything in the message. Sweet!
