Cryptographic Co-Processor ATECC508A (Qwiic) Hookup Guide
 QCPete
Example 2: Sign
This example shows how to create a digital signature. To try it out, simply upload the Example2_Sign.ino, and watch your serial terminal at 115200 baud. Note, you may need to hit reset.
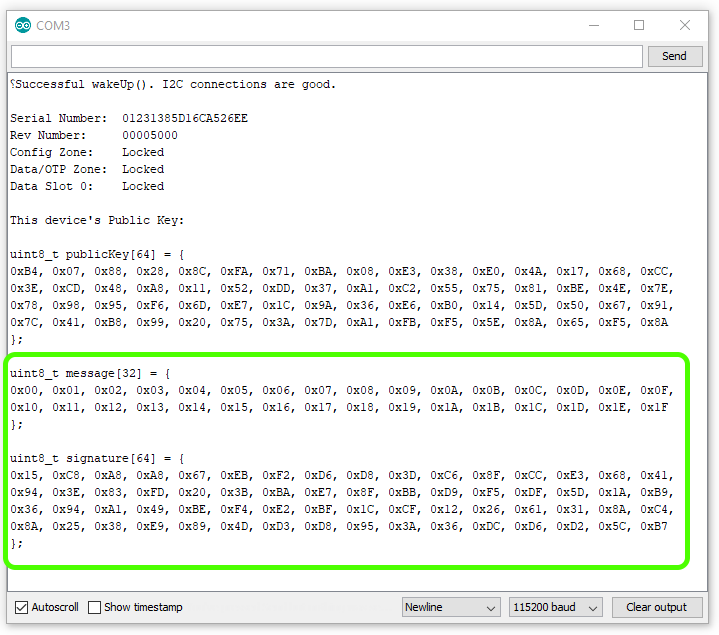
Important things to know about ECC signatures:
ECC signatures are created using a secret private key and the elliptical curve algorithm. For the purpose of this example, we can just ignore the printout of the keys public key at the top - this is part of the
printInfo()function. As a side note, we will never know the devices private key. The private key for this device is created, stored and locked up inside the device.ECC signatures are 64 bytes long.
Contrary to most definitions of signatures, ECC signatures are different every time! ECCs include intentional randomness in the calculation, and so it will always produce a new unique signature. However, every signature that it creates will pass verification (as we will later see in example 3). Try hitting reset on your Artemis a few times and watch the signature values change.
Same message+same private key=new signature.With the ATECC508A, we can only send it 32 bytes of data to sign. If you need to sign something larger, then it is recommended that you create a 32-byte hash of the data first, then you can sign the hash. Basically, when you send a bunch of data into a hashing algorithm (such as SHA256), it will always respond with a unique 32 byte digest. It is very similar to creating a digital signature, however it does not require a key, so anyone can calculate the hash of any data. You may find that for many projects, 32 bytes is enough data, so for now, there's no need to pursue hashes.
The Code
Now lets take a quick look at the important parts of the example code. There are two things worthy of note:
At the very top, we define the message we want to sign.
language:c
// array to hold our 32 bytes of message. Note, it must be 32 bytes, no more or less.
uint8_t message[32] = {
  0x00, 0x01, 0x02, 0x03, 0x04, 0x05, 0x06, 0x07, 0x08, 0x09, 0x0A, 0x0B, 0x0C, 0x0D, 0x0E, 0x0F,
  0x10, 0x11, 0x12, 0x13, 0x14, 0x15, 0x16, 0x17, 0x18, 0x19, 0x1A, 0x1B, 0x1C, 0x1D, 0x1E, 0x1F
};
Not much to say here, other than it's a nice array of 32 unsigned 8 bit integers. We chose to make the values simply count from 0 to 32, but these could really be anything.
language:c
//Let's create a digital signature!
atecc.createSignature(message); // by default, this uses the private key securely stored and locked in slot 0.
Well, the comments say it all, but I will mention that by sending the argument "message", we are sending a pointer to the first index (0), of the array. createSignature actually does 4 things for us under the hood:
Loads the message into the co-processor's memory location on the chip called
tempKey.Commands the co-processor to sign the contents of tempKey.
Receives the 64 byte signature and stores it in a public variable accessible at
atecc.signature. Note, we created an instance of the ATECCX08A class with the nameatecc, but you could choose something different, and then you'd need to modify how you access this signature array.Prints a nice
ready to compileserial debug message showing the signature. Handy for copying and pasting between code.