Wireless Remote Weather Station with micro:bit
 bboyho
 Experiment 3: Checking Sensor Data with Arrays
Introduction
We have successfully sent data from the first micro:bit and received it using a second micro:bit! However, we are not done yet! If you look at the data sent, sometimes the second micro:bit can miss some data points depending on when either micro:bit is powered up. If you are just viewing the data on the serial terminal or saving the values into a variable, it's not too much of a concern. However, this will cause problems if you decide you want to save and graph the data using the OpenLog. The data may be shifted depending on when you powered the micro:bit. The missing data points will have holes in your data set and cause errors whenever the micro:bit saves data intended for a different sensor. Below is an example output with missing data.
In this section, we will save the weather stations running time and temperature into an array. To check, we will have a second array to keep track of what is received to ensure that we have received everything that was transmitted. If we have received it, we will display the values in comma delimited form through a serial terminal. If not, we will not output the values. For debugging purposes and to help us understand what is going on, we will also display the status of the second array that is keeping track of what is being received.

Parts Needed
You will need the following parts:
- 2x micro:bit Boards
- 2x Micro-B USB Cables
- 1x Weather:bit Carrier Board
For a few items listed, you will need more than one unit (i.e. micro:bits, micro-B USB cables, etc.). You may not need everything though depending on what you have. Add it to your cart, read through the guide, and adjust the cart as necessary.


micro:bit Board
DEV-142083.1 Sending Some Data
Let's take a step back and only send the running time and temperature for simplicity.
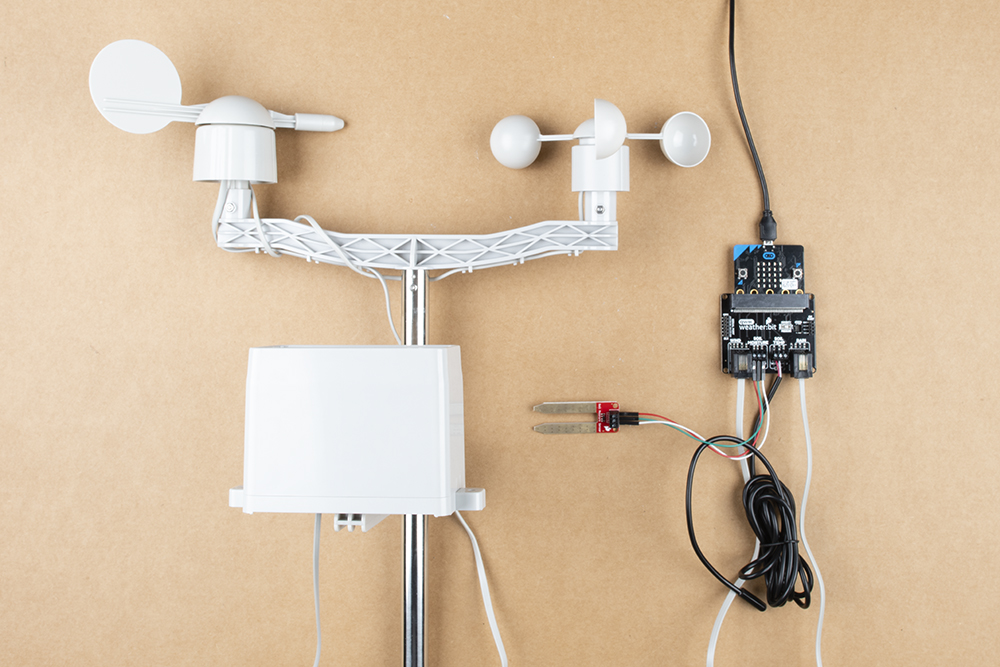
Hardware Hookup
We recommend having just the weather station's micro:bit connected for this section to avoid confusion when uploading code.
The setup is the same as the previous experiment. However, we are just using the BME280's temperature sensor. We can leave everything connected as it currently is from the previous example.
Running Your Script
We are going to use Microsoft MakeCode to program the micro:bit. You can download the following example script and move the *.hex file to your micro:bit. Or use it as an example to build it from scratch in MakeCode.
Code to Note
This code is just a shortened version of experiment 2.1's code for simplicity.

3.2 Receiving and Checking Some Data
In this section, we will be receiving two readings and storing them into arrays. We will check the data to see if we received all the readings for that instance. If we do not receive everything in that row, we will not output the readings to the serial terminal. Instead we will output a message indicating that we did not receive everything.
Hardware Hookup
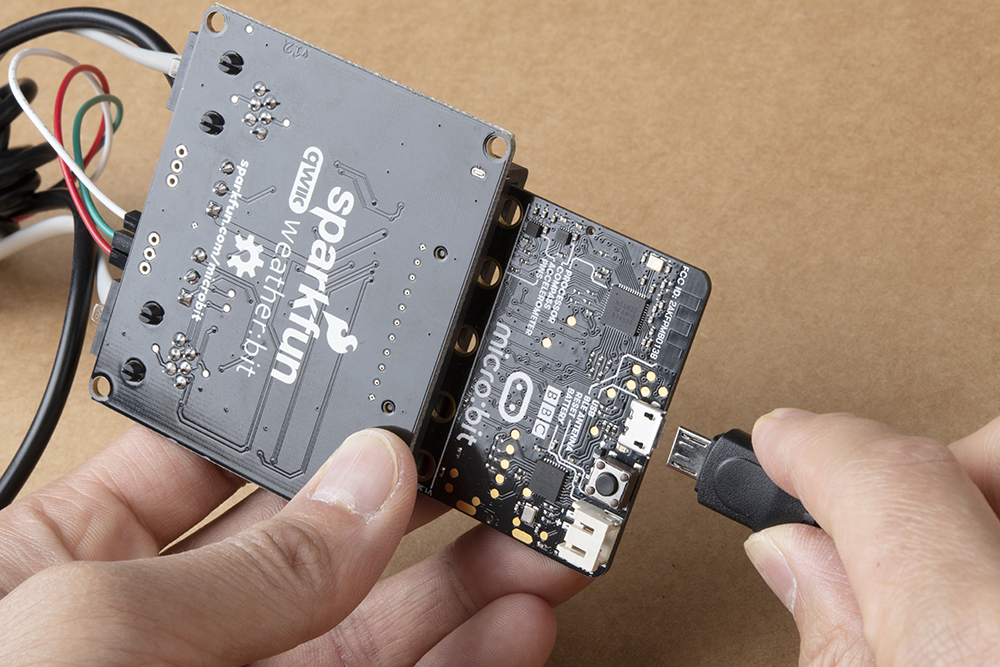
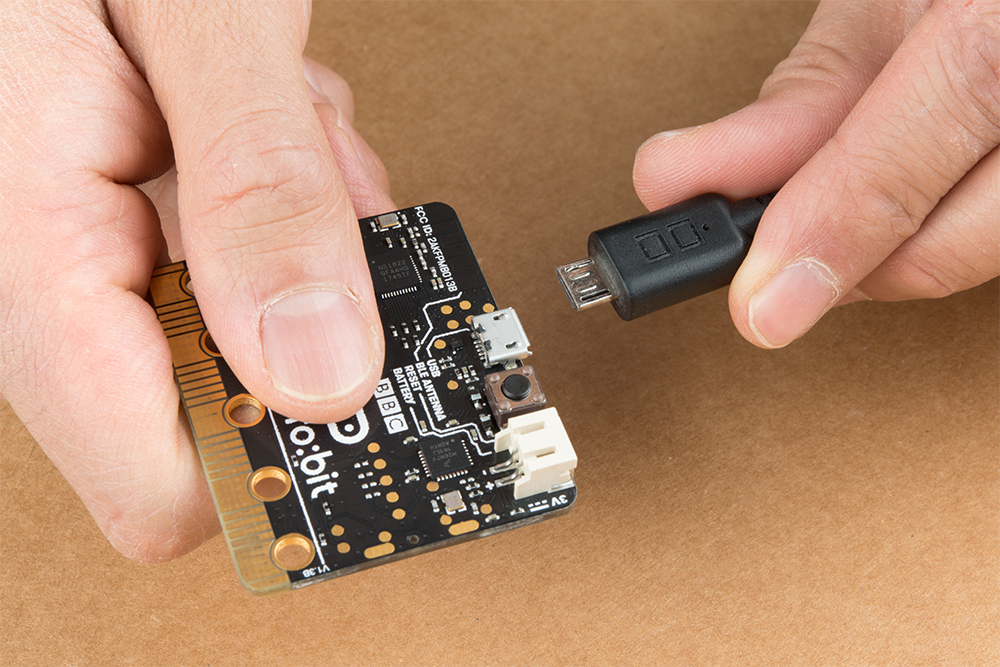
To avoid confusion when uploading code, unplug the first micro:bit from your computer. Then connect the second micro:bit to your computer via USB cable.
Running Your Script
We are going to use Microsoft MakeCode to program the micro:bit. You can download the following example script and move the *.hex file to your micro:bit. Or use it as an example to build it from scratch in MakeCode.
Code to Note
There is a lot going on. Let's inspect the code in parts.
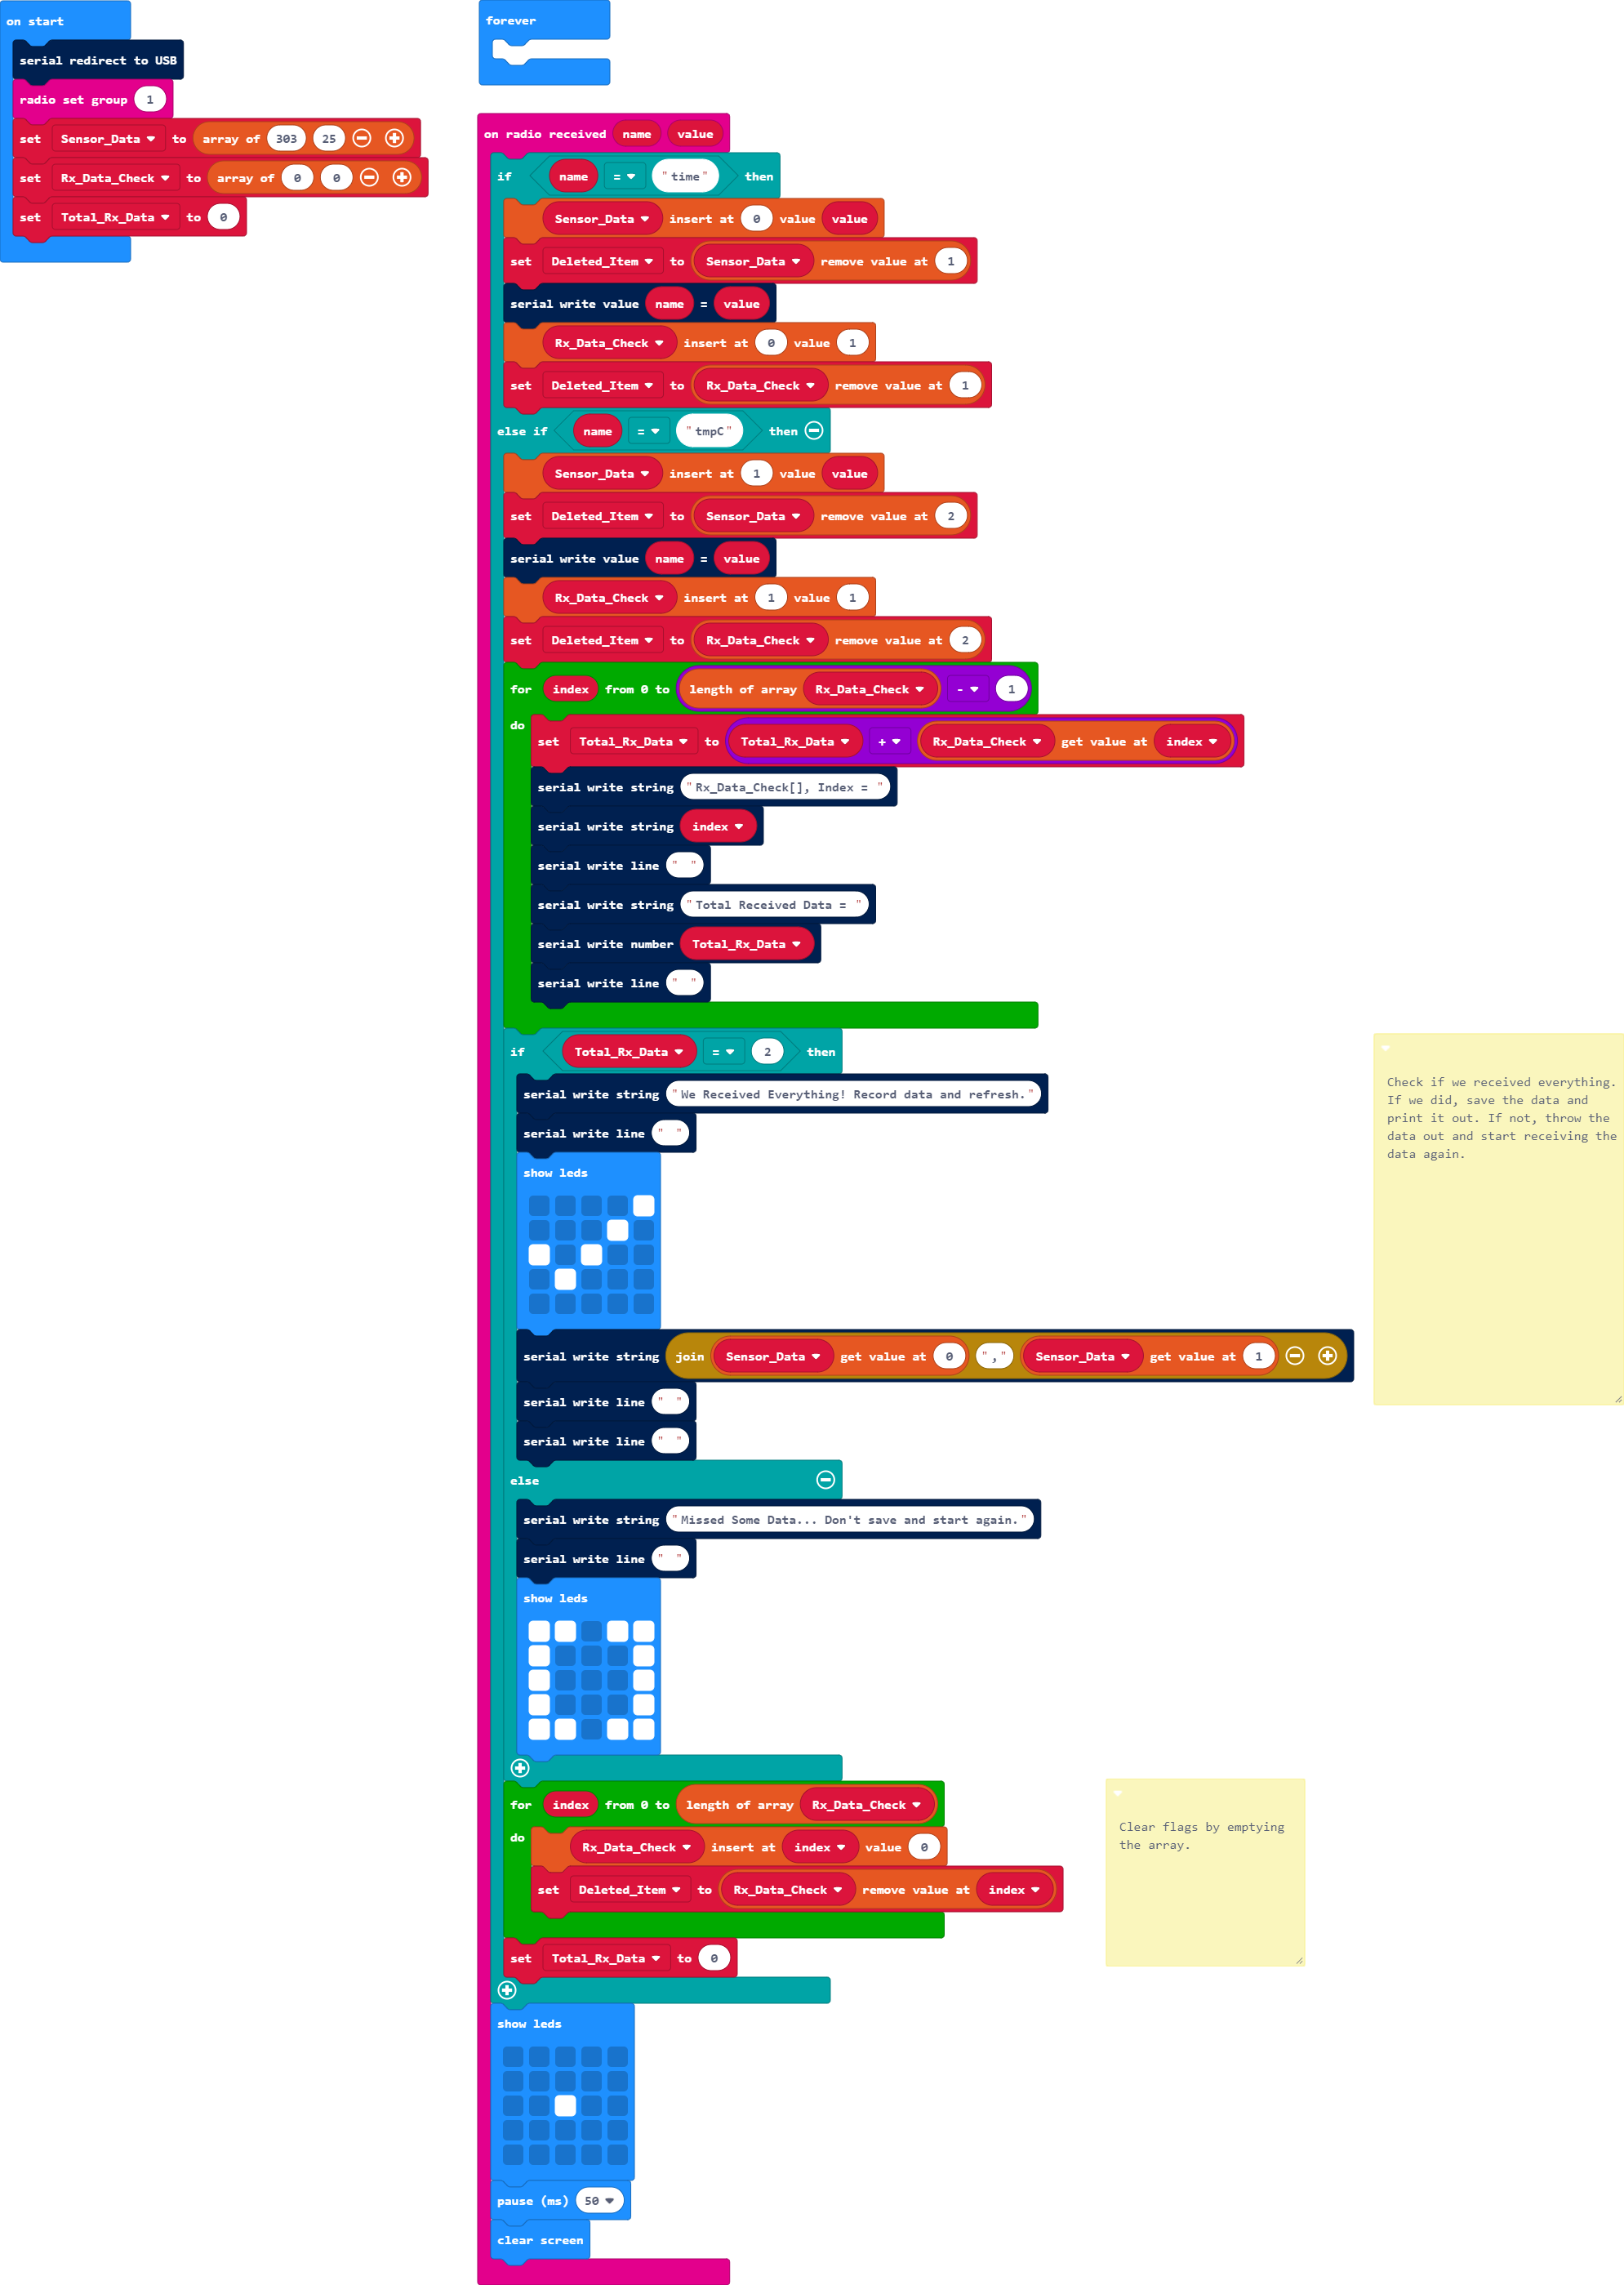
As the receiving micro:bit is powered up, we set up the serial and radio. We then create two arrays. Similar to creating regular variables, we first need to create two array variables called Sensor_Data and Rx_Data_Check from the variables block. We set each to an array of ____ ____ from the array blocks so that they are able to to save more than one number. The values in Sensor_Data are used to initialize the array for two data points from the weather station and will be used as a place holder for the array. The values in Rx_Data_Check are used to initialize the array as well but this will be used to keep track of each data point that is received for each interval. We know that the weather station will be sending two data points associated with the time and tmpC strings. We will change those values to a 1 to indicate that we have received one data point. We will assume that those two are received before the transmitting micro:bit loops back and sends the next running time and temperature. Otherwise, it will remain 0 if we did not receive anything. We also create one more variable called Total_Rx_Data and set it to 0. We only need one, which will be used to add up all the 1's from the received data points in Rx_Data_Check.

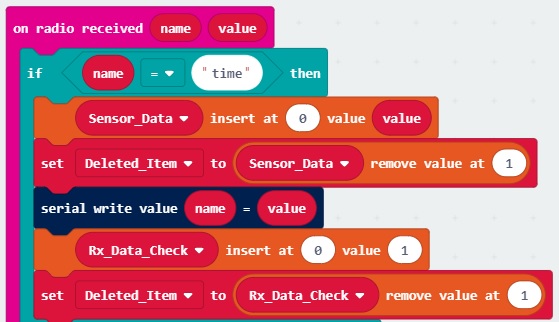
We will use the on radio received name value to listen for the string and number pair. We will use the if statement to check if we have received one of the strings sent from the first micro:bit. The first string we will check is time. If we received that as the string, we will use the array's ____ insert at ____ value ____ . The first space is for the array called Sensor_Data. The number where the second space is in the code block indicates the location that the data will be placed at. Since we expect this to be the running time, it will be at position 0 in the array. In terms of programming, this is refered to as index 0. Once inserted, everything will be shifted to the next higher position. The final space in the code block indicates the number that we will be inserted at that position; in this case the number received will be equal to the radio's variable called value. This code block is an advanced operation but it is quite useful when collecting and organizing data.
Now that we have inserted one data point into the Sensor_Data array, we will want to delete the old data point. In this case, it is the old running time. This was shifted to the next higher position, which is at position 1 in the Sensor_Data. This is important because we do not want to flood the memory and break the micro:bit. You'll probably notice a sad face with an error code when this happens. Don't worry, you can still upload new code to the micro:bit.
Just make sure to fix your code to prevent the micro:bit from being sad and not able to run any code. We will first create a variable to "throw away" the old value called Deleted_Item. We set the variable to the Sensor_Data at position 1. This is different than how we usually save numbers with variables because we will specify the position that we are removing. Since we know the old position is the next higher position, we will set that to 1. Once this block is executed, the old value is saved in Deleted_Item and we remove whatever was at Sensor_Data's position 1.
Whew, that was a lot but we are not done! Next we will send the string and number to the serial terminal to monitor what is going on. Since we received a data point for the running time, we will update the Rx_Data_Check array like we did for the Sensor_Data at position 0 by marking it as 1. We will repeat the step to remove the old information from the Rx_Data_Check.
Below is a graphical representation of arrays in MakeCode of what is happening. The left is the code that is running. On the right is a graphic of what is happening to the array in the background. You will not actually see this in the MakeCode editor.
We will then exit the if statement block and head to the bottom where we blink the middle LED in the array.
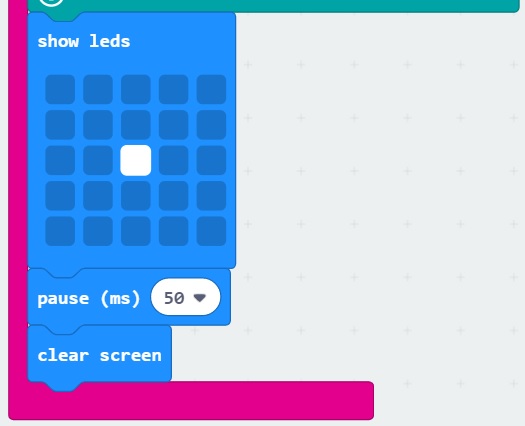
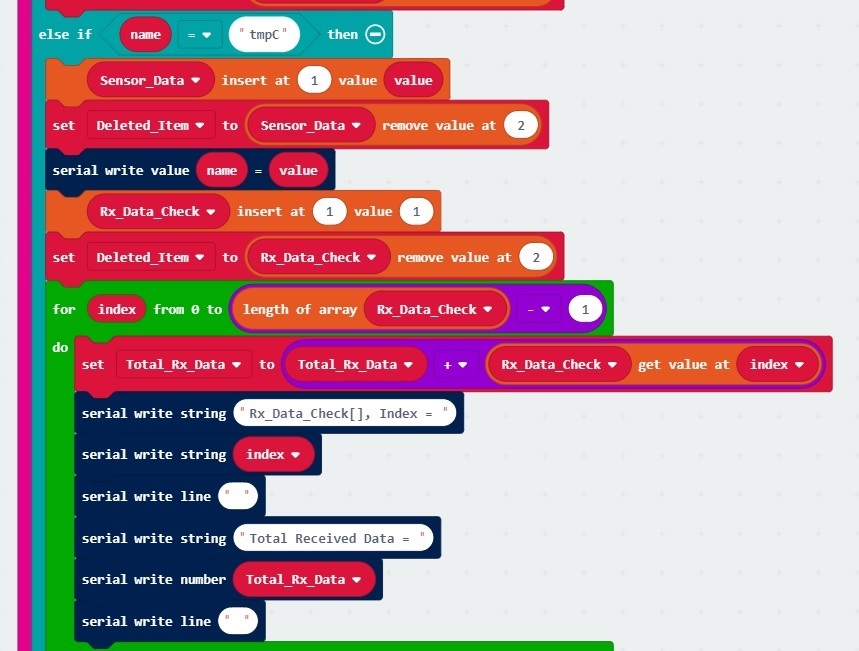
The receiving micro:bit will listen for the next data point. When we receive it, the code will start executing from the top of the on radio receive name value. Since we know that the next data point to be received is tmpC, the else if statement block will jump to the next check. It will repeat all the steps as outlined earlier but for the temperature at position 1.
Since we know this is the last value to be received in this experiment, we will start checking to see if we received two data points inside the for loop block by adding all the 1's in Rx_Data_Check array. Each time we loop through, we will output where we are at in the Rx_Data_Check array and the current total for received data (called Total_Rx_Data). Note that programmers start counting a 0 instead of 1. The length of Rx_Data_Check array is 2. So the for loop will execute 3 times if we do subtract the length of the Rx_Data_Check array by 1.
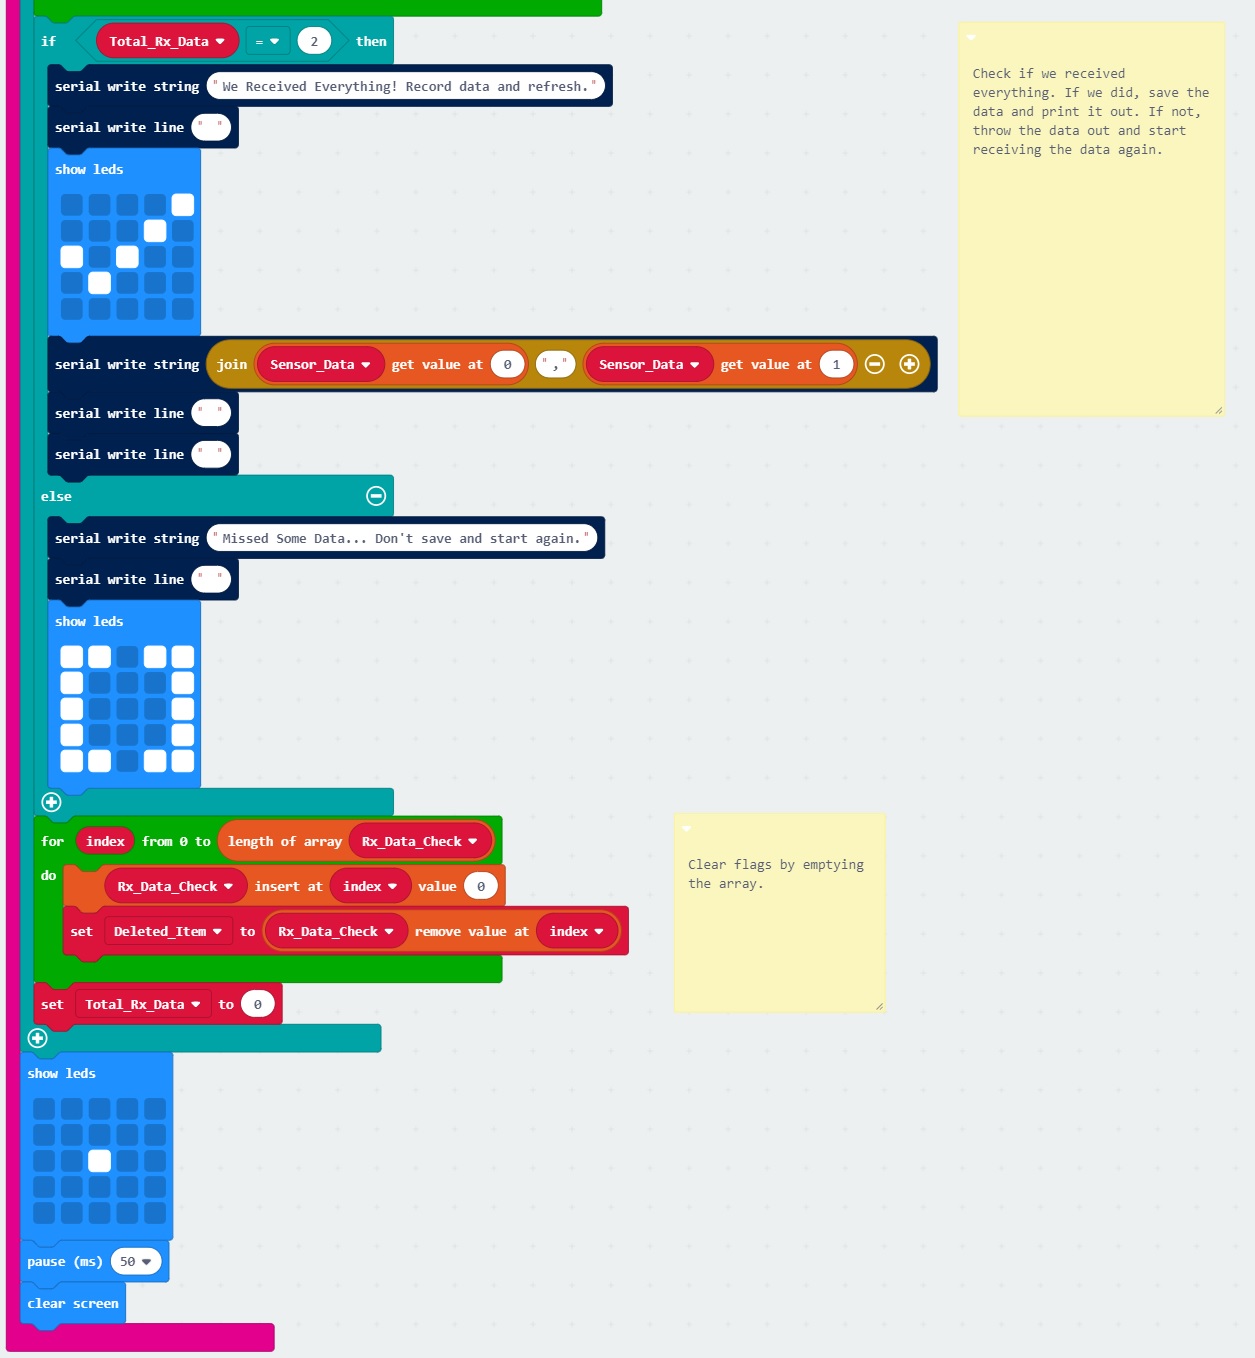
If it equals a total of 2 data points, we will output a message in the serial terminal. We will also display a check mark in the LED array, and output the readings at that instance in a comma delimited form. If it does not equal what we expect, we will output a message indicating that we did not receive everything, display a bracket [] to represent there was something missing in the array, and not output any readings for that instance. We will reset the Rx_Data_Check array and blink the LED before exiting.
What You Should See
You can pair, upload code to the micro:bit, and view the output on the MakeCode console without having to drag and drop the file to the micro:bit after updating the firmware. For more information about using the WebUSB feature on MakeCode, make sure to check out the instructions provided by micro:bit support.
Otherwise, you can use your favorite serial terminal or program to graph the output in a real time, serial data plotter.
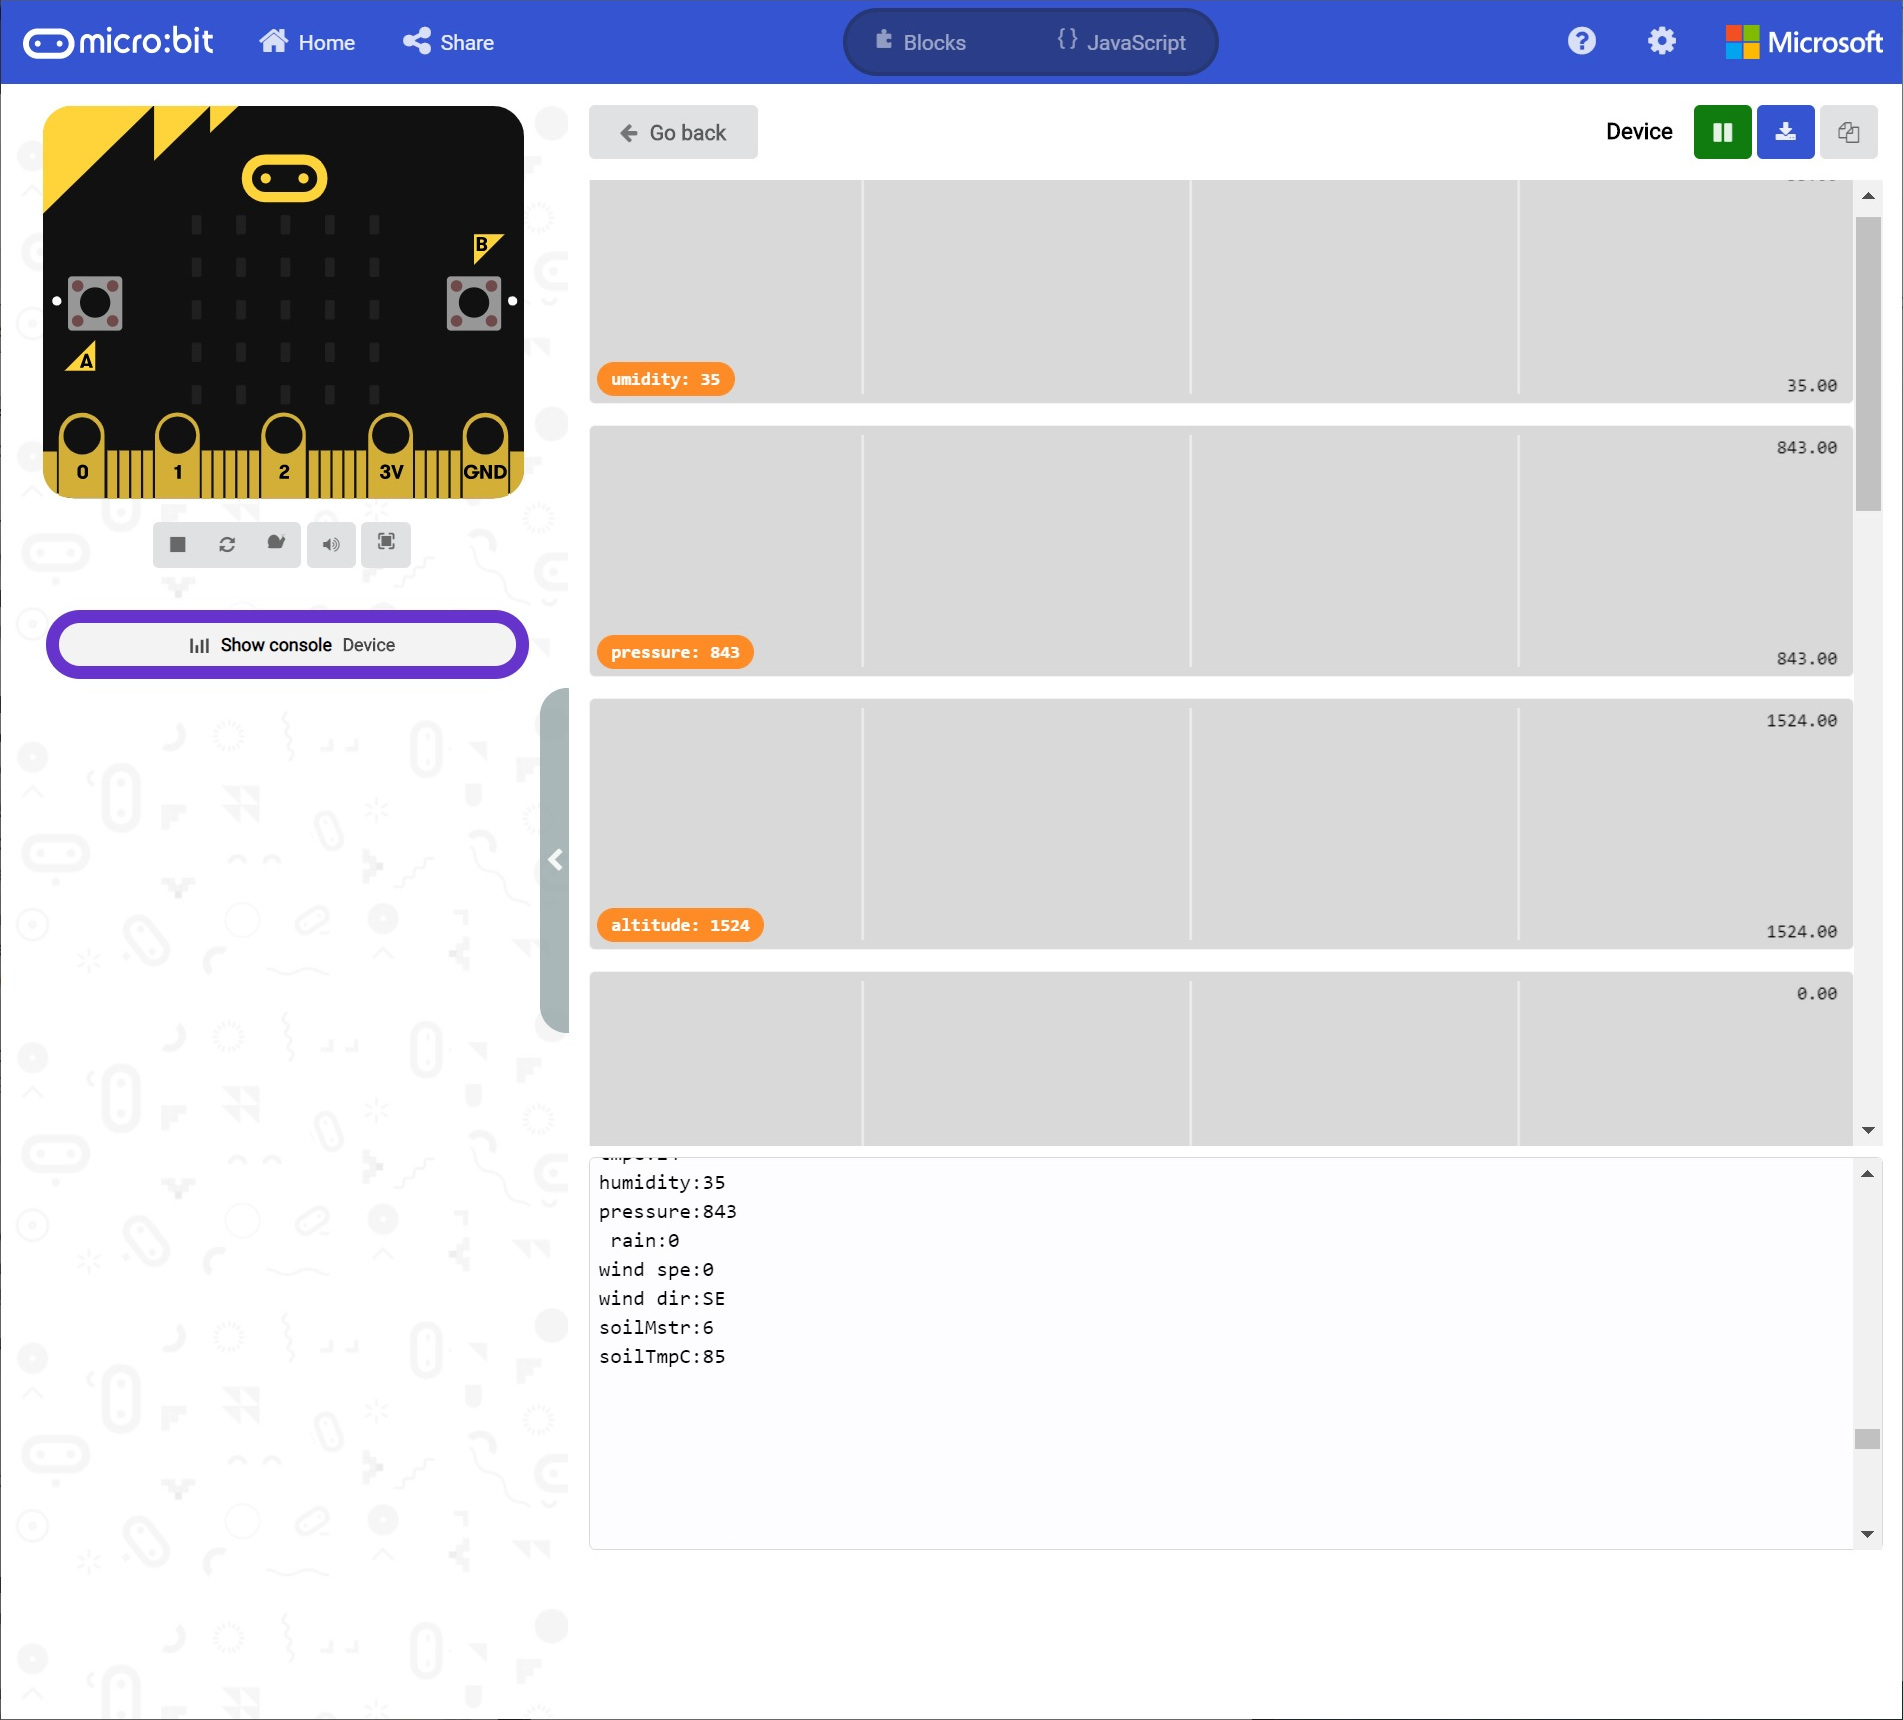
We'll use the MakeCode console once again to display the serial output from the receiving micro:bit. If you have paired the micro:bit to your computer and used the one-click download feature for MakeCode, a "Show console Device" button should appear in MakeCode. Click on the button to begin viewing the serial output.
Apply power to the first micro:bit that is attached to the weather station. It will begin transmitting sensor data to the second micro:bit and display in the MakeCode console. You should see the output messages with the checks and readings for each instance. Whew, that was a lot of work to check for two data points. Let's move onto the next experiment and repeat this for the other sensor values that were sent in experiment 2