SparkFun Arduino UNO R4 WiFi Qwiic Kit Hookup Guide
Example 6: Qwiic Atmospheric Sensor (BME280)
Library Installation
We've written a library to easily get setup and take readings from the Qwiic Atmospheric Sensor, which you can install through the Arduino Library Manager. Search for SparkFun BME280 Arduino Library and you should be able to install the latest version. If you prefer manually downloading the libray from the GitHub repository, you can grab it here:
Hardware Hookup
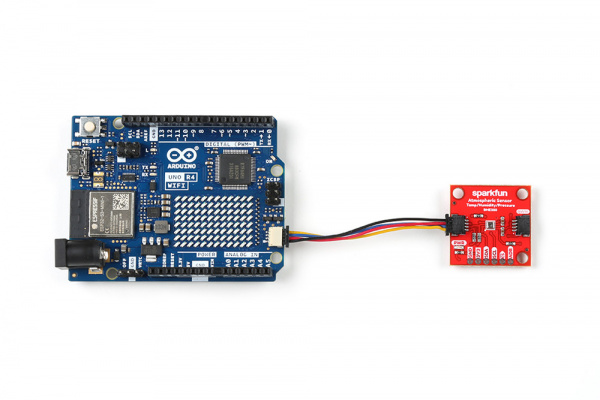
Plug one end of the Qwiic connector into the Qwiic port on the breakout board, and the other end into the Qwiic connector on the Arduino Uno R4 WiFi board like so:
Software Example
This basic example configures an BME280 on the I2C bus and reports out the data to the Serial Monitor at a baud rate of 115200 baud.
language:c
/*
  Get basic environmental readings from the BME280
  By: Nathan Seidle
  SparkFun Electronics
  Date: March 9th, 2018
  License: This code is public domain but you buy me a beer if you use this and we meet someday (Beerware license).

  Feel like supporting our work? Buy a board from SparkFun!
  https://www.sparkfun.com/products/14348 - Qwiic Combo Board
  https://www.sparkfun.com/products/13676 - BME280 Breakout Board

  This example shows how to read humidity, pressure, and current temperature from the BME280 over I2C.

  Hardware connections:
  BME280 -> Arduino
  GND -> GND
  3.3 -> 3.3
  SDA -> A4
  SCL -> A5
*/

#include <Wire.h>

#include "SparkFunBME280.h"
BME280 mySensor;

void setup()
{
  Serial.begin(115200);
  Serial.println("Reading basic values from BME280");

  Wire1.begin();

  if (mySensor.beginI2C(Wire1) == false) //Begin communication over I2C
  {
    Serial.println("The sensor did not respond. Please check wiring.");
    while(1); //Freeze
  }
}

void loop()
{
  Serial.print("Humidity: ");
  Serial.print(mySensor.readFloatHumidity(), 0);

  Serial.print(" Pressure: ");
  Serial.print(mySensor.readFloatPressure(), 0);

  Serial.print(" Alt: ");
  //Serial.print(mySensor.readFloatAltitudeMeters(), 1);
  Serial.print(mySensor.readFloatAltitudeFeet(), 1);

  Serial.print(" Temp: ");
  //Serial.print(mySensor.readTempC(), 2);
  Serial.print(mySensor.readTempF(), 2);

  Serial.println();

  delay(50);
}
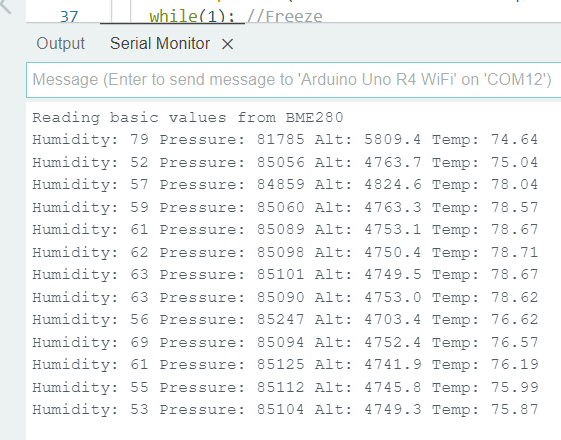
Select your Board and Port and click Upload. Open the serial monitor after the upload completes with the baud set to 115200 to watch data print out.

