SparkFun Arduino UNO R4 WiFi Qwiic Kit Hookup Guide
Example 3: Qwiic OLED
Library Installation
The easiest way to install the Qwiic OLED library is to search for SparkFun Qwiic OLED in the Arduino Library Manager tool. You can also manually install the Qwiic OLED Library from the SparkFun Qwiic OLED Arduino GitHub Repository. Alternatively, you can download by clicking the button below.
Hardware Hookup
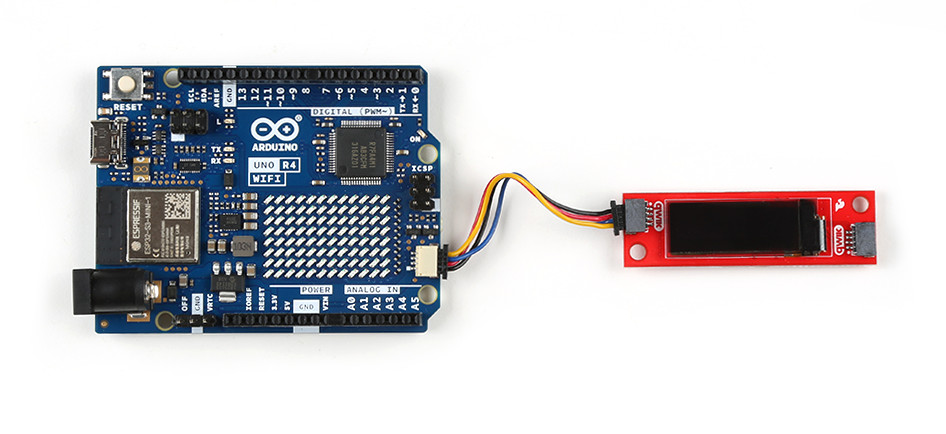
Plug one end of the Qwiic connector into the Qwiic port on the breakout board, and the other end into the Qwiic connector on the Arduino Uno R4 WiFi board like so:
Software Example
The following example is taken from Example 1 of the SparkFun Qwiic OLED library and is titled "Hello".
language:c
/*

  Example-01_Hello.ino

  This demo shows the basic setup of the OLED library, generating simple graphics and displaying
  the results on the target device.

   Micro OLED             https://www.sparkfun.com/products/14532
   Transparent OLED       https://www.sparkfun.com/products/15173
   "Narrow" OLED          https://www.sparkfun.com/products/17153

  Written by Kirk Benell @ SparkFun Electronics, March 2022

  Repository:
     https://github.com/sparkfun/SparkFun_Qwiic_OLED_Arduino_Library

  Documentation:
     https://sparkfun.github.io/SparkFun_Qwiic_OLED_Arduino_Library/

  SparkFun code, firmware, and software is released under the MIT License(http://opensource.org/licenses/MIT).
*/

#include <SparkFun_Qwiic_OLED.h> //http://librarymanager/All#SparkFun_Qwiic_Graphic_OLED

// The Library supports three different types of SparkFun boards. The demo uses the following
// defines to determine which device is being used. Uncomment the device being used for this demo.

// QwiicMicroOLED myOLED;
// QwiicTransparentOLED myOLED;
QwiicNarrowOLED myOLED;


void setup()
{
    Serial.begin(115200);
    Serial.println("Running OLED example");

    Wire1.begin();

    // Initalize the OLED device and related graphics system
    if (myOLED.begin(Wire1) == false)
    {
        Serial.println("Device begin failed. Freezing...");
        while (true)
            ;
    }
    Serial.println("Begin success");

    // Do a simple test - fill a rectangle on the screen and then print hello!

    // Fill a rectangle on the screen that has a 4 pixel board
    myOLED.rectangleFill(4, 4, myOLED.getWidth() - 8, myOLED.getHeight() - 8);

    String hello = "hello"; // our message

    // Center our message on the screen. Get the screen size of the "hello" string,
    // calling the getStringWidth() and getStringHeight() methods on the oled

    // starting x position - screen width minus string width  / 2
    int x0 = (myOLED.getWidth() - myOLED.getStringWidth(hello)) / 2;

    // starting y position - screen height minus string height / 2
    int y0 = (myOLED.getHeight() - myOLED.getStringHeight(hello)) / 2;

    // Draw the text - color of black (0)
    myOLED.text(x0, y0, hello, 0);

    // There's nothing on the screen yet - Now send the graphics to the device
    myOLED.display();

    // That's it - HELLO!
}

void loop()
{
    delay(1000); // Do nothing
}
As before, make sure you select the correct board and port in the tools menu. Upload the code, and you should see something like the image below.
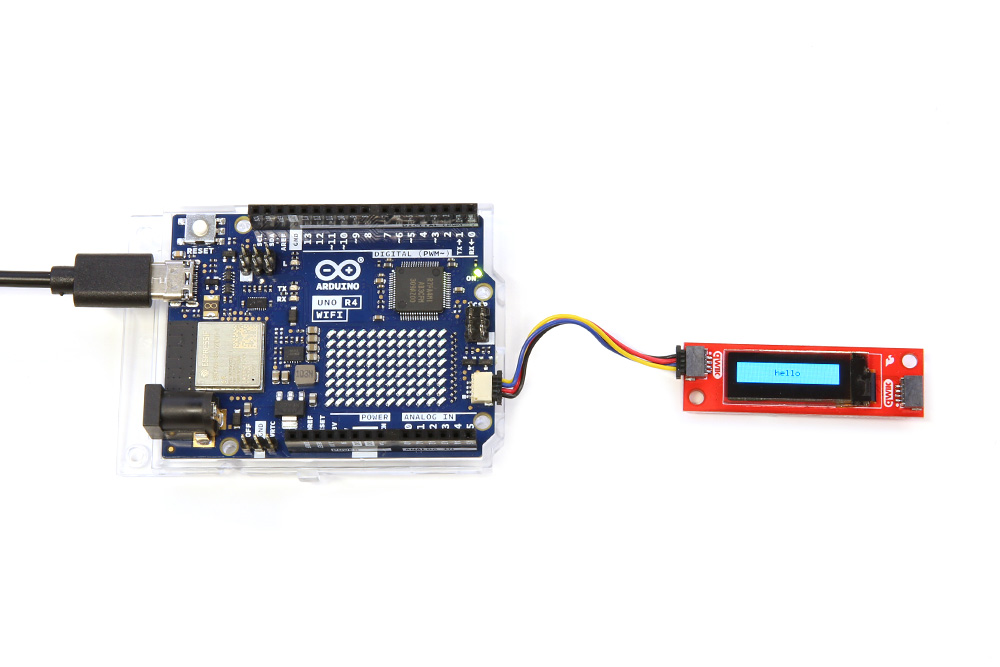
Play with the settings, make your OLED say different things!